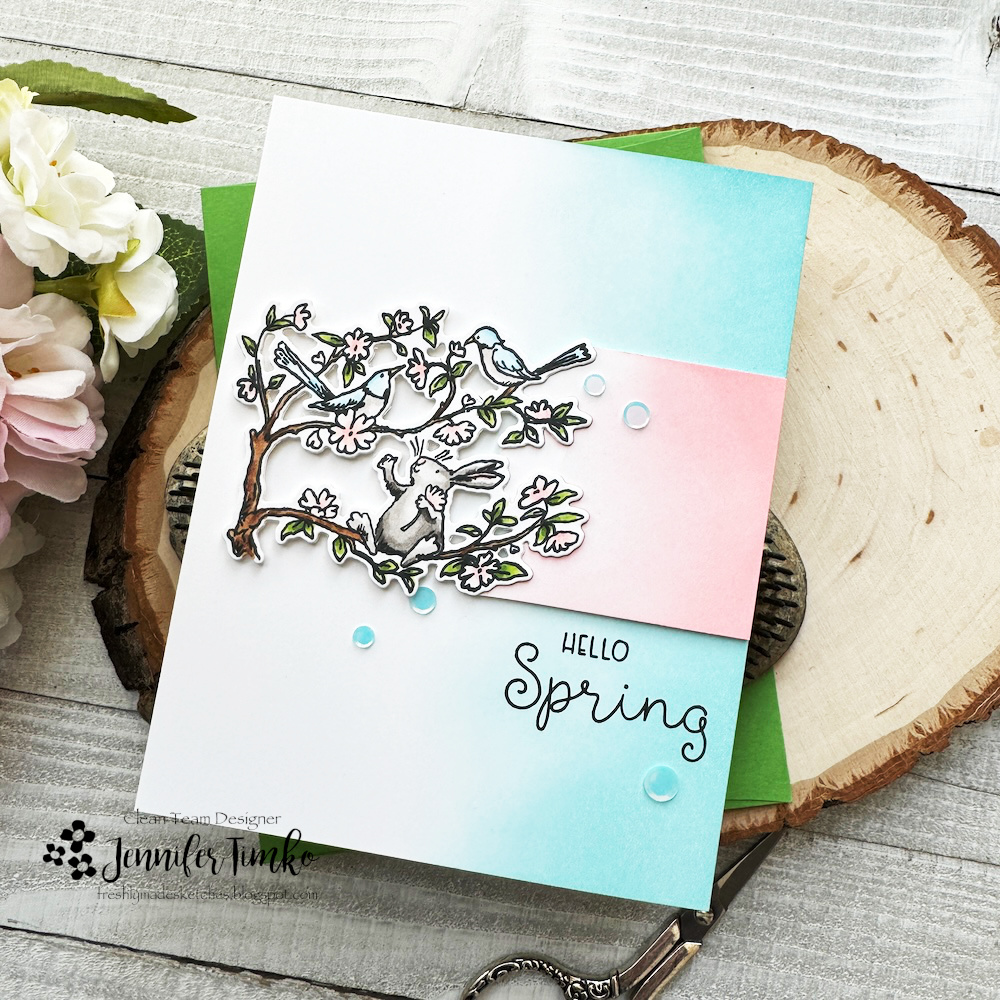
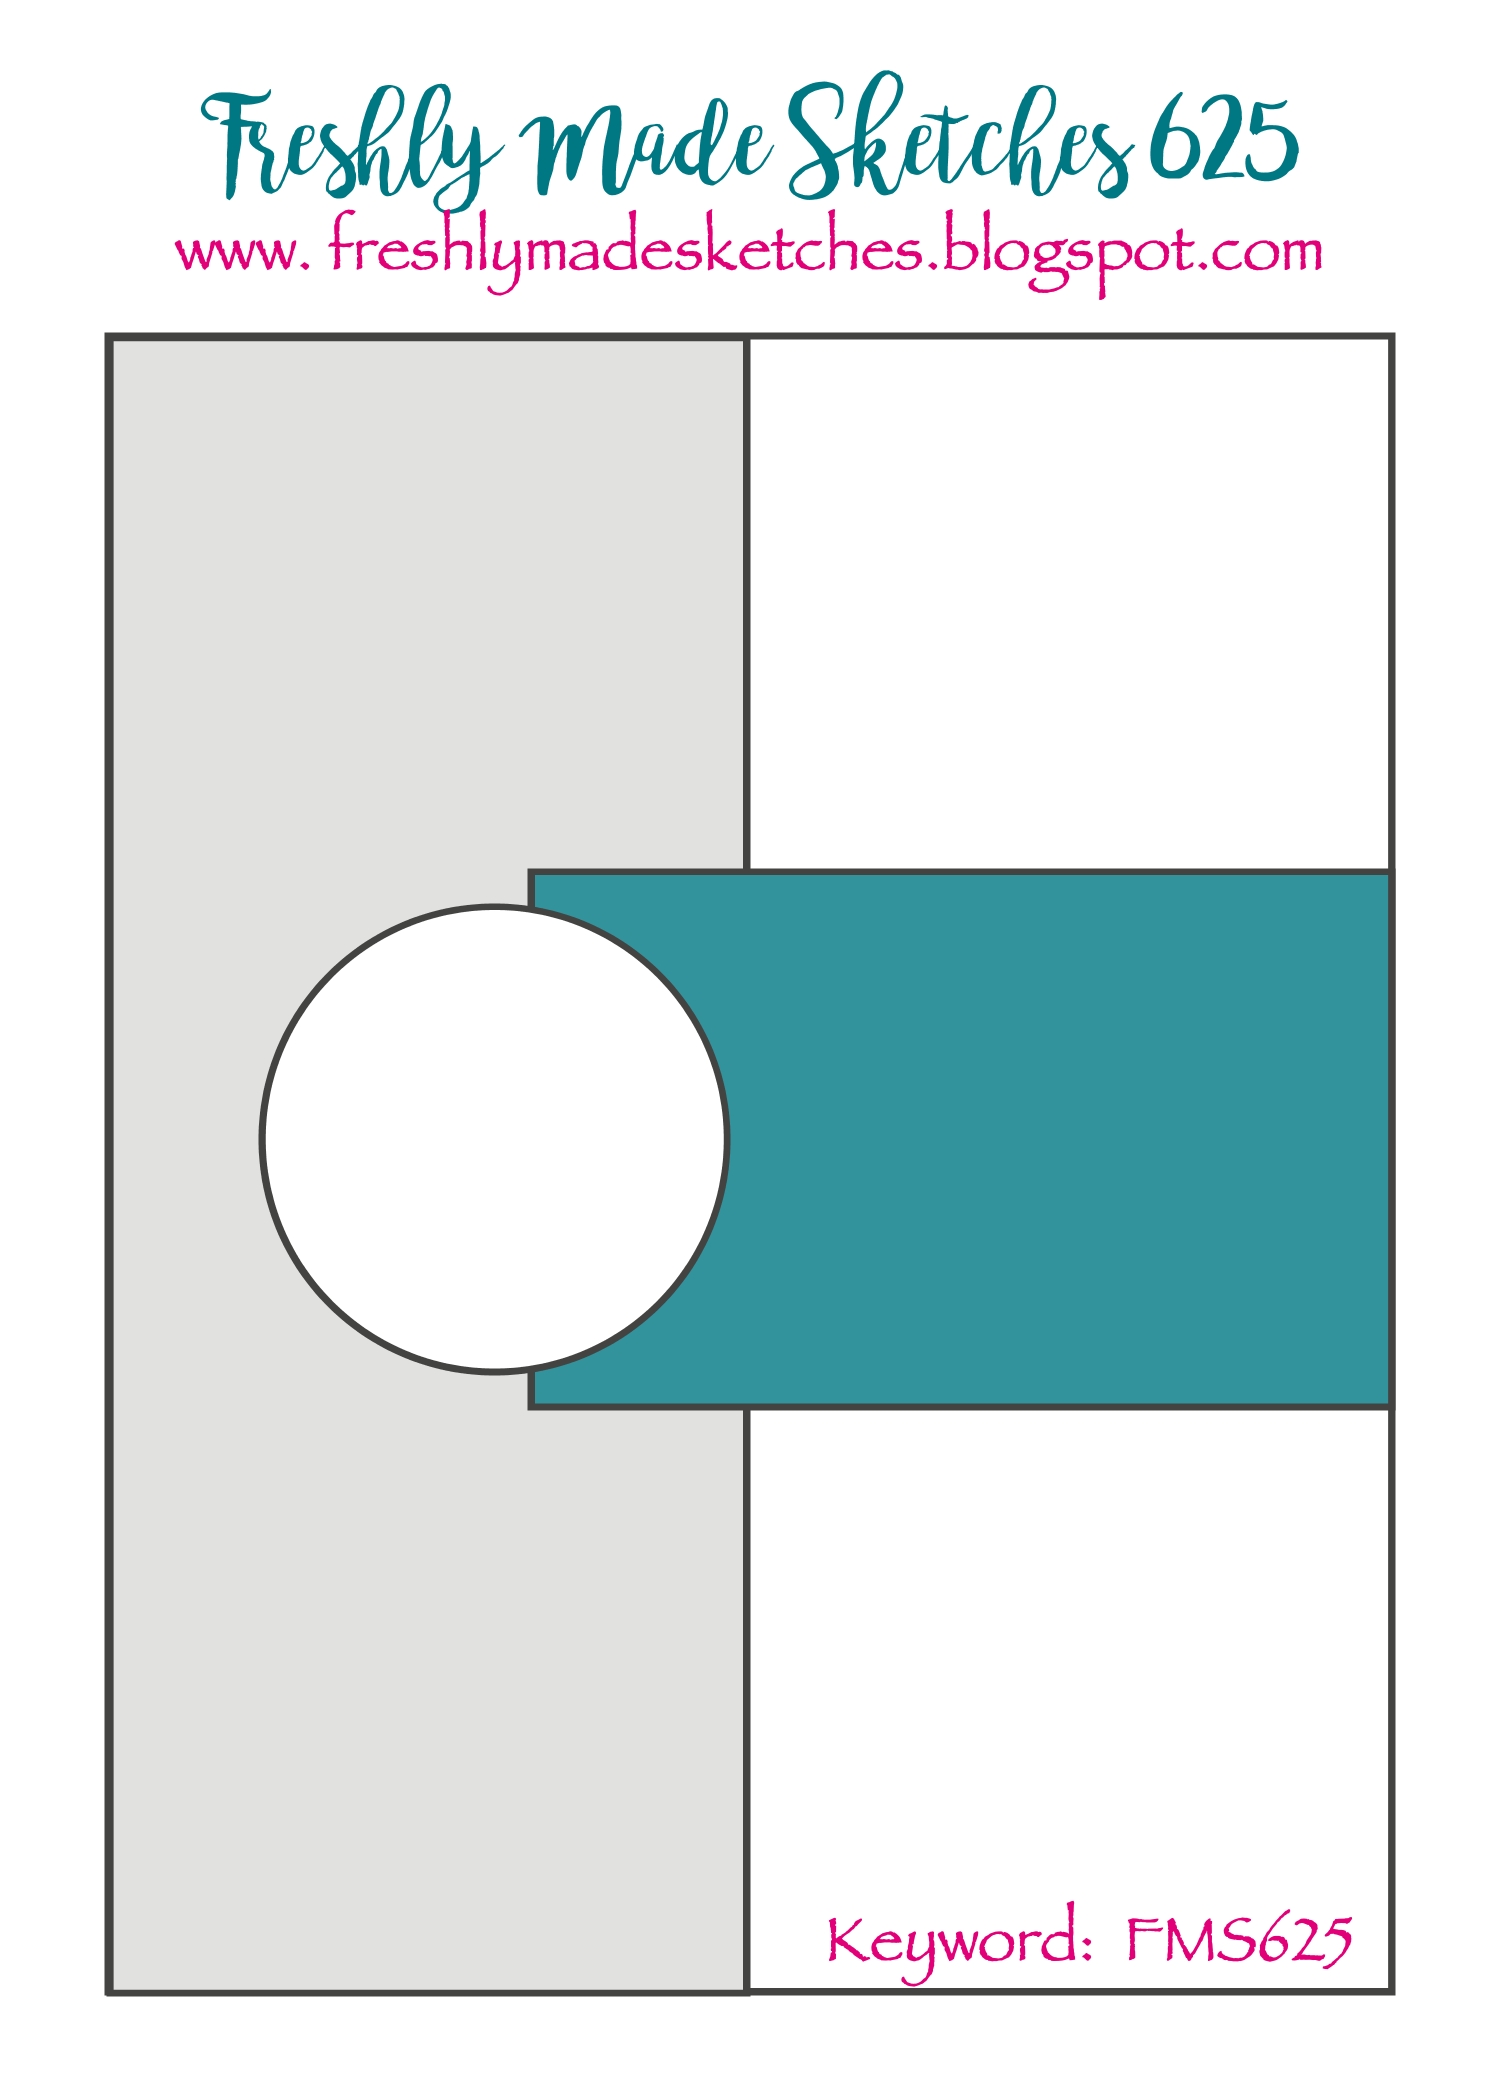
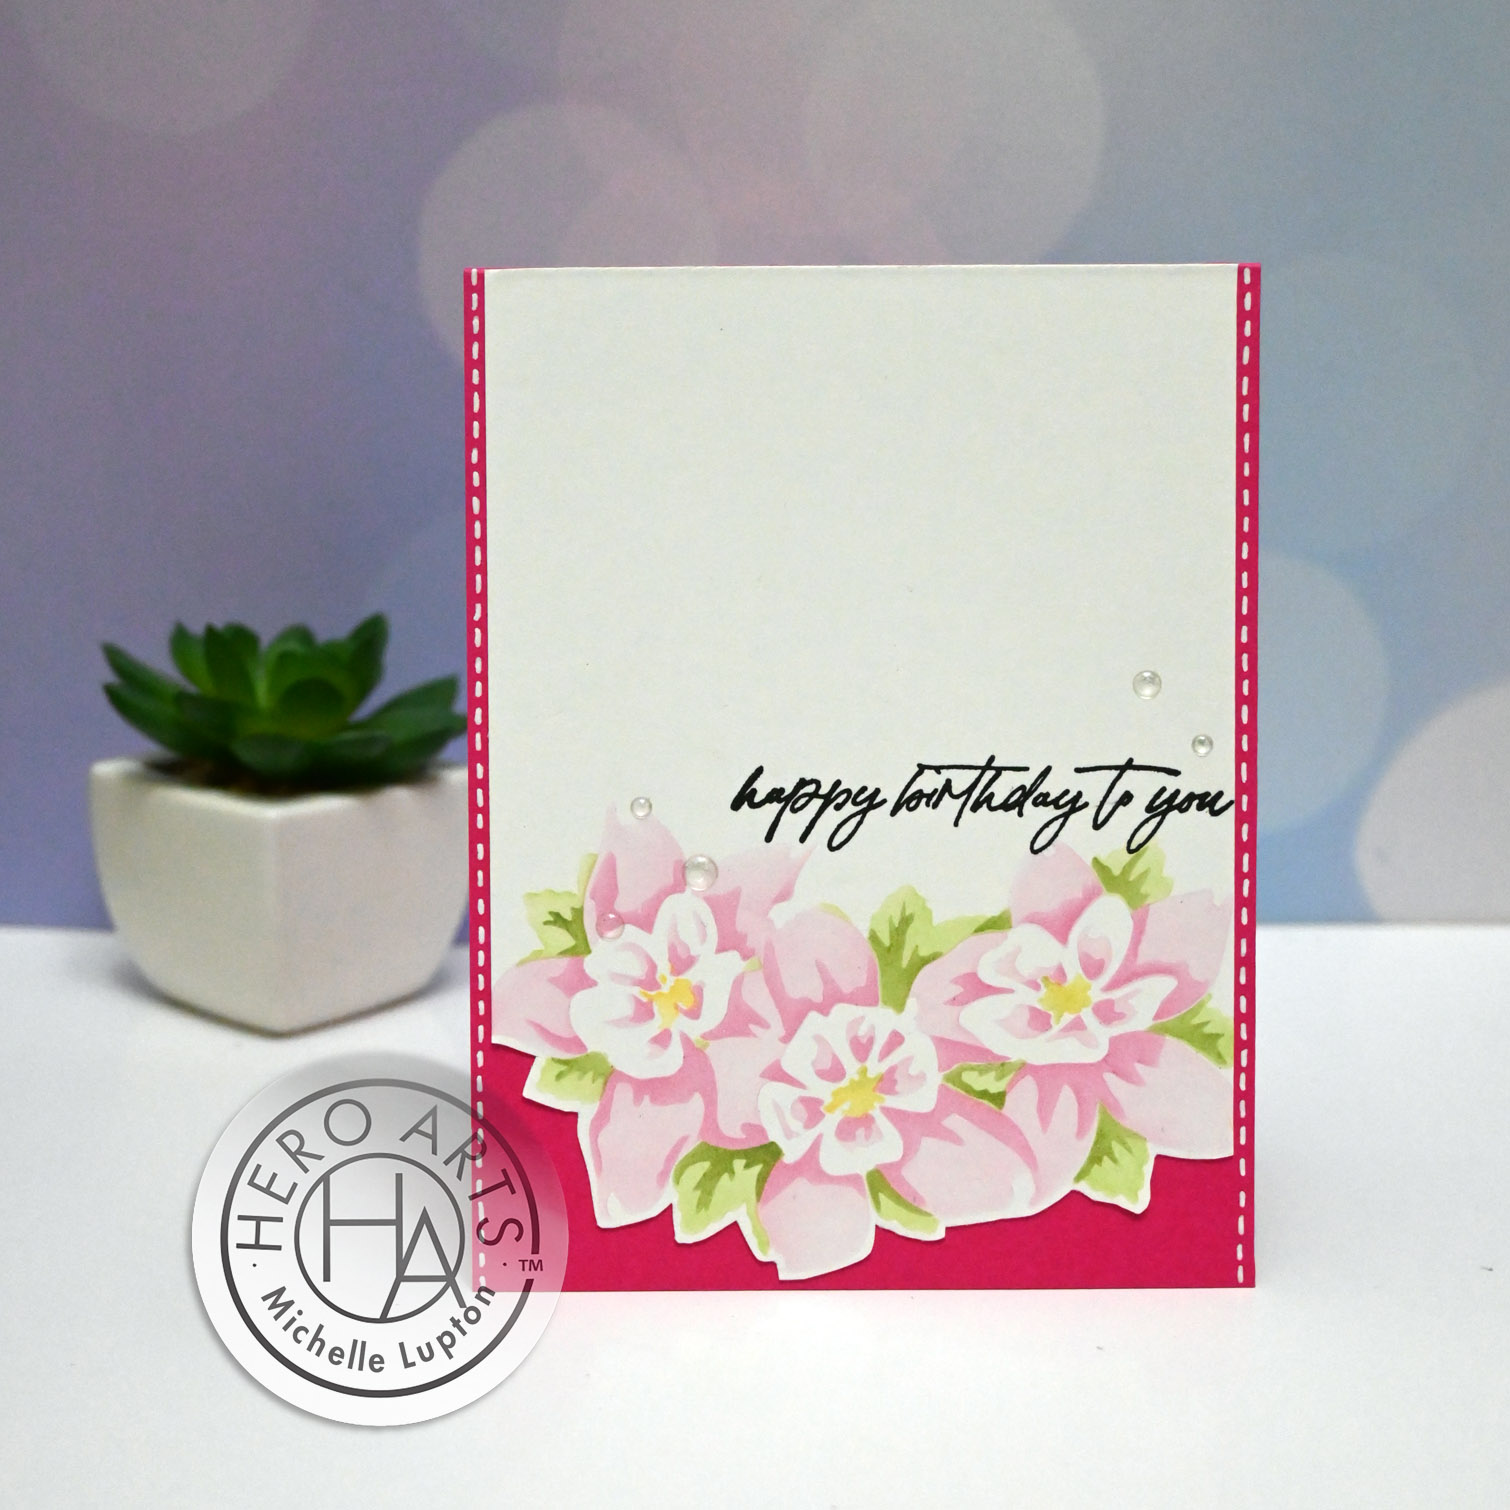
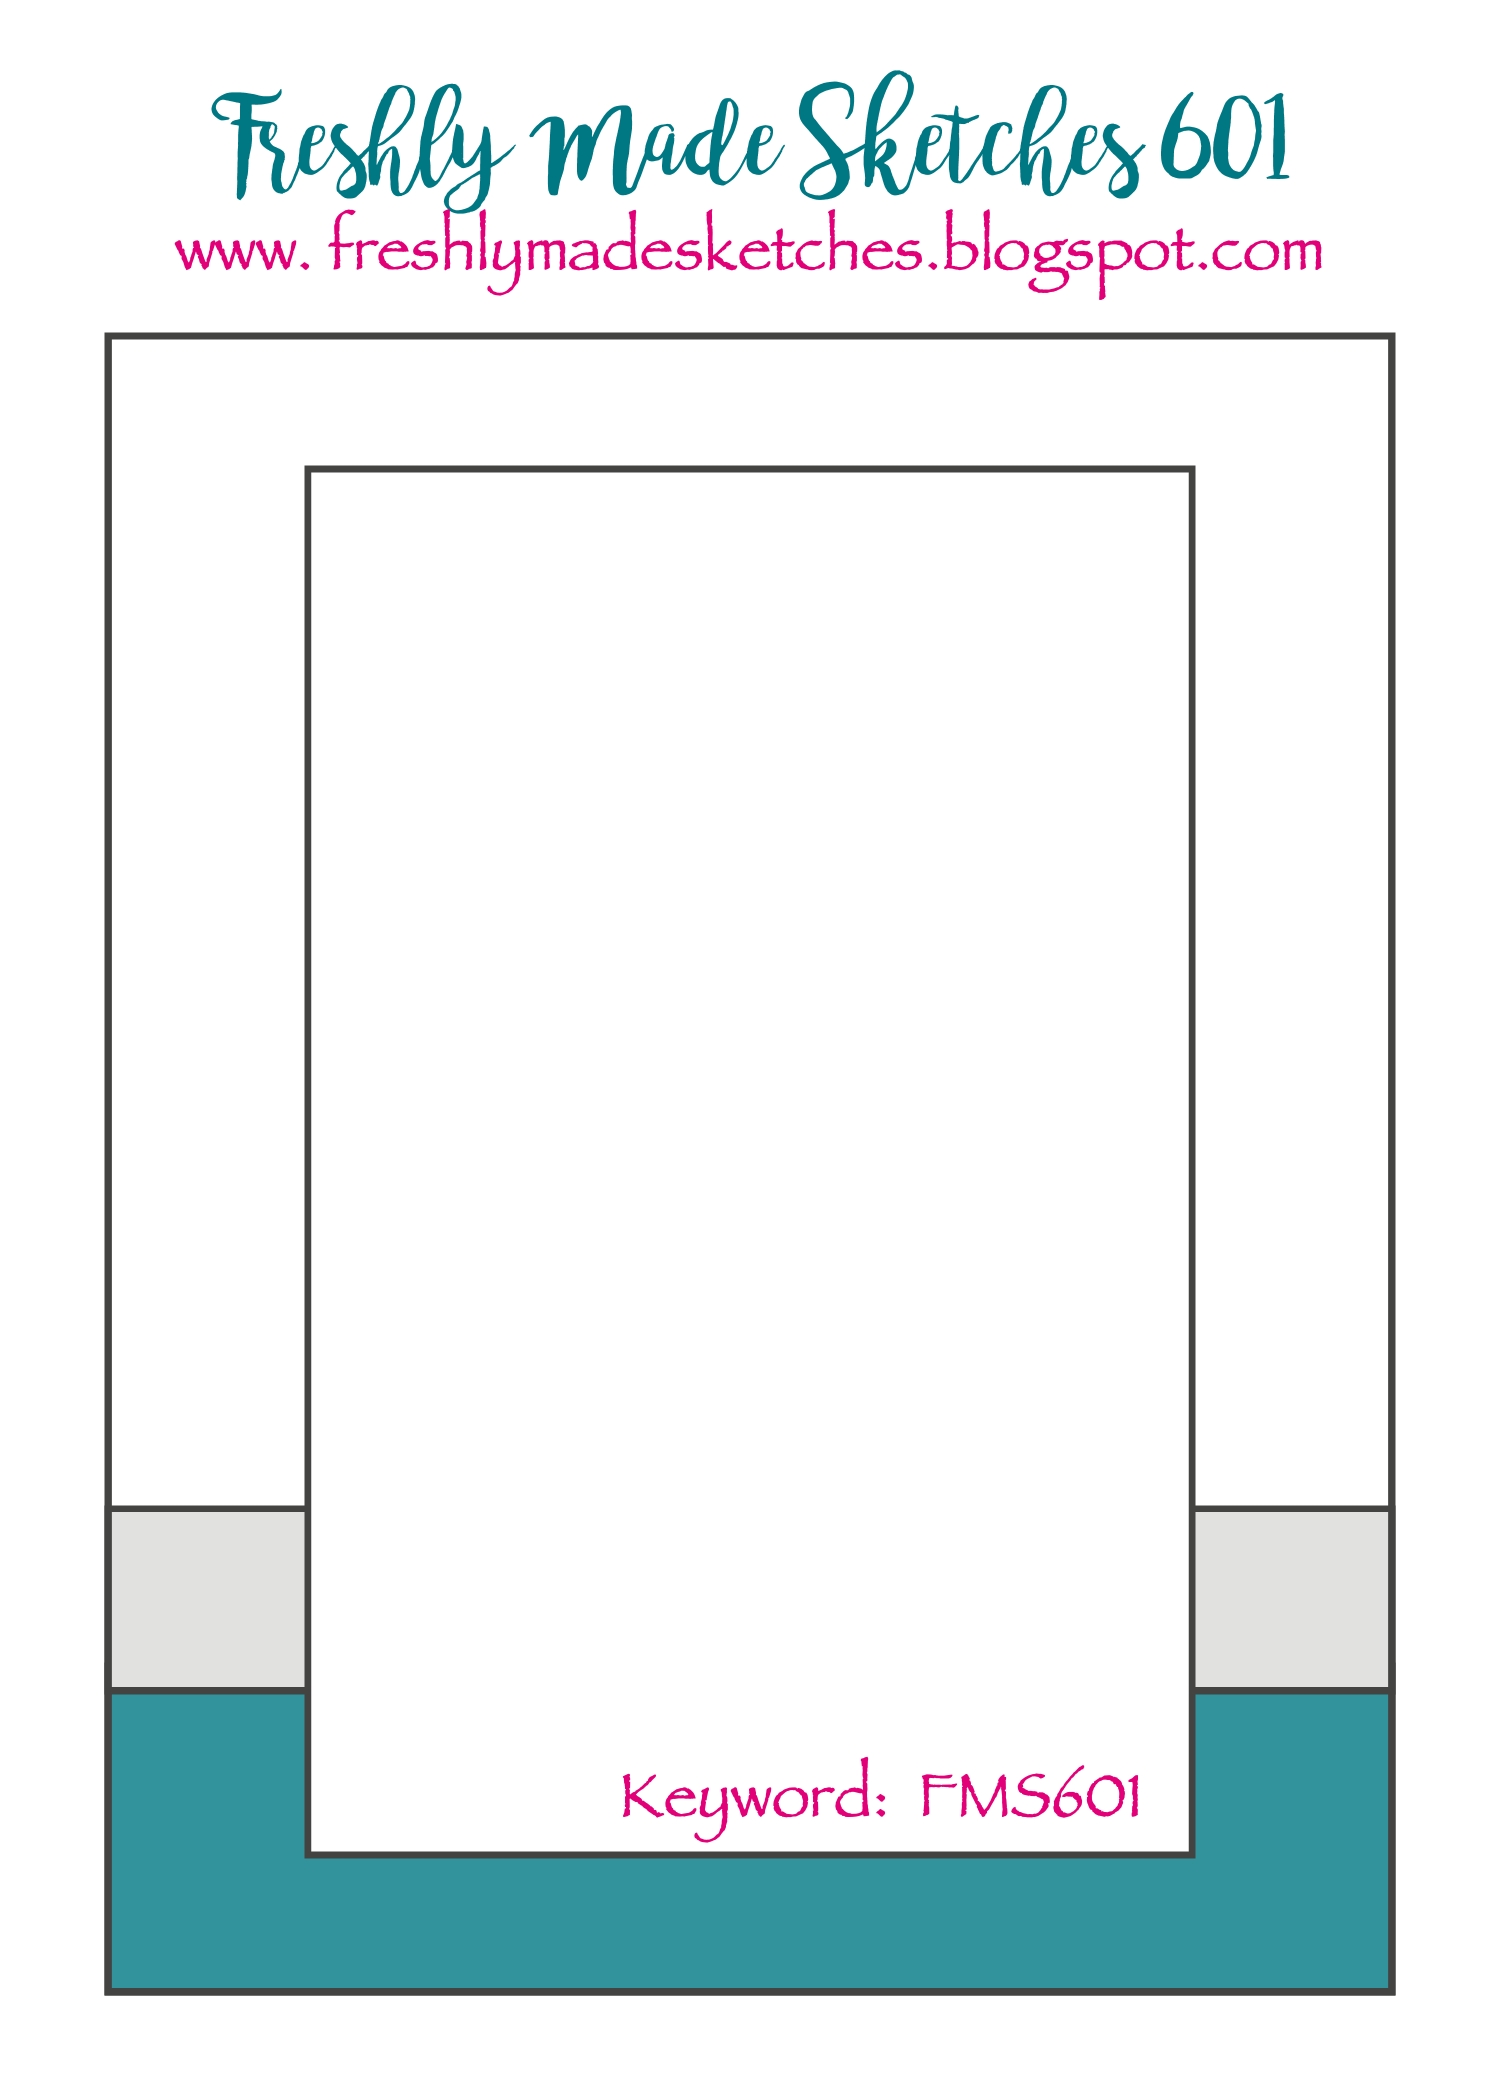
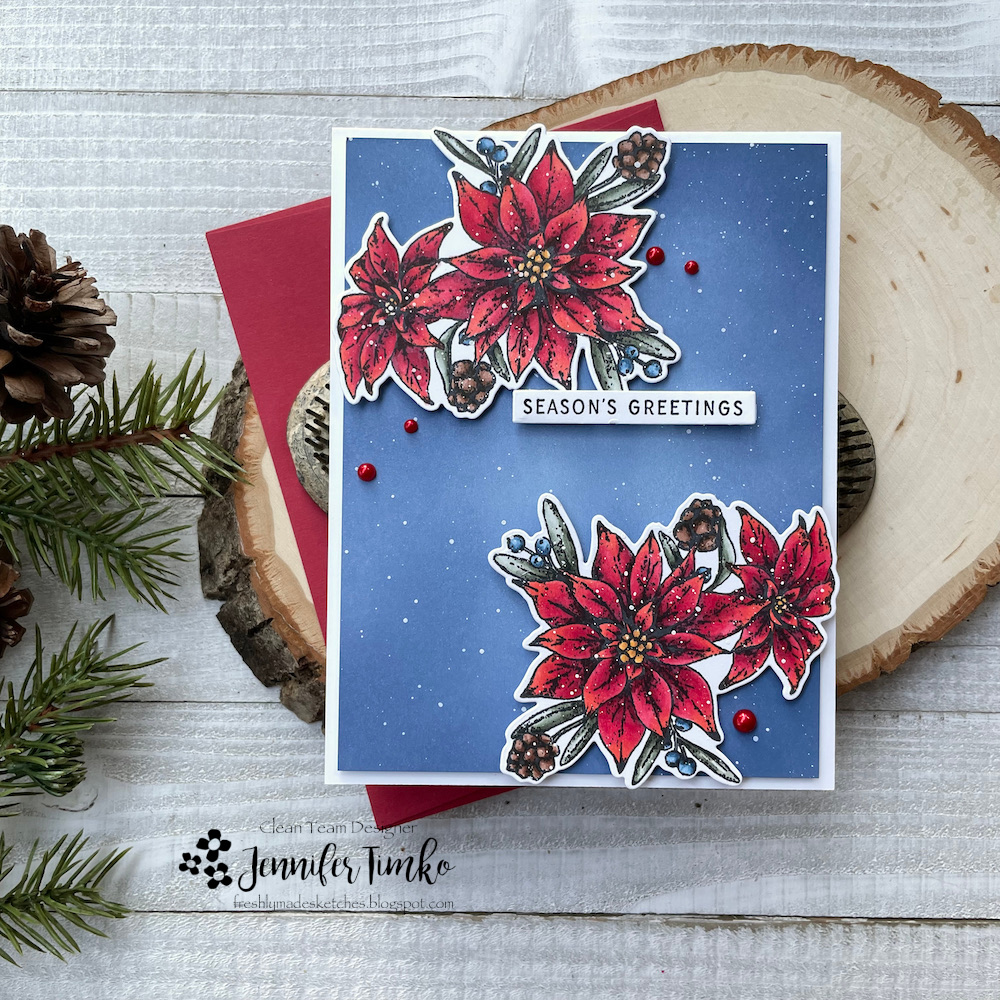
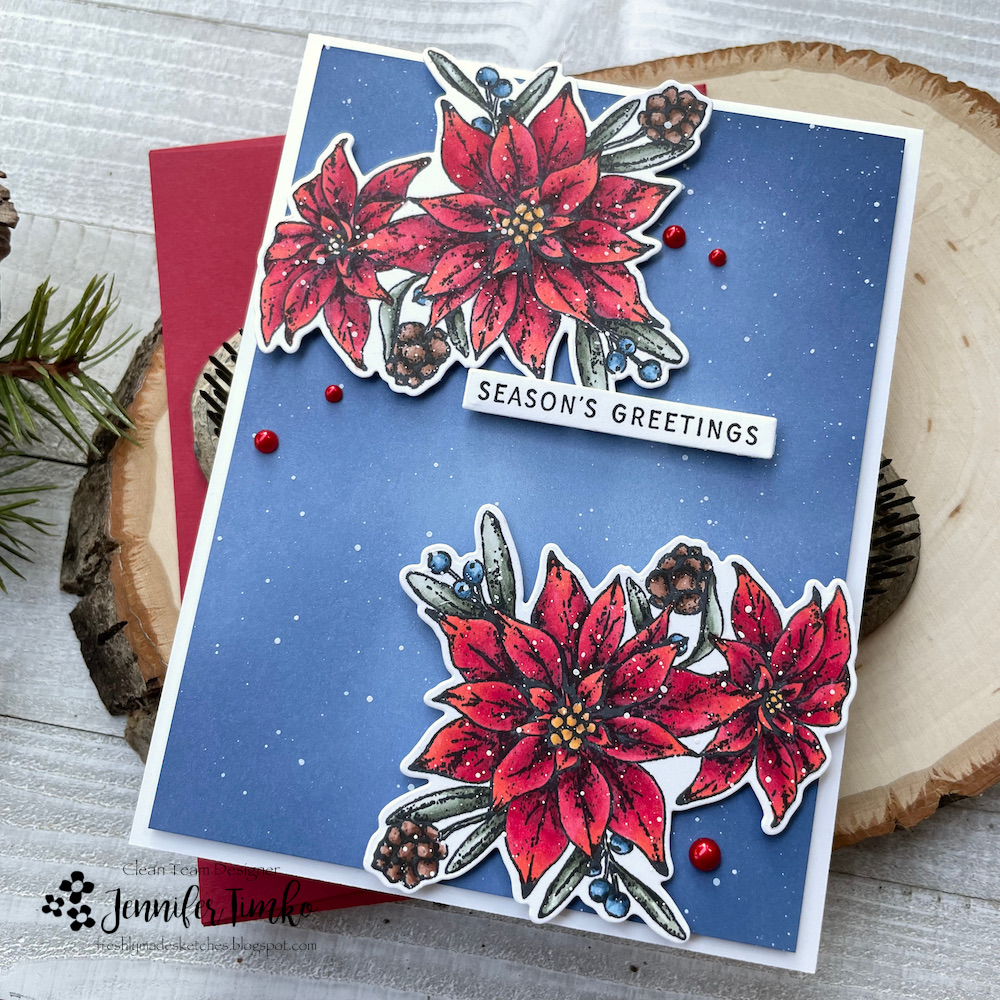
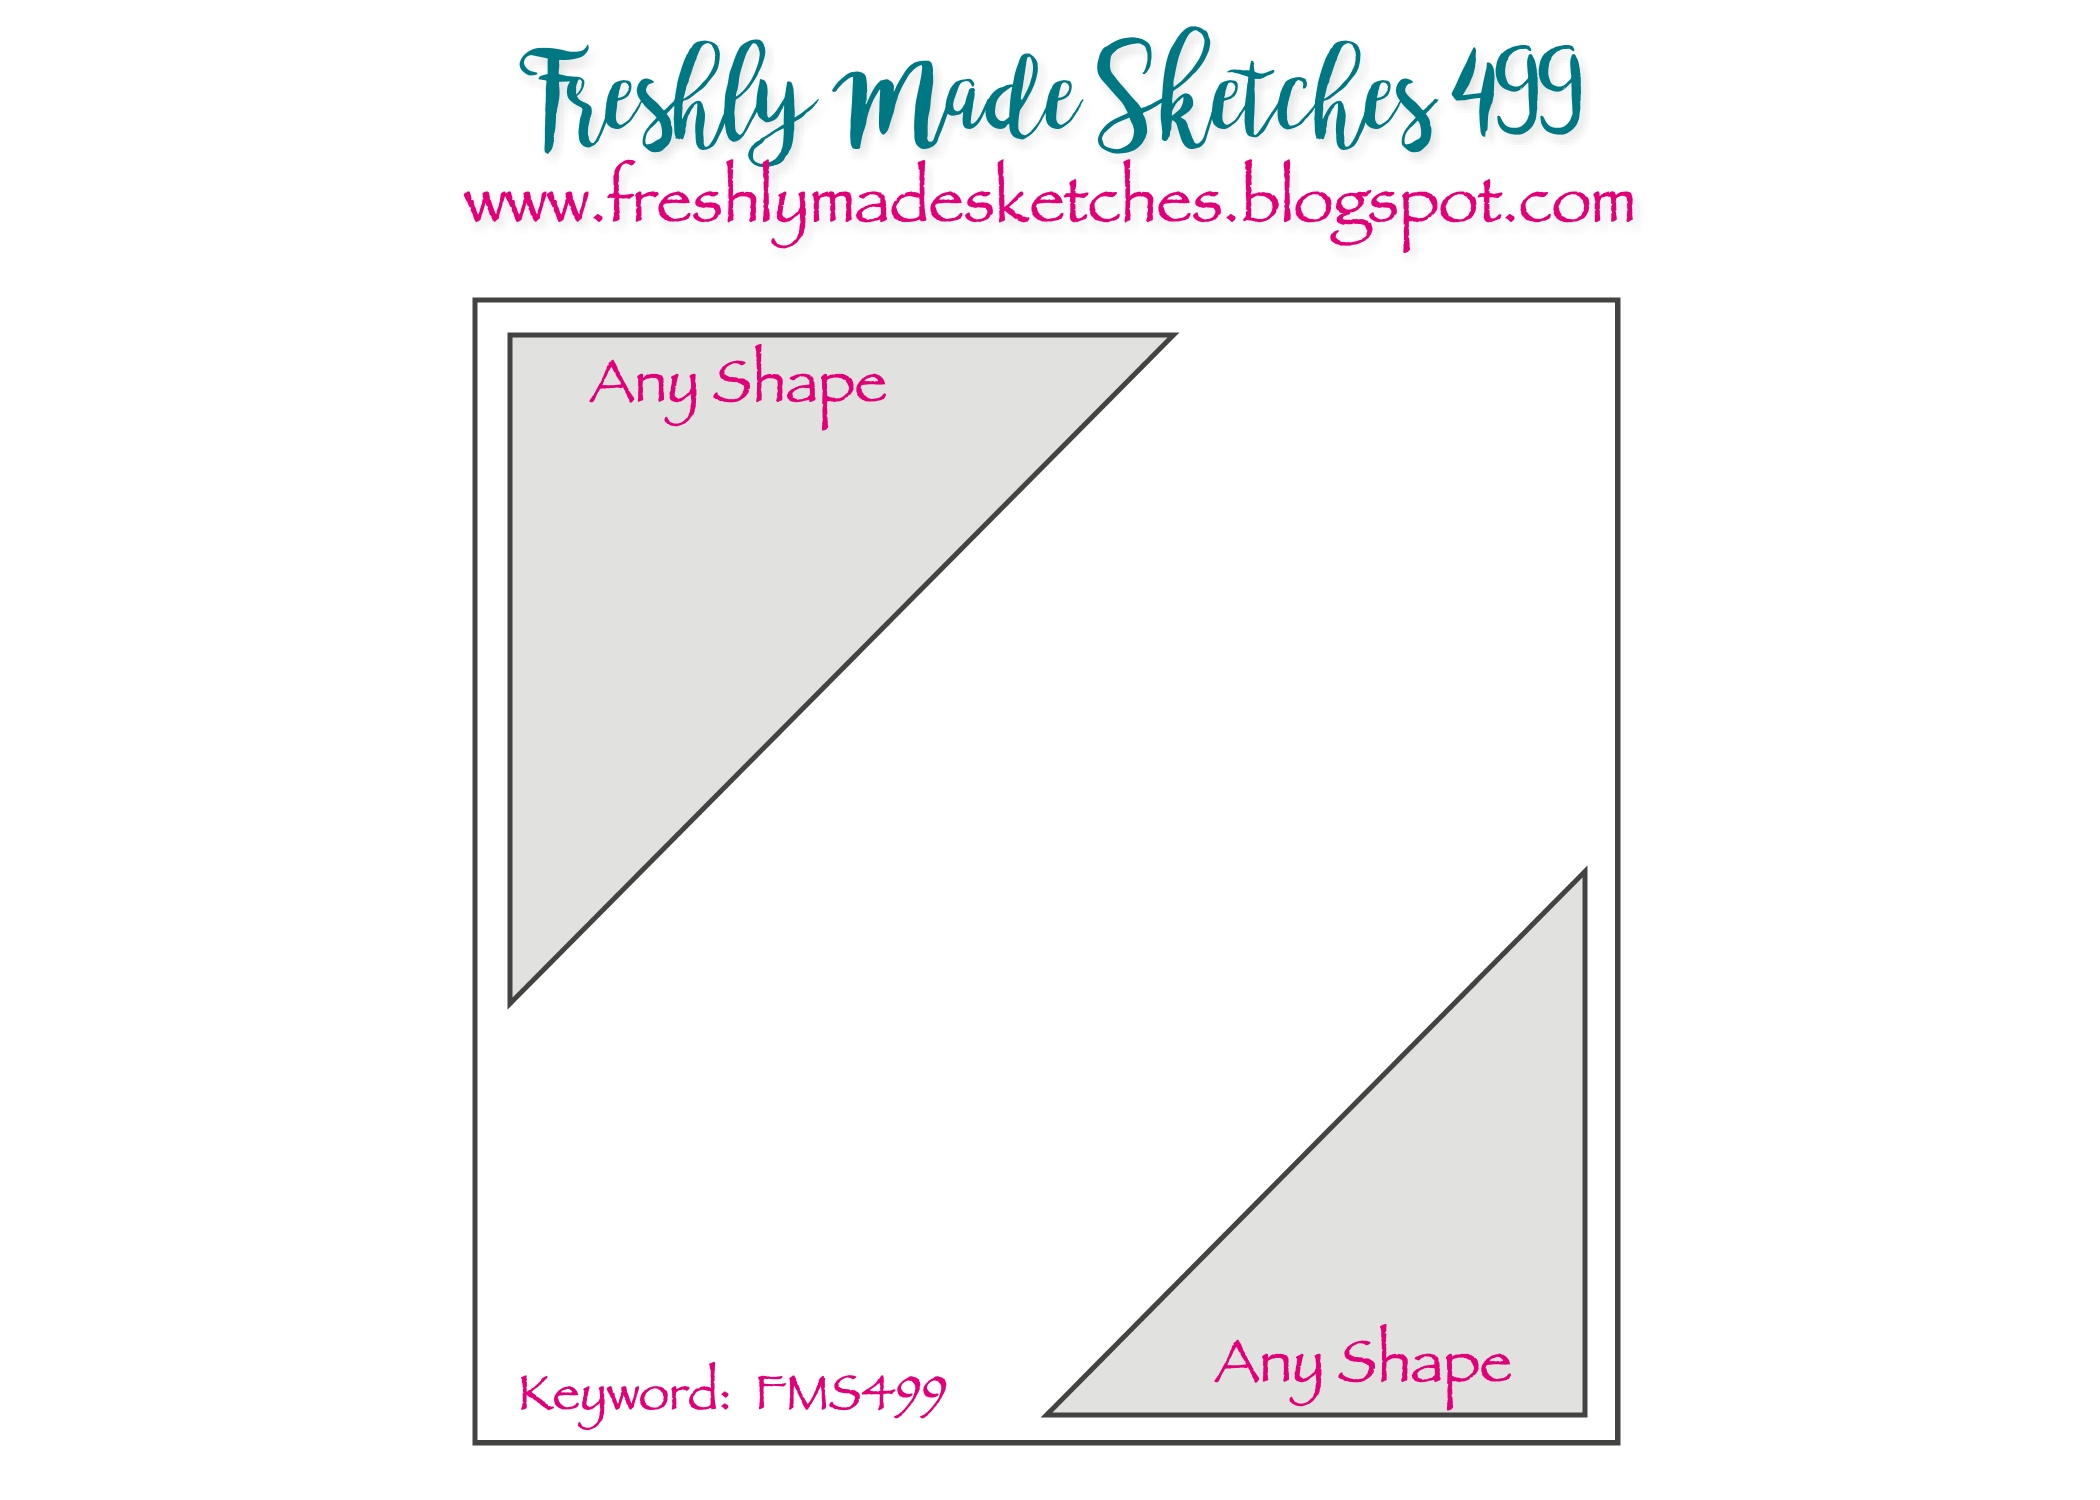
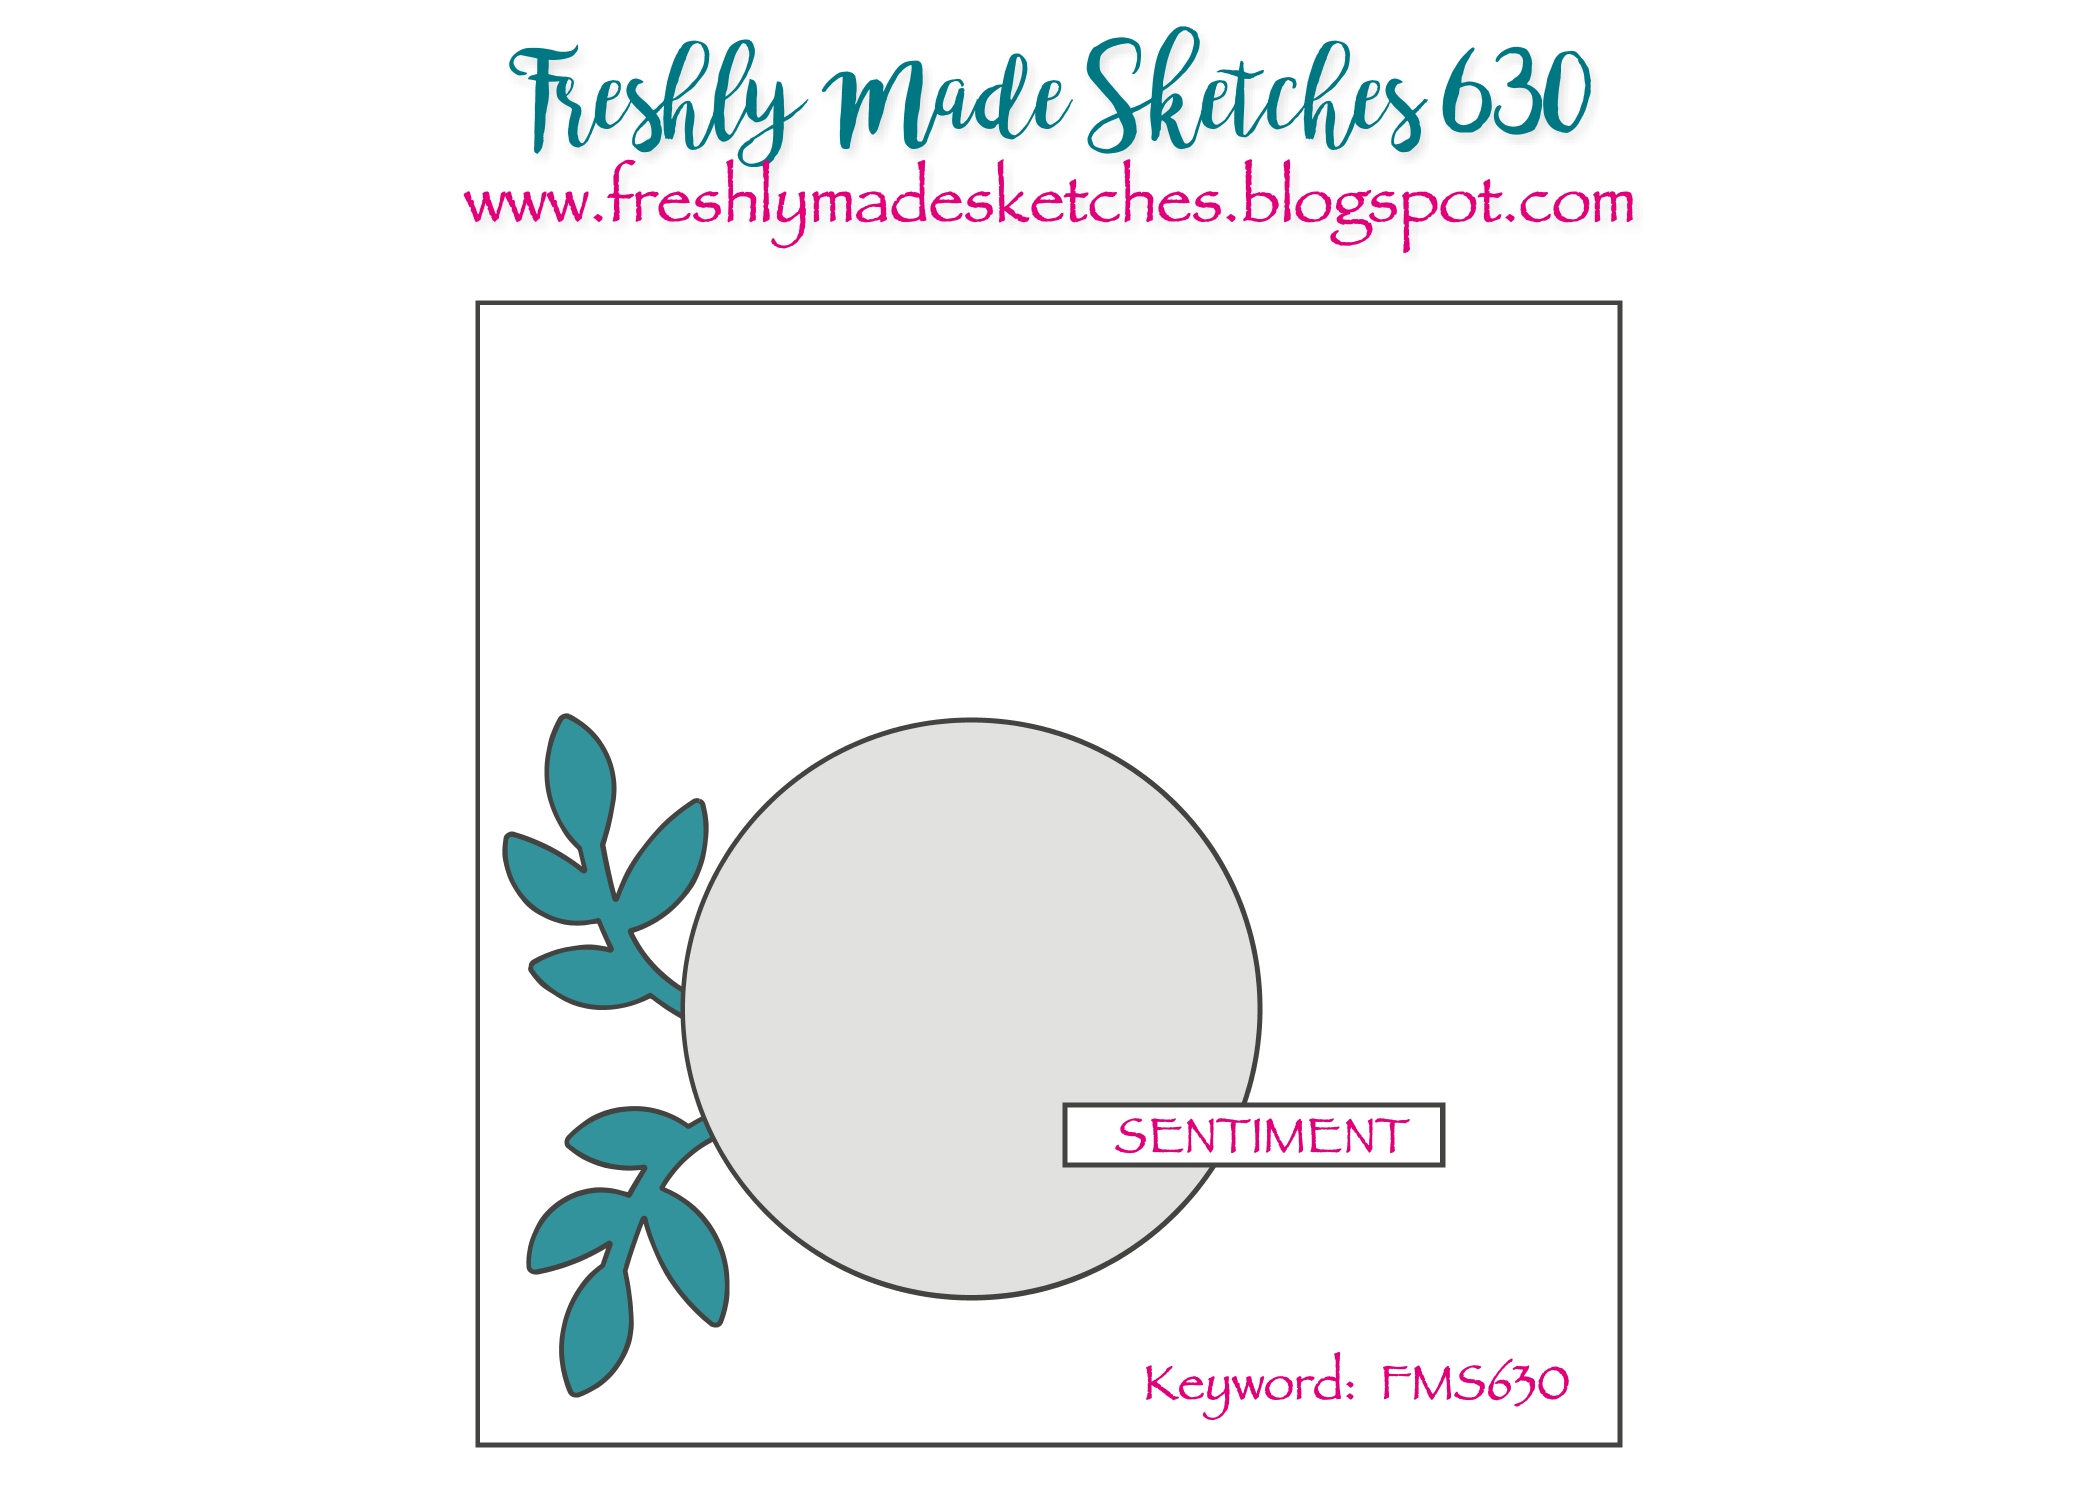
Hi everyone! Back with the latest from Freshly Made Sketches and I am the sketch designer this week. Not gonna lie, I cheated on the sketch and created it after I had colored my image for the card. I just HAD to use it!
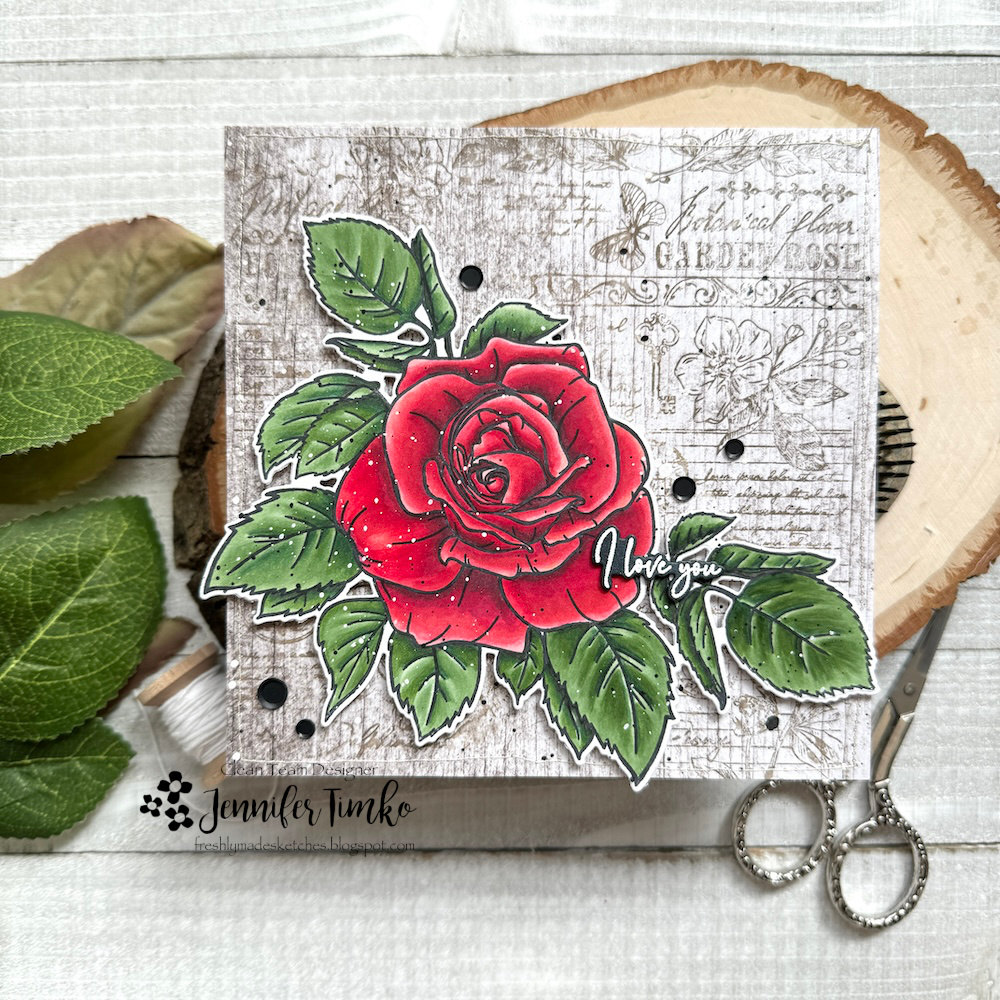
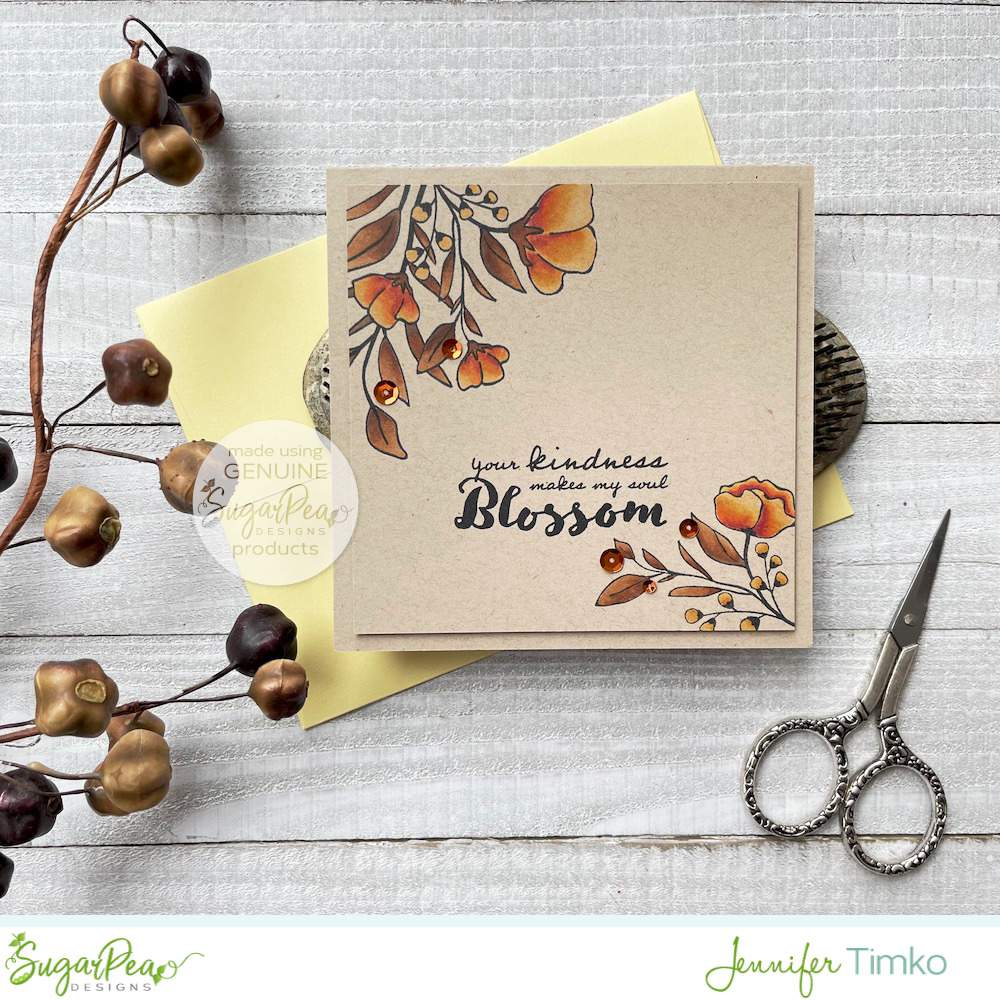
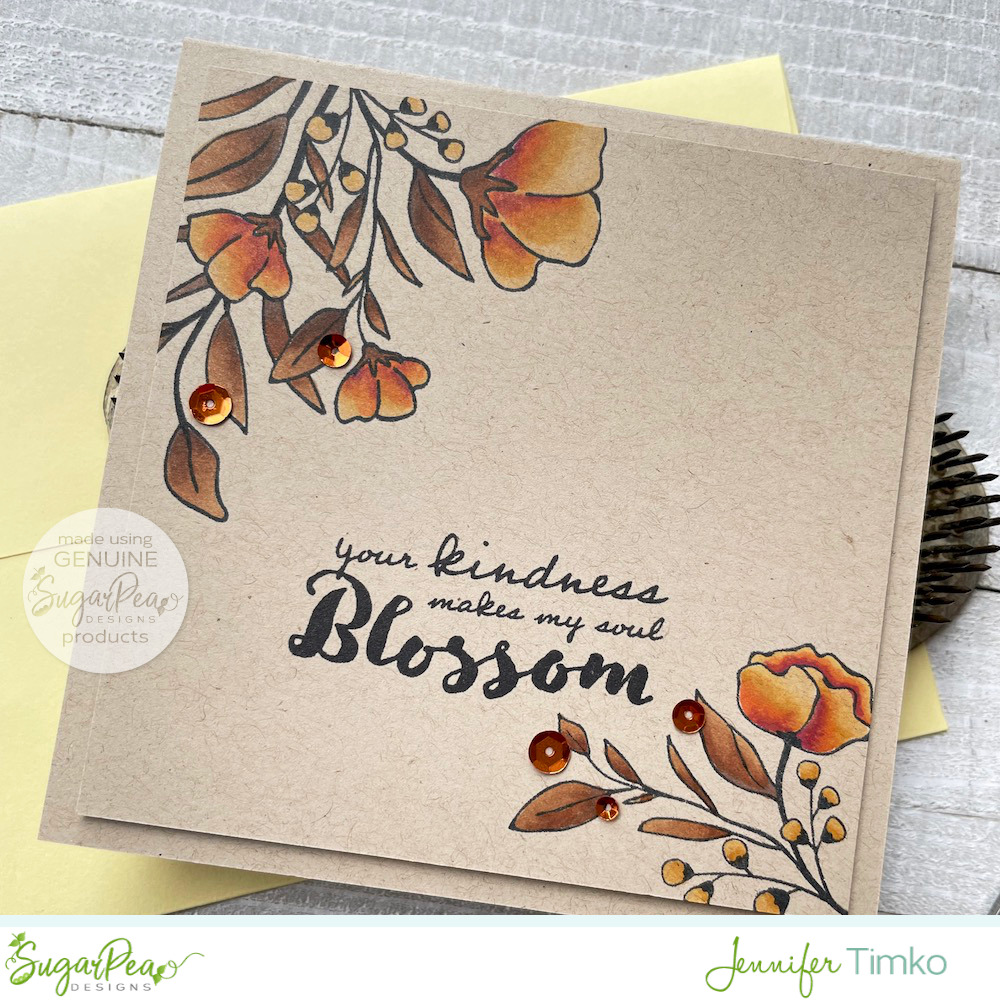
This giant image is so beautiful and perfect for practicing coloring. In this case, Copic Marker coloring. I thought about a not-red rose but thought I’d just keep it classic for the first use of the stamp. It is the Big & Bold – Smell the Roses stamp and die set from Colorado Craft Company. I did the coloring over a few days and had fun playing with shading not just on the flower but on the leaves too.
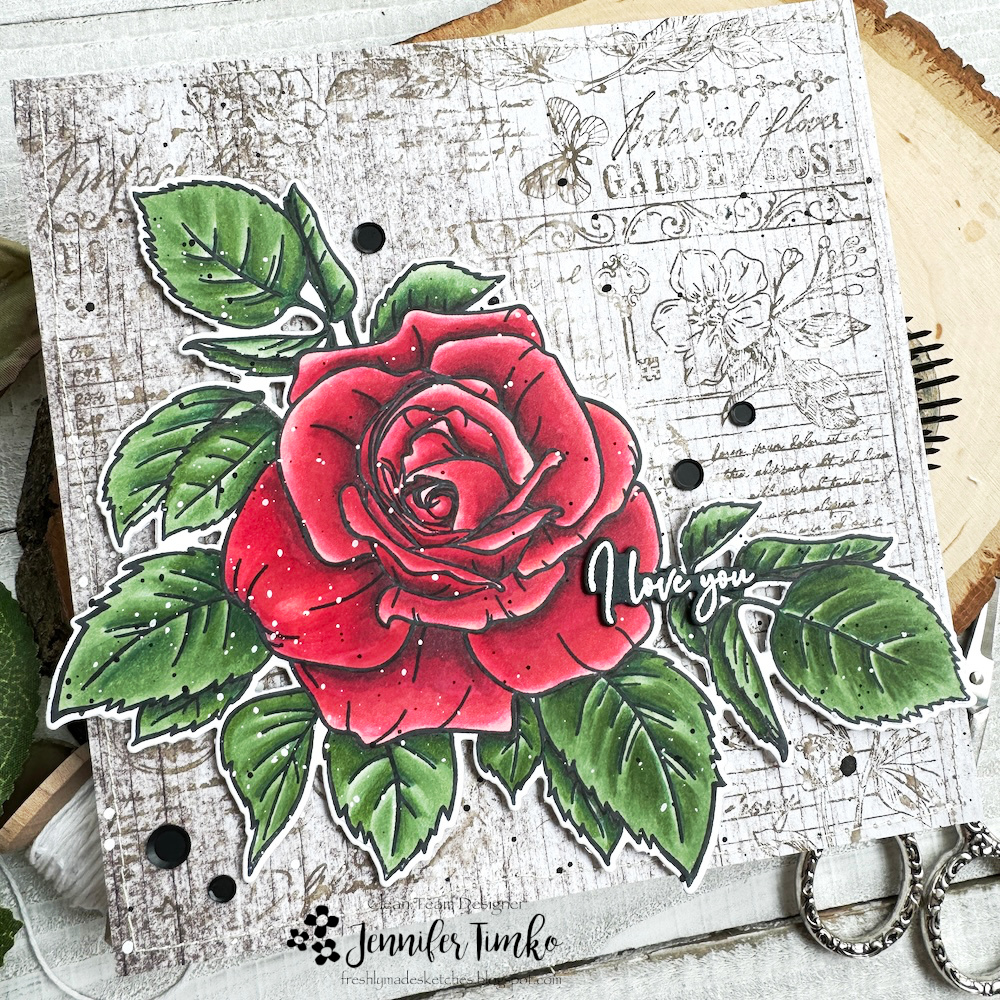
The base of the card is 5-1/2″x 5-1/2″ so that I didn’t have to cut off any of the image. I used a woodgrain background and then did some “imperfect” stamping with the Vintage Flora stamp by Honey Bee Stamps. It isn’t as big as the card but I just inked up part of it with Distress Oxide Ink in Scorched Timber. I did some stitching around the edges and then I added some splatters in white gouache and black watercolor paint and a few black confetti pieces. Finally, I chose a sentiment from the stamp stamp set as the flower. Perfect for the red rose, don’t you think?!
I hope you enjoy this card as much as I did making it. Have a great rest of your week and I look forward to seeing you in the gallery!