Skip to content

CASE Me A Christmas Card – Surprise Edition

CASE Me A Christmas Card – Surprise Edition published on 1 Comment on CASE Me A Christmas Card – Surprise Edition

For those of you who know Michelle Lupton, you know that she is both super talented and one of the nicest people! Over the last years, she has done a series of CASE Me A Christmas Cards where she will CASE (Copy and Share Everything) one of her guests cards and vice versa. You take a non-holiday card and turn it into a holiday card using the inspiration of each other’s work. It is always such fun. This year, Michelle has had some things happen where she was just unable to commit to the project. Soooooo….a whole group of stampers committed to do it together in honor of her!!! This is primarily an Instagram event and all you have to do is go over to IG and search for the hashtag: #casemeachristmascard2023

The hardest part of doing this for me is narrowing down the choice of what to CASE. I generally use the rule of three on a CASE where I change 3 things while keeping some of the main elements of the original. In this case, I chose a floral card with partial die cutting. Her original is posted below. I used the Joyful Poinsettia set from WPlus9 (I know you are super shocked) and found the die for the set worked perfectly in the partial die cutting. I used my Copic Markers to color the image with traditional colors.

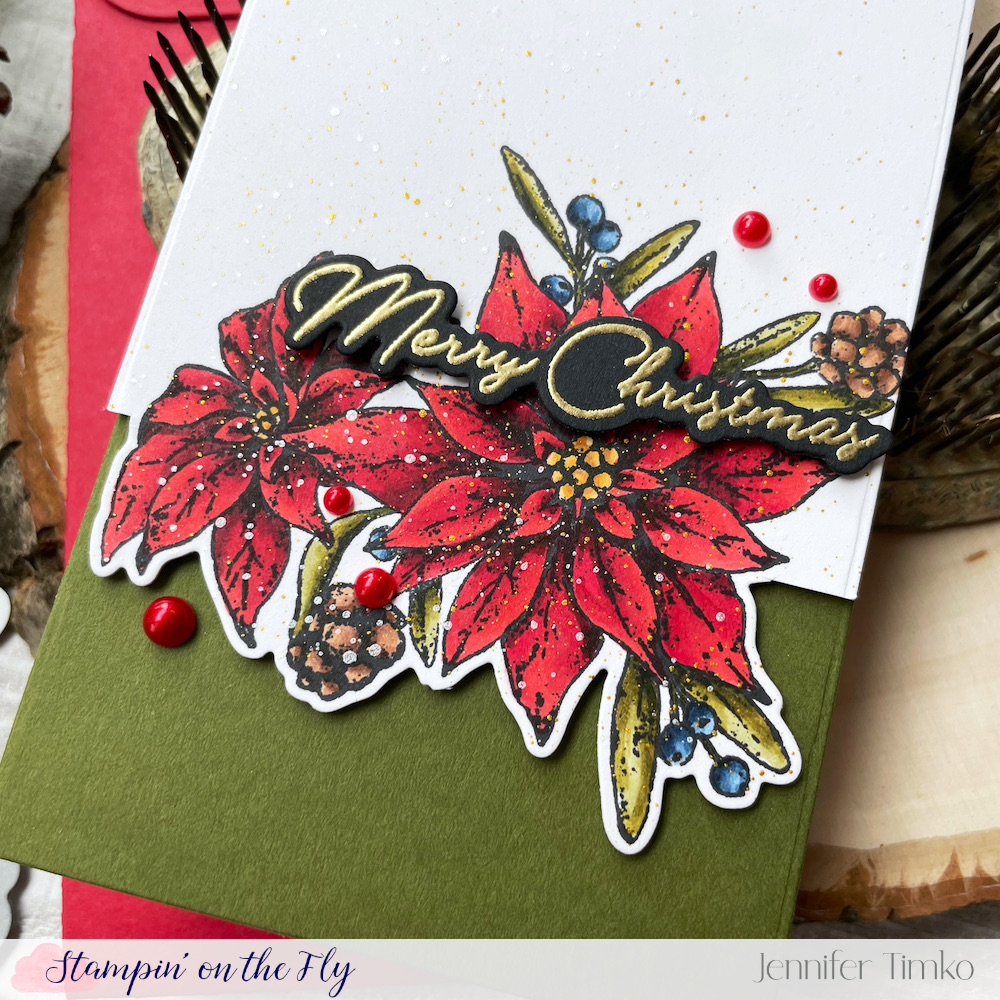
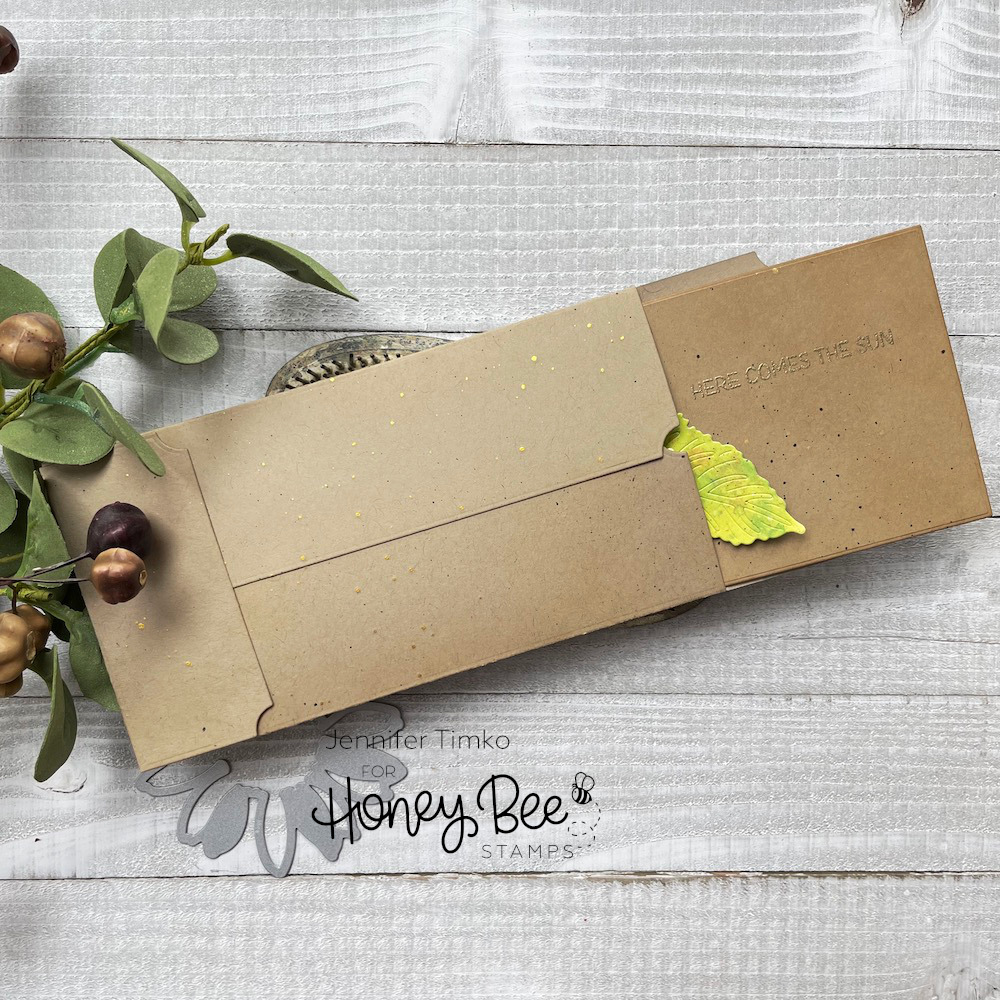
I chose Artichoke Card Stock from Concord and 9th as my base once I had finished my coloring. Then I created a mini slimline card using the Sweet Stacks: Mini Slimline Dies. I heat embossed my sentiment in Gilded Embossing Powder on Black Card Stock by Concord and 9th. Oh, and if you have ever had trouble with heat embossing on black (I did and thought it was my powders…and I tried a lot of powders), this card stock changed the game. It is smoother and somehow the heat embossing stays crisper. YAY! I added some splatters with Gold and Irisdescent White and then some red pearls.

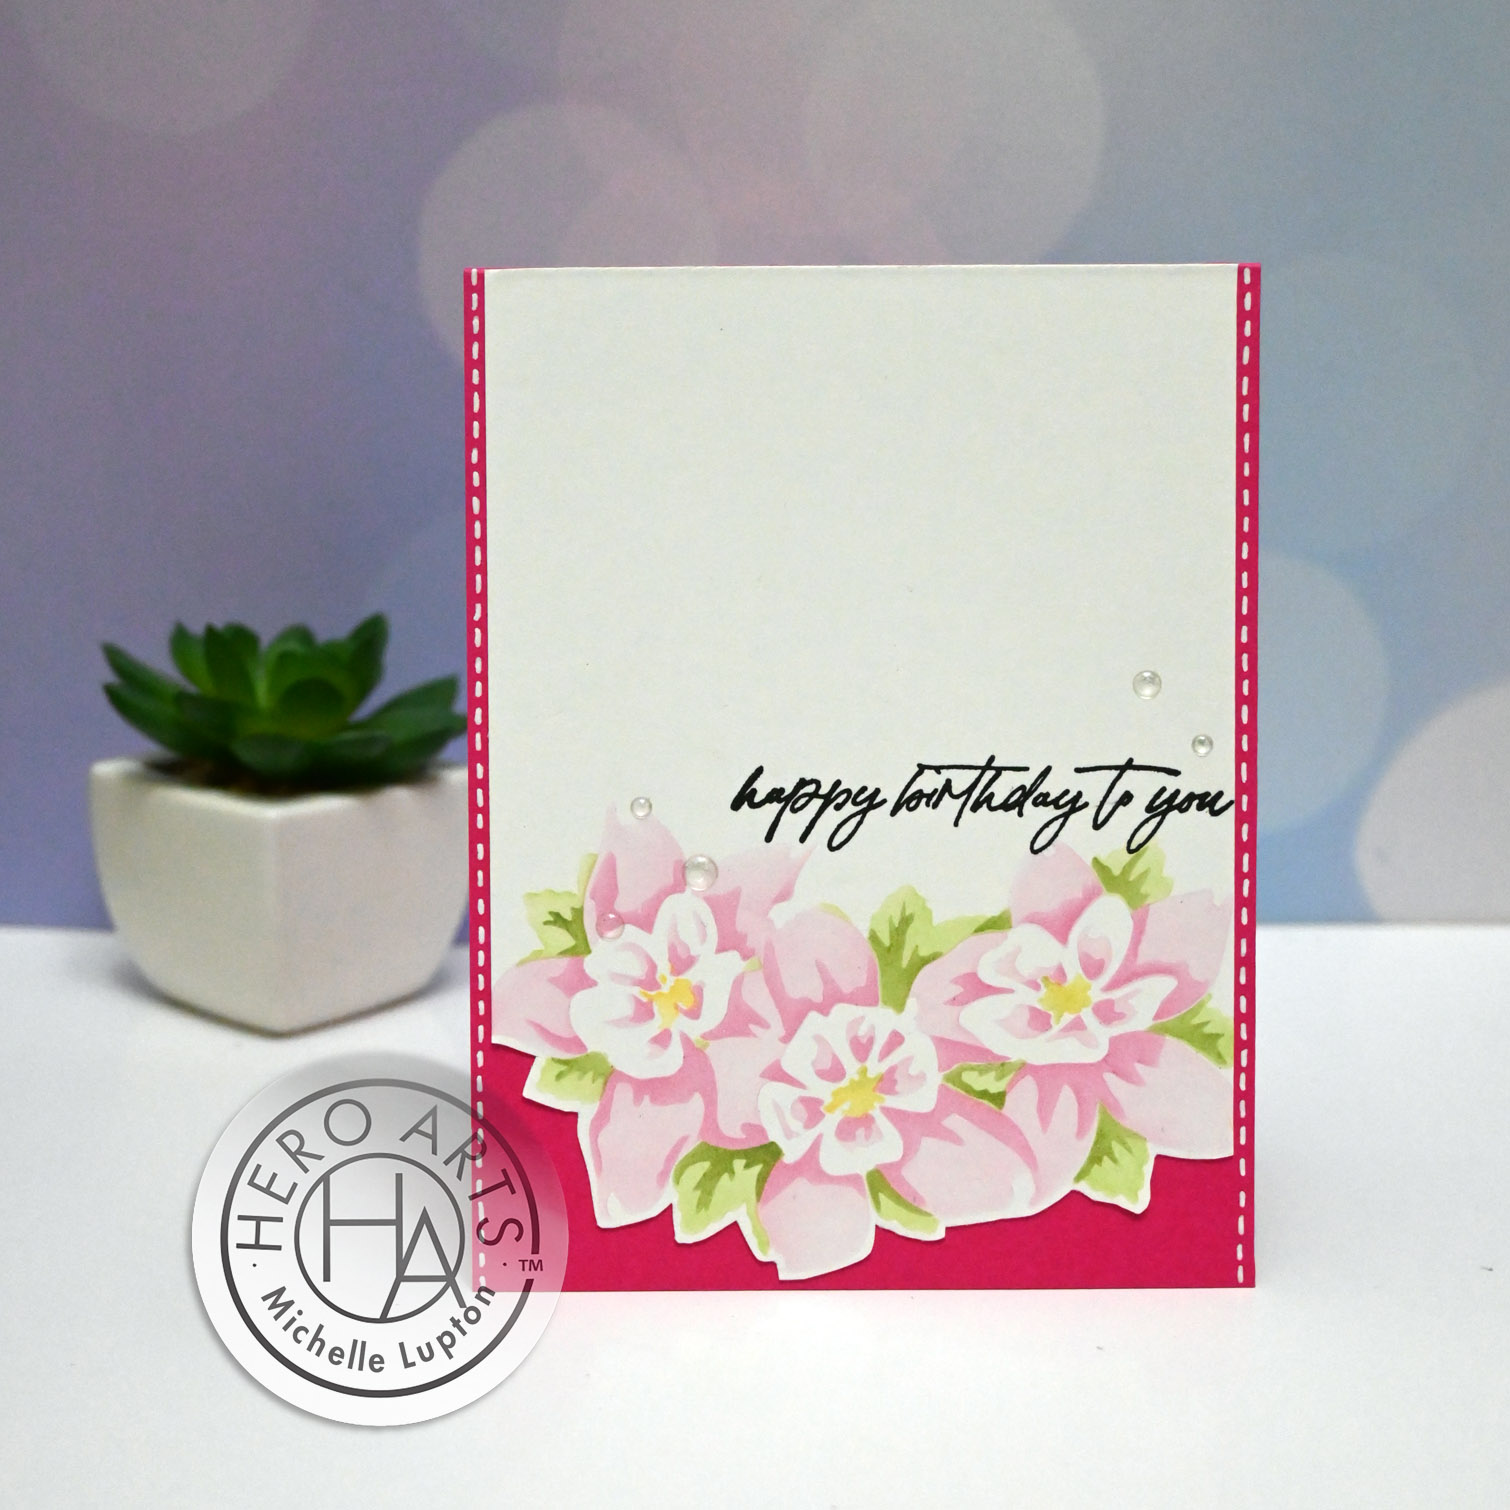
So here is Michelle’s gorgeous card. Things I kept: Partial Die Cut, Sentiment Placement, Florals and Gems. Things I changed: Slimline layout, Copic coloring, Raised sentiment, Image panel to edge.

I hope you like my version of her card. Please come over and celebrate with us all. Michelle is just beloved and I’m thrilled to be a part of this ode to her talent.

Honey Bee Stamps Autumn Splendor Release – Sneak Peek Day 3

Honey Bee Stamps Autumn Splendor Release – Sneak Peek Day 3 published on 1 Comment on Honey Bee Stamps Autumn Splendor Release – Sneak Peek Day 3

Welcome to the Honey Bee Stamps Autumn Splendor Release Sneak Peeks! Today is day three of our peeks at the new release and, as usual, you will be totally wow’d by all the amazing sets.

I am so excited about today’s share! I’m including a die set introduced yesterday by the team and a new sentiment set. AND….all things mini-slimline! Today’s products are: Lovely Layers: Sunflower Honey Cut Dies, Bitty Buzzwords: Seasons Stamp and Honey Cut Dies, Sweet Stacks: Mini Slimline Dies and Mini Slimline Envelope Dies (These affiliate links will not be live until the release opens for sale on August 23rd after the Release Party on IG and FB at 9p CT.)

I’m going to be real here. Based on the reaction to the last flower (the Coneflower), I’m sure this Sunflower Honey Cut set is going to fly out the door. Fly! So be ready to get it fast. I went on a tried and true path and used the dies on the prints from the Team Tie Dye paper. Then, on the flower petals, I added some Copic Marker shading for more depth. The paper had already done most of the work so the shading was super easy but adds so much.

I added gold and black splatters on all the elements and set them aside to dry. Then I started working on my base. I used Neenah Desert Storm paper with the new Mini Slimline Sweet Stacks dies. Once cut, I brushed on Distress Ink in Antique Linen and Vintage Photo then added splatters to match the flower. Once dry, I pondered my sentiment. And then… the obvious, most awesome sentiment jumped right out. I know, I know. But I really made me happy! I stamped in Versamark and heat embossed with Gold Embossing Powder.

Putting the card together was easy after that. I used strategic foam tape to give the flower dimension and then attached it to the base. But I wasn’t done yet. This card needed its very own special envelope! The new Mini Slimline Envelope Honey Cuts are brilliantly designed. There are a couple of styles: rounded edges or the ticket edge I used here. It is super easy to piece together too so your special card can have that last special touch! I added the same ink and splatters to the envelope that I used on the card. And now just look. When the recipient goes to pull out the card, they see the sentiment first!! Oh. My. Word. Again, I may be overly pleased with myself but this just make my creative day!

So glad you stopped in today. Back tomorrow for day four of the peeks! Have a beautiful day!

Primary Sidebar