Skip to content

Fancy Friday – Occasions Catty CASE

Fancy Friday – Occasions Catty CASE published on 3 Comments on Fancy Friday – Occasions Catty CASE

Welcome to this month’s Fancy Friday Blog Hop!  Our team is a group of stampers who love to make beautiful things.  Sometimes they are clean, sometimes they are layered but the one thing I can say for sure is that our projects will be fancy!  If you hopped over from my friend Holly Stene, welcome to the next stop.  For April, we have decided to CASE the Occasions Catalog.  Fun, right?
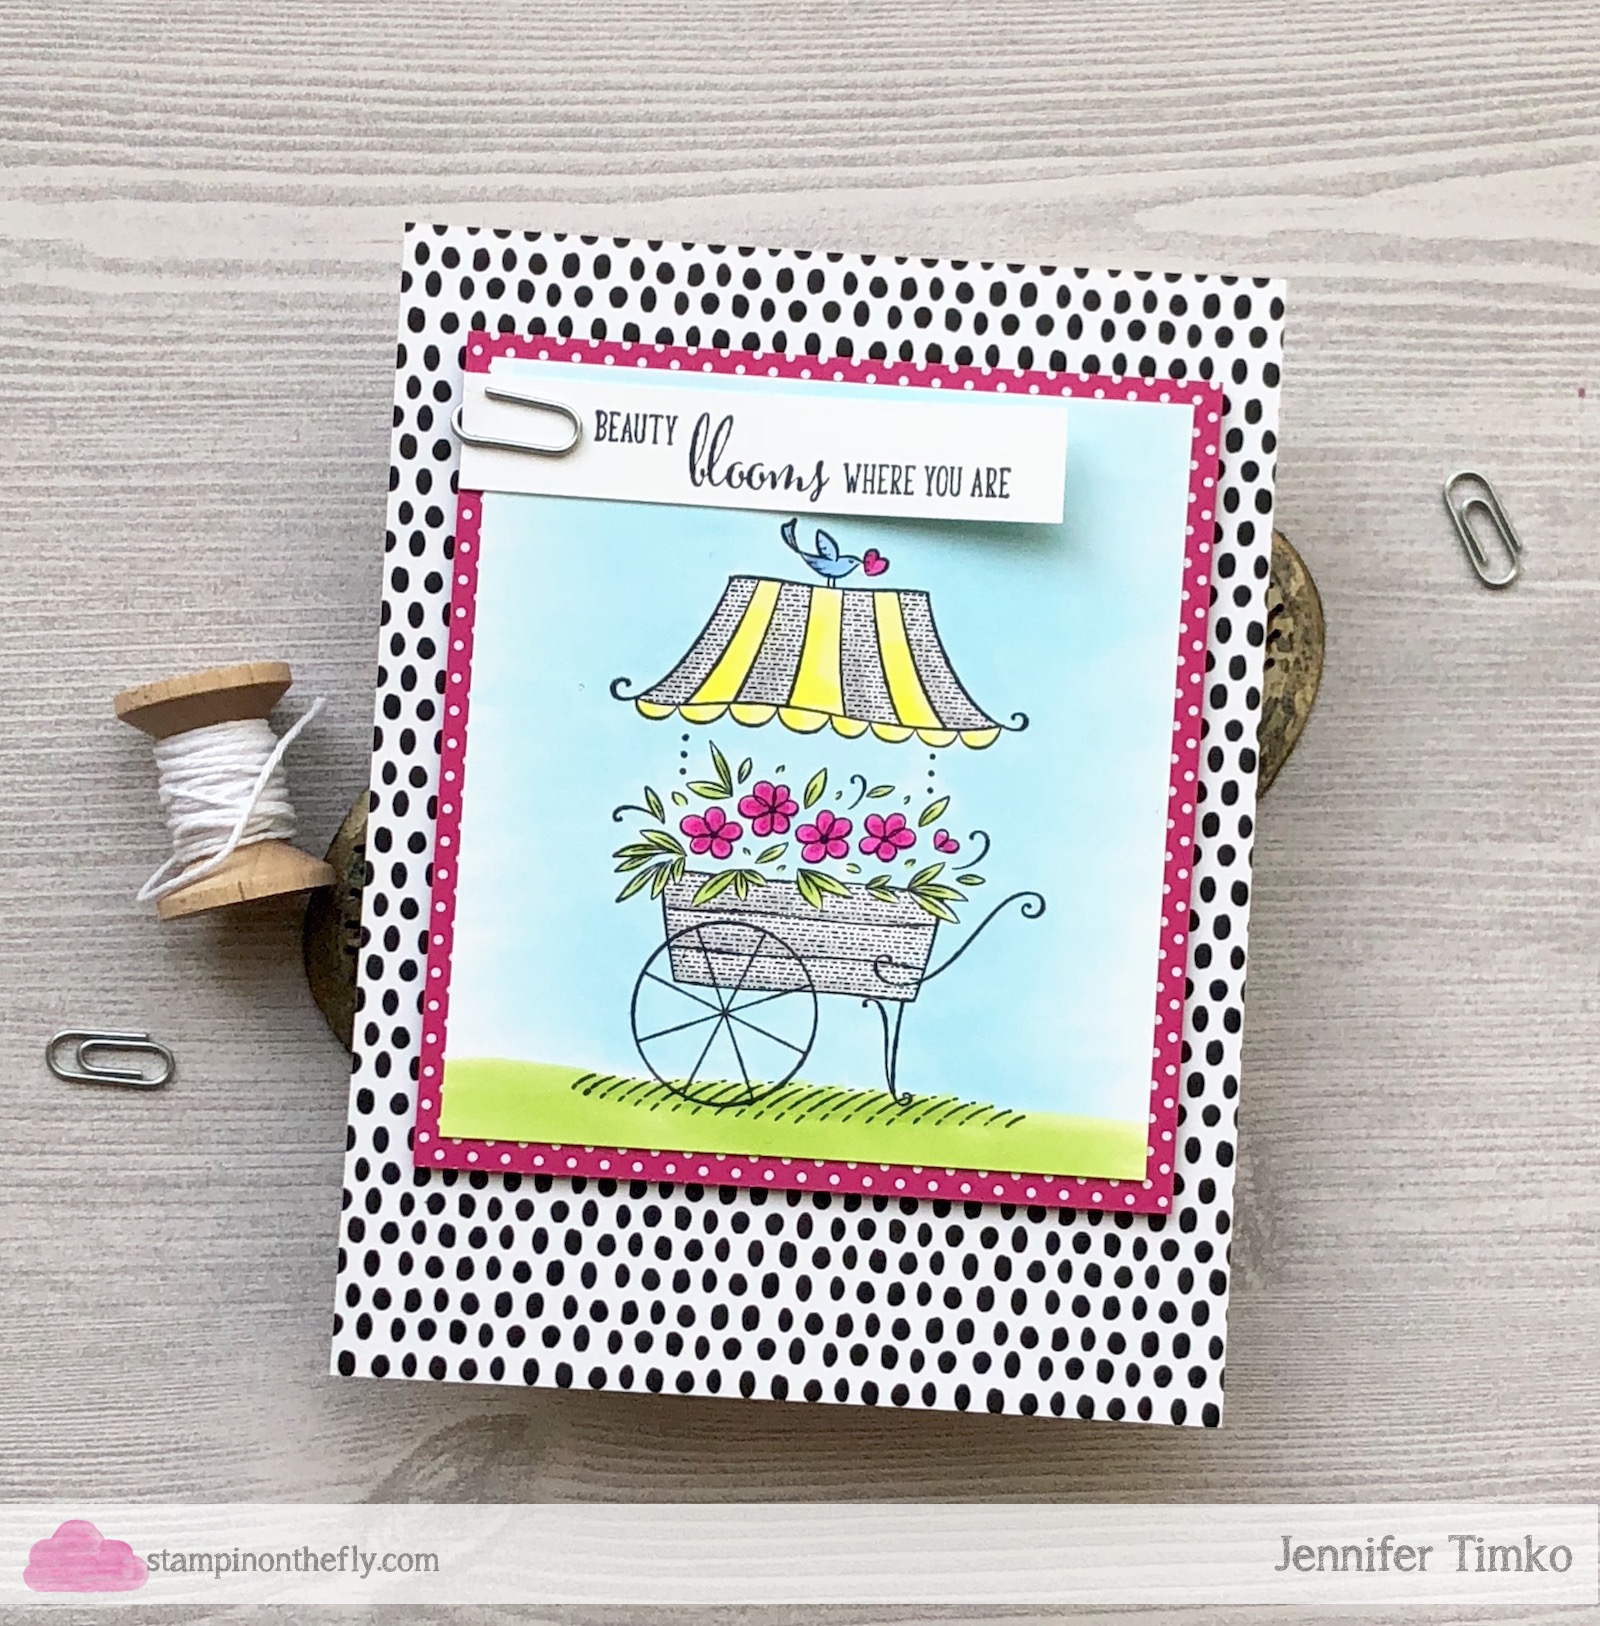
Beauty Blooms by Jen Timko | Friendship's Sweetest Thoughts Stamp by Stampin' Up, Copic Coloring, Tutti-Frutti DSP by Stampin' UpI think CASEing is always a wonderful compliment to the original designer, don’t you?!  But I also think there are some nice basic “rules” that go along with it.  First, whenever possible I feel it is really important to give credit to the original designer if you are posting your card or using it for a class.  I know how happy it makes me to know that I have inspired someone!  I also believe in honoring the work that was done by the original artist.  Even clean and “simple” cards can take a long time to design because finding balance is challenging.  What is simple to copy might have taken hours to get right.  Second, when I am CASEing, I look to change at least three things.  That way the card is true to the inspiration but still has original elements.

For today’s card, I pulled out Friendship’s Sweetest Thoughts and stamped onto Thick Whisper White with Momento Tuxedo Black ink.  I really love this adorable set and have not given it nearly enough love.  I colored the image using Copic Markers but you could use Stampin’ Blends too.  I thought this fun dotted paper from the Tutti-frutti DSP pack was perfect as a base and then added some retired Pop of Pink DSP behind the image.  The sentiment comes from the stamp set and I attached the banner with a retired clip.
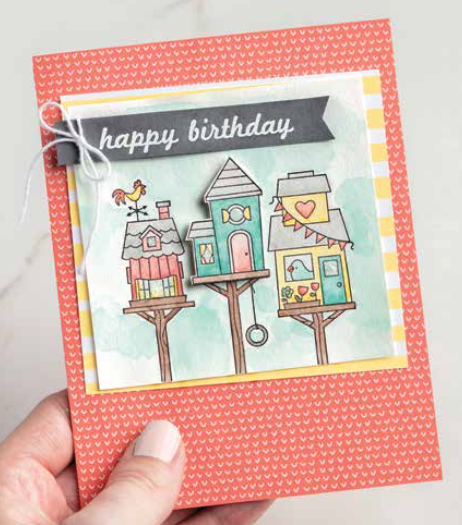
Stampin’ Up Occasions Catalog p. 41

Here is my inspiration card from the catalog.  What are my three changes?  Different image and coloring medium, change of designer papers, change of accessory on the banner.  So while my card is clearly a CASE, it has a fresh and original feel to it.  I wish I knew which of the Concept Artists at Stampin’ Up actually designed this card but it is just fabulous!!

I am thrilled to be joining my Fancy Friends this month.  It has been a while and I missed hopping with them.  Next up is the incredible Jennifer Picard.  I know you will love what she is sharing today!!  Thank you for stopping in.  Hope to see you again soon!

You can click our logo above to get to the Fancy Friday Pinterest page!

Products used:

Stamp:  Friendship’s Sweetest Thoughts (SU); Ink:  Momento Tuxedo Black; Paper:  Thick Whisper White (SU), Tutti-frutti DSP (SU); Accessories:  Mini Paper Clip (SU retired), Dimensionals

Signature 2016 - 1

SaveSave


SaveSave

SaveSave

SaveSave

Fancy Friday

Fancy Friday published on 8 Comments on Fancy Friday

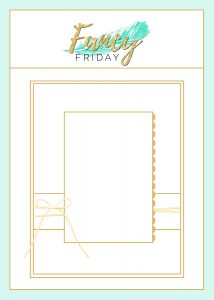
Welcome to this month’s Fancy Friday Blog Hop!  Our team is a group of stampers who love to make beautiful things.  Sometimes they are clean, sometimes they are layered but the one thing I can say for sure is that our projects will be fancy!  If you hopped over from the amazing Marisa Gunn, welcome to the next stop.  For November, we are all working with a sketch.  And you know I cannot resist a sketch!!

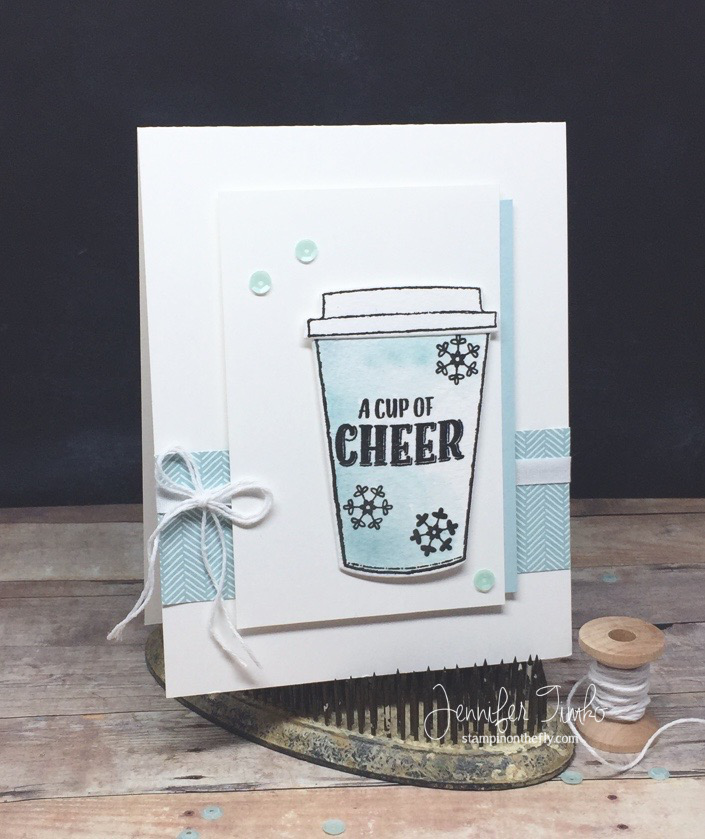
Fancy Friday - Cup of Cheer by Jen Timko | Merry Cafe Stamp Set by Stampin' Up, Coffee Cups Framelits by Stampin' Up, Coffee Break DSP by Stampin' Up, WatercolorI thought the sketch was a perfect one to show off this fun coffee cup set from Stampin’ Up.  It is called Merry Café and it can be found in the Holiday Catalog.  It is a sister set to the Coffee Café set from the main catalog and the dies from that set are used for both.  Fabulous!  I chose to do a quick watercolor on the cup using Soft Sky ink after stamping the cup, sentiments and snowflakes in Versafine Ink.  You want to make sure you use a water safe ink when you stamp.  After cutting them with the framelits and the Big Shot, I just popped them up on Dimensionals for the image panel.  To keep with the sketch, I added a strip of Soft Sky card stock along the side for a simple extra border that is a great way to use scraps.  The patterned paper for the crossing panel is from the Coffee Break DSP pack and I love those subtle chevrons.  I added some white cotton ribbon (SU ret) across the panel and tied it with some White Baker’s Twine.  Finally, I pulled some of the sequins from the October Paper Pumpkin kit as a finishing touch.  This card hits the sweet spot for this time of year for me.  Quick, cute and easy to duplicate!  I hope you enjoy it too!

Now I am really, REALLY excited to tell you that our Fancy Team has grown a bit.  Our new members will be introducing themselves over the next few months but I get the extraordinary pleasure of sending you over to one of my favorite stampers.  As an Artisan in 2011, Jennifer Picard has been one of my crafty heroes for a long time.  Truth be told, I’m a little star struck!  I know you will love her work as much as I do so hop right over to see what she has created.

You can click our logo above to get to the Fancy Friday Pinterest page!

Products used:

Stamp:  Merry Café (SU); Ink:  Versafine Onyx Back; Paper:  Fabriano Extra White Watercolor Paper, Thick Whisper White (SU); Accessories:  Paper Pumpkin October Sequins, Big Shot, Coffee Cups Framelits (SU), White Baker’s Twine (SU), White Cotton Ribbon (SU ret)

Signature 2016 - 1

SaveSave

SaveSave

Fancy Friday September – Holiday in 3D

Fancy Friday September – Holiday in 3D published on 2 Comments on Fancy Friday September – Holiday in 3D

Welcome to this month’s Fancy Friday Blog Hop!  Our team is a group of stampers who love to make beautiful things.  Sometimes they are clean, sometimes they are layered but the one thing I can say for sure is that our projects will be fancy!  If you hopped over from the incredible Allison Okamitsu, welcome to the next stop.  For September, we have created 3D Holiday Projects.  And oh, what inspiration awaits you!

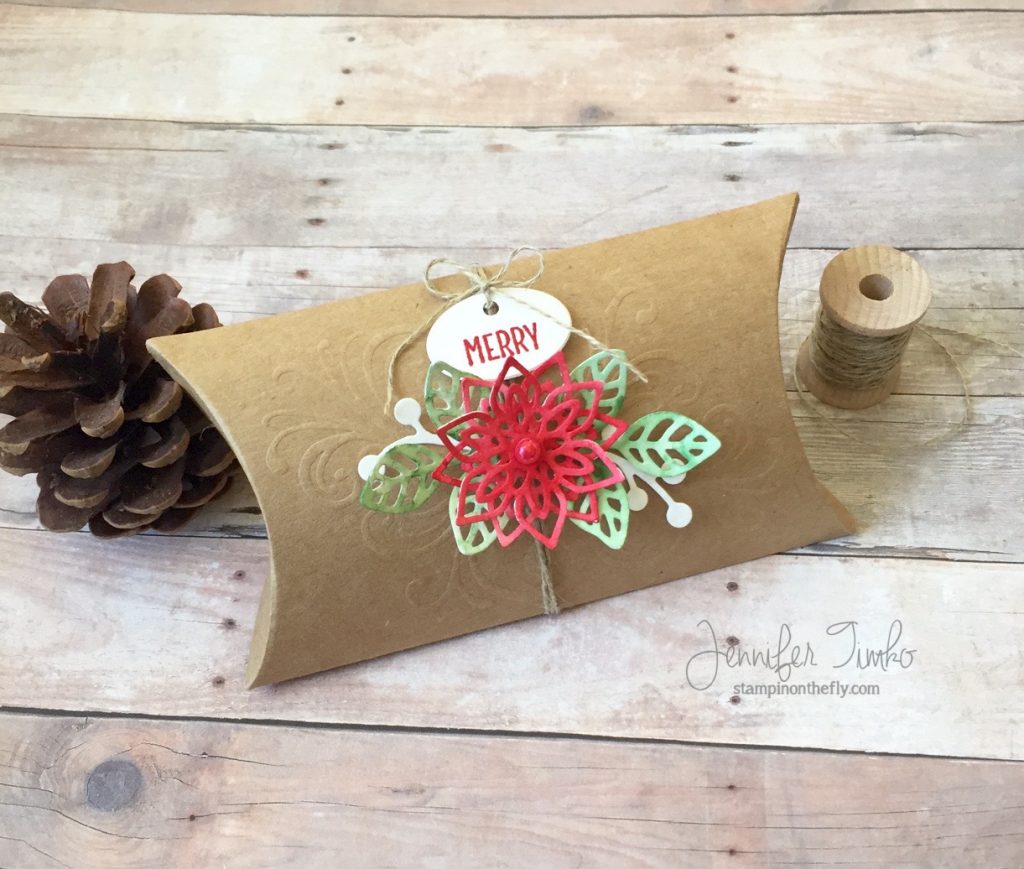
Fancy Friday 3D by Jen Timko | Flourish Thinlits by Stampin' Up, Pillow Box by Paper Pumpkin, Merry Café Stamp Set and Coffee Cups Framelits by Stampin' UpI have to admit that I don’t make a lot of “alternate” projects with my monthly Paper Pumpkin subscription because I usually love them exactly as they are!  And I did love the one we got for September for sure.  But I saw an opportunity to show you something else with more of a Christmas flair if you decided to use all those leaves on other projects.  This pillow box has the most lovely swirl detail that really lends itself to any occasion.  Using my Flourish Thinlits, I cut flowers, leaves and berries from watercolor paper.  Then, with an aqua painter, I quickly added Real Red to the flowers, Garden Green to the leaves and left the berries white.  Super fast but the watercolor look is a little softer than having used the dies on card stock (but you could totally do that to save a step!).  I cut the bottom set of leaves off of each stem to make them more proportional to the flow and then took the berry stem and cut it apart to give me two berry sets from one die cut.  I put a Mini Dimensional under the center of the flower (the perfect size!) and attached the second flower to the top one.  Then I used Glue Dots to attack the rest behind the center of the flowers.  Using a Basic Pearl that was colored with a Copic Marker, I added a center that covered all that was underneath.

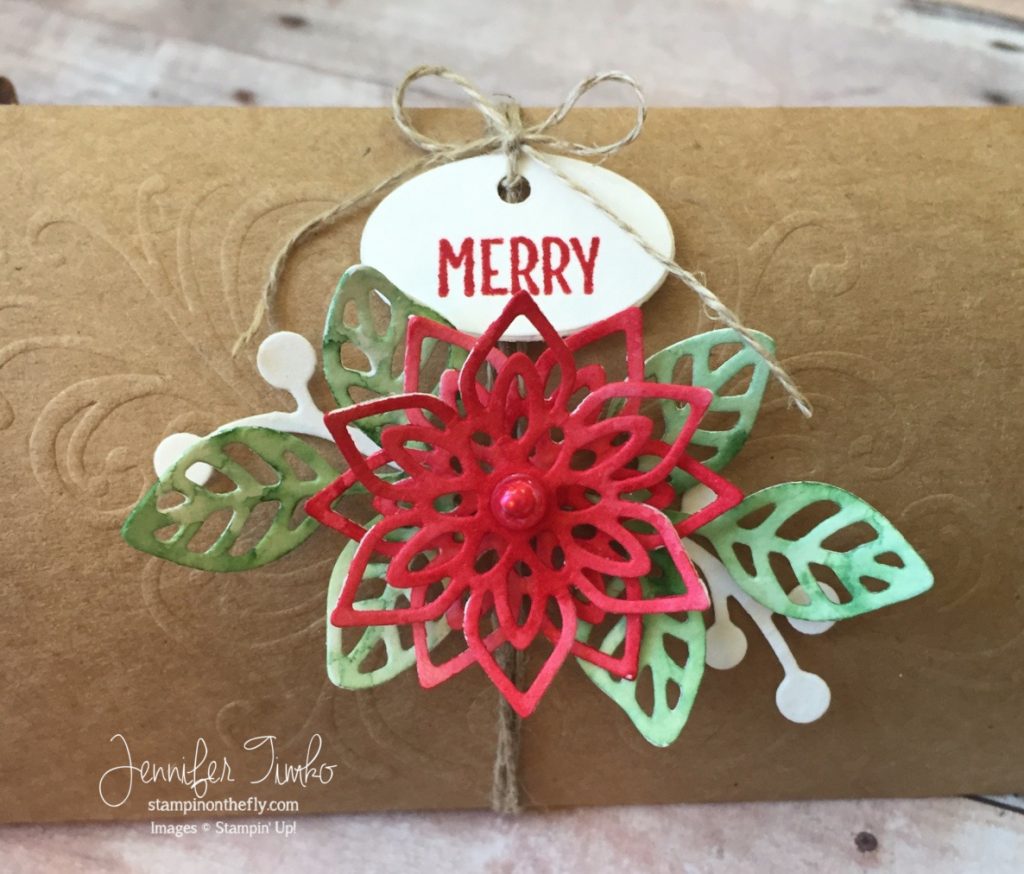
Fancy Friday Closeup by Jen Timko | Flourish Thinlits by Stampin' Up, Merry Café Stamp Set, Pillow Box by Paper PumpkinNext, I stamped the sentiment from Merry Café onto some more watercolor paper (to ensure a color match) and then cut it out with the oval die from the Coffee Cups Framelits.  I set it up for the sentiment to sit a little low in the oval to allow room to cut a little hole with my 1/8″ Circle Punch to create a tag.  Cute, right?  I wrapped the box with Linen Thread and tied on the tag.  I used some glue to attach the floral spray to the box (to make sure it stayed put!).

Those of you who know me, know that 3D projects are not my go-to thing.  But Paper Pumpkin elements make it easy to look like a real pro!  Don’t be afraid to think outside the, well, box on those!  I hope you enjoy the rest of the hop.  Next up is my friend, the always amazing Jeanna Bohanon.

You can click our logo above to get to the Fancy Friday Pinterest page!

Products used:

Stamp:  Merry Café (SU); Ink:  Real Red, Garden Green; Paper:  Canson Watercolor; Accessories:  Paper Pumpkin September, Multi Matte Medium (as glue for the floral spray), Big Shot, Coffee Cups Framelits (SU), Linen Thread, 1/8″ Circle Punch

Signature 2016 - 1

SaveSaveSaveSave

SaveSave

Fancy Friday – Speechless!

Fancy Friday – Speechless! published on 8 Comments on Fancy Friday – Speechless!

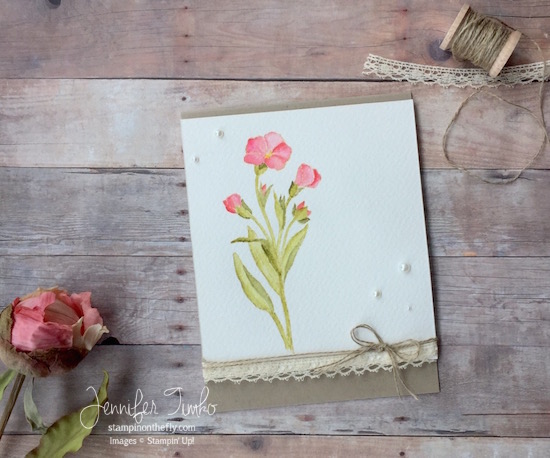
Welcome to this month’s Fancy Friday Blog Hop!  Our team is a group of stampers who love to make beautiful things.  Sometimes they are clean, sometimes they are layered but the one thing I can say for sure is that our projects will be fancy!  If you hopped over from one of my crafty heroes Cathy Caines, welcome to the next stop.  For April, we are focusing on the gorgeous artwork and images in the stamp sets.  Sometimes pictures speak louder without words!FF April by Jen Timko | Butterfly Basics Stamp by Stampin' Up, No Line WatercolorI chose this gorgeous flower image from the Butterfly Basic stamp set as my focal point.  I thought it would be fun to try coloring it using the no-line watercolor technique.  I’m still working on this but I am pretty happy with the end result here.  One of the best parts of stamping is that there is always something new to learn!!  After I colored the flowers, I added a few pretty little details.  First some lace trim (this one is retired but SU always has the most amazing ribbons and trims) and then I added some Linen Thread.  The base is Crumb Cake, one of my favorite neutrals.  I added some Basic Pearls too, because, well, I love them!

Now on to the rest of the hop!  These talented stampers are going to inspire you for sure!  Next up is the lovely Sue Plote.

You can click our logo above to get to the Fancy Friday Pinterest page!

Click HERE to purchase these wonderful Stampin’ Up products!

Stamp:  Butterfly Basics; Ink:  Tim Holtz Distress Ink, Zig Clean Color Markers; Paper:  Fabriano Watercolor, Crumb Cake; Accessories:  Lace Trim (retired), Linen Thread, Basic Pearls, Dimensionals

Signature 2016 - 1

Fancy Friday – Step Up Sketch Challenge

Fancy Friday – Step Up Sketch Challenge published on 5 Comments on Fancy Friday – Step Up Sketch Challenge

Welcome to this month’s Fancy Friday Blog Hop!  Our team is a group of stampers who love to make beautiful things.  Sometimes they are clean, sometimes they are layered but the one thing I can say for sure is that our projects will be fancy!  If you hopped over from the amazing Erica Cerwin, welcome to the next stop.  For March, we have double the fun!  Not only do we have a sketch but we have a step it up challenge.  Making a basic card and a stepped up version!  It is going to be a fun hop!

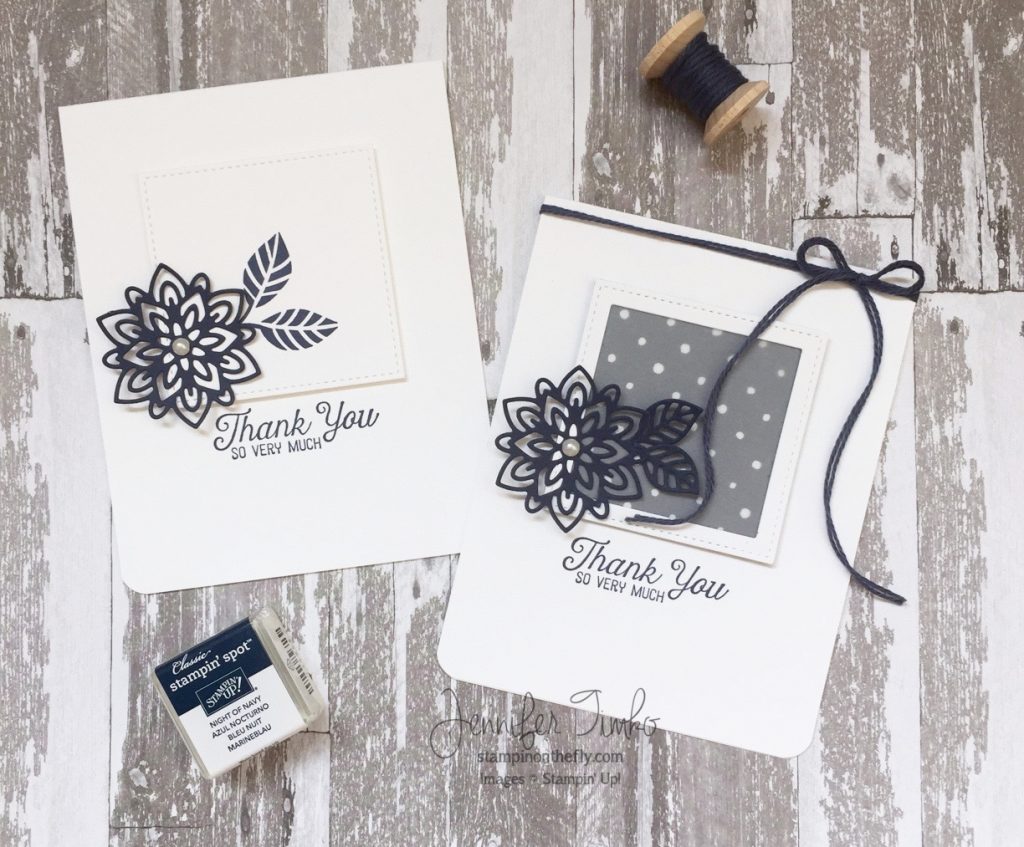
Fancy Friday March by Jen Timko | Flourishing Phrases Stamp Set and Flourish Thinlits by Stampin' UpSo here are my cards together but I also took photos of them separately so you can see the details better.  Both versions are still “clean” but the stepped up version has a bit more wow to it.

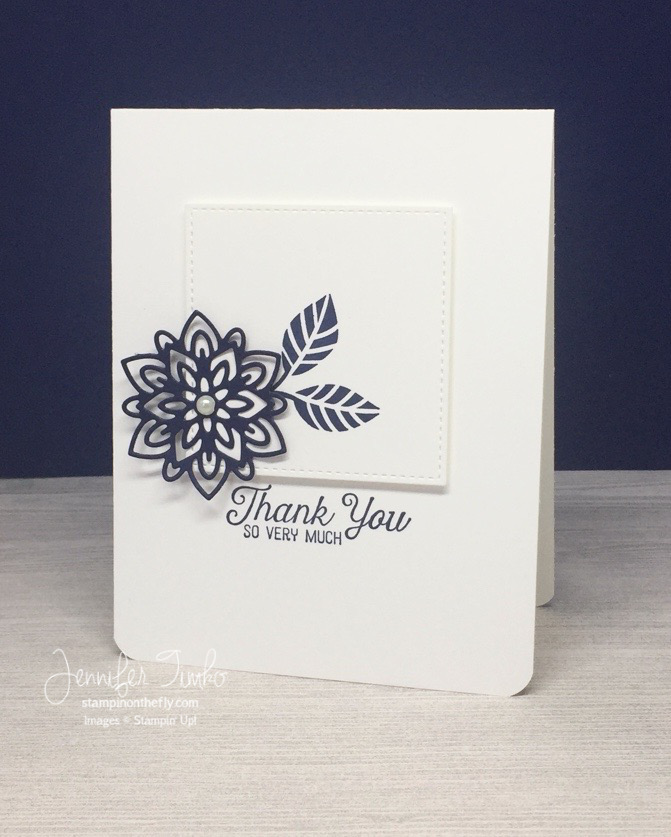
FF Mar Flourish Basic by Jen Timko | Flourishing Phrases and Flourish Thinlits by Stampin' UpFor my first card I used the sketch as my guide.  I love the new Stitched Shapes Thinlits and they worked perfectly here.  I stamped the leaves from the stamp set in Night of Navy then cut a flower with the coordinating thinlits to go with them.  The sentiment is from the same stamp set.  When you have a card that is super clean, every detail matters.  Bold contrast (like the navy and white) really catches the eye and the bit of stitching helps the card feel finished.  The Basic Pearl in the flower’s center adds a special touch.

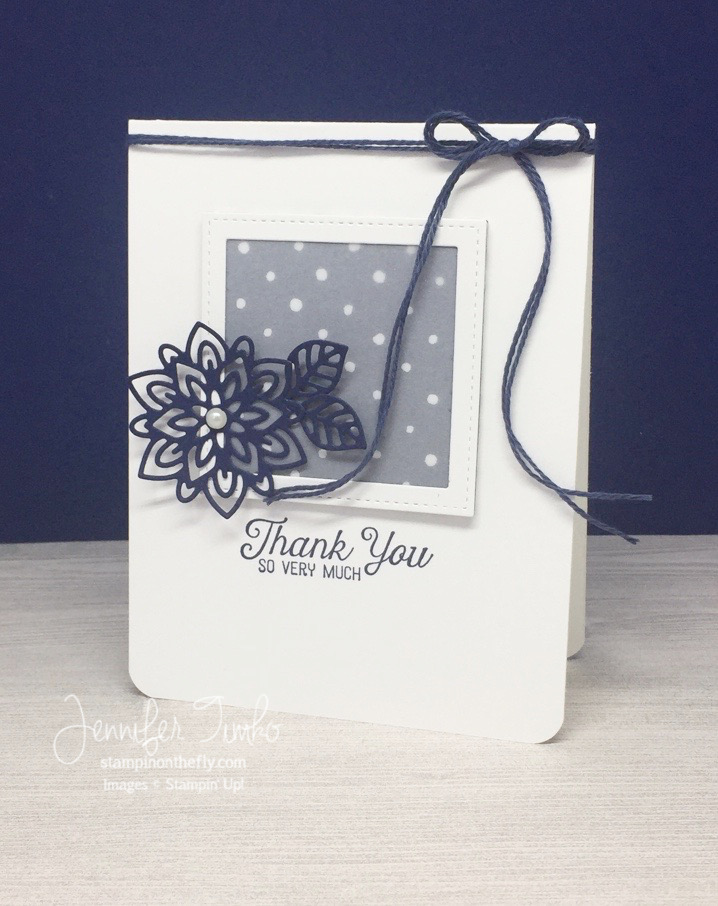
FF Mar Flourish Stepped Up by Jen Timko | Flourishing Phrases and Flourish Thinlits by Stampin' Up, Floral Boutique DSP, Stitched Shapes, VellumFor my stepped up version, I added a few more elements.  First I cut a frame with my stitched squares and then also cut a square from both White Vellum Card Stock and Floral Boutique DSP (the polka dots).  I layered them up and attached them together.  The vellum helps the DSP not take over the card and you can still see the flower.  This time, I cut both the flower and the leaves from with the Flourish Thinlits and then added them to the square.  The sentiment remains the same as above, as does the pearl.  But I decided it needed more accessorizing so I added some Night of Navy Solid Baker’s Twine.  For both cards, I used my Envelope Punch Board to round the corners (those little punches are so handy on that board!).

I hope you like both of my cards and the sketch.  I think the team is going to impress you with their creativity!  And let’s face it, these ladies are all about stepping it up!

Now for the rest of the hop!  I’m telling you….this team is the most talented group.  You will be so inspired as you go along.  Next up is my amazing friend Cindy Schuster.  She is one of my favorite stampers and one of the nicest people you could ever meet!

You can click our logo above to get to the Fancy Friday Pinterest page!

Click HERE to purchase these wonderful Stampin’ Up products!

Stamp:  Flourishing Phrases; Ink:  Night of Navy; Paper:  Floral Boutique DSP, Thick WW, White Vellum; Accessories:  Big Shot, Stitched Shapes Thinlits, Flourish Thinlits, Basic Pearls, Night of Navy Baker’s Twine, Envelope Punch Board

Signature 2016 - 1

Fancy Friday – Think Pink

Fancy Friday – Think Pink published on 4 Comments on Fancy Friday – Think Pink

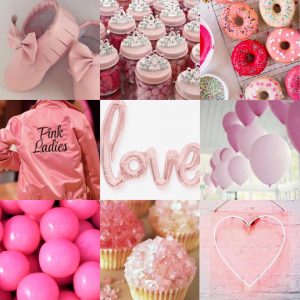
Welcome to this month’s Fancy Friday Blog Hop!  Our team is a group of stampers who love to make beautiful things.  Sometimes they are clean, sometimes they are layered but the one thing I can say for sure is that our projects will be fancy!  If you hopped over from the amazing Susan Wong, welcome to the next stop.  For February, we have an inspiration challenge….Think Pink!

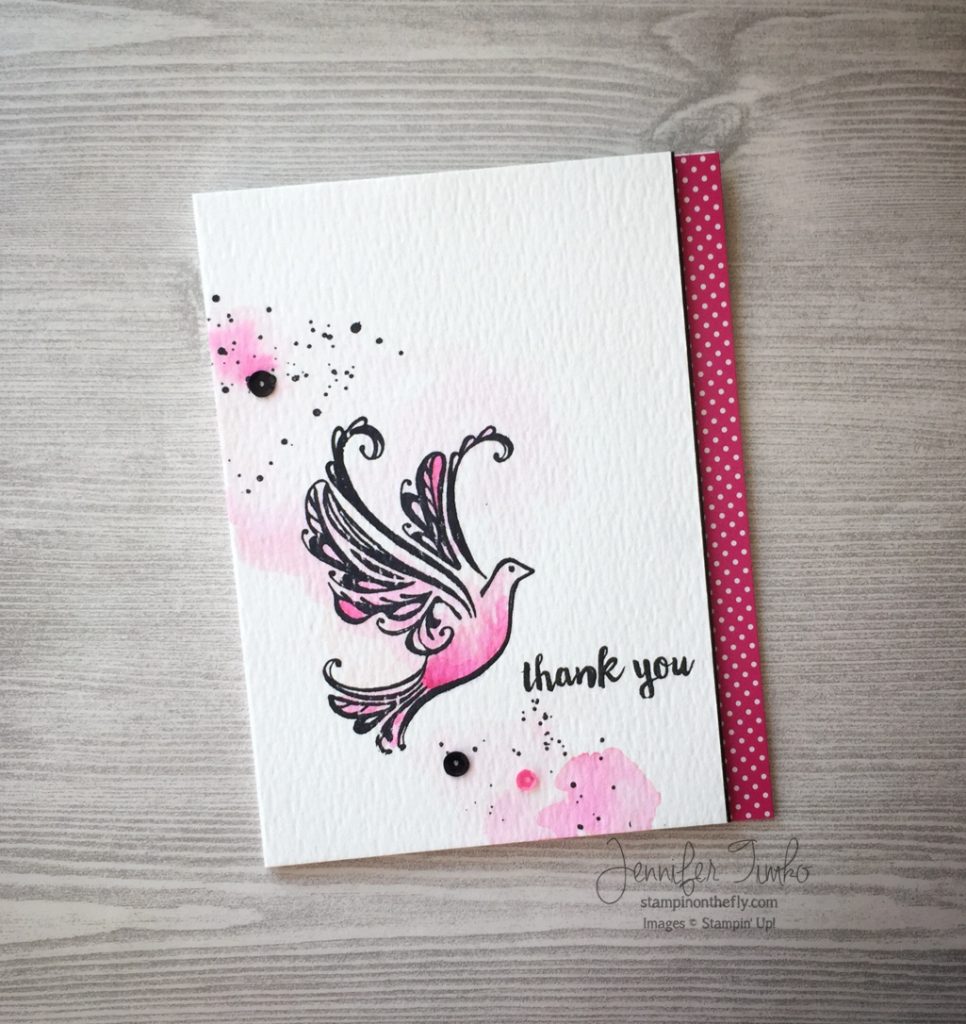
Think Pink by Jen Timko | Strength & Prayers Stamp Set by Stampin' Up, Watercolor, Pop of Pink DSPI have loved this beautiful bird image from Strength & Prayers since I got it and I wanted to use it for a non-sympathy card.  I thought playing with it in pink would be fun.  I stamped the image onto watercolor paper and also stamped the splatters from Gorgeous Grunge.  Then I started a loose watercolor with Pink Pirouette followed by additional coloring with Melon Mambo.  I just pulled the color right from the lid of my ink pads using an Aqua Painter.  Super easy to do, especially when you get to go out of the lines like I did here.  After the color dried back a bit, I went back in and layered in some more Melon Mambo to add more depth.  The sentiment is from a Paper Pumpkin set and I thought the font was a nice match to the art on the image.  I added a small border on the colored panel with Basic Black card stock and put it on a Pop of Pink DSP base.  Lots of pink here but you could use any color singly or a combination for a different look.

I hope you enjoy this fun look!  There are some serious “pink girls” in our hop and I just know they will have had a great time creating with this theme.

Now for the rest of the hop!  I’m telling you….this team is the most talented group.  You will be happy you hopped!  Next up is my amazing friend Connie Collins.  Her work is always extraordinary and you are sure to love what she created!

You can click our logo above to get to the Fancy Friday Pinterest page!

Click HERE to purchase these wonderful Stampin’ Up products!

Stamp:  Strength & Prayers, Paper Pumpkin, Gorgeous Grunge; Ink:  Melon Mambo, Pink Pirouette, WPlus9 Black Dye Ink, Versafine Onyx Black; Paper:  Tim Holtz Watercolor Paper, Basic Black, Pop of Pink DSP, Thick WW (Card Base); Accessories:  Aquapainter, Metallic Sequins, Sequins (Pretty Pink Posh)

Signature 2016 - 1

Fancy Friday – Pencils and Ink

Fancy Friday – Pencils and Ink published on 12 Comments on Fancy Friday – Pencils and Ink

Welcome to this month’s Fancy Friday Blog Hop!  Our team is a group of stampers who love to make beautiful things.  Sometimes they are clean, sometimes they are layered but the one thing I can say for sure is that our projects will be fancy!  If you hopped over from the amazing Allison, welcome to the next stop.  For January, our theme is “Just Because”.  Kind of an anything goes concept which is always fun!

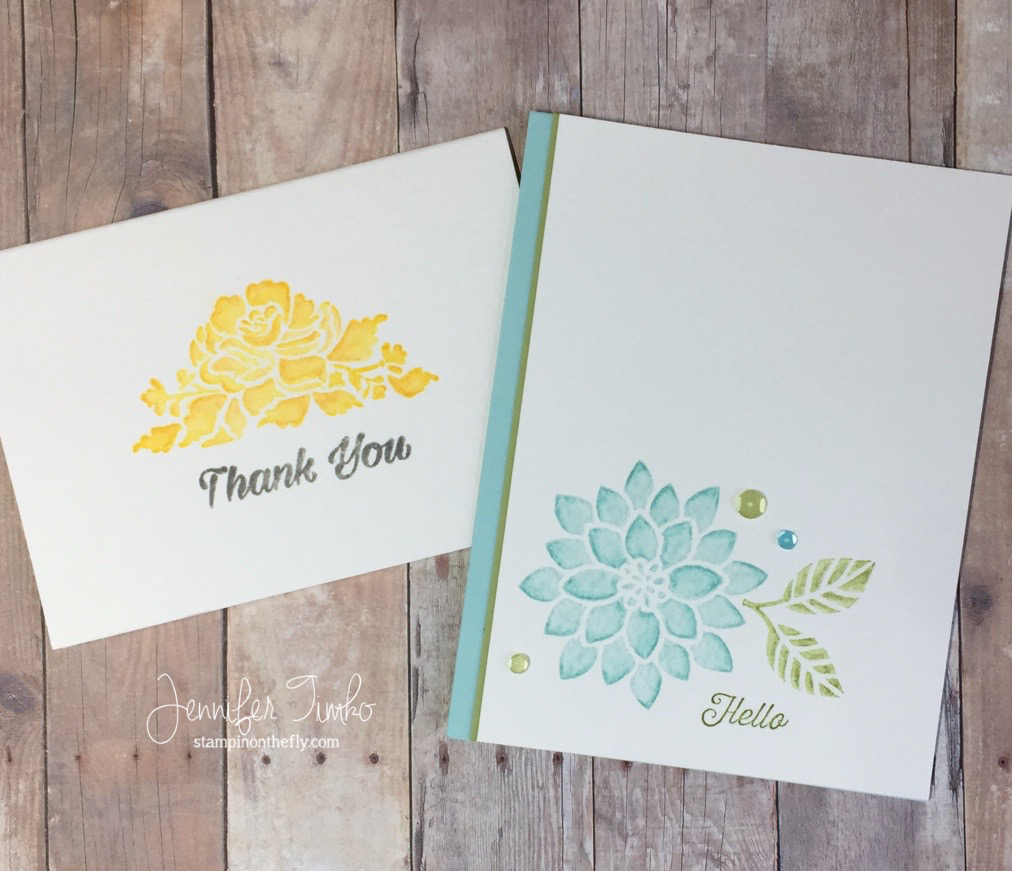
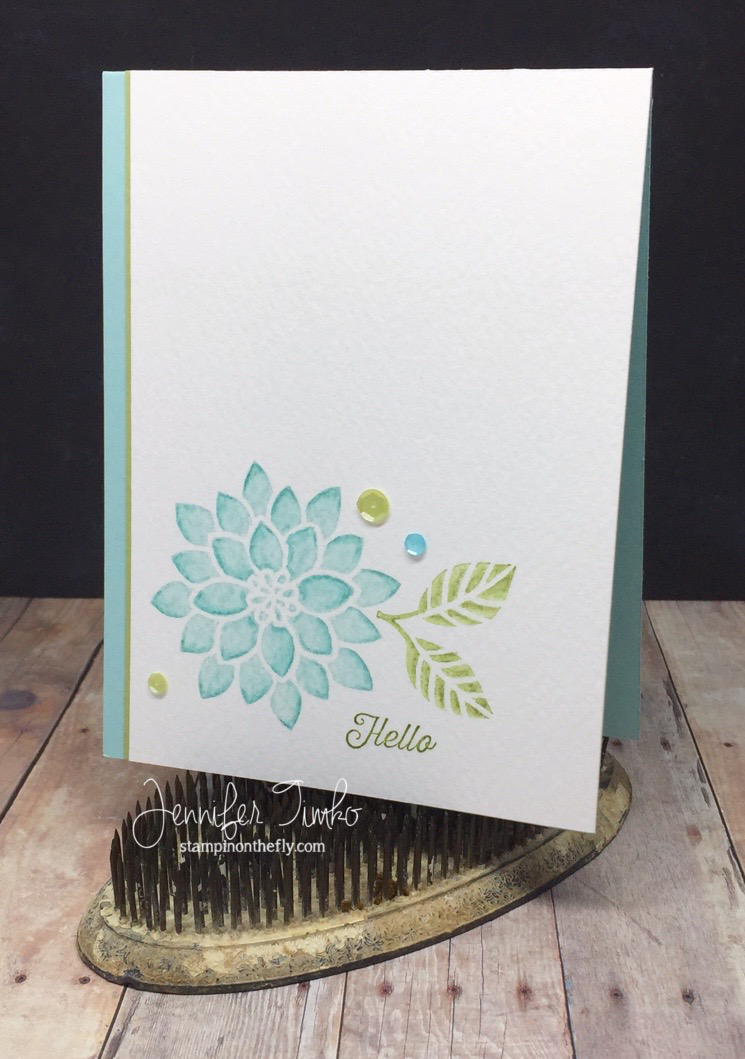
Watercolor Pencils and Ink - Jen Timko | Stampin' Up Watercolor Pencil Blending on Flourishing Phrases and Floral Phrases stamp setsI chose to show you a new technique that you can try with your Watercolor Pencils from Stampin’ Up.  The fun of this is the color coordination that Stampin’ Up is known for and now you can use it to your advantage with this new coloring medium.  The first card I created for today used complementary blues, Soft Sky and Bermuda Bay, and greens, Pear Pizzazz and Old Olive.  I stamped the flower from Flourishing Phrases onto watercolor paper and then added shading using the pencil in Bermuda Bay.  The effect is so pretty and changes the whole feel of the image.
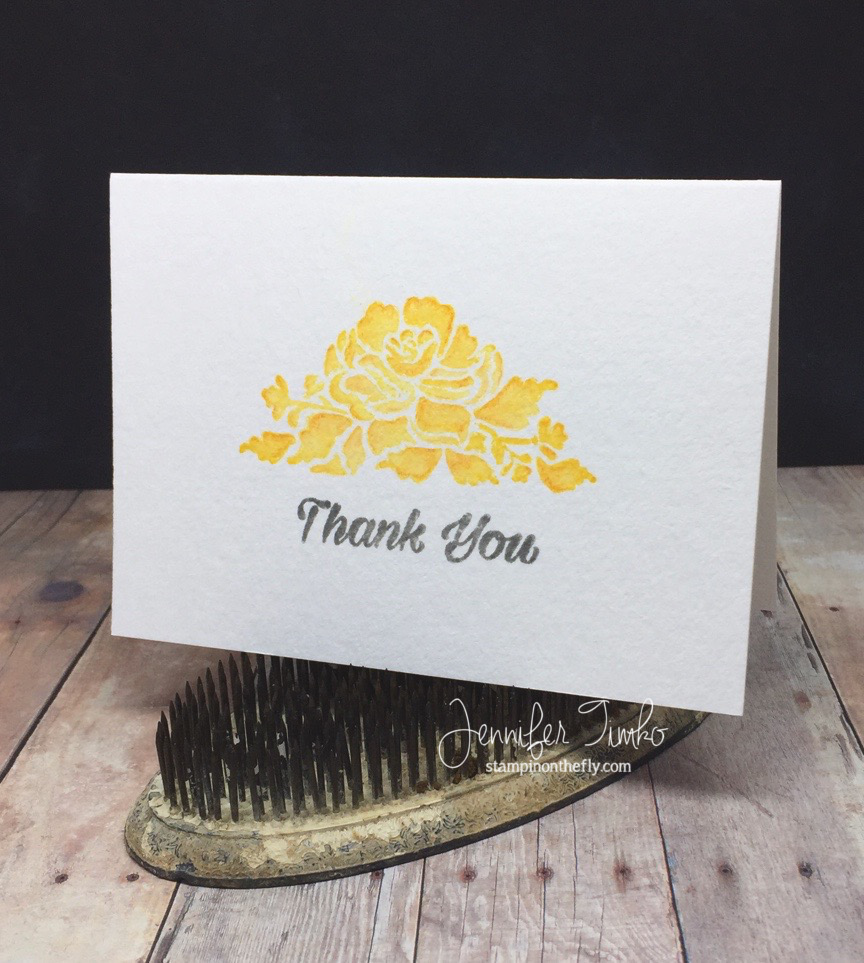
Flourishing in Blue by Jen Timko | Watercolor Pencils and Ink on Flourishing Phrases Stamp Set by Stampin' UpSo I decided to try it with more colors.  I decided to used Daffodil Delight ink and the Pumpkin Pie pencil together for my second project but I show my “worksheet” at the end of the video as I played with options.  While the flower from Floral Phrases already has a watercolor look, this ups the game a bit as you add shading. Daffodil Floral by Jen Timko | Floral Phrases Stamp Set by Stampin' UpHere is my video with all the details.


Click here for the direct link to the video if you prefer:  Watercolor Pencils and Ink

Just a quick note on the pencils.  Apparently many of you already own these lovelies because they are currently unavailable.  No fear though.  They should be back in stock by Feb. 13th if you don’t already have them.

Now for the rest of the hop!  I’m telling you….this team is the most talented group.  You will be happy you hopped!  Off to see the super talented Krista Frattin.  As always, she has created something fabulous!

You can click our logo above to get to the Fancy Friday Pinterest page!

Click HERE to purchase these wonderful Stampin’ Up products!

Stamp:  Floral Phrases, Flourishing Phrases, Paper Pumpkin Oct; Ink:  Daffodil Delight, Soft Sky, Basic Gray; Paper:  Fabriano Watercolor Paper, Strathmore Watercolor Note Cards, Pool Party, Pear Pizzazz; Accessories:  SU Watercolor Pencils, Zig BrusH2O, Sequins (Pretty Pink Posh), Misti Stamping Tool,

Signature 2016 - 1

Fancy Friday – Winter White

Fancy Friday – Winter White published on 2 Comments on Fancy Friday – Winter White

Welcome to this month’s Fancy Friday Blog Hop!  Our team is a group of stampers who love to make beautiful things.  Sometimes they are clean, sometimes they are layered but the one thing I can say for sure is that our projects will be fancy!  If you hopped over from the amazing Allison, welcome to the next stop.  For December, we are bringing out our winter white – projects that are white and one neutral.

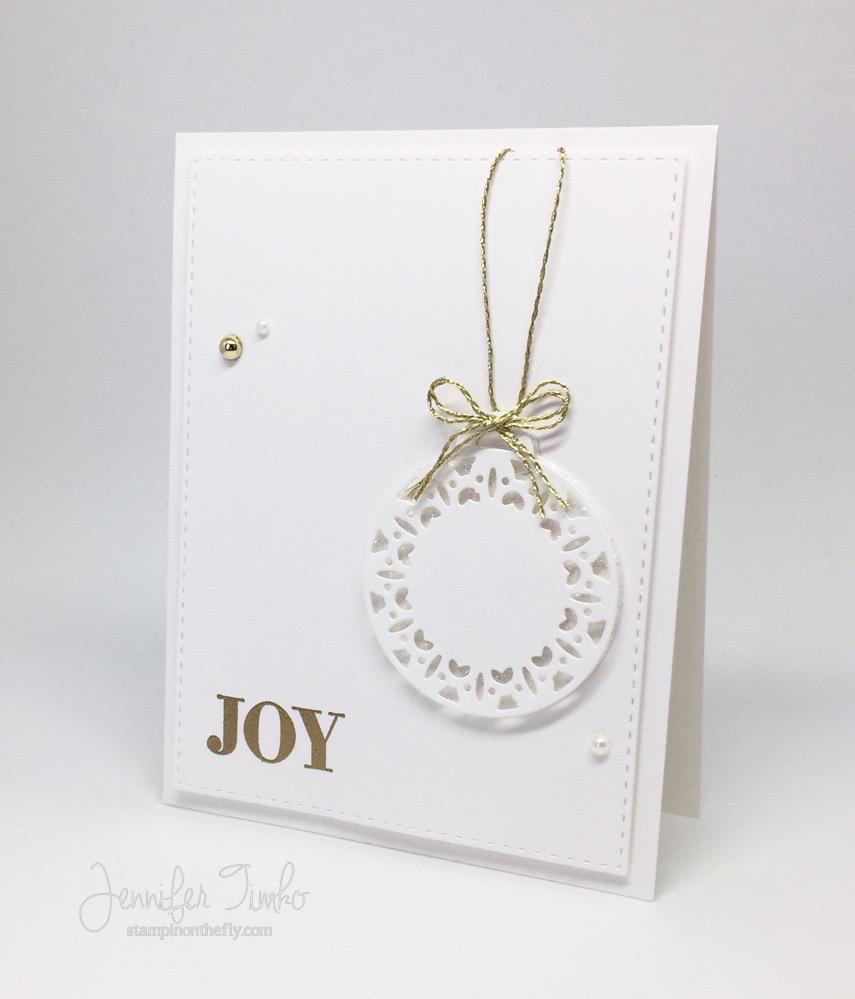
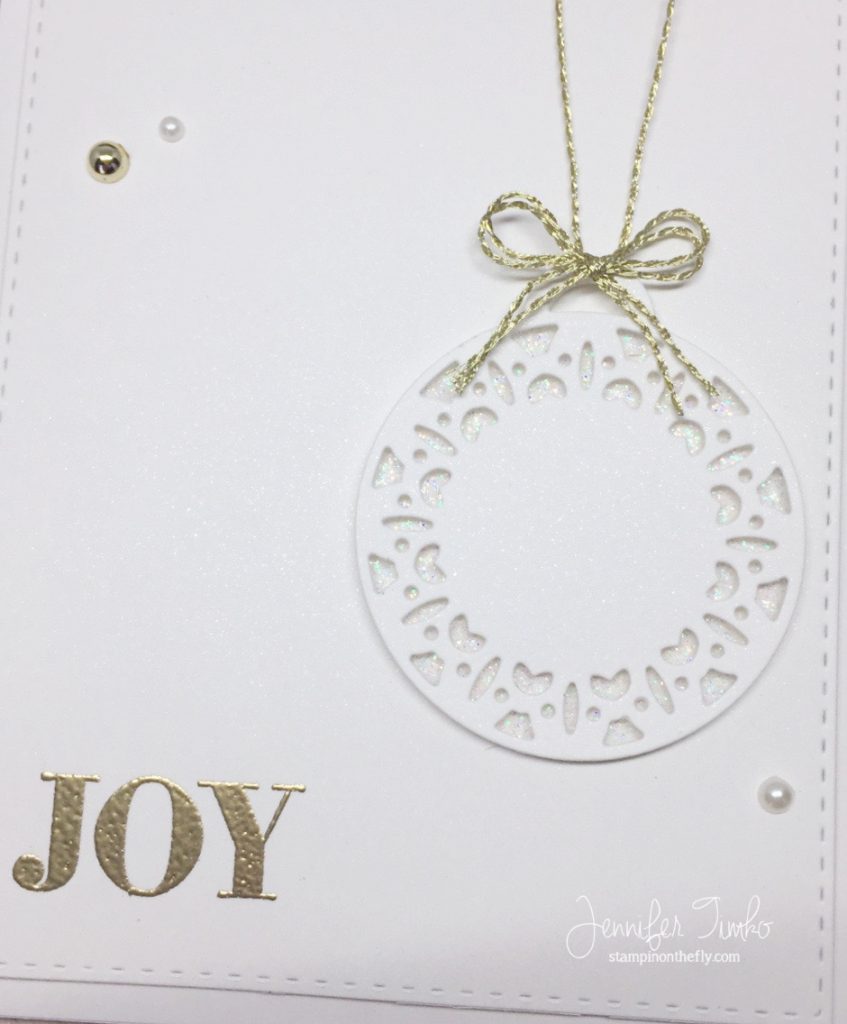
I chose to use gold as my neutral and pull out some sparkle.  I will admit that there is no way to get a picture of all the shimmer on this card.  Believe me, I tried.  So please trust when I tell you that it is a stunner in person.  I started with a base of Shimmery White card stock.  The subtle sparkle in this is so elegant.  I used my Merry Tags framelits and cut the front ornament from the Shimmer White too.  Then I cut the backing piece from Dazzling Diamonds Glimmer Paper.  Yep….it is a wow!  I added a gold embossed sentiment from Holly Jolly Greetings and some pretty elements that I had left over from my Stitched with Cheer card kit.  The gold twine and the gold “pearl” are so pretty with the embossing.

I tried here to capture all the shine but, well, I only sort of got it.  But you get the point.  Just try combining these elements and you will pat yourself on the back!  *smile*

Fancy-Friday-08Now for the rest of the hop!  I’m telling you….this team is the most talented group.  You will be happy you hopped!  Now off to my dear friend Jeanna Bohanon.  As always, she has created something fabulous!
You can click our logo above to get to the Fancy Friday Pinterest page!

6a00e54f94e01b883401b8d05f0bdc970c-320wi-2

Click HERE to purchase these wonderful Stampin’ Up products!

Stamp:  Holly Jolly Greetings; Ink:  Versamark; Paper:  Shimmery White, Dazzling Diamonds Glimmer Paper; Accessories:  Big Shot, Merry Tags Dies, Stitched Rectangles Dies (Simon Says Stamp), Stitched With Cheer Card Kit, Gold Stampin’ Emboss Powder, Heat Tool

Signature 2016 - 1

Fancy Friday – Holiday Inspiration

Fancy Friday – Holiday Inspiration published on 3 Comments on Fancy Friday – Holiday Inspiration

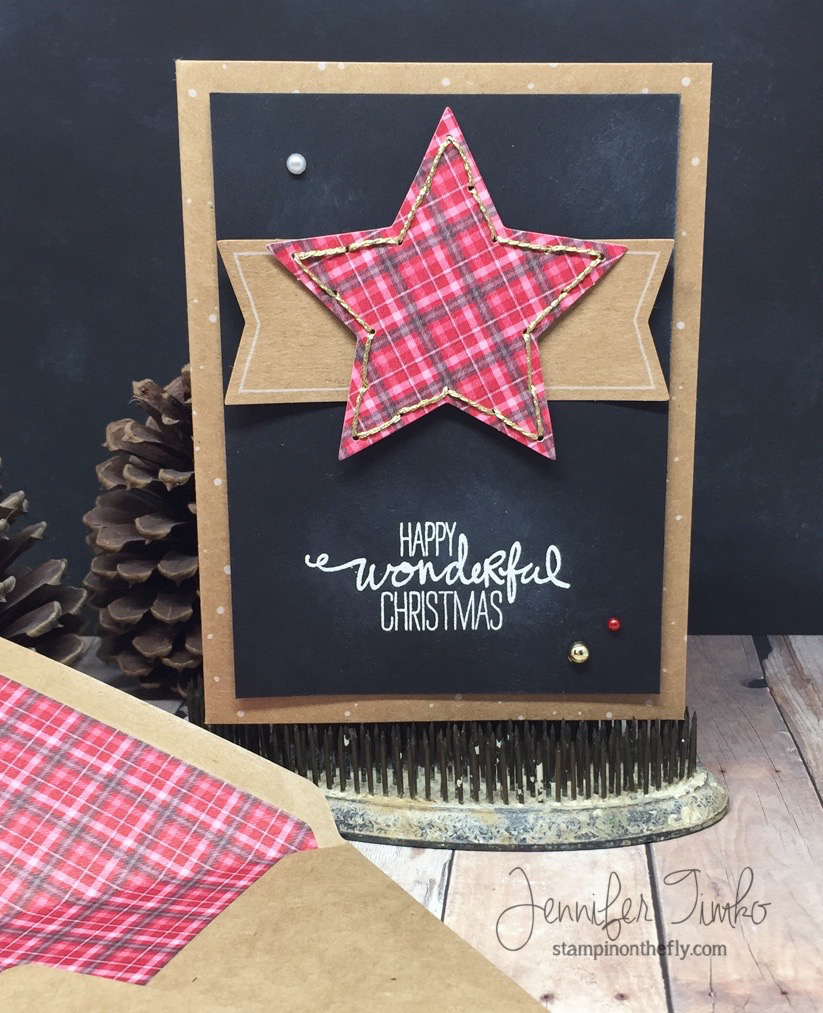
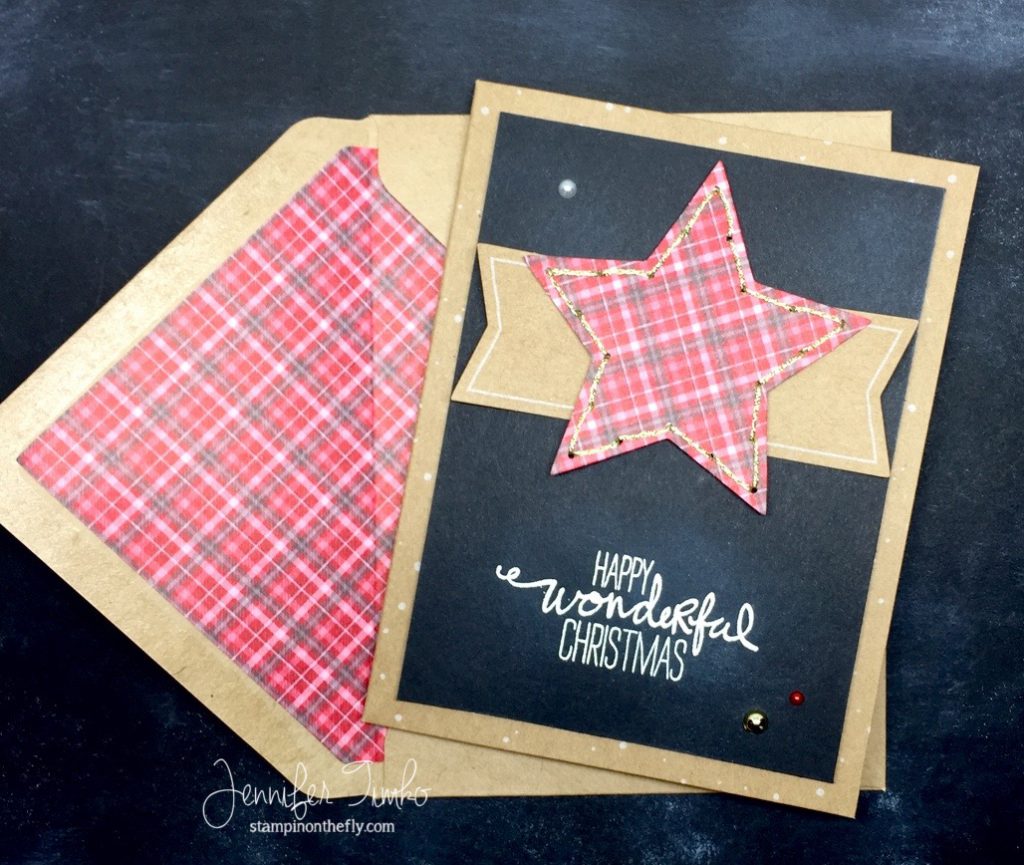
Jen Timko - FF Nov - Plaid ChristmasWelcome to this month’s Fancy Friday Blog Hop!  Our team is a group of stampers who love to make beautiful things.  Sometimes they are clean, sometimes they are layered but the one thing I can say for sure is that our projects will be fancy!  If you hopped over from my friend Cindy, welcome to the next stop.  For November, we have an inspiration challenge!  And what inspiration it is!

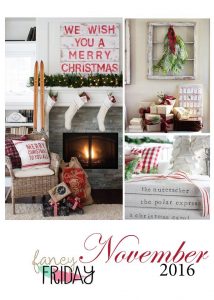
Nov FF InspirationThere are so many beautiful elements in these photos to draw from!  I decided to pull the plaid, the kraft/burlap and the chalkboard style wrapping paper into a card.  I started with the Stitched with Cheer kit from Stampin’ Up’s Holiday Catalog and then put a spin on it.  That is one of the best parts of kits.  If you are pressed for time, the kits are perfect just as they are!  If you are like me and have a hard time making multiples of things, the kit allows for personalization.  In this case, I just did a mix and match.  I pulled the star and two of the kraft banners along with the kraft base.  The stitching on the star is super quick and the metallic thread in the kit is gorgeous!  I adhered the two banners together and the seam is hidden behind the star.  I pulled out a piece of Basic Black card stock and cut it to 3-3/4″ x 5″.  I stamped this sentiment from Wondrous Wreath (it is a favorite of mine) with Craft White and then embossed with White Stampin’ Emboss Powder. Then I sponged on a tiny bit more of the Craft White to give the chalkboard feel.  Gold, red and white “pearls” are in the kit.  I did use at least one that was from a previous kit (but I can’t remember because I was playing with them for so long, haha).  But that is just me being me.  Use the ones from the kit and keep it simple!  If you have the sentiment set that goes with the kit, most of them would work here too.  So to make this the only non-kit items you need are black card stock and the white ink/embossing powder.  Jen Timko - FF Nov - Plaid Christmas

Fancy-Friday-08You are going to love all that the team has to share this month!  How lucky I am to be a part of this  Fancy Friday team.  We have another new face joining us this month….the lovely Susan Wong.  You know her work, I’m sure!  No more delay!  On with the hop.  The extraordinary Cathy Caines is next up.  You already know you will be wow’d!

You can click our logo above to get to the Fancy Friday Pinterest page!

6a00e54f94e01b883401b8d05f0bdc970c-320wi-2

Click HERE to purchase these wonderful Stampin’ Up products!

Stamp:  Wondrous Wreath; Ink:  Craft White; Paper:  Basic Black; Accessories:  Stitched With Cheer Card Kit, White Stampin’ Emboss Powder, Heat Tool, Sponges, Dimensionals

Signature 2016 - 1

Fancy Friday – Merry Tags Partial Die Cut

Fancy Friday – Merry Tags Partial Die Cut published on 6 Comments on Fancy Friday – Merry Tags Partial Die Cut

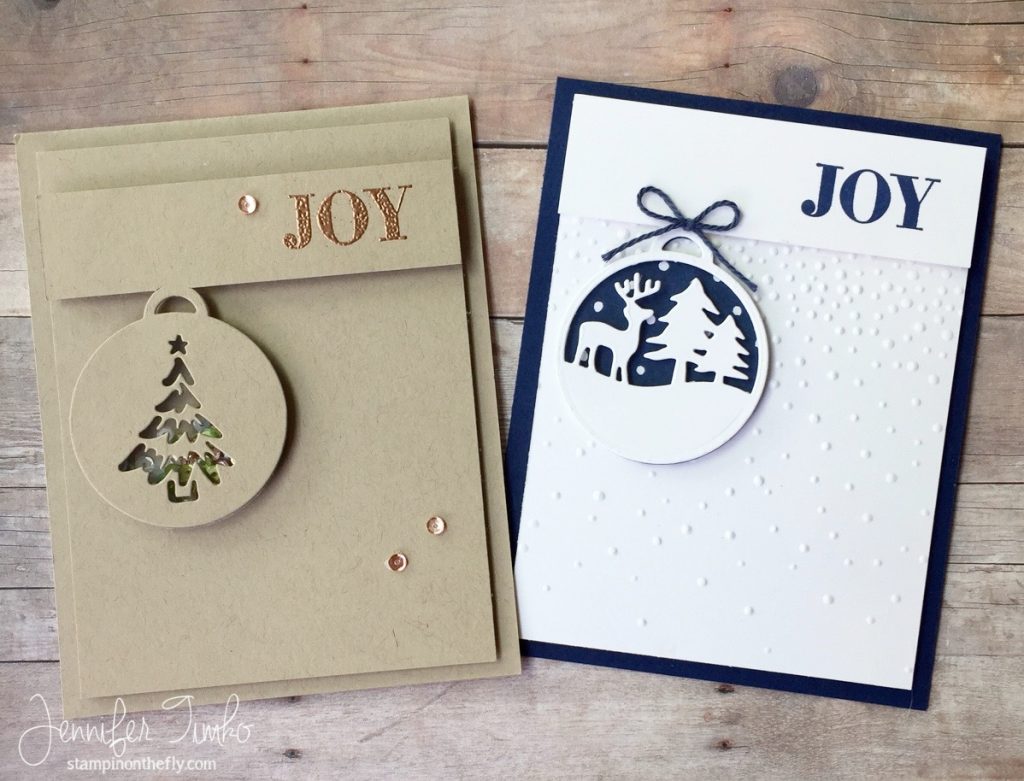
Jen Timko - Merry Tags Partial Die Cut TechniqueWelcome to this month’s Fancy Friday Blog Hop!  Our team is a group of stampers who love to make beautiful things.  Sometimes they are clean, sometimes they are layered but the one thing I can say for sure is that our projects will be fancy!  If you hopped over from the lovely and talented Connie, welcome to the next stop.  For October, our theme is a Technique challenge!  I love a good technique and I thought it would be fun to revisit the Partial Die Cut Technique.

So I debated whether I should do this as a shaker card or using DSP and I finally decided to show you both!!  They each have their wow and I can totally see you being able to go crazy with ideas on them.  To keep it simple, I created a video tutorial for you on the shaker card.

If you are having trouble seeing it in your email, you can click HERE!

Just a few of the details to add in from the video.  The DSP in the background on the deer and tree tag is from the Floral Boutique pack.  Just remember your paper doesn’t have to be “holiday” to work perfectly.  And you could totally use some Glimmer Paper for a wow effect!  DSP on the bottom panel or textures like the Softly Falling Embossing Folder will change the look and allow for fun variations.  I’m really hoping you’ll share your versions with me!!

Fancy-Friday-08I think you are going to jump for joy as you hop around this month!  You know these stampers are simply going to wow you!!  And speaking of wow, I get the privilege of introducing a new member of our Fancy Friday team.  The amazing Sue Plote has agree to join us.  Her work is extraordinary and we are thrilled to have her along.  Have fun on the hop!

You can click our logo above to get to the Fancy Friday Pinterest page!

6a00e54f94e01b883401b8d05f0bdc970c-320wi-2

Click HERE to purchase these wonderful Stampin’ Up products!

Stamp:  Holly Jolly Greetings; Ink:  Versamark, Night of Navy; Paper:  Crumb Cake, Thick Whisper White, Floral Boutique DSP; Accessories:  Big Shot, Merry Tags Framelits, Sequins (Pretty Pink Posh – Concord and 9th Birthday Mix), Window Sheet, Die Brush, Stampin’ Trimmer, Night of Navy Baker’s Twine, Foam Adhesive Strips

Signature 2016 - 1

Primary Sidebar