Happy Friday everyone! A quick post today to show you a card I’m sharing over at the Picket Fence Studios blog today! I got a little bit of stamping time and I just HAD to color this gorgeous new girl named Kiesha!
I stamped Kiesha using the Picket Fence Hybrid Ink with my Misti. Then I started playing with her shading. I learned something from Lydia recently about adding a violet hue to ethnic skin colors for depth. Wow, what a difference a little makes!
Once I had her skin tones like I wanted, I delved into her hair. Just look at the lovely art there! All the details in the image are mesmerizing. I played with grays and browns to create some highlights. Still need to work on the shading for dark hair but I’m overall happy with my first attempt on this image.
I hope you like this one too and I look forward to hearing your thoughts. Make sure you go check out the whole line of “Girl” stamps too. They are all gorgeous!! Thanks so much for stopping in today. I hope you have a fabulous day!
So….how is your holiday prep going?! I’m going to say that things at my house seem to be a little crazy. Truthfully, it has been a bit difficult getting things moving for us with all the loss we have had over the last few months. But I keep telling myself that we have to focus on the real meaning of Christmas. We have so many blessings, the biggest of which is an amazing family. How lucky I am!
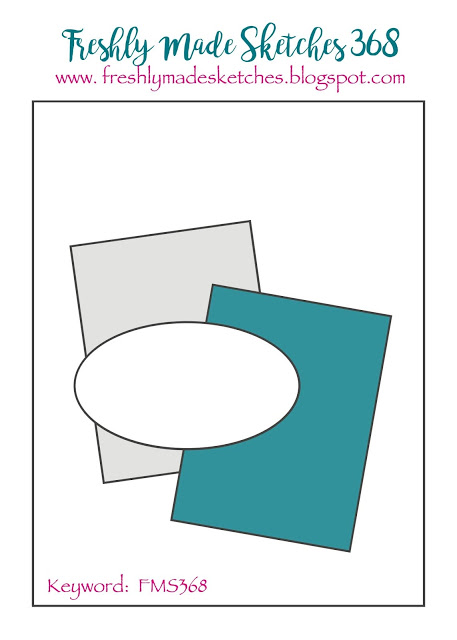
Today I have the last Freshly Made Sketches challenge for the year. The team always takes the holidays off but we leave our sketch open during the whole time so that people can play along. Hopefully you will have some time to join us! Our sketch is courtesy of the lovely Narelle Farrugia. She is one of the newest Artisan Design Team members for Stampin’ Up and I’m so thrilled for her! She has mad skills so it is no surprise that she gave us a great sketch with lovely layers!
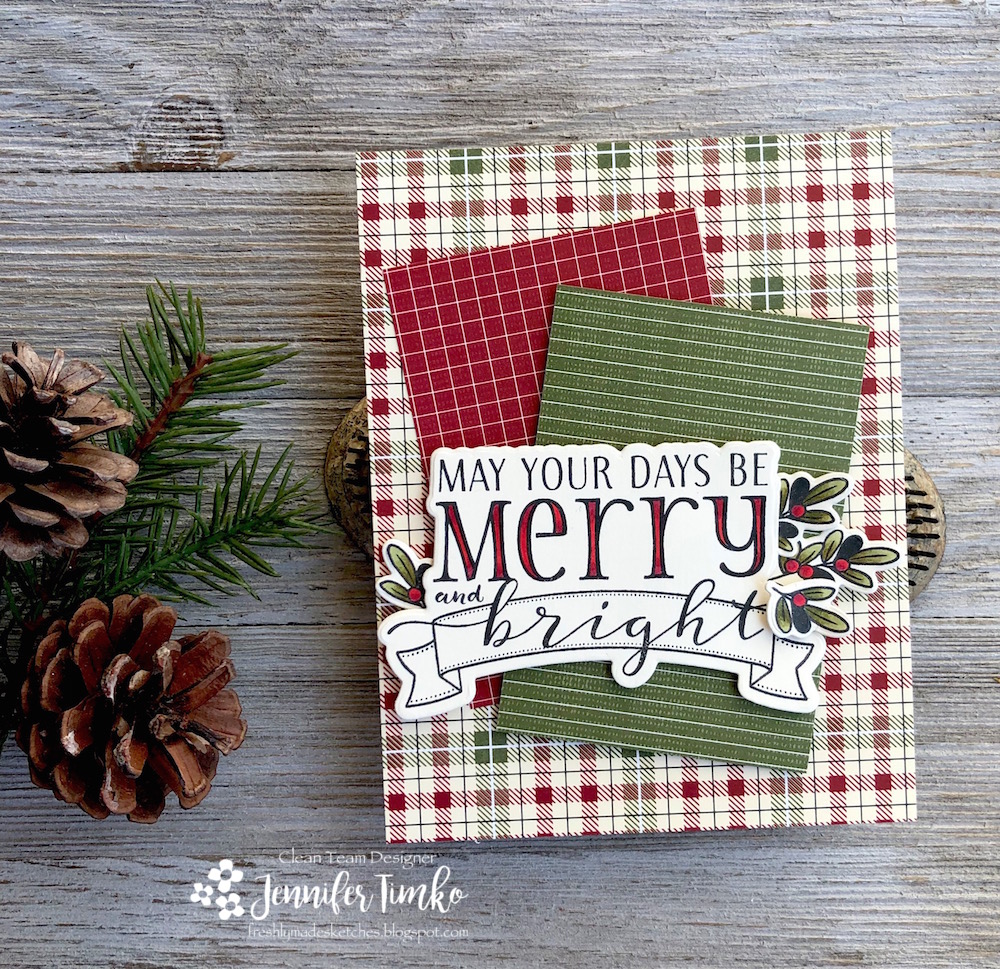
With the layers on the sketch, I thought that this great patterned paper from Stampin’ Up would be perfect (Festive Farmhouse). I just chose a plaid that I liked (there are a few) and then two prints that went with it. Because the base of the plaid is vanilla and not white, I used some Thick Very Vanilla card stock (also SU) to stamp my sentiment and images.
I colored the little leaves and berries using Copic Markers to add a little bit of detail. But let’s face it, the sentiment is the star of the show! At first I had it without coloring but when I mocked up the card, it seemed a little too plain. So I added additional coloring to the letters to help it pop. And you know what else??? I think this is the last Christmas card of the year for me. I’ll admit that I didn’t make nearly what I normally do and I didn’t send out handmade cards to my entire list. But sometimes you just have to accept limitations and move along.
I hope to have some other cards to share with you over the upcoming weeks. I’m still playing with the new release from Picket Fence Studios and I have some unused stamps that have been calling my name to be used. Wishing for you that your last days before Christmas are merry and bright! See you soon!
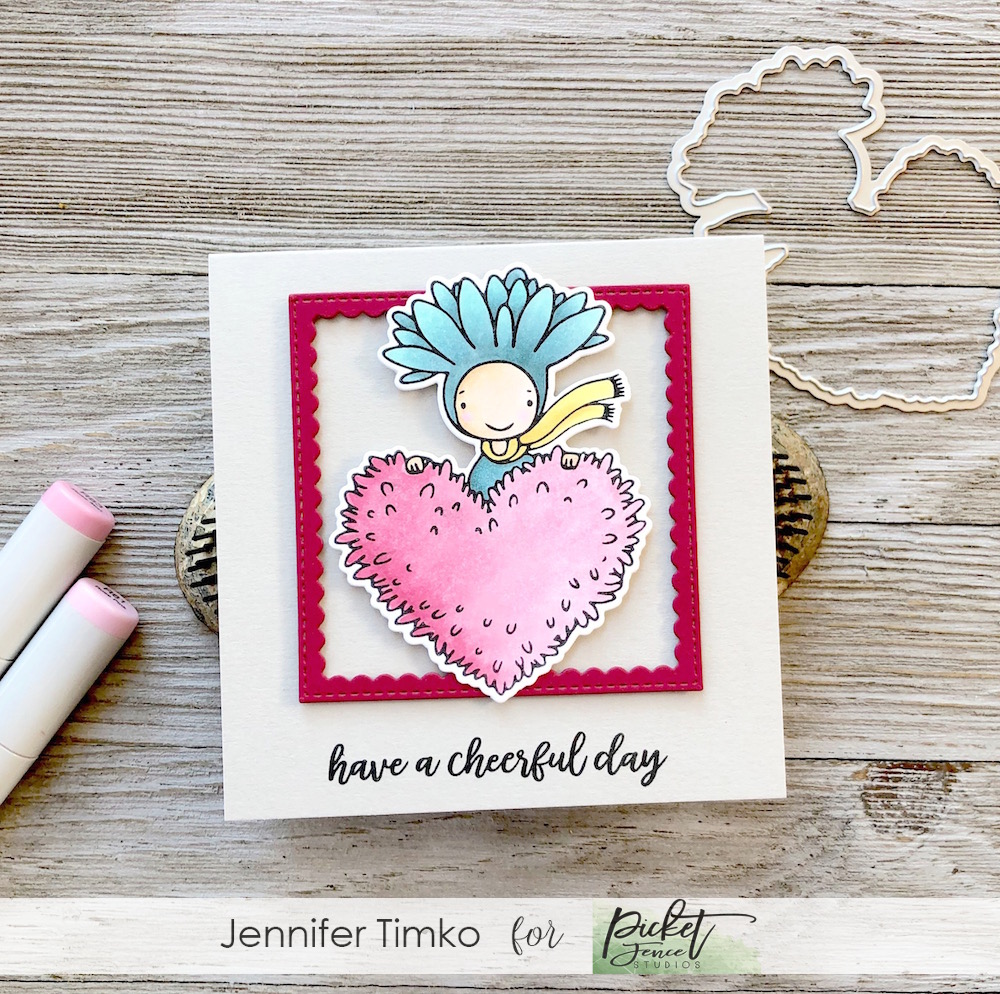
It is the 14th of the month and that means today is a super fun day at Picket Fence Studios! Time for the December release!! I have two cards to share with you for the release and I know the team will have lots to share too.
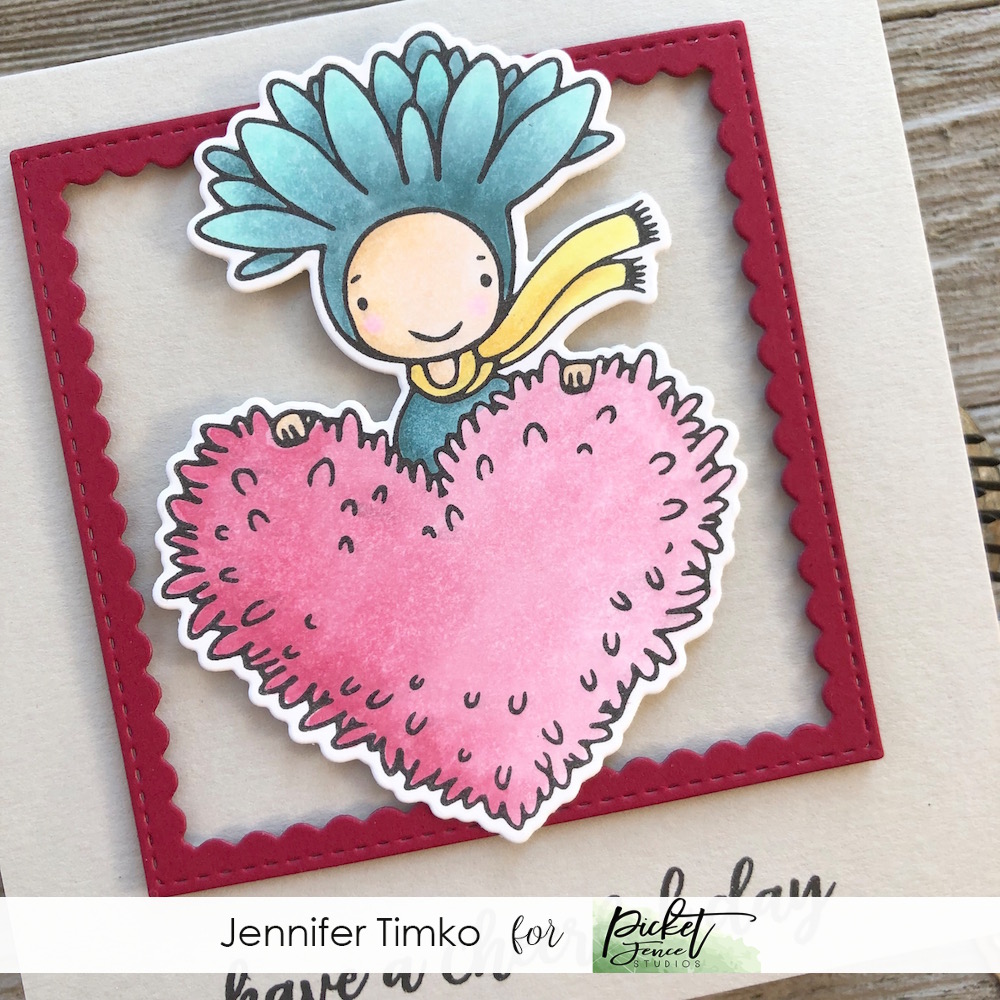
Let’s get started with this ADORABLE image! Oh. My. Word. So cute. And such fun to color. I stamped her in the Black Hybrid Ink and then colored with my Copic Markers. Super awesome news here too….there are dies on every release now. I do love a coordinating die!!
So I cut her out with the die and decided to keep the rest of the card simple so as to focus on the image. I cut a scalloped frame and stamped the sentiment from the same stamp set. With all the Christmas cards I have been trying to make last minute, this release is a great change of pace!
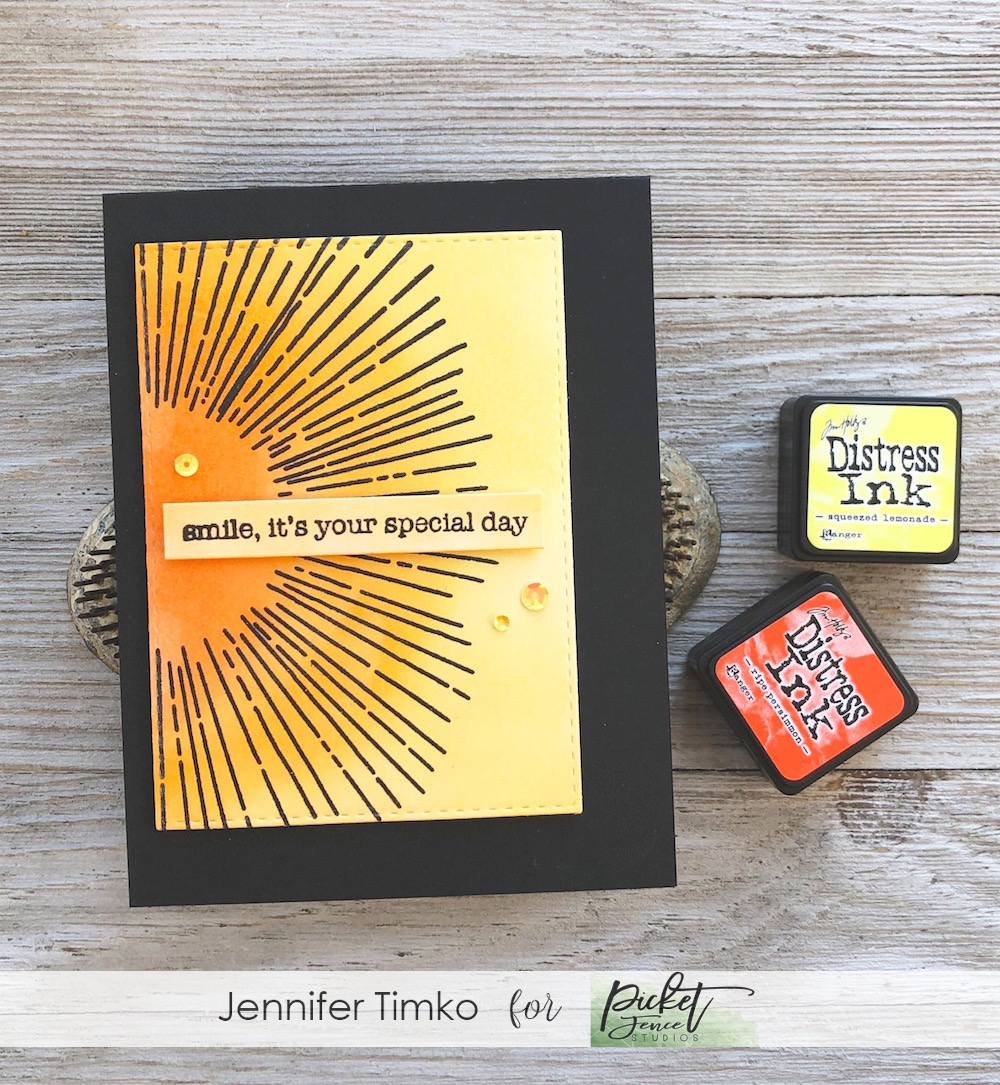
With my next card I tried to do what I never do enough…make a masculine card. I have so many men in my life that need cards so you’d think I be a pro but nope. I thought this set really called for me to give it a go. I stamped in Versafine Ink (because it stays wet long enough to emboss) and then heat embossed with clear embossing powder. Out came the Life Changing Blender Brushes again and I blended on oranges and yellows until I was happy. I cute my inked panel down with some stitched rectangle dies and then used part of the cut off piece for the sentiment panel (all the coloring was done, after all). I found some sequins in my stash that matched and then put the panel on a black card base. My high schooler agreed that it looks like a “man card” so I’m going to call it mission complete.
Make sure you hop over to the Picket Fence Studios site to see the whole release! You will love it! Thanks for stopping in today. Hope you have a great weekend.
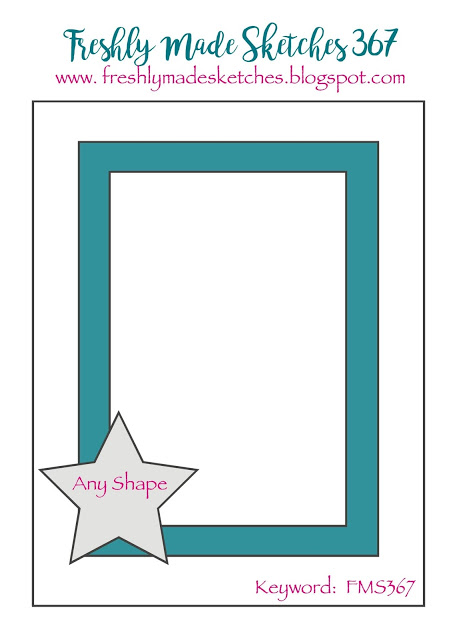
It was no surprise that last week’s gallery at Freshly Made Sketches was particularly fantastic…a Design Team Call certainly brings out everyone’s best! And we are at it again for this week’s sketch too. And oh what a great one it is!
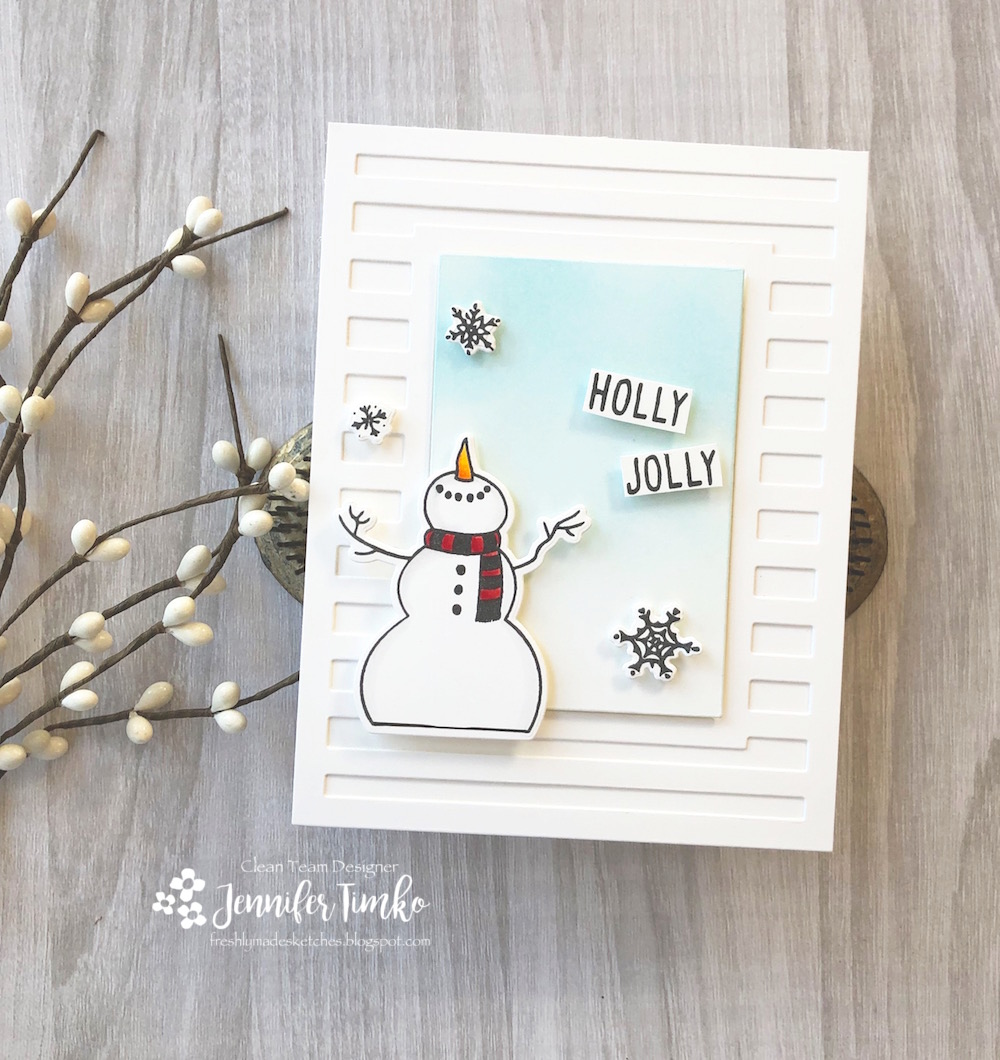
The incredible Karren Johnson created this one and it has tons of potential for creativity. I saw the layered rectangles and immediately thought of this great cover panel from Reverse Confetti (Striped Frame). I cut it from white card stock. With the little rectangle in the middle, I added distress ink using the Life Changing Blender Brushes. Even on regular card stock, these really do make blending SOOO much easier!
I stamped the snowman from Let It Snow (Honey Bee Stamps), some snowflakes and the sentiment all in Hybrid Ink. Then I added a little bit of Copic coloring to the snowman. I hand cut the words and then added all the elements using foam tape. There is something about this fellow and his snowflakes that makes me happy every time I pull him out. Maybe it is the easy coloring but I’m pretty sure it is the simple joy he has in throwing the snow around. It always looks like he is creating a magical scene to me.
Well, I hope you enjoy this one. I’m back on Friday with the latest from Picket Fence Studios. They are having a small December release that you will love. Also…if you missed it…hop over to their Instagram page for a chance to win the entire release for you AND a friend! YES! Go…right now….ok, go after you go to FMS to check out all the details for the sketch. Hope you have a great day and I’ll see you soon!
Happy Friday to you! I’m here with a quick share of a card I created for the Picket Fence Studios blog. I’m super behind on Christmas cards so it is a good think they have stamps that practically make the card for you!!
I love these fun reindeer and the sentiments from the Santa’s Sleigh Ride set. I colored them quickly with Copics after stamping them with Picket Fence Studios’ Black Hybrid Ink. (Don’t forget to enter my GIVEAWAY over on Instagram for a chance to win this awesome ink.) I created a chalkboard look for the background after embossing the sentiment with white embossing powder. Super simple to do and I love this look! Things needed a bit more holiday cheer so I found a retired candy cane paper from SU and some green glitter paper from Concord and 9th to add color. Then I added some colored pearls to finish.
I hope you enjoy this one! So glad you stopped in today! Hope you have a great weekend….lots of fun and games! As long as you remember that Santa eventually checks that list!
I cannot even tell you how happy I am to bring you the sketch from Freshly Made Sketches this week. Why?? First of all, the sketch is super clever and amazingly unique, just like its designer Cécile. Second, we are announcing a Design Team Call. Yes, we are looking to add to our team and we are so happy to see who is ready to join us. All the details are on the challenge blog.
But I’ll start with my card for today’s challenge. I was so in awe of this sketch and could not wait to use it. I started off knowing I wanted to use embossing paste for the striped detail but which stencil? After a few false starts I settle on this brick style that I had from Stampin’ Up. And I also used their Silver Embossing Paste that hadn’t been opened (seriously, why?). I love the effect for a holiday card! Next up, what to use for the images. I settle on the gorgeous Poinsettia stamp set from Simon Says Stamp (always a coloring favorite for me. The images were stamped on Shimmery White paper (SU) which has a subtle sparkle to it and still works for Copics. I stamped using the new Black Hybrid Ink from Picket Fence Studios since it is Copic friendly. I used my Misti and left the stamp in place for later. Then using my red family of Copics, I colored the flowers and then added some gray centers. After the coloring was done, I put my panel of flowers back in the Misti and overstamped with Versamark Ink and heat embossed with silver embossing powder. Finally, I cut the images out with the coordinating dies.I hope you will jump right over to the the challenge site and consider playing along this week. This sketch is sure to be a hit! I’m so glad you dropped in today. Thanks for sharing a few minutes of your time with me. See you soon!
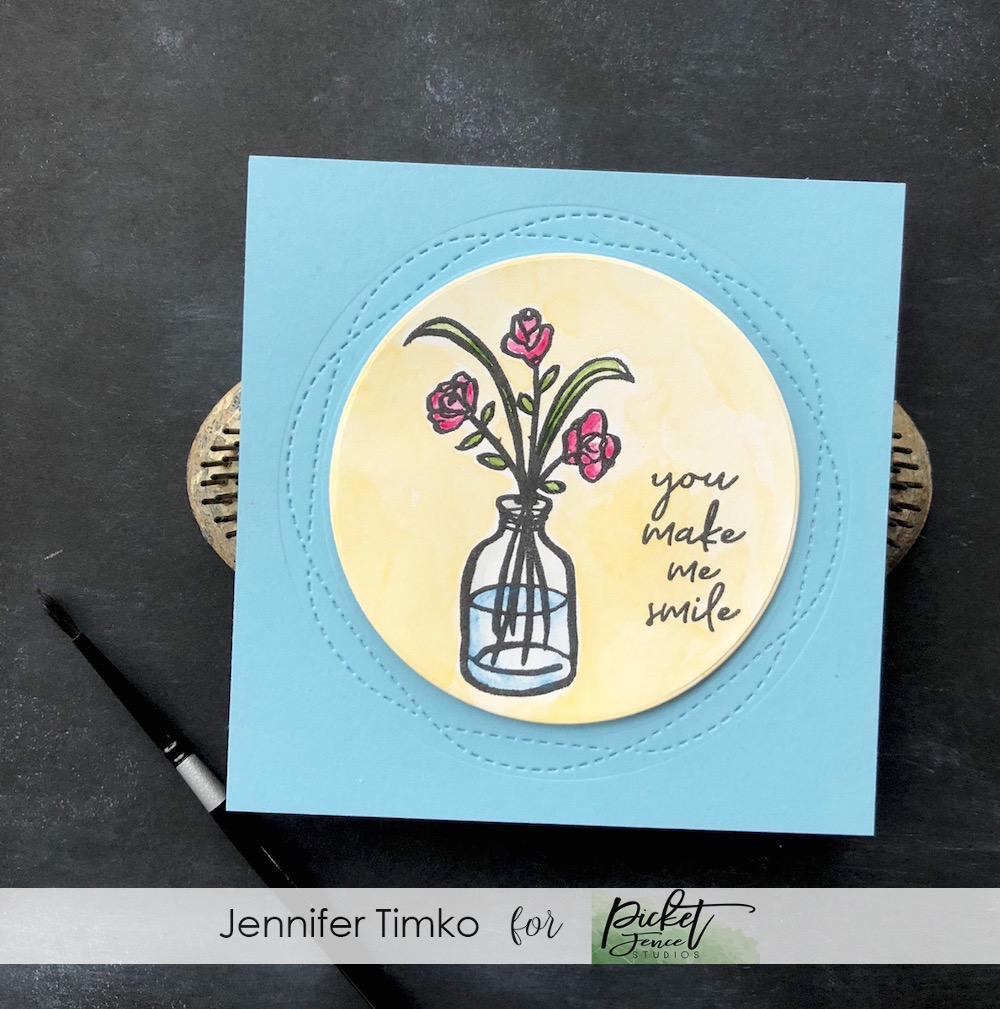
I thoughts I’d share a sweet little Monday card with you. I created this just for fun using the new Rustic Floral set from Picket Fence Studios. I love this darling little image and the sentiments in the set are perfect for note cards for many occasions. I stamped this in the new Black Hybrid Ink from Picket Fence and wow! Hybrid it is! I tested it with Copics and this was my watercolor test. PERFECT! I love a one stop black ink! It doesn’t budge or smear with either. Not sure how that is possible but some things just don’t require an explanation. I’ll accept that it is crafting magic!
I love it so much that I’m going to gift it and the Crafty Friends stamp set to one lucky person. I’m going to make this an Instagram drawing so hop over and follow me there and enter for your chance to win. You can find the details HERE.
After coloring the image and the background of this with Daniel Smith watercolors (just some quick and easy coloring) I cut it out using the Wonky Circle Dies by Gina Marie Designs. The stitched background is made with the same set…it cuts the stitches separately from the circle cutting die. So clever!
That’s it for today. I hope you hop over and find me on Instagram to enter. Back on Wednesday with an awesome announcement from Freshly Made Sketches! You will not want to miss it! Until then, have a happy start to your week.
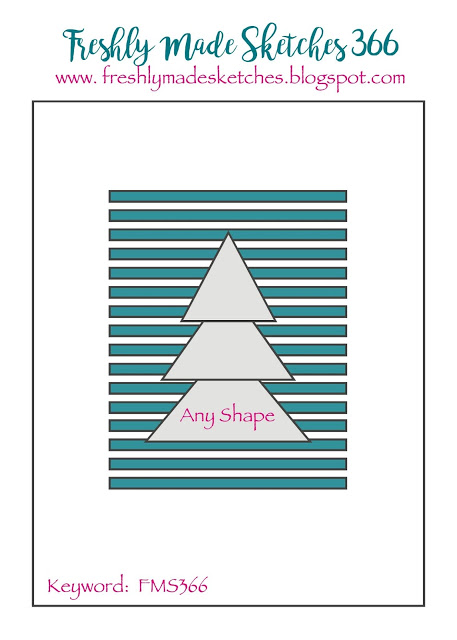
A quick post today with the latest from Freshly Made Sketches. The lovely Jennifer Brum is our sketch hostess and I love her sketch this week. Well, in truth, I loved her original version….and I also love the flipped version that I had in my head (without going back to the team page to confirm the sketch). Ah well, that is how it goes some weeks. So imagine, if you will, that my layers are properly aligned. Jen, sorry!!
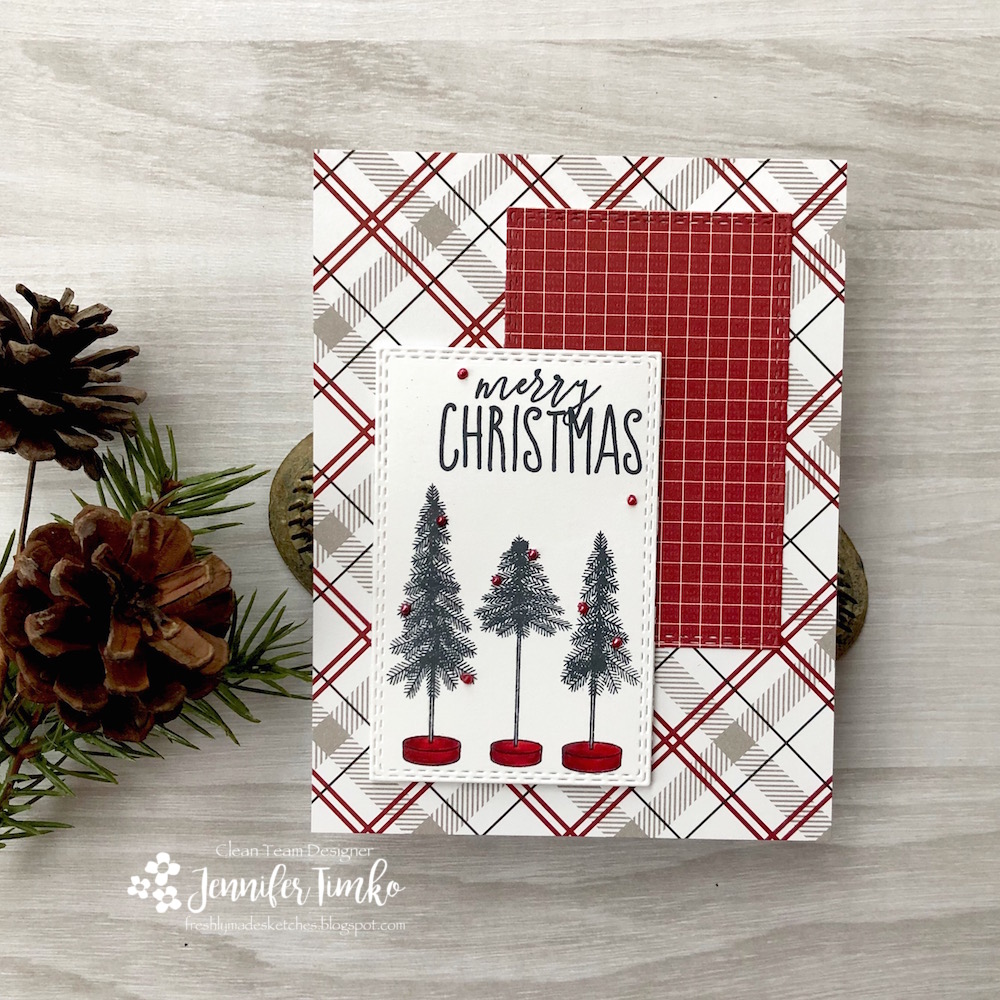
I used the O Christmas Tree stamp set by Concord and 9th. This is a go-to set for me and has been for a while. Love the sentiments but these trees seemed to be perfect with all the prints. I stamped them with Momento Tuxedo Black and added a little bit of Copic coloring to add a pop. It still needed something so I colored some pearls to match. The printed papers are from Stampin’ Up (Festive Farmhouse – Holiday Catty).
I hope you enjoy this sweet sketch. I love all the possibilities! I’ll be back later this week and I’ll look forward to seeing you then. Hope you have a great week!
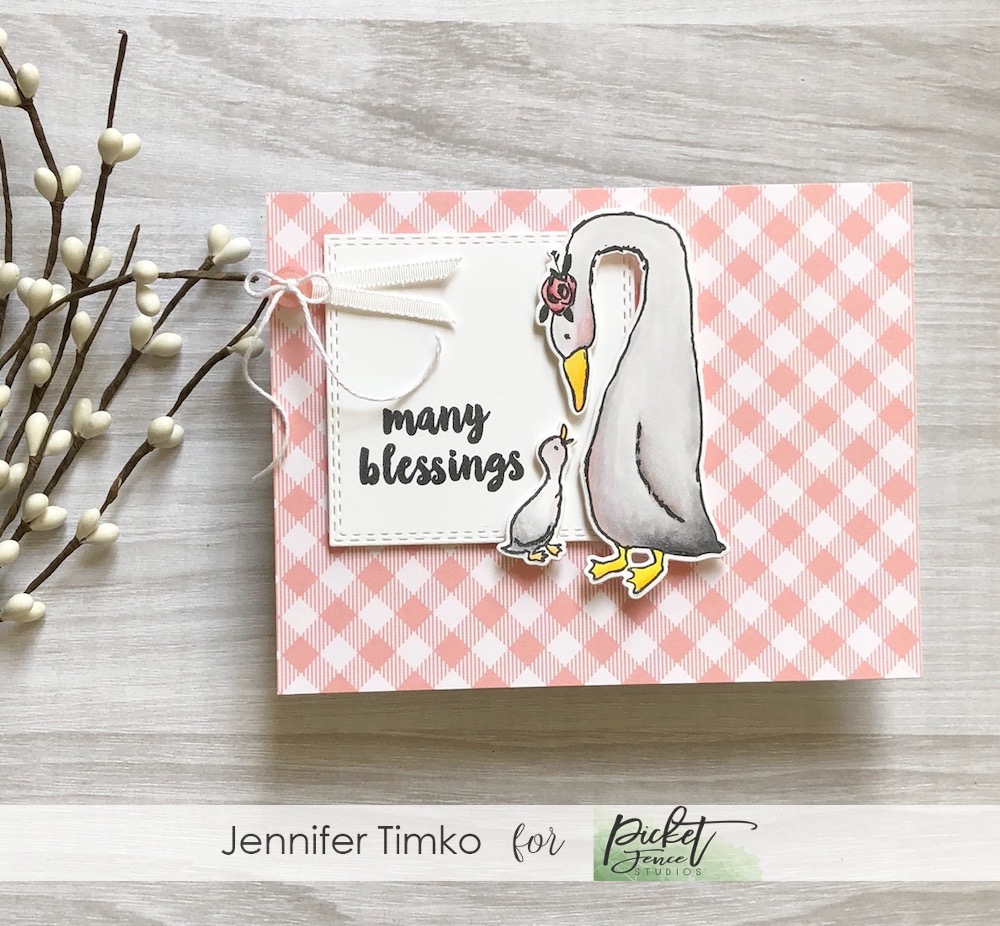
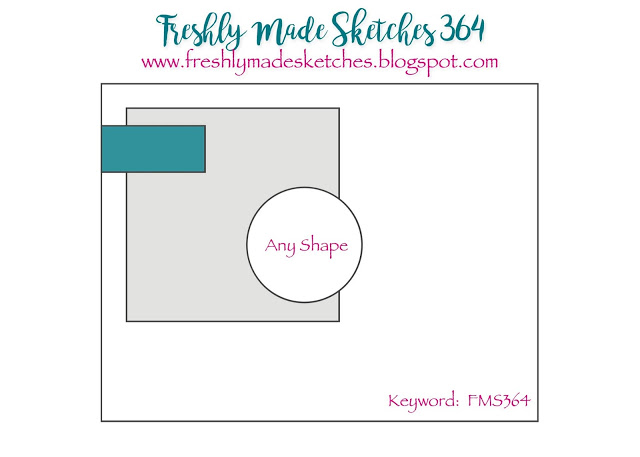
Happy Wednesday to you! I hope your week is going well. Here to share the latest from Freshly Made Sketches. The amazingly talented Kim Singdahlsen is our sketch hostess this week and I was super inspired by her challenge. It seemed just right for a baby card I needed to make for a very special family member whose shower is coming up.
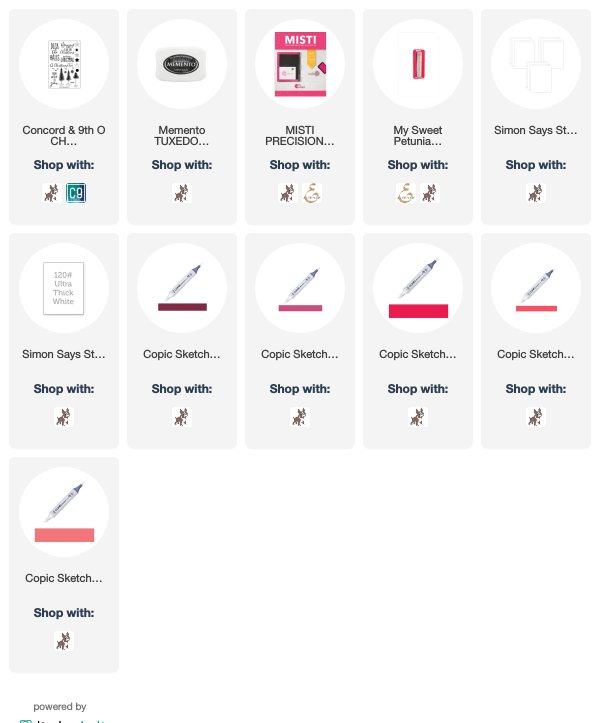
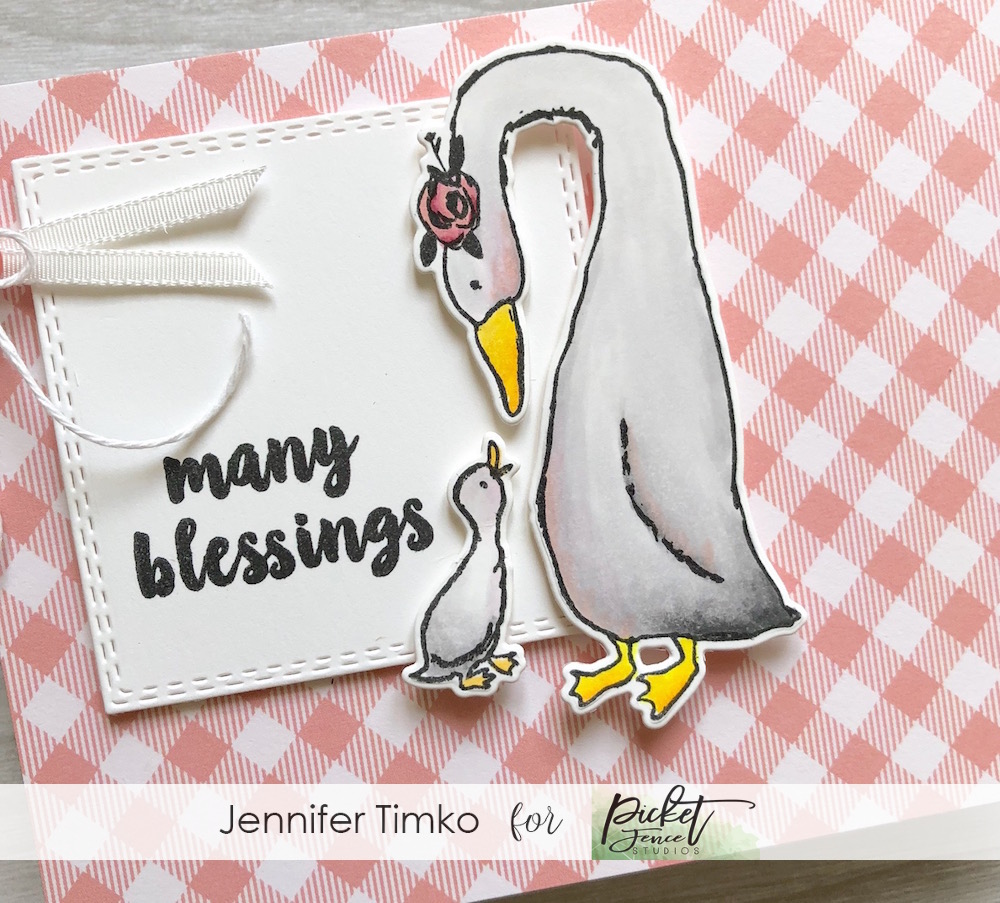
I thought the set called “i love you momma” from Picket Fence Studios was perfect for both the sketch and for the shower. And I admit that I’m a total sucker for the namesake sentiment since one of my boys says that to me (more lately with all that has been happening). I stamped both the momma goose and her little one using the new Picket Fence Studios Hybrid Ink. It was my first time using it and I wanted to give it a go with Copic markers. And I love it! Works great and I can’t wait to try it with more mediums.
After I had colored the geese, I cut them out with new prototype dies for the set. More dies will be coming to the shop soon and I’m really excited about that. I added a sentiment from the set and then started with some details. The Double Stitched Square Dies from Gina Marie Designs are wonderful and I love this pretty gingham paper from Lawn Fawn. To keep with the sketch I added some ribbon and a coordinating button from my stash (SU retired). I included most of the colors I used below but the grays are the Toner Grays.
I’m so happy you stopped by to visit today! I want to share one more thing with you. Starting on Monday, Picket Fence Studios started their Black Friday WEEK Sale. Not just one day, no way! So all the way through 11/26/18 at 11:59p Central, you can get 20% off plus FREE US shipping. Additionally, you get a free blender brush for every $30 spent (while supplies last). Use coupon code: BLACK20
I hope you have a great rest of your week. For those of you in the US, I wish you a Thanksgiving filled with joy, family and lots of pie (and turkey too). See you soon!
Back today with a card I created for the Picket Fence Studios blog. I am super excited about how this turned out and I hope you will like it too. I even create a video for it…wow, it has been a while since I have done that.
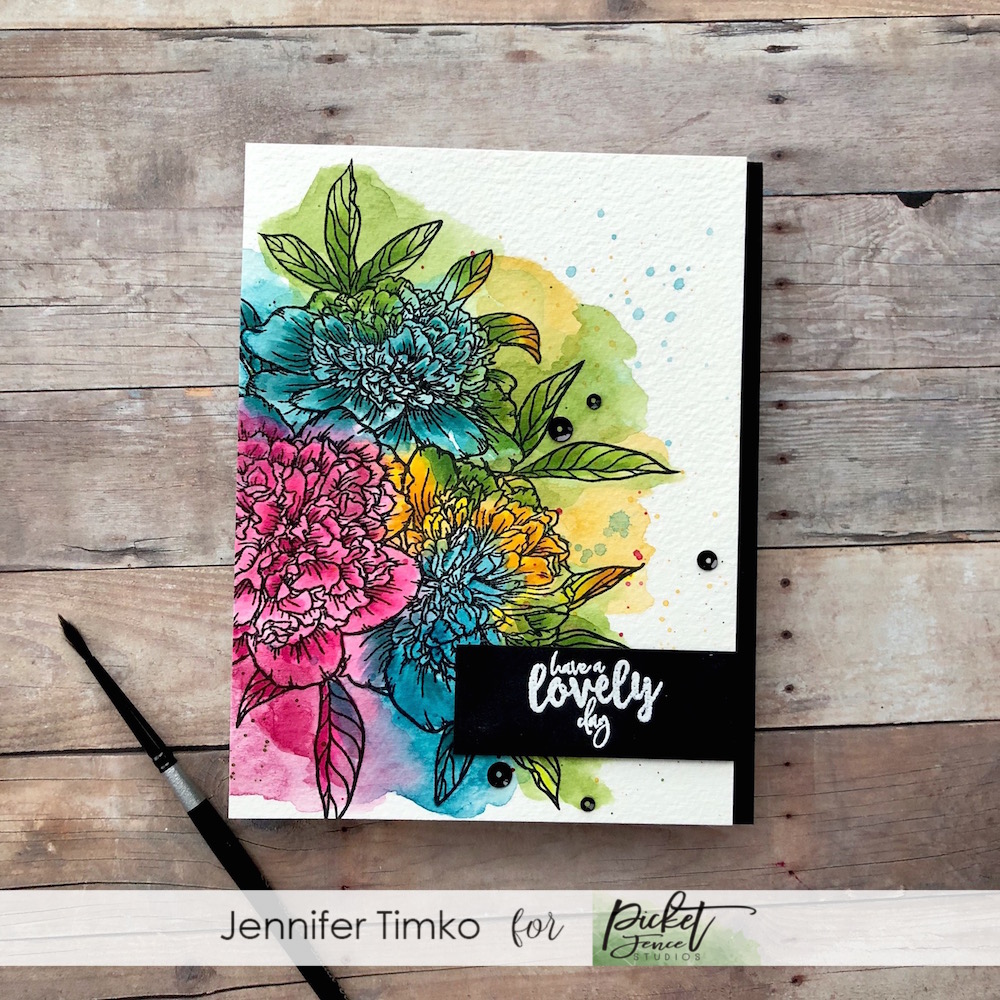
I saw a similar technique done by the amazing Kelly Latevola and had it in my “to try” list for quite a while. This lovely Ruffled Peony Bouquet set seemed like the perfect one to use with it so I got to experimenting. In my video, I talk a bit about The Daily Marker 30 Day Coloring Challenge. I cannot recommend joining in enough. Even if you don’t share it all, a little coloring every day (or every day that you can) for a month can make a big difference in your attitude and your creativity. I think it allows me to try more things, risk “failing” and it is good for the soul.
I’d love to know what you think about this technique. I will confess that as I created it, I kept thinking how my my mom would have loved this. But maybe that is why coloring is so good. You can remember and smile and heal a bit. I’m linking all the colors for the markers below in my product list along with some of the other products. If you have any questions, please let me know. And if you will be out and about during your holiday traveling in the US next week, keep your eyes open….I’ll be out there! Hopefully I will see you! Thanks for stopping by today. See you soon.
Primary Sidebar
We use cookies on our website to give you the most relevant experience by remembering your preferences and repeat visits. By clicking “Accept”, you consent to the use of ALL the cookies.
This website uses cookies to improve your experience while you navigate through the website. Out of these, the cookies that are categorized as necessary are stored on your browser as they are essential for the working of basic functionalities of the website. We also use third-party cookies that help us analyze and understand how you use this website. These cookies will be stored in your browser only with your consent. You also have the option to opt-out of these cookies. But opting out of some of these cookies may affect your browsing experience.
Necessary cookies are absolutely essential for the website to function properly. This category only includes cookies that ensures basic functionalities and security features of the website. These cookies do not store any personal information.
Any cookies that may not be particularly necessary for the website to function and is used specifically to collect user personal data via analytics, ads, other embedded contents are termed as non-necessary cookies. It is mandatory to procure user consent prior to running these cookies on your website.

 I stamped Kiesha using the Picket Fence Hybrid Ink with my Misti. Then I started playing with her shading. I learned something from Lydia recently about adding a violet hue to ethnic skin colors for depth. Wow, what a difference a little makes!
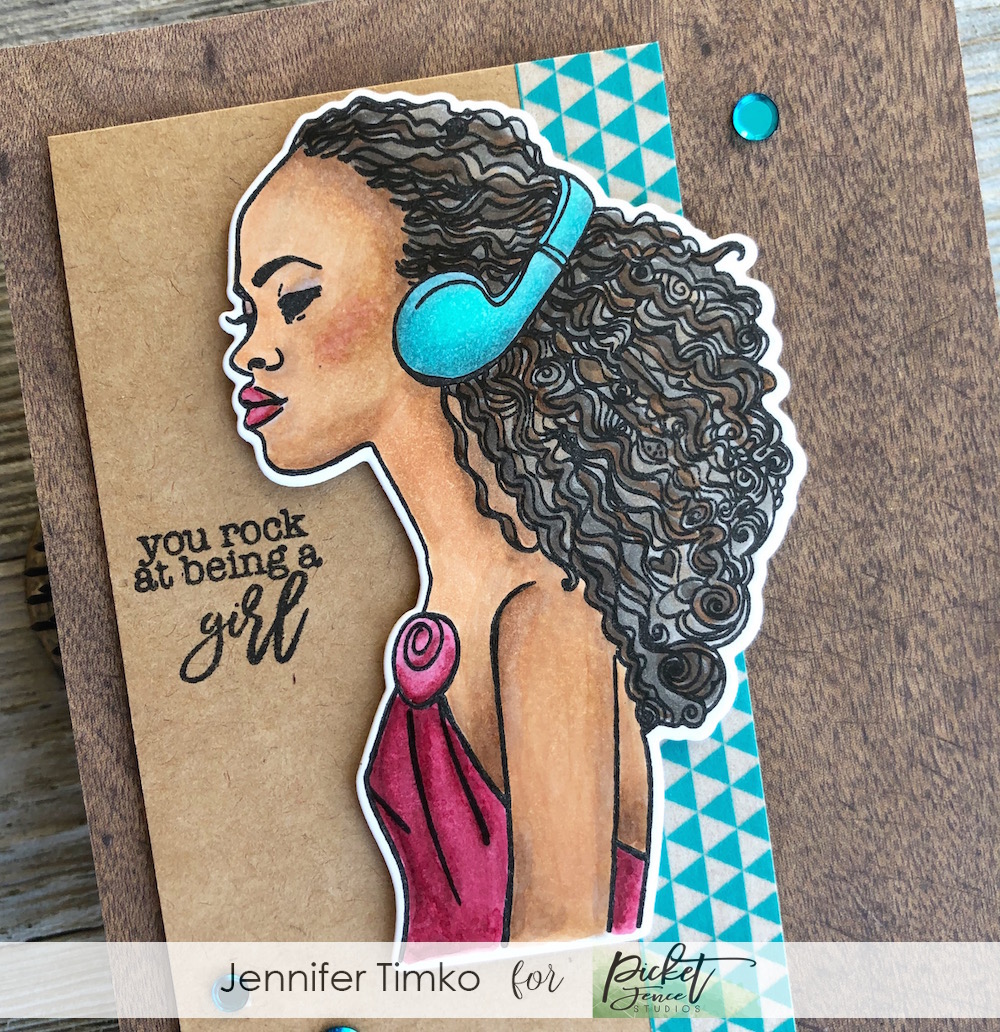 Once I had her skin tones like I wanted, I delved into her hair. Just look at the lovely art there! All the details in the image are mesmerizing. I played with grays and browns to create some highlights. Still need to work on the shading for dark hair but I’m overall happy with my first attempt on this image.