Dropping in quickly to share the winner of my Picket Fence Studios gift certificate. So happy to announce that the winner is:KATHY! I’ll send an email to the one you provided in comments to let you know the details! Thanks to you all for your sweet comments!
Happy Release Day!! So happy to share with you some projects I created for the Picket Fence Studios March Release AND a chance to win a $15 gift card for shopping at PFS. Yep, it is a great day!
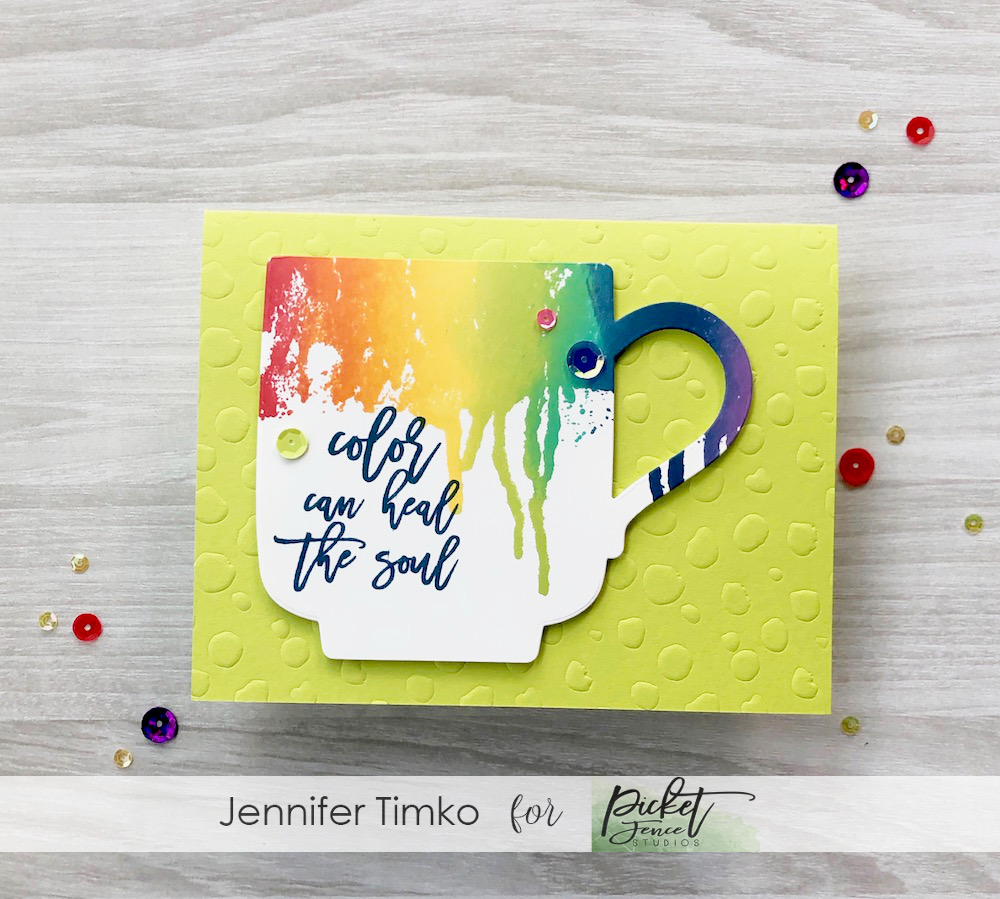
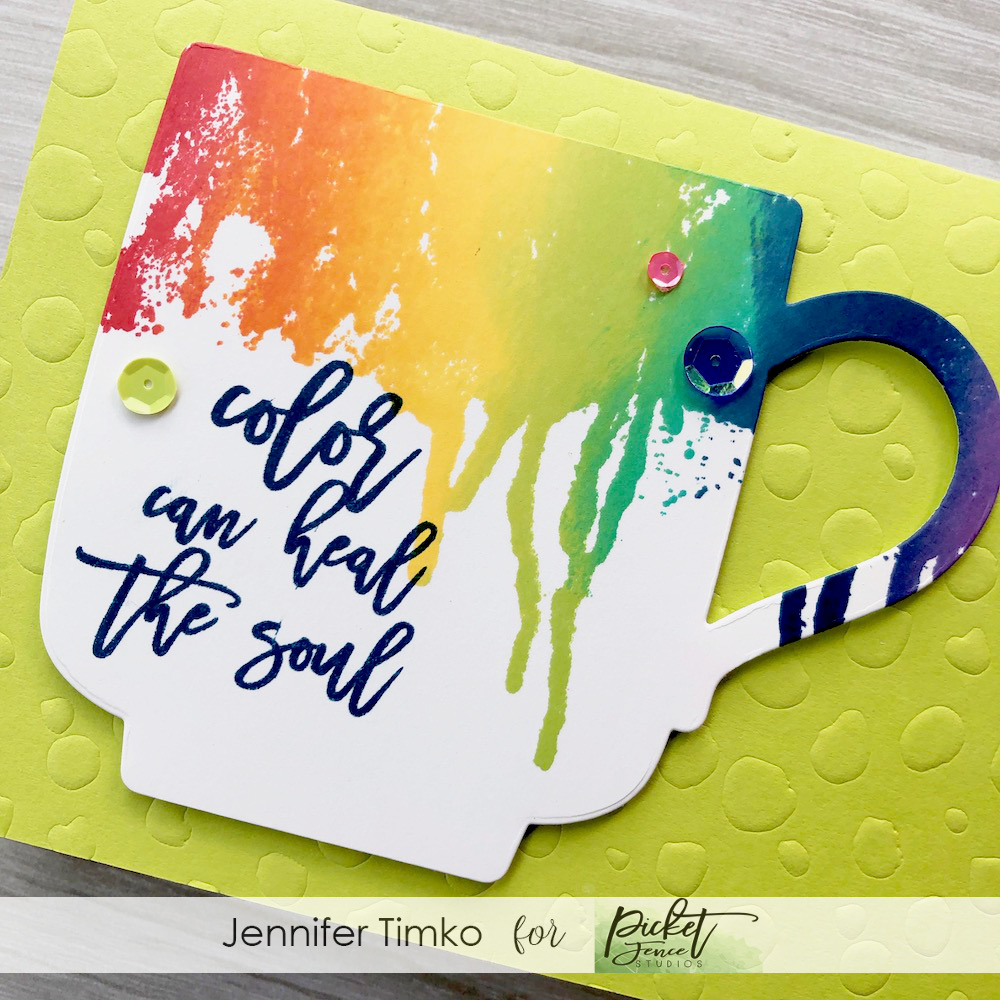
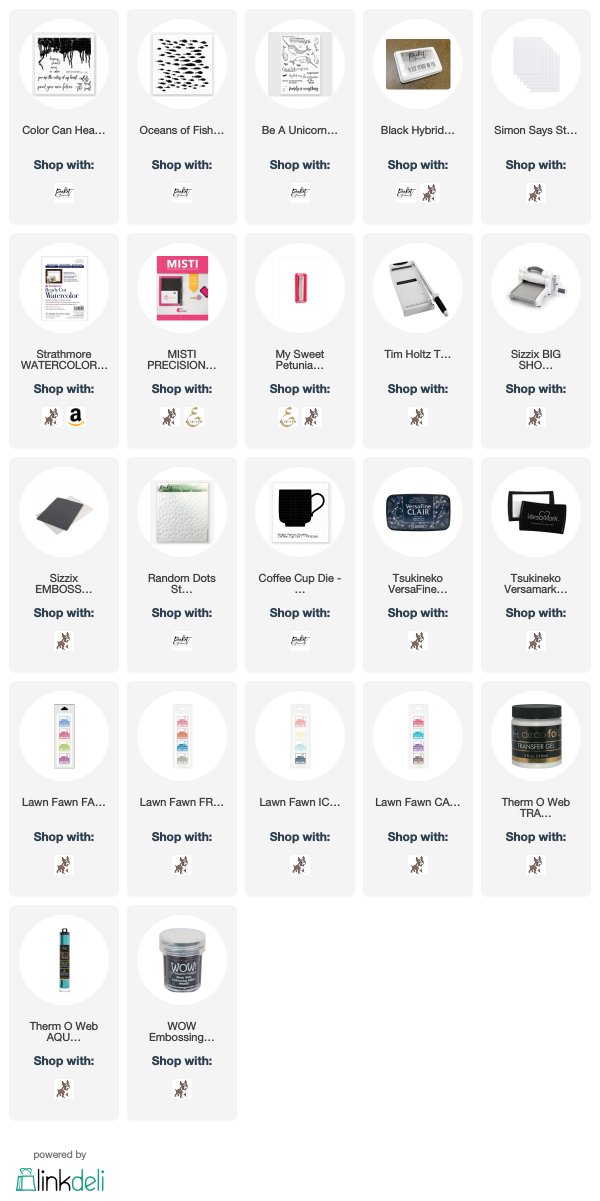
I am going to get right to it and introduce the new stamp set called Color Can Heal the Soul. This is a pretty paint look image that has beautiful sentiments that you are sure to love. As soon as I saw the stamp set, I thought about creating a coffee cup that I want to have! And even better, Picket Fence Studios has just the die for the job. I inked the paint drip image with a rainbow of colors and then stamped onto white card stock.
Then using the die, I cut out a coffee cup. I thought this sentiment from the set was just what I would put on my morning cup. In fact, I would love this to BE my morning cup for coffee!! To add a bit of texture, I embossed using the Random Dots Stencil. I love using a stencil for embossing…a great way to stretch these must have products! I went into my stash of sequins and started grabbing colors until I found the combination I liked to finish the card.
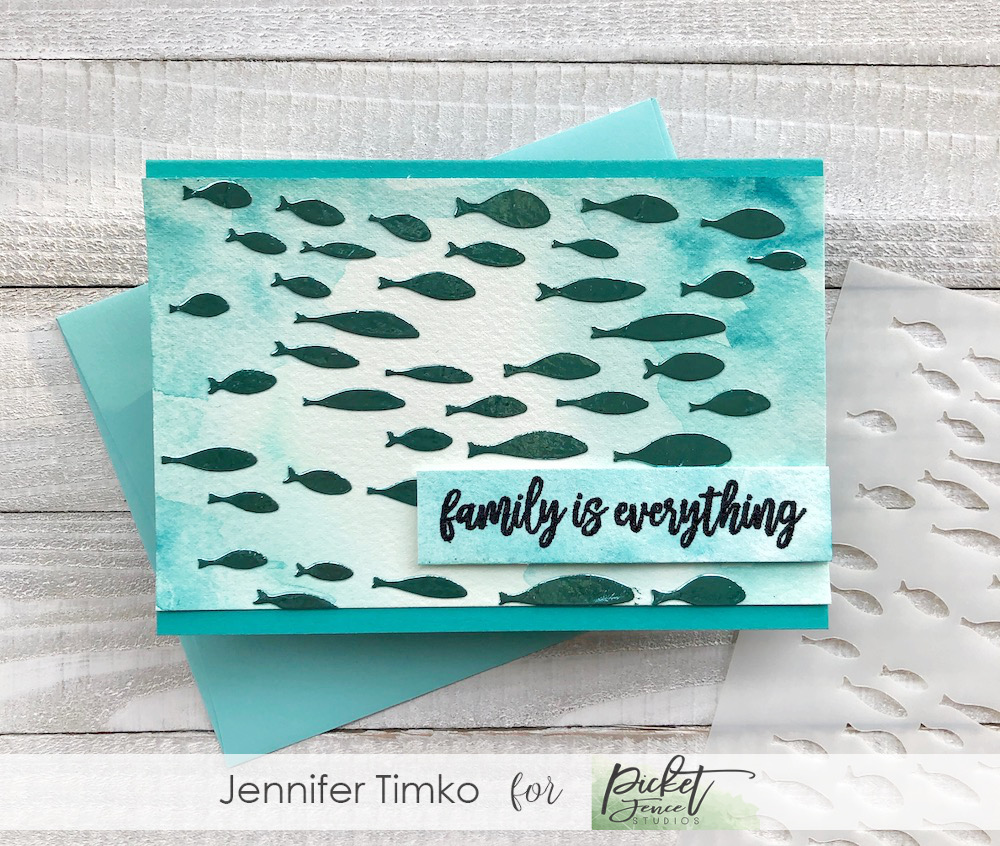
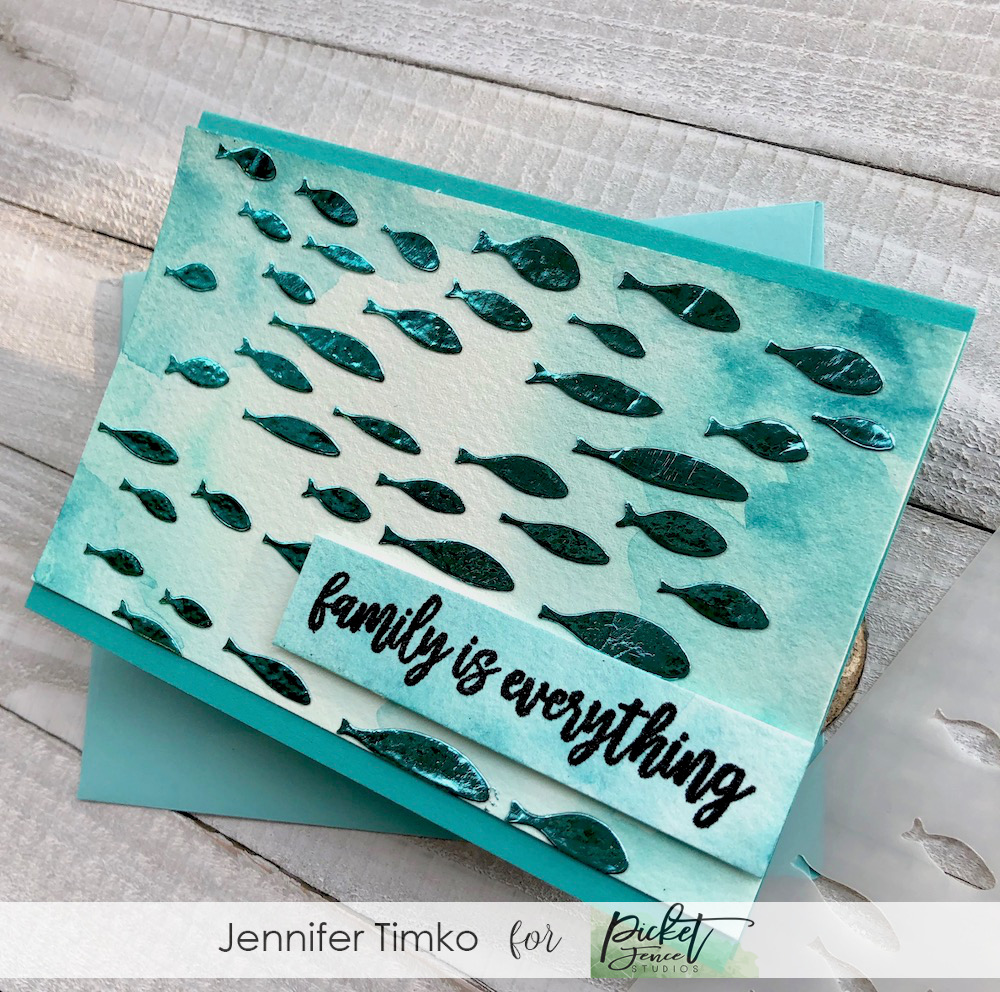
Next up, I wanted to focus completely on another stencil. A new stencil called Oceans of Fish. As I debated pulling out the Glimmer Paste (and believe me, I almost did), I chose another version of shine for this one. I thought the fish would be amazing in foil! So I grabbed Transfer Gel (which acts pretty much like embossing paste except a little thinner) and applied it to a watercolored panel.
Let the gel dry for at least an hour and then add Deco Foil Transfer Sheets on top with a heat laminator (or foiling machine). I love the shine you get! I added some Embossing Glitter for the sentiment to add to the shine. With all that is going on (more texture and shine in person too), I thought it best to leave this one cleaner.
I hope you like the sets I am featuring today. I’ll be back over the upcoming days and weeks to showcase more of the release! But now…the GIVEAWAY! In your comments, tell me your favorite way to use a stencil (because I always need more ideas). That’s it. Comment and share your idea. I’ll randomly choose one winner and announce on March 19th. Thanks so much for stopping in today! See you soon.
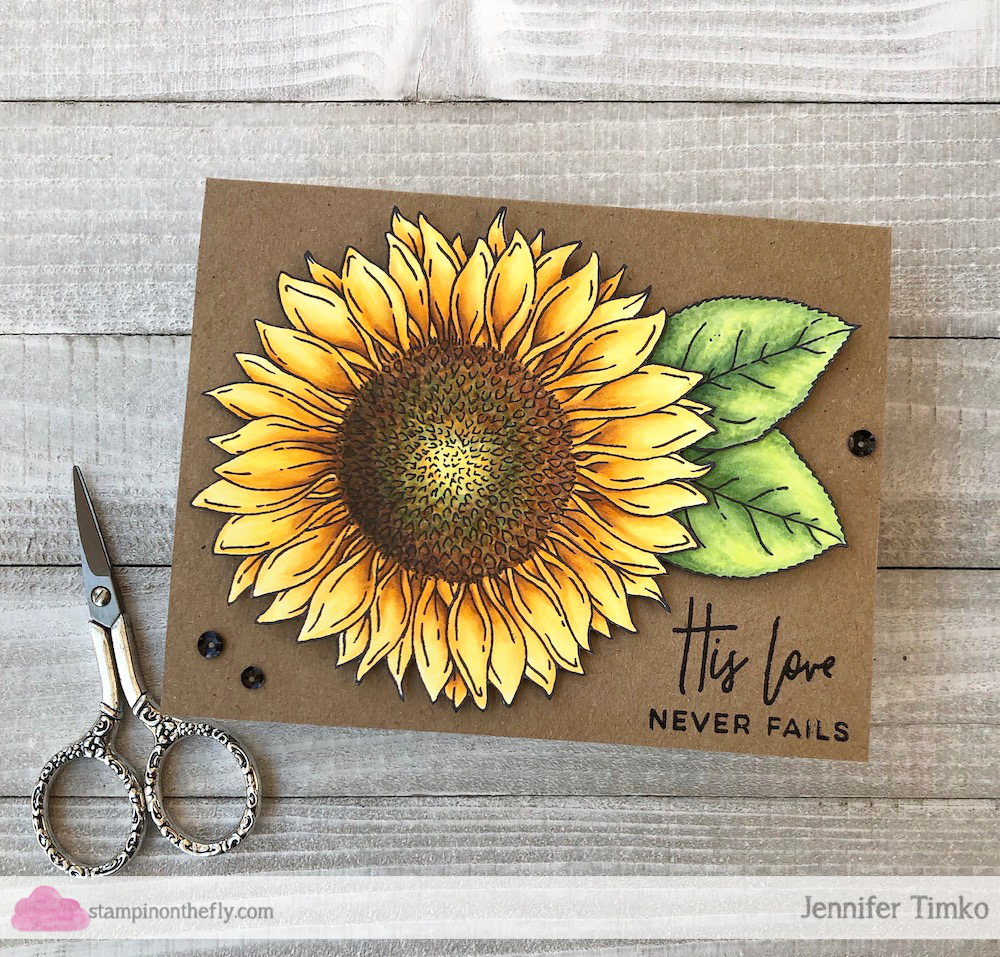
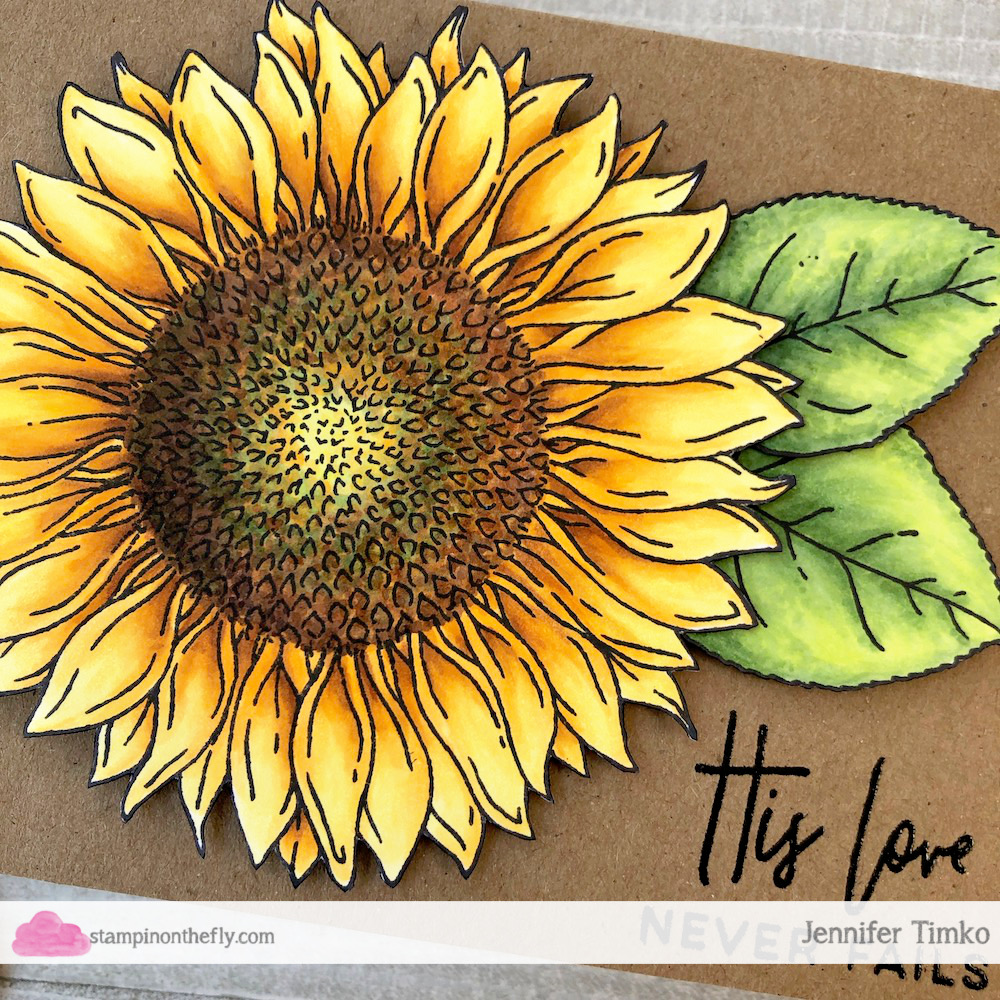
I am sharing a card today that was almost a month in the making. If you follow me on Instagram, you probably saw my progress on coloring Taylored Expressions’ gorgeous Big Bloom – Sunflower image over the course of the Daily Marker 30 Day challenge in February. I did a little at a time and tried to just enjoy the coloring process where it fit in. You see, a year ago I had just attended the amazing Stamping Away retreat and the lovely Jen Shults had stamped a few extra images for me from her incredible Taylored Expressions stash. Yes, it took me a year to finally decide to tackle this flower (and yes, there is actually another one for another time). I am so grateful still for that retreat time and for all the inspiration I received.
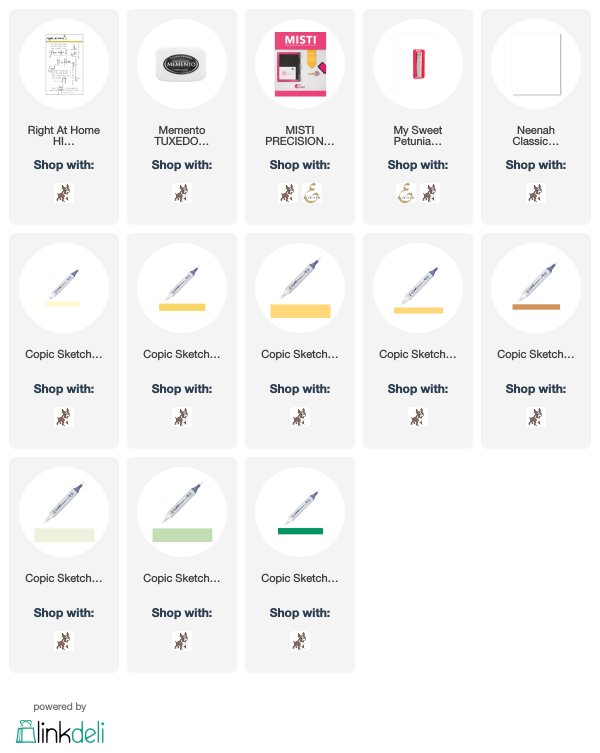
After all the coloring, I finally had time to finish the fussy cutting and figured out what I was going to do with the image. I thought that a basic kraft card stock was perfect under the earthy tones of the sunflower and I chose a simple sentiment by Right At Home from the His Love set. It was really nice to make a card just because. No deadline, no particular purpose (although I think I have a place for this to go now), just for me to have fun coloring. I am committing to do that a little more where it fits in because it makes me happy!
Now there are a ton of Copic Markers that were used to create this. I have linked a few below in my Link Deli but I will also just simply list them for you for simplicity. I don’t think I have ever used this many markers on anything but it was worth the complexity, I think.
I’m out on a trip and more flying next week but in between, I will be getting some projects done for Picket Fence Studios and the March release. I hope you have an amazing weekend and I’ll see you soon! Thanks for stopping in today.
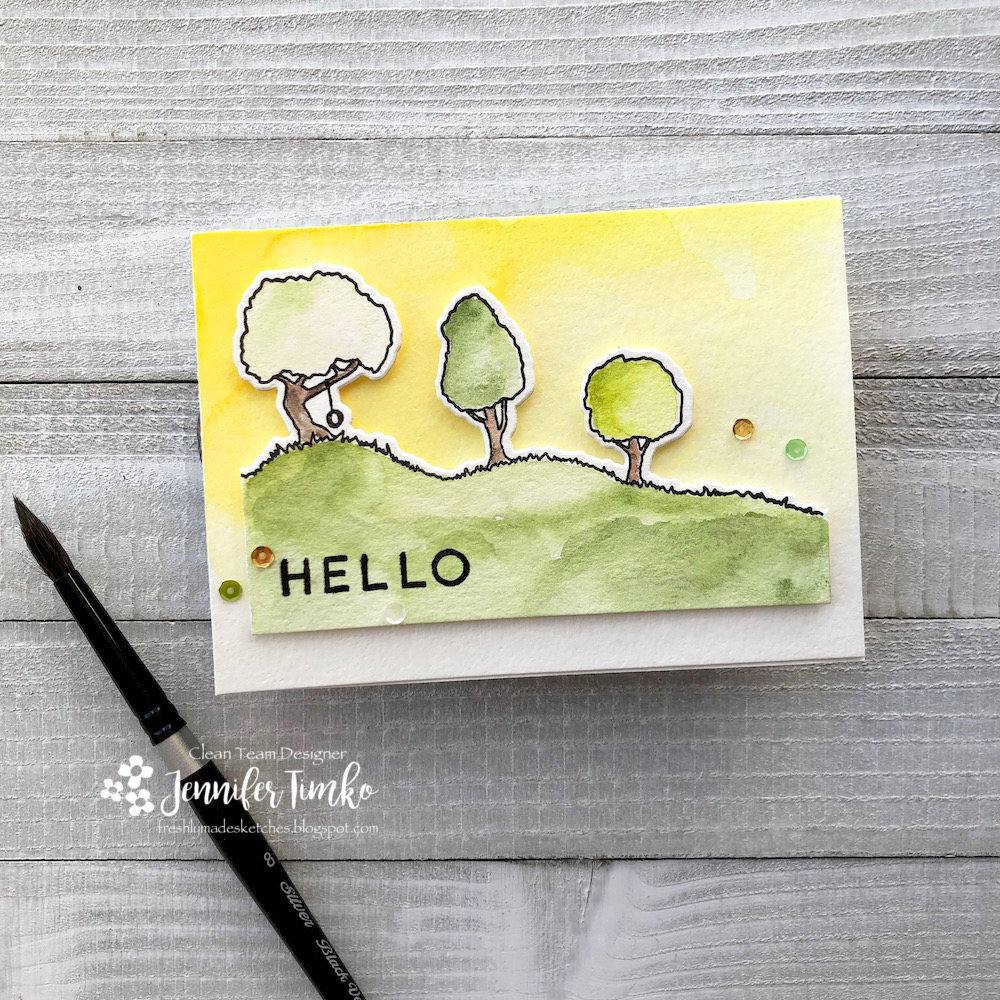
Happy middle of the week to you! Here with the latest sketch by Freshly Made Sketches where the wonderful Amy is our sketch hostess. This little trio sketch is sure to get you looking through your stamps for fun.
I had lots of ideas but finally settled on these trees from the City Stacks Stamp set by Concord and 9th. It is probably a stretch for the sketch but sometimes that is how it rolls. Besides, I wanted to play with my Daniel Smith watercolors. I just got a whole new split that has lots of greens and they called out to be used. This was a quick watercolor after stamping in the Picket Fence Studios Hybrid Black ink. I decided the background was a little too plain and added a wash of some yellows behind. Hopefully this is what Virginia will start looking like soon. Sunny with pretty green things!!
Ok, off to visit a friend today (and discuss an upcoming collaboration!!). Until Friday, have a great day!
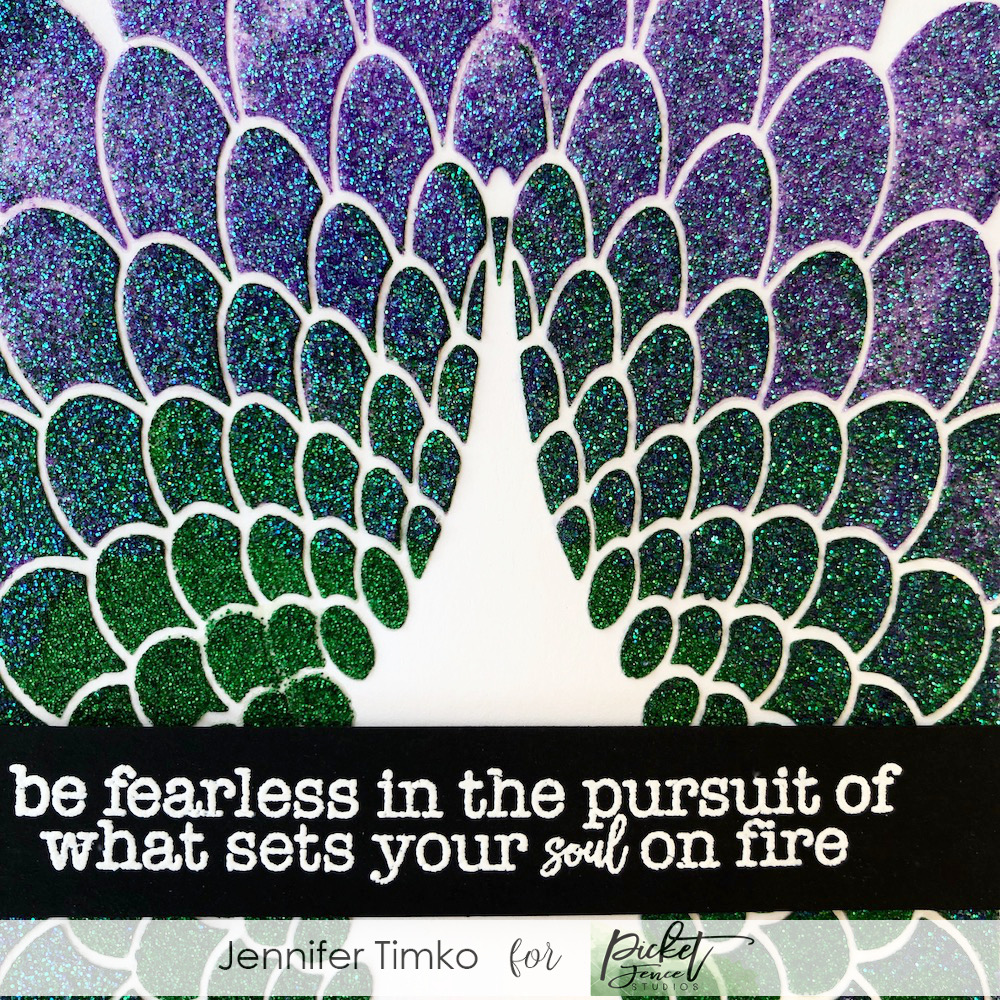
You know that moment when you see a craft product and you know EXACTLY what you need to make? Well, that is what I felt when I saw the Peacock Tail stencil from Picket Fence Studios. I just knew, without a doubt, that it needed to be used with Nuvo Glimmer Paste. The only problem, I didn’t have any of the paste. So I ordered and waited and finally I got to sit down to see if I was right. Yes, yes I was!!
I was introduced to the Glimmer Paste a year ago while I was at Stamping Away. I created some panels there with the paste and loved it. But I was super indecisive about which colors to buy and I put it off. No more! I chose Emerald Green and Tanzanite Lavender for their “peacock” colors but let’s face it, they are just gorgeous. I taped my stencil to a board over some white card stock and simply applied the paste. I first added the green and then the lavender, allowing the colors to blend together where they met. The result you see was my first try and really fast. I initially planned for this to be a trial run but decided it was too pretty to waste and put it right onto a card. I’m going to warn you now, I am going to need to glimmer paste all the stencils!!
A note about the paste though….you do need to move reasonably quickly once you have the paste in place. Don’t let your stencil sit with the paste on it. Pull it off, put the project aside to dry and get right to rinsing off the stencil so it doesn’t stick there. You can see my stencil cleaned up perfectly but I knew this from when I first used it.
To finish the card, I thought this sentiment from Wild Heart Gypsy Soul was perfect for the wow of the shimmer. I simply stamped in Versamark Ink and heat embossed with Wow White Embossing Powder. So glad you stopped in today. Let me know what you think about this card and the glimmer paste! See you soon!
I’m over at the Picket Fence Studios blog and wanted to share here too. When I was creating today’s card, I was completely enamored with the new Petite Cup Die and wanted to focus squarely on that. I love a stand alone die that can be great for so many kinds of cards. For today, I created a card to support and cheer on a friend.
I started with a stack of printed papers in varied colors and used the die to cut out the cups. On the middle cup, I simply cut it on the reverse so I could stack them better. Super fast and think of all the papers you have that would be great for this! To make the gingham cups pop against the background, I chose a woodgrain paper that added texture but also help highlight the fun designs. For a sentiment, I went to the fantastic Exhale Worry stamp set. Seriously, this is one you simply must have. It will be a workhorse for you. I put the sentiment on a little banner and added a button and some twine from my stash.
I hope you enjoy this card! Don’t forget to look at your die cuts for fun and inspiration. There are so many ways to use them!! Thanks for stopping in today. See you soon.
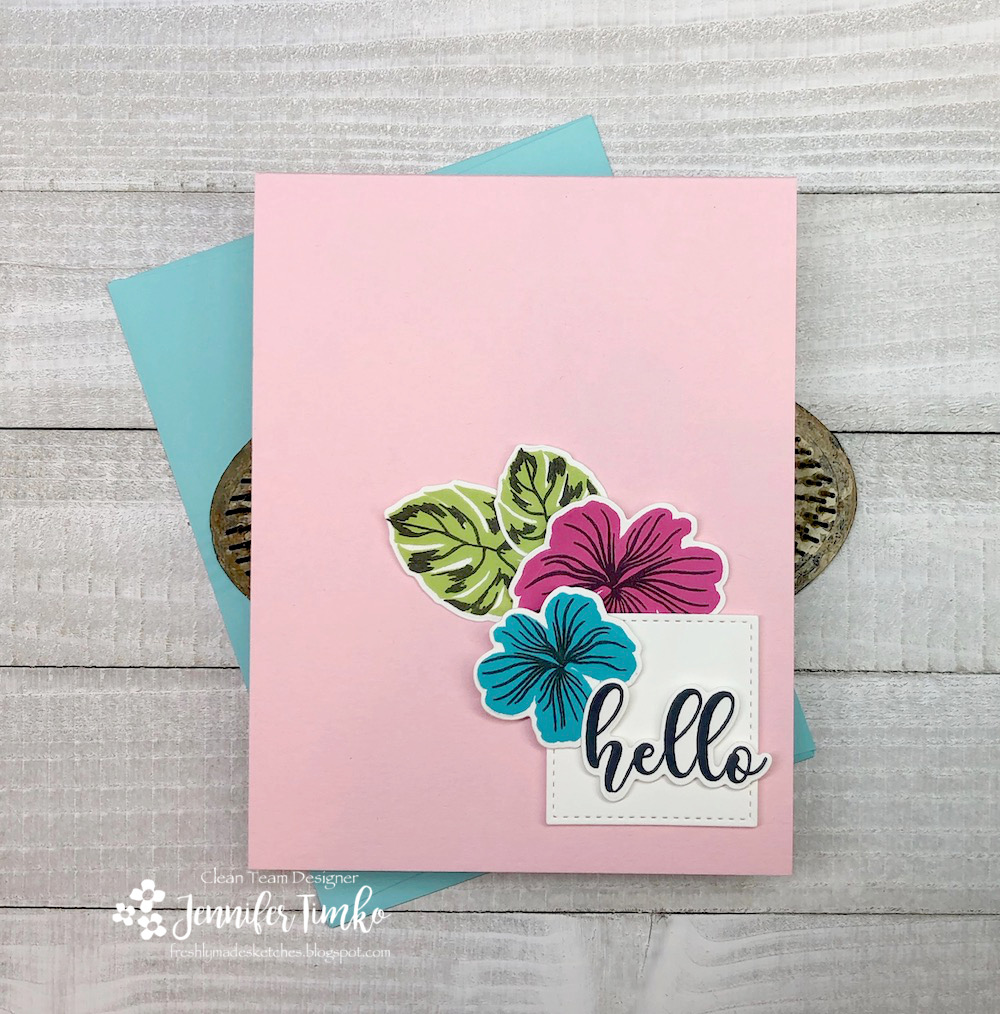
Happy Wednesday! Today over at Freshly Made Sketches we have an interesting sketch that is sure to spur you on to create. The lovely Narelle is our sketch hostess and we all know that she has a special talent for layering. Her sketch reflects that perfectly and it lends itself to lots of different takes.
I went a pretty simple route, to be honest, and used flowers as the circles. I have this great set from Gina K Designs that is so pretty and seemed perfect. I stamped the flowers and leaves using Gina K inks and then die cut them with the set’s coordinating dies. I added a stitched square for the layering and then debated the sentiment. Fortunately, the set has this pretty script that has a coordinating die so that was a natural choice.
I have to admit that the call of the bright colors is upon me. Winter ice and yuck can be done now and I’m ready for flowers! Until the time that winter decides to cooperate, you can expect that I’ll just keep doing cards with sets like this. Thanks so much for stopping in today. I’ll be back on Friday with a card I created for the Picket Fence Studios blog. Until then, have a great week!
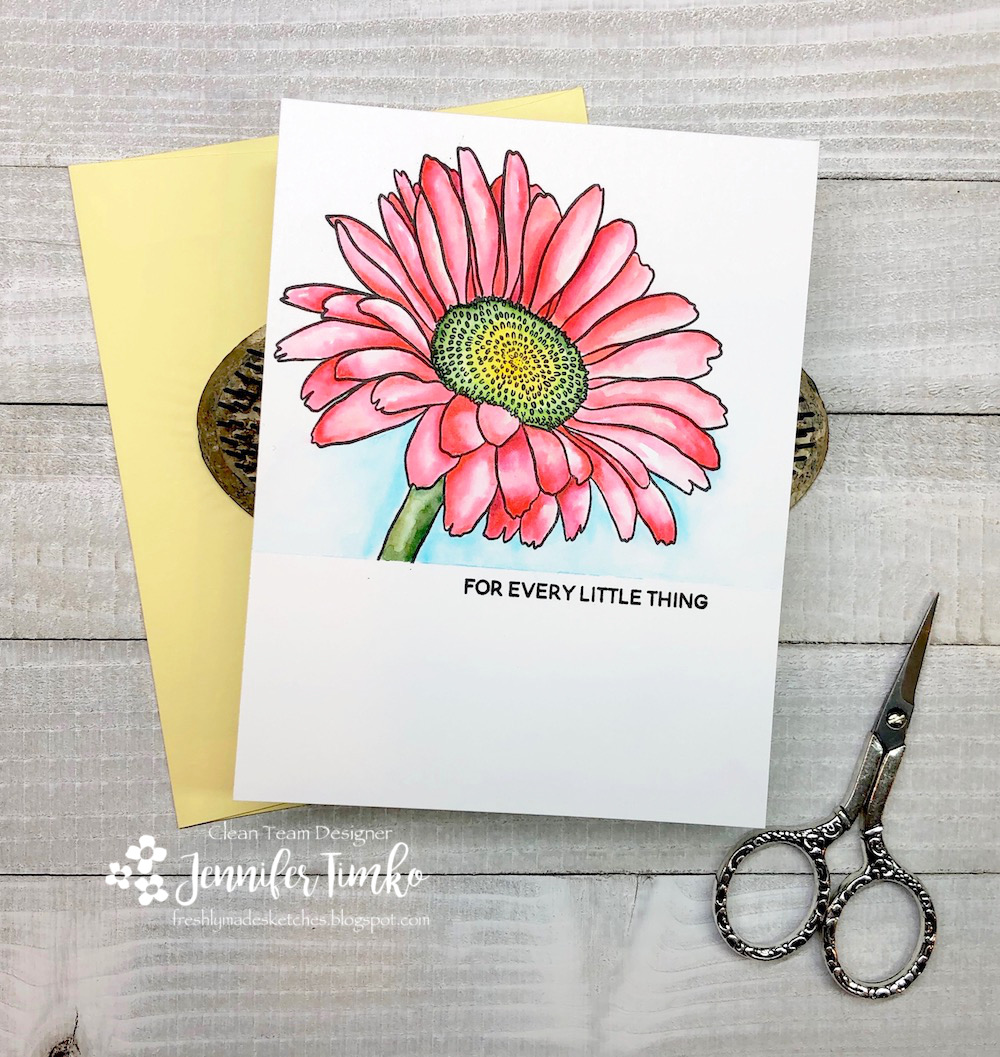
So you may have noticed (especially if you follow me in Instagram) that I have been trying hard to participate in the Daily Marker 30 Day Challenge as much as possible this month. I really am trying to eek out more coloring, even if only for a few minutes. So this card is a reflection of that as I found the perfect way to use the sketch by Karren Johnson for this week’s Freshly Made Sketches challenge. Karren is an amazing Copic colorist and this sketch lends itself to colored images, bold panels and word dies, among other things.
I chose to use this new Mondo Gerbera Daisy by Ellen Hutson as my focal image. I stamped in black ink and then colored it with my Zig Clean Color Real Brush Markers. I chose a number of corals/reds/pinks to play with the shading on the flower. It didn’t take long and I love it. The flower reminds me of the Gerbera Daisies my dad would grow when I was little. There is something velvety and special about these flowers and I was thrilled that Ellen came out with this one.
A super quick post today. I’m back at work this week and it seems harder that usual after spending time at my mom’s last week. Off to bed to be ready for winter weather fun tomorrow! I hope you have a great day and will play along this week. See you soon.
Hi everyone! It is one of my favorite days…release day! Every single month Picket Fence Studios gives us so much to use for creating and this month is no exception. Another amazing release!! So I’m going to get right to my cards.
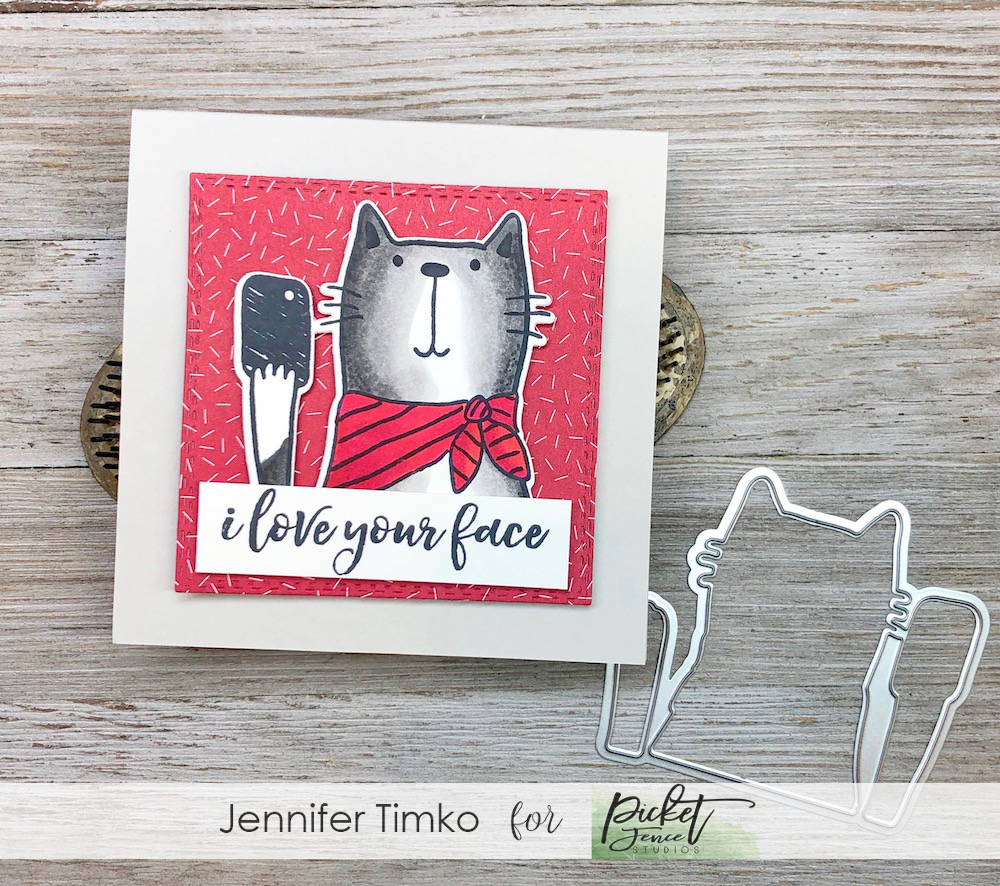
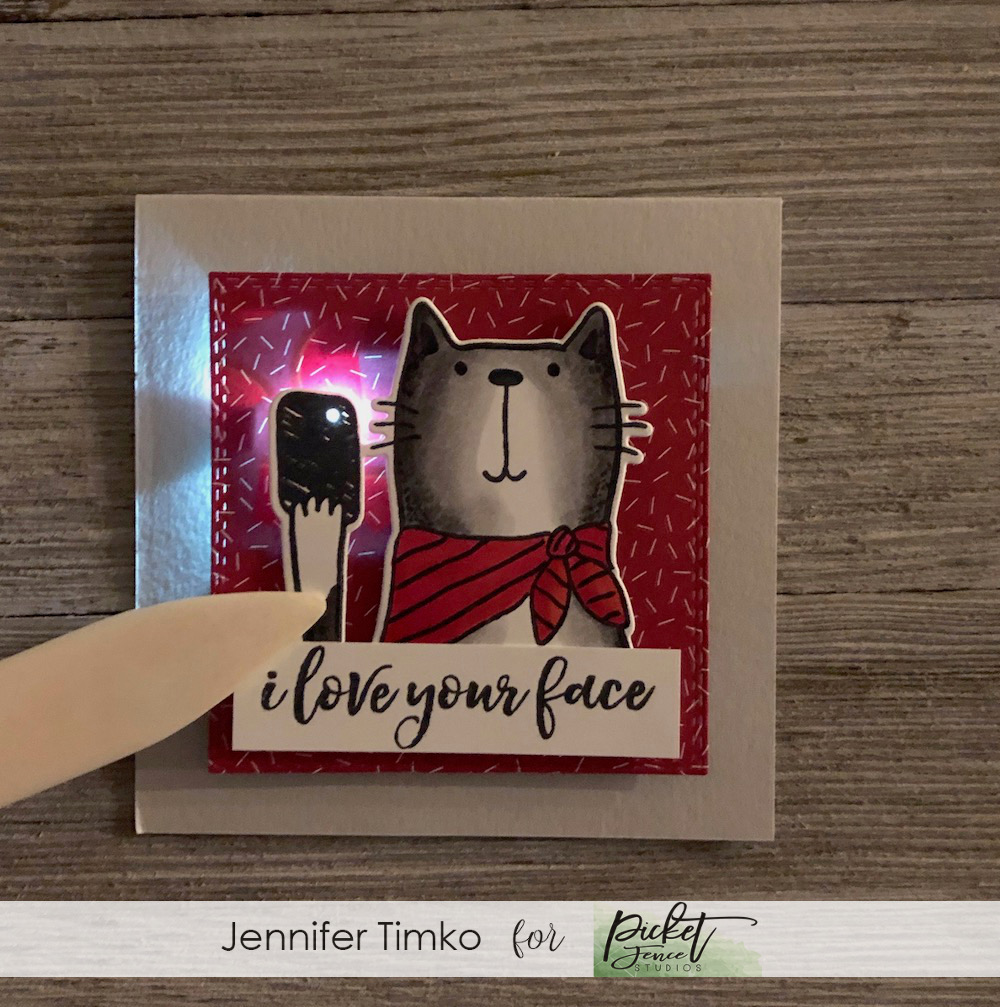
First up, I used this super cute selfie cat to create an interactive card. The name of the stamp is I Love Your Face and it is such fun. I colored the kitty to look a bit like my little Meg. We decided that Kate is far too dignified for selfies but Meg, well, she would totally be taking them! But then I wanted to take it a step further.
So I created an interactive light up card using Chibitronics Chibi lights. So when you push the cat’s paw, the camera “flashes”. I used my bone folder here to keep my hand out of the way. I dimmed the lights a bit too so you can see the light better. I’ll post a quick video over on my FB and IG pages later today. The foundation of this card is pretty simple. I used stitched dies to cut out the square of patterned paper. Then I used the actual die and traced inside it to make sure I knew where my boundaries are. I built the simple circuit and then poked a small hole in the paper under the cat’s paw so the light could shine through well. I think this is fun for anyone, don’t you?
Next up, I chose a set from the “Girls” series and this one is called Shop Hard. Now, I chose this image because it reminds me of one of my neighbor girls. So much so that I showed her mom (and mom agreed). This girl is like family to us and she is such a beauty. How could I not color her?? So out came the Copics and I chose some colors I thought would be right. While I love the sentiments in the set, they were not quite right for this girl (she is a super athlete and doesn’t have much time for shopping). Instead, I chose one from the new set called Let’s Shake Our Tail Feathers. I think it is perfect for a teenage girl!
The whole team will be sharing today and I hope you enjoy my cards. Make sure you go check out the whole release over at the Picket Fence Studios site! Thanks for stopping in today. See you soon!
Glad you are here to visit today as I share the latest from Freshly Made Sketches. The always brilliant Cécile has created a unique and wonderful sketch for us this week. Such fun when you get to stretch your brain with something truly new.
I will admit that those triangles had me a bit confounded at first so I reverted to another shape. Circles! You’d think I’d have had my fill of those last week but nope. So I pondered what stamp set to use and how to make this work. And I came across this Hey There set by Lawn Fawn that had gone uninked….how is that even a thing?! Every image in this set is totally adorable. I stamped the barn, the cow and the fence (in my brain this would be the leaf element) and of course the speech bubble. Because why shouldn’t a cow send Valentine’s sentiments? I colored them with my Copics and started playing with the layout. Originally I started with no background shapes at all but quickly found that not to work. So I cut a landscape border for “grass” and then cut it out with a circle die (and cut whole circles from blue card stock while I was at it). That worked much better! It seemed for me that a square card worked better so I cut a square from some Lawn Fawn plaid and then layered my elements. I kind of love this quirky cow card and DH will surely chuckle. He thinks cows are hilarious so I think he will like it. I’m back in FL this week to work on my mom’s house….so off I go back to organizing. I hope your day is wonderful! See you tomorrow with the latest release info from Picket Fence Studios!
Primary Sidebar
We use cookies on our website to give you the most relevant experience by remembering your preferences and repeat visits. By clicking “Accept”, you consent to the use of ALL the cookies.
This website uses cookies to improve your experience while you navigate through the website. Out of these, the cookies that are categorized as necessary are stored on your browser as they are essential for the working of basic functionalities of the website. We also use third-party cookies that help us analyze and understand how you use this website. These cookies will be stored in your browser only with your consent. You also have the option to opt-out of these cookies. But opting out of some of these cookies may affect your browsing experience.
Necessary cookies are absolutely essential for the website to function properly. This category only includes cookies that ensures basic functionalities and security features of the website. These cookies do not store any personal information.
Any cookies that may not be particularly necessary for the website to function and is used specifically to collect user personal data via analytics, ads, other embedded contents are termed as non-necessary cookies. It is mandatory to procure user consent prior to running these cookies on your website.

 KATHY! I’ll send an email to the one you provided in comments to let you know the details! Thanks to you all for your sweet comments!