I’m up on Social Media for Honey Bee Stamps today and wanted to share here too. You will see that I’m kind of of a spring themed roll and just kept with it.
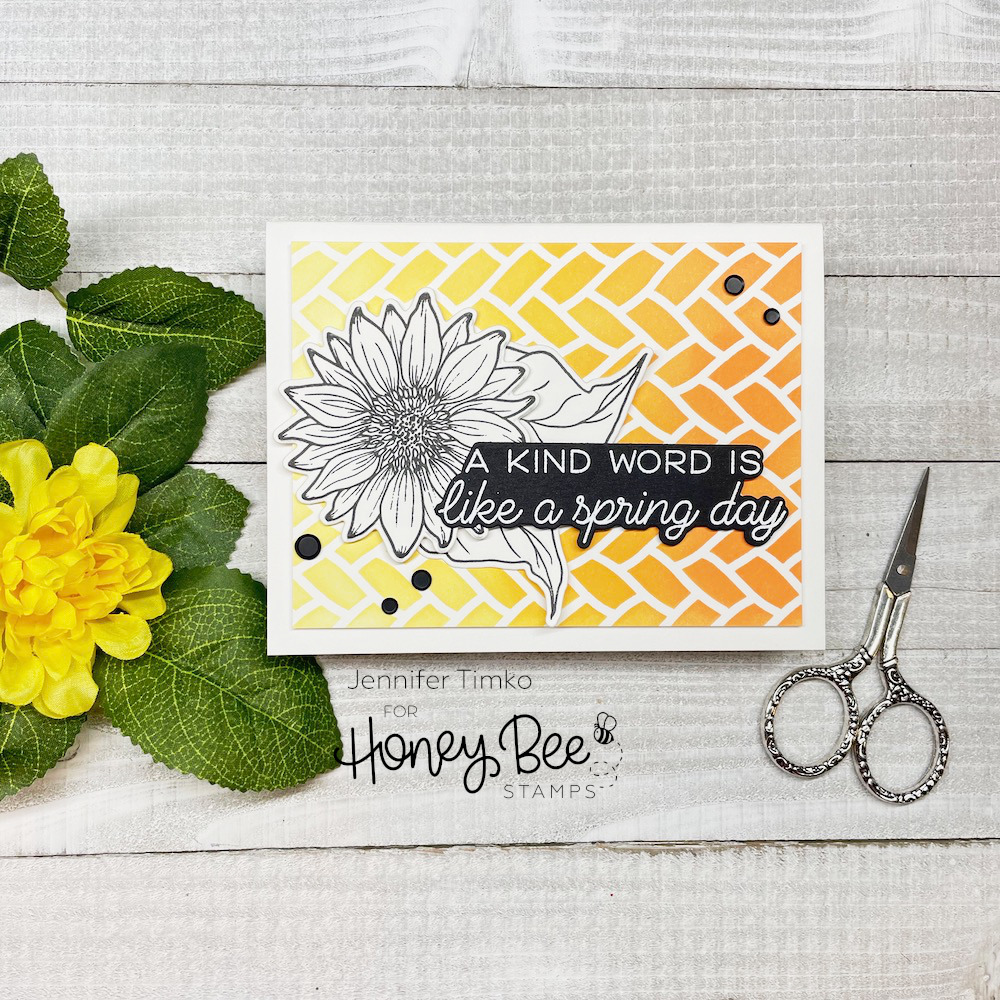
I have loved the idea of uncolored images on a bold background for awhile and thought it was time to give it a try. I inked the Sweet Sunflowers images and then just cut them out with the coordinating dies. I used the Basketweave Stencil to create this ombré background to provide a pop of color and texture. The sentiment is from the Spring Joy Bouquet set and I simply love this one!
Short and sweet today! Hope you have a beautiful day!
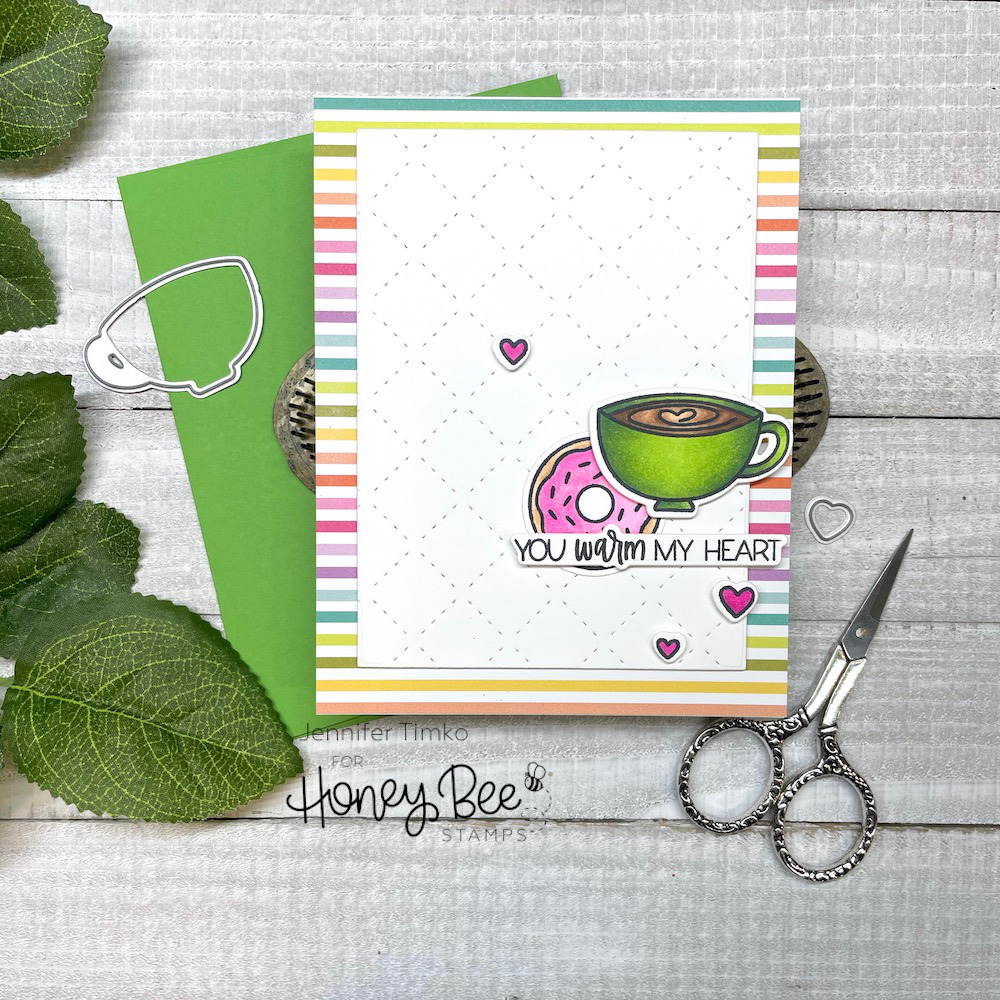
I chose the Love You S’more stamp set since it has this adorable coffee image and I do love the sentiment from the same set. I used the stripes from the Birthday Bash papers and added a bit of texture with the Quilted A2 Cover Plate (that I just cut down a bit).
I hope you like this fun card! Today is the last day of the Coffee Lovers Hop and make sure you go over to see all the inspiration there! And for all who have been patient with me being gone over the last weeks, here is a photo of my final sign off flight to be a Captain on the Airbus!
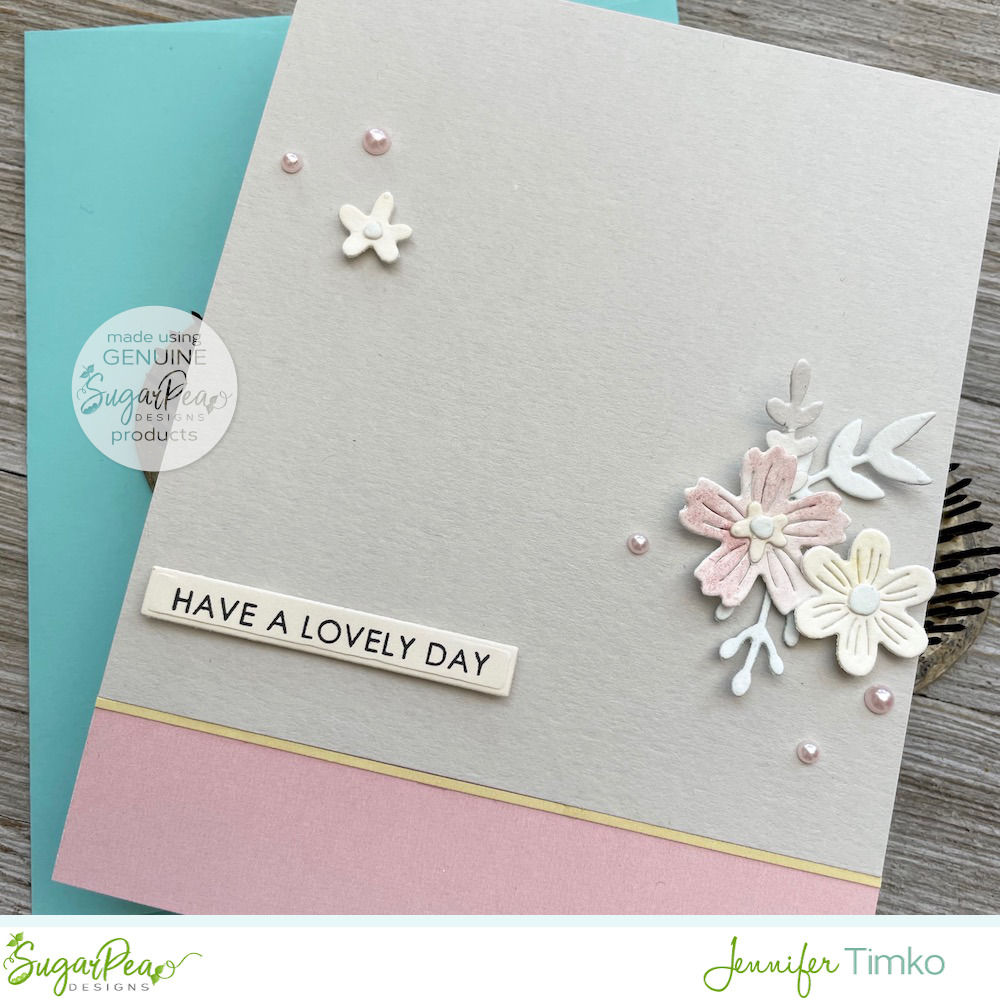
Super quick post for today to share the latest from Freshly Made Sketches and SugarPea Designs. I am the sketch designer for FMS this week and I, um, conveniently “aligned” the sketch with the one for SPD. Yeah, I know…but I opted for smarter not harder.
I kept this super clean and just focused on the soft colors from the SugarPea Mix It Up inspiration. I cut the flowers and leaves with the Open Book dies and then colored them with watercolors. I chose a soft gray base to keep with the palette.
I chose some pretty papers from a Honey Bee Stamps Paper Pack for the pink and yellow and then added a few pink pearls from my stash.
I’ll be back on Friday for a project for Honey Bee Stamps. Until then, back out later today to finish my sign off on my upgrade. Thanks for stopping in today! See you soon.
Well, as I told you, been a bit quiet here. If all moves along as scheduled, I’ll be finishing my training in Denver today. A pesky blizzard has impacted our training center so there is a chance of delay but here’s hoping all is successfully accomplished by the end of the day.
I created this card before I left and it is the last one I have for you. I cannot wait to have some creative time when I get home!
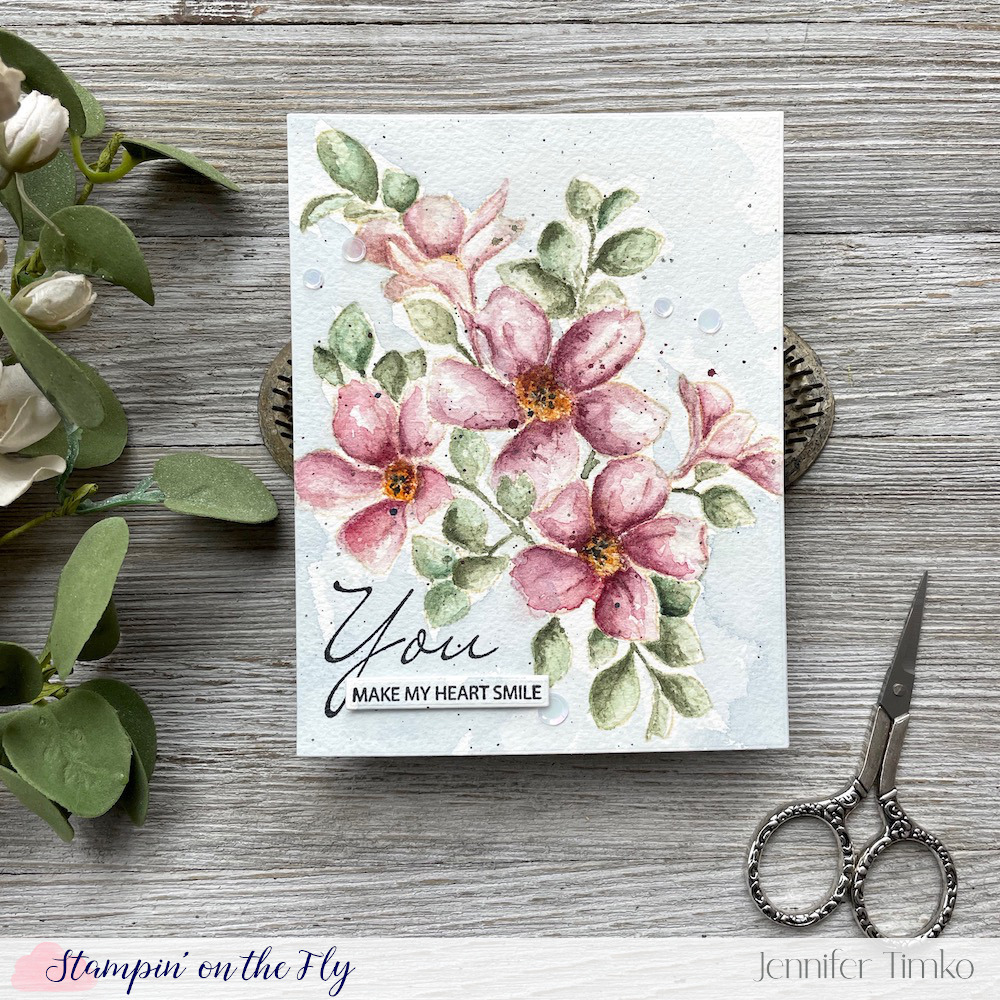
I started with the Flowers for You set by Gina K Designs. This was part of her latest release and I was thrilled to be able to join in the launch. I stamped this with Distress Ink in Antique Linen onto Fabriano Cold Press paper. Then I just played with no-line watercoloring.
I feel like this kind of coloring is still a work in process for me but I do love the look so much. So…practice, practice, practice! It helps with the image is as pretty as this one! The sentiment comes from the same set and there are many to choose from.
Thanks for stopping in today! I hope you have a wonderful start to your week!
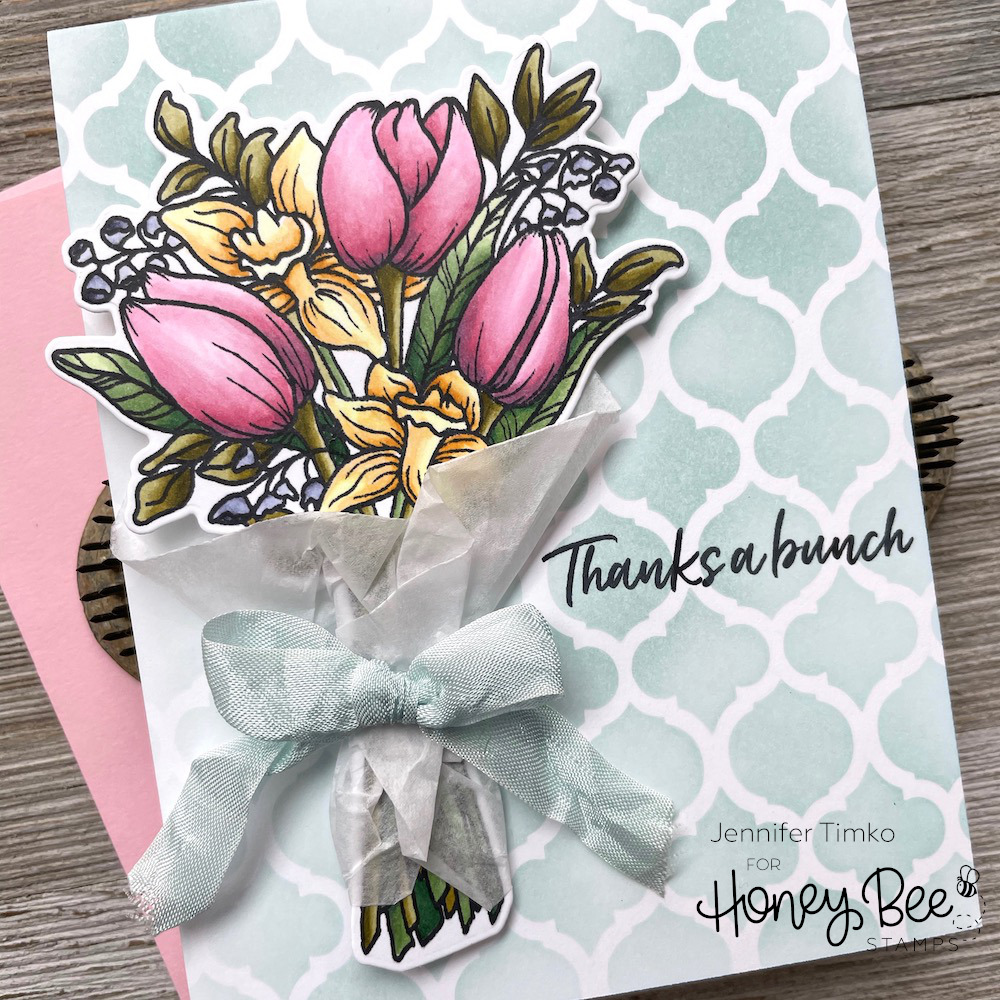
Hi everyone! I’m so happy to be sharing a project I created for the Honey Bee Designs Social Media Team. I suspect right now everyone is ready for a touch of spring and this seemed the perfect way to share some.
I used the Spring Joy Bouquet stamp set and coordinating dies for the pretty bouquet. I love tulips so much and this lovely image designed by the amazing Emily Midgett was wonderful to color. I added the Floral Bouquet Wrap Die that cut out some tissue paper for the flowers and tied it up with some ribbon from my stash.
To add a little additional dimension, I used one of the Quatrefoil Layers Stencil with Speckled Egg Distress Ink. Such a quick and easy way to add so much to a card!
Short and sweet! Training is moving along well and I’m hoping to be done with this part of it on Monday. I’m in Denver though, so the big snow event could impact our training center. I’ll be back on Monday for one more card that I made before leaving. Until then, have a wonderful weekend!
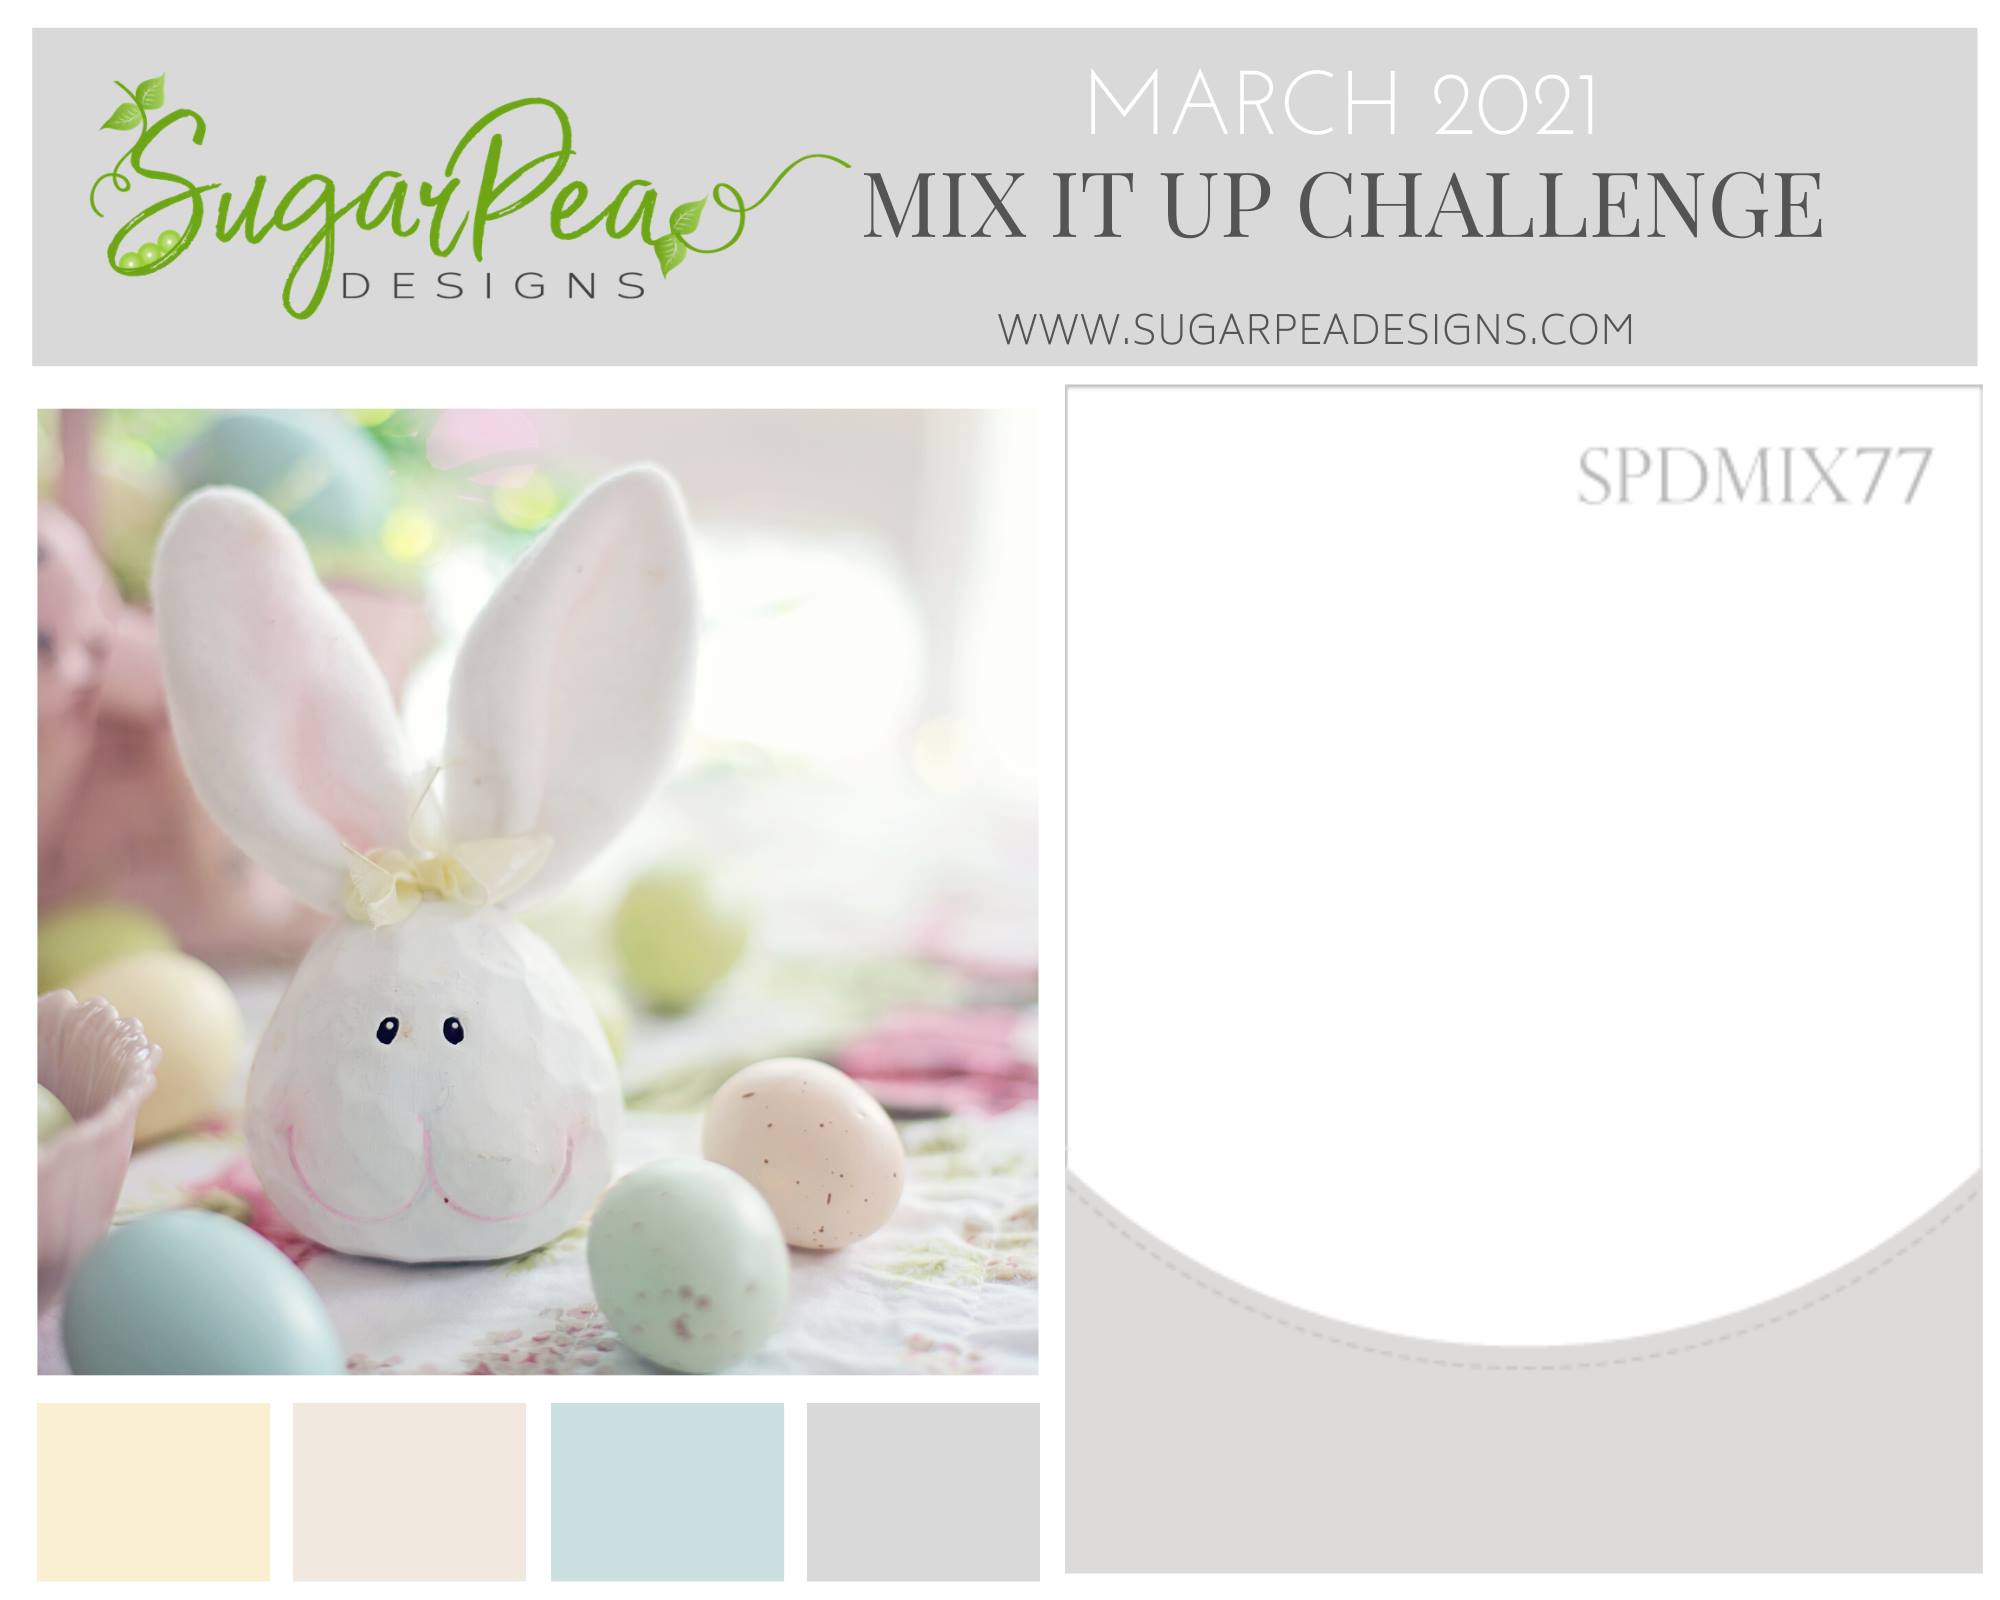
I hope your week is going well so far! I am bringing you a bit of March inspiration for the SugarPea Designs blog today.
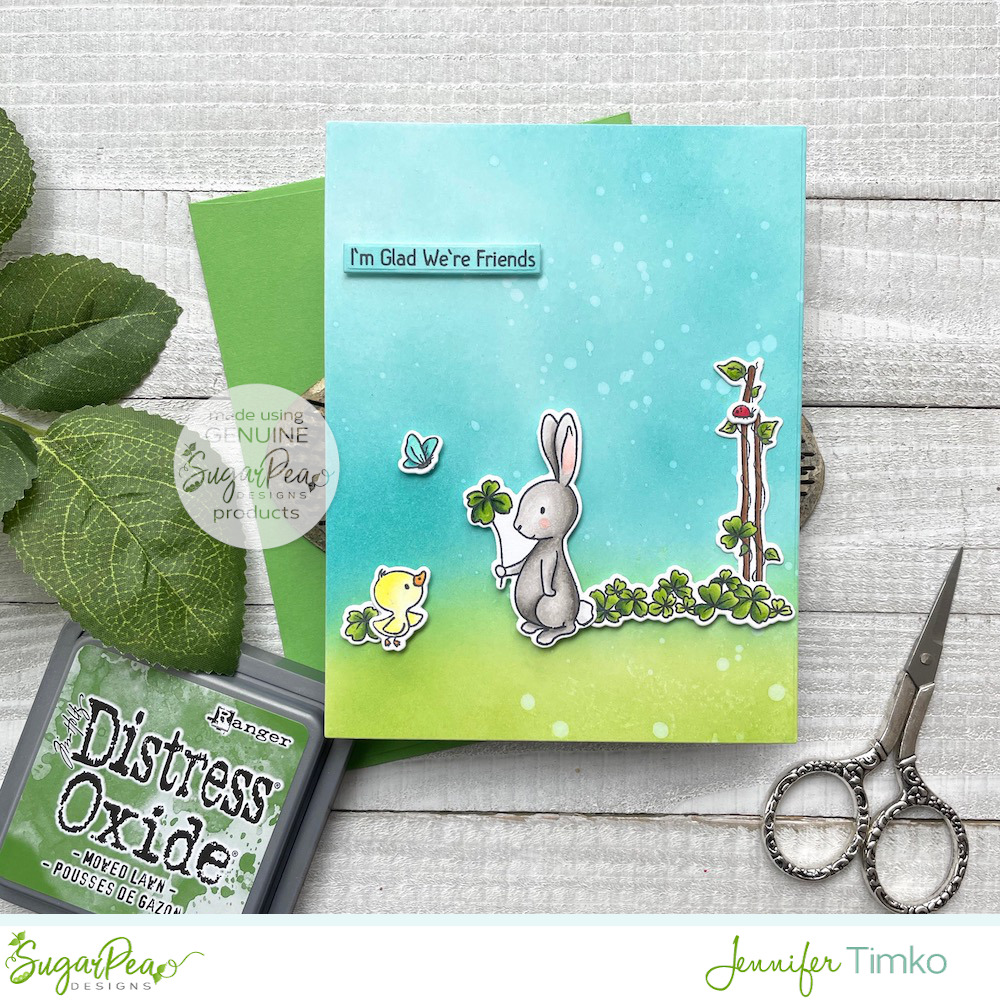
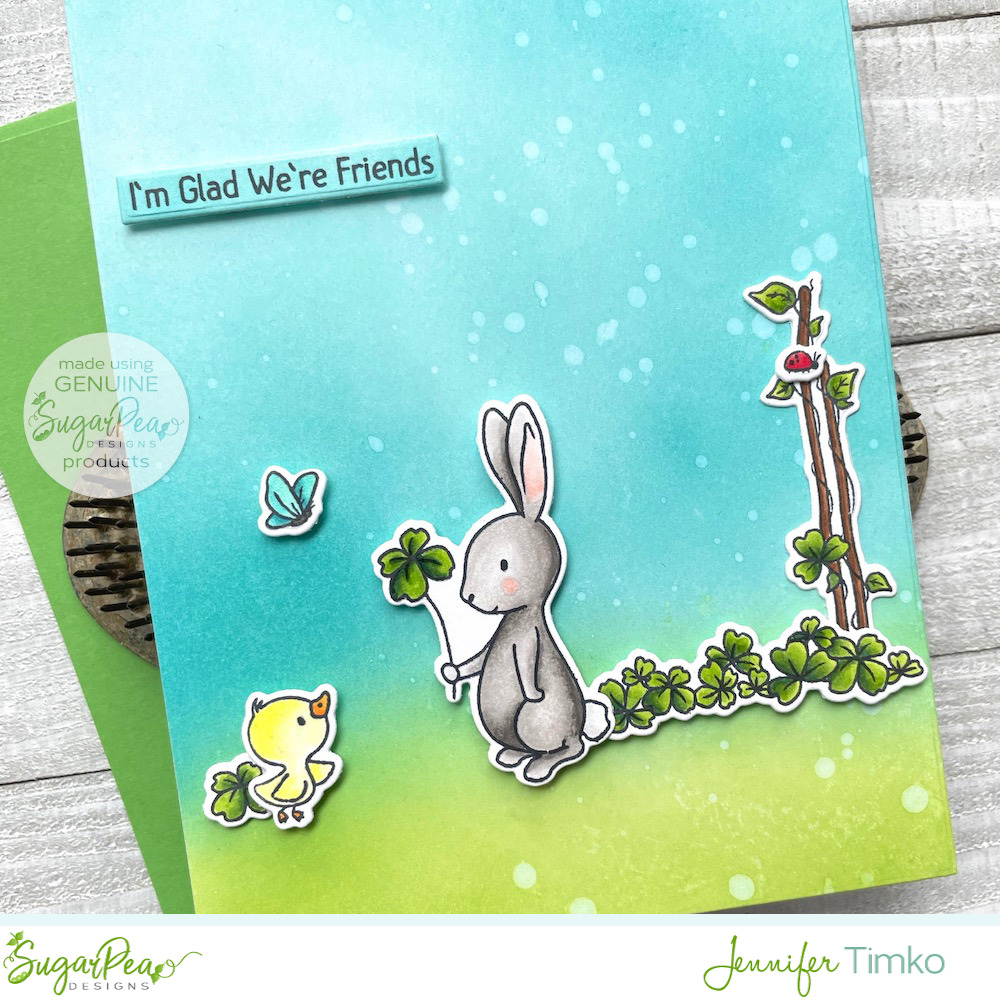
All the sweet clover from Cottontail Cuties was perfect for a fun March card, don’t you think?! I stamped all the images in Momento black ink and then colored with Copic markers. I love all the choices for creating a scene and had fun putting these together. I mean, honestly, who can resist a bunny with a four leaf clover?
I debated using a grass stencil but instead opted to create a Distress Oxide background. These are fun to do and an easy option to add color and texture. I love how the images pop against it. The sentiment comes from the same stamp set and could easily be replaced with the Good Luck in the set. I cut it out with the SugarCut – Sentiment Strips after stamping it on a scrap of the inked card stock.
Thanks so much for stopping in today. As I mentioned last week, this is pretty much the last of my posts for a bit. I will be back in just over a week for another share. Until then, stay safe and know how grateful I am for you all.
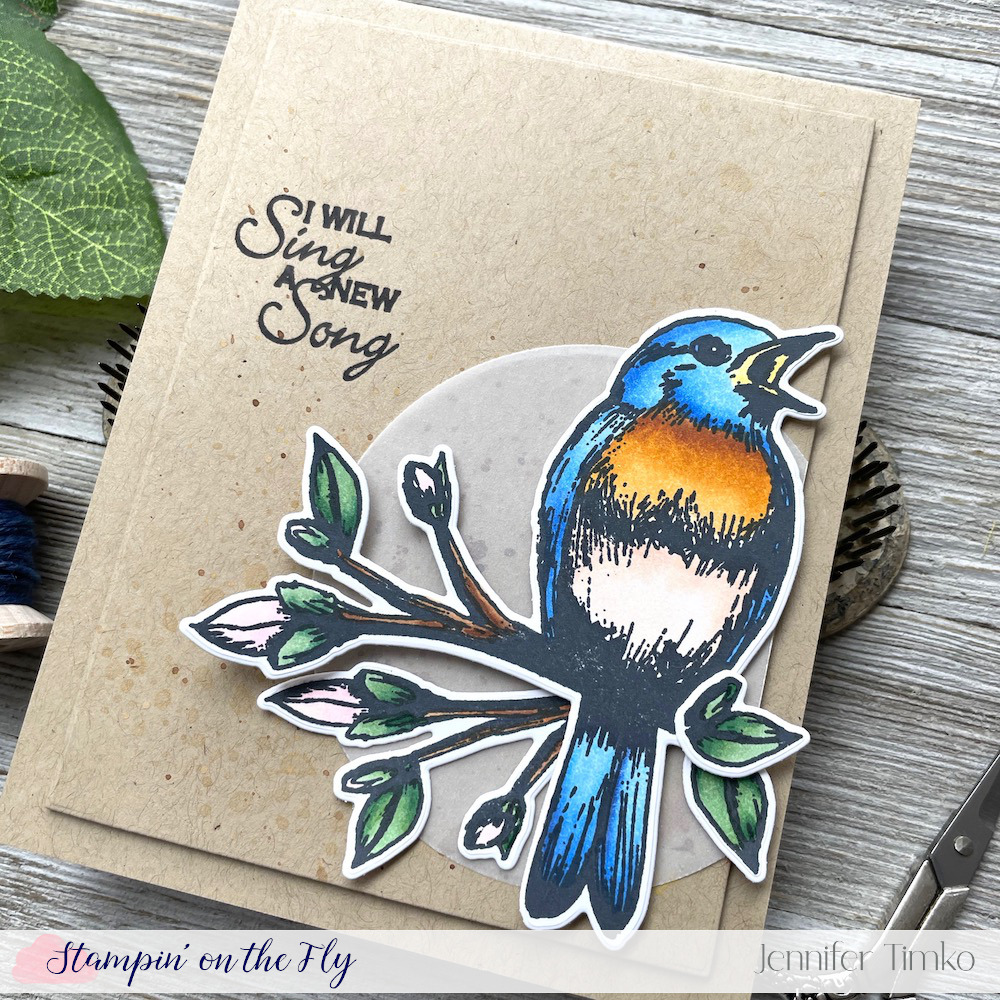
I’m thrilled to be able to offer you inspiration forGina K Designs‘ new release! It goes live tonight (when this post goes up) so you can head right over to see all the amazing products.
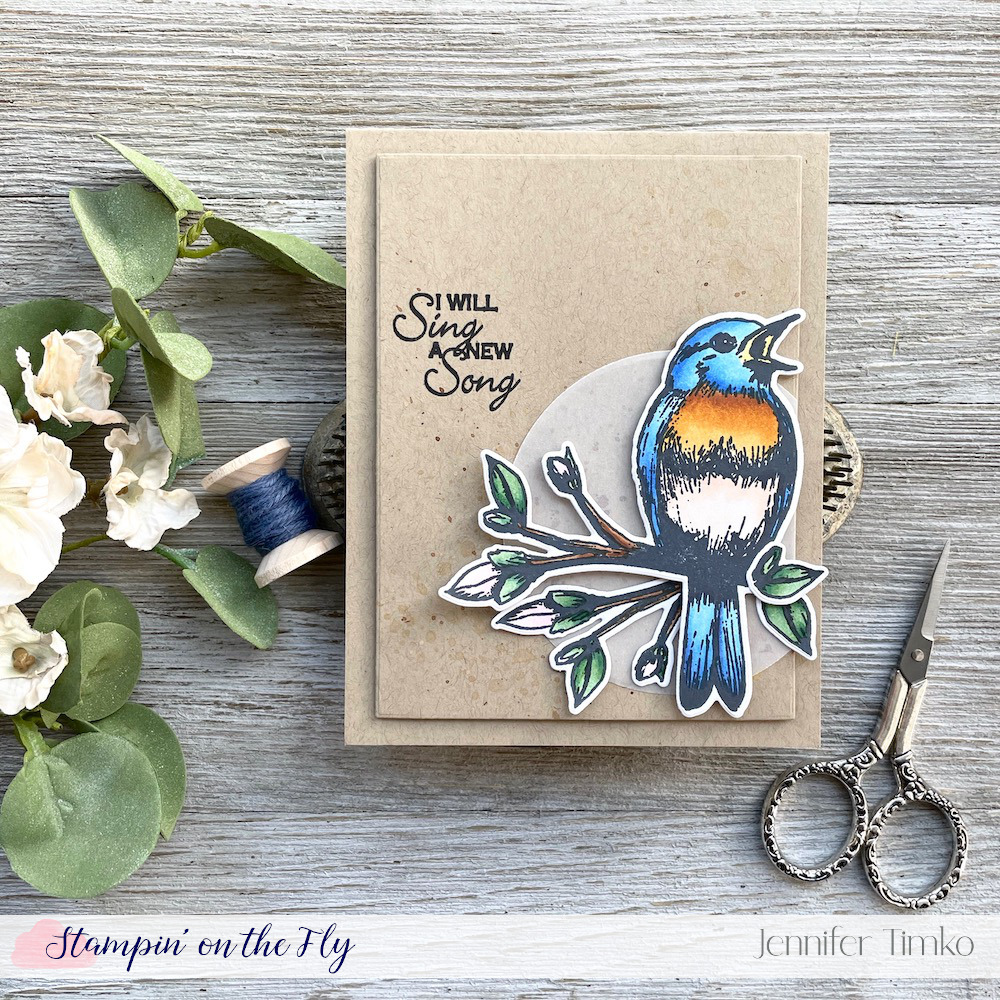
For today, I’ll be showing you Beautiful Birds. And the title says it all. The images are incredible and were designed by Melanie Muenchinger.
I’m sure Melanie had a specific bird in mind when she drew this but I decided it was a bluebird. Because I love them. The image shading is great for showing where colors go and makes it fun to color. I thought my bluebird would be perfect on a cherry tree (I “might” be looking towards spring) so I colored the branch that way and added another branch and leaves from the set too.
After splattering the Kraft card stock with some distress ink, I cut a vellum circle as a layer for the bird. All of the sentiments in the set are beautiful but this one called out to me. And how pretty is the combination of script and print on the fonts?
I hope you enjoy this showcase of the Beautiful Birds set. Again, the shopping is live and I’d very much appreciate you shopping with me here: Shop at Gina K Designs
Hi everyone! A quick update before I get to my card for today. Starting tomorrow, I will be going to training at United Airlines for about 3 weeks. I’ll have a picture at the bottom of the post (gasp…yeah, I know, I never share pictures of me here). The short answer is that I’ll be going to the Captain seat of the Airbus 319/320. So I’ve been working ahead on DT cards and other projects. Even with that, I’ll be pulled back here and will probably miss a couple of FMS weeks. Hope the team doesn’t fire me! *smile* That said, I will have cards coming late tomorrow for Gina K Designs and also on Friday for Honey Bee Stamps so stay tuned.
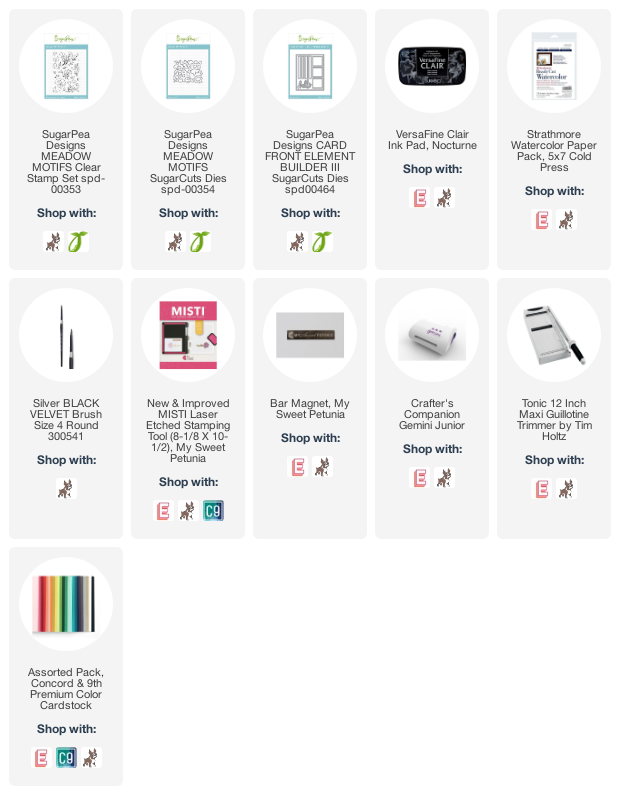
Now for our scheduled programming! The sketch this week for Freshly Made Sketches from the wonderful Judy Rozema lends itself to lots of interpretations. I pulled out some favorite things from SugarPea Designs.
I started with Meadow Motifs, because it is a great place to start. I stamped this sweet flower and did a quick watercolor with Daniel Smith paints. I cut it out with the coordinating dies. Using one of the stitched squares from the Card Front Element Builder III dies seemed like a good choice for the sketch and then I decided to pull out some ribbon.
I haven’t played with a shabby bow in quite a while and I thought it was a nice fit the flower and colors. I do love them! I added a few confetti elements and then put the entire layer on an Eggplant base (Concord and 9th).
Now back to the beginning. In January, I went to a Captain leadership training class in Denver. It was a top-notch event which culminated with us getting our Captain wings from the Executive Chairman, Oscar Munoz.
Thanks for stopping in today. The Gina K Designs release goes live at 7p Central Time tomorrow so I’ll share at that time and then again a card for Friday. Until then, I hope you have a wonderful day.
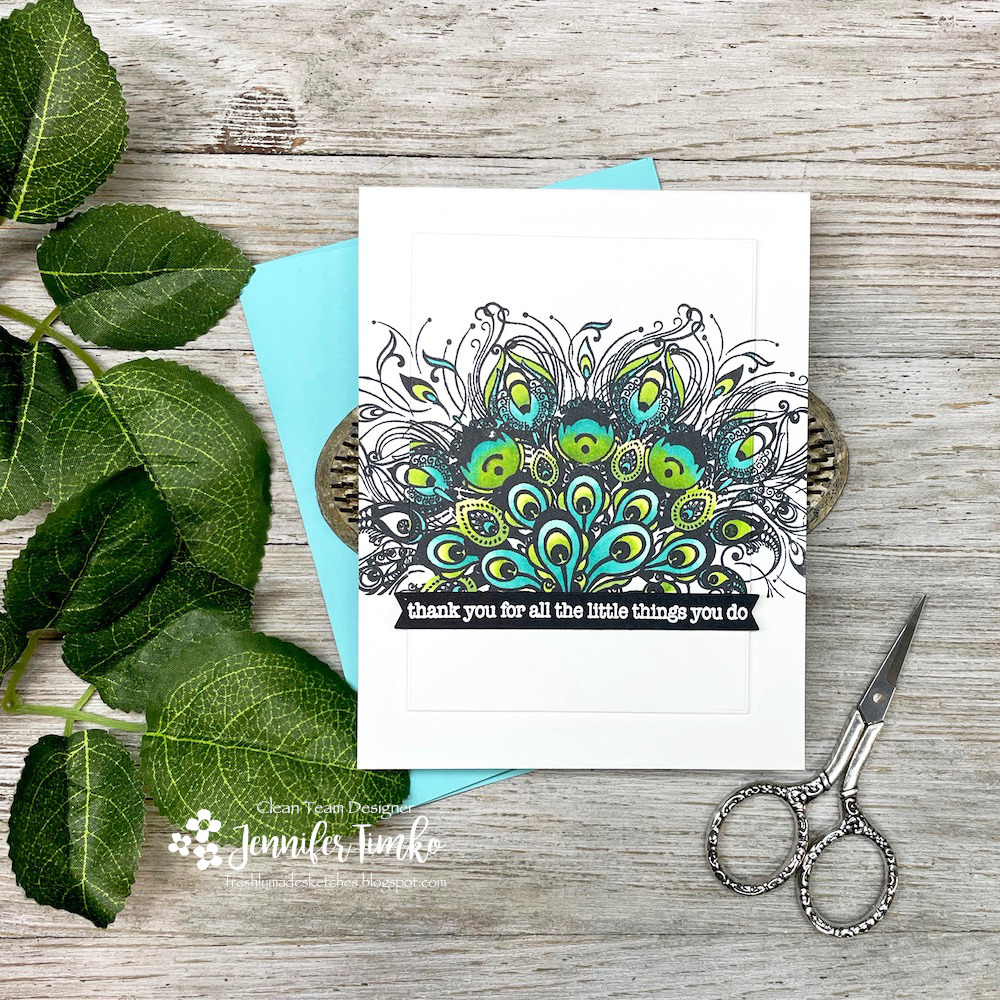
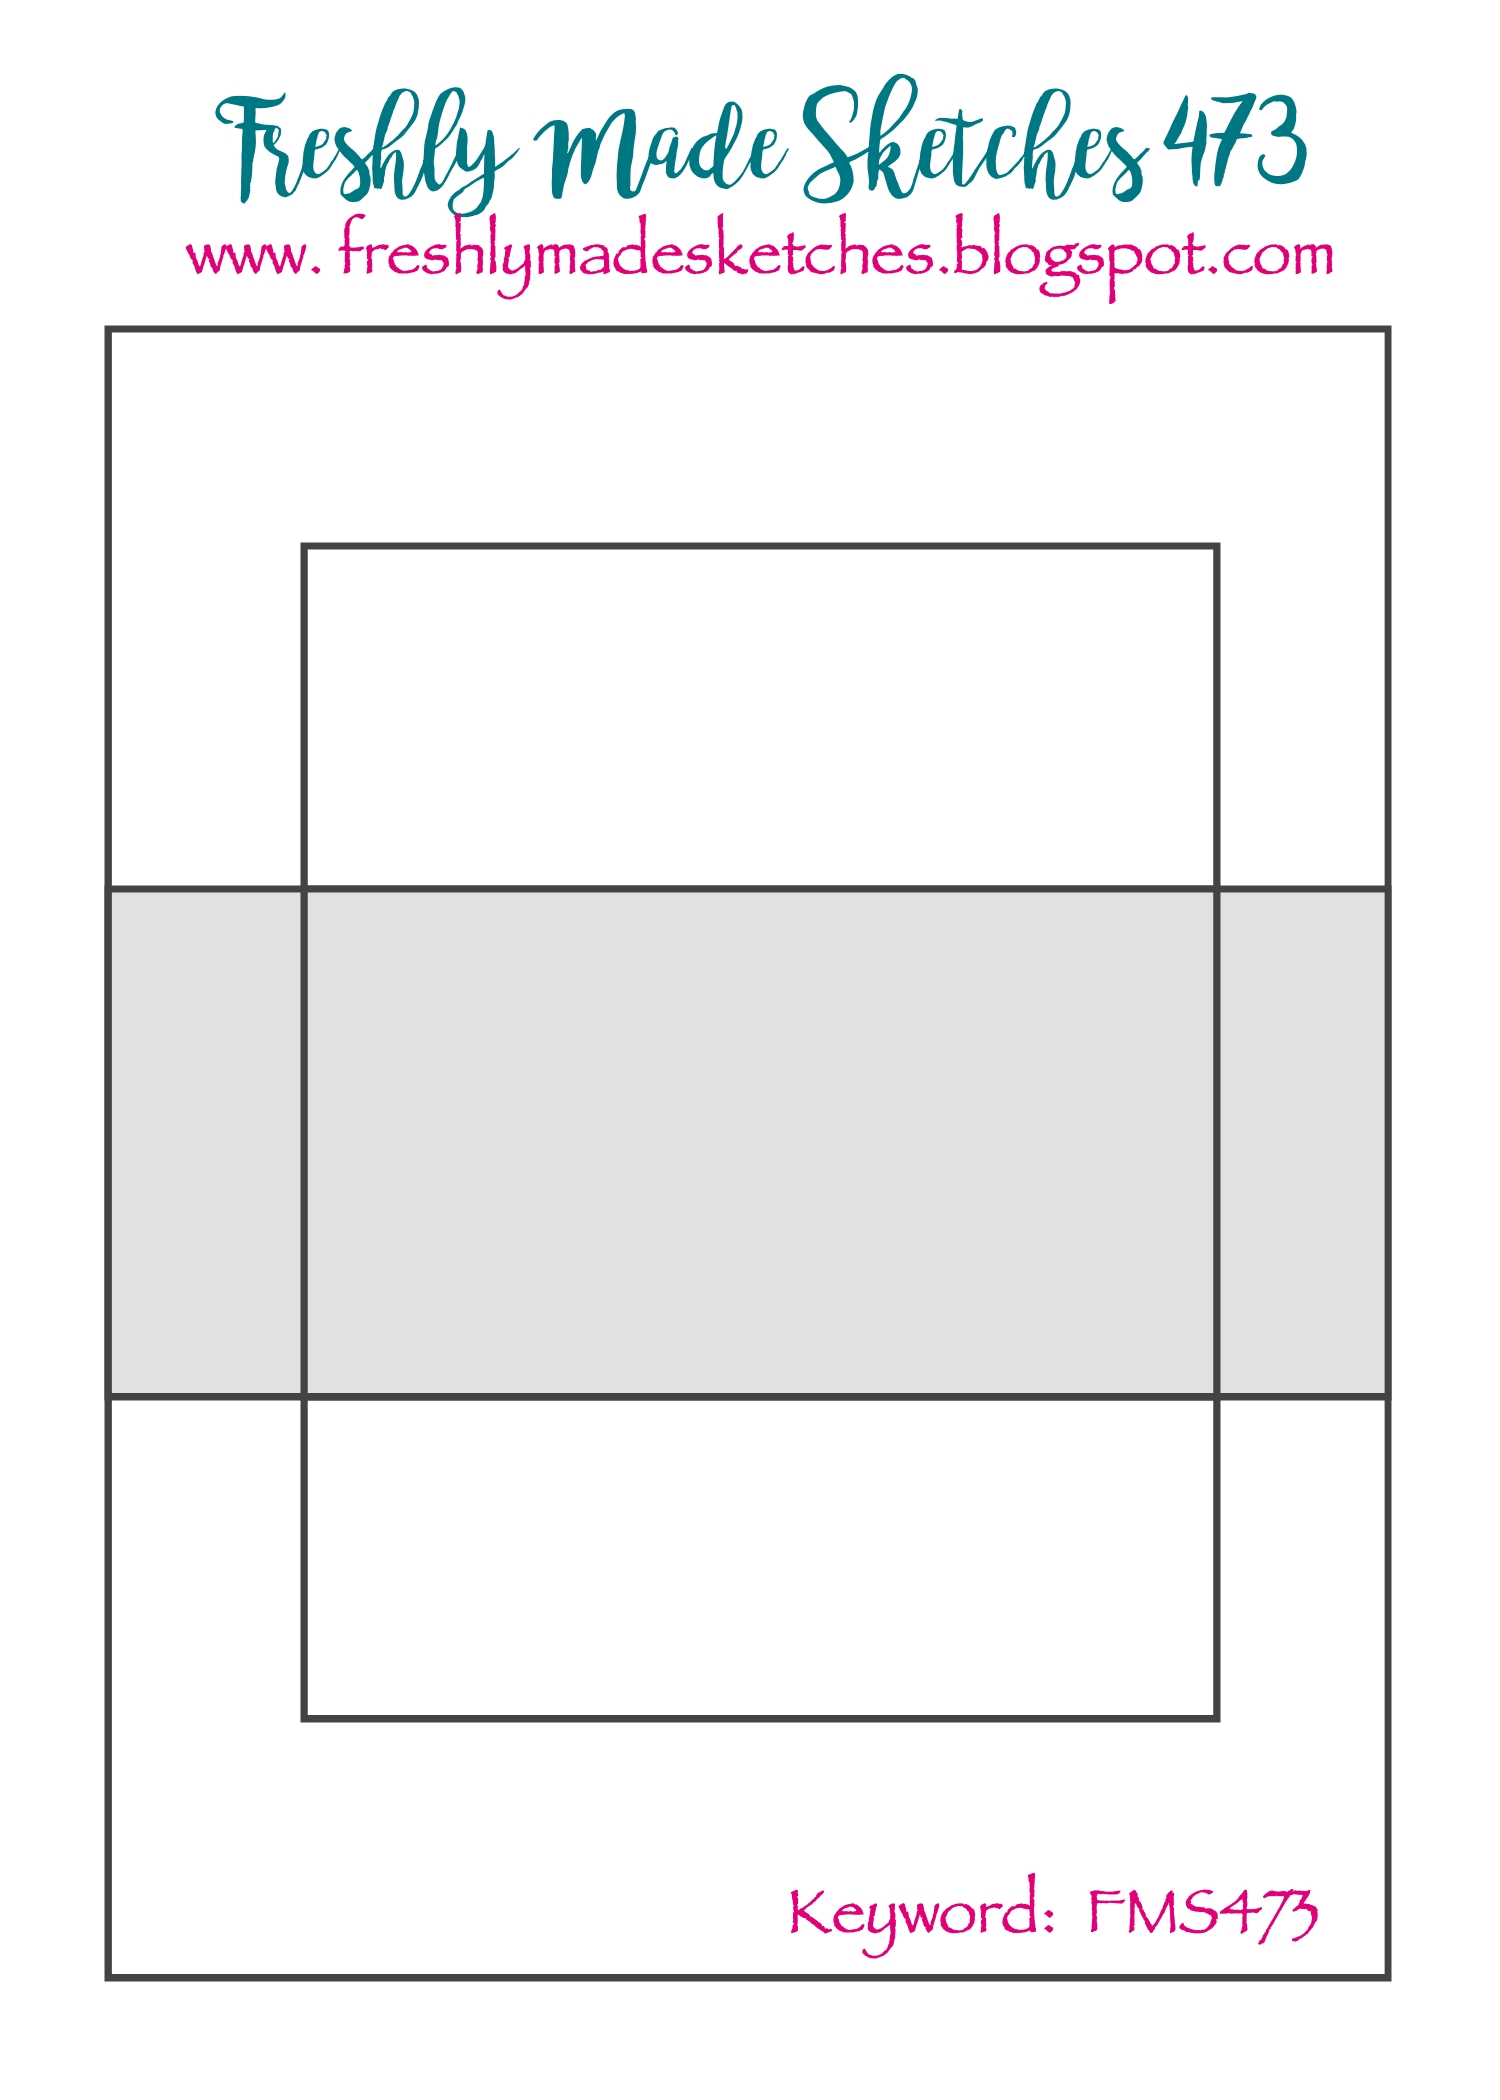
Hi everyone! Busy week for posts this week but I am thrilled to share today’s Freshly Made Sketches challenge. Our wonderful Amy O’Neill has a sketch that will open up all kinds of creative opportunities!
I knew immediately that I wanted a “border” style image and then I came across this Shake Your Tail Feathers stamp from Picket Fence Studios! PERFECT! Using my Misti, I stamped it on a card base and again on another panel. On the top panel, I just colored with Copic Markers and played with shading on my greens and teals. Such fun! I cut the panel down and then chose a sentiment for the crossing panel from the same set.
I hope you enjoy this take on the spotlight technique and will have some creative time to join us this week. I’ll be back on Friday for a new project for Honey Bee Stamps (and a hop!). See you soon!
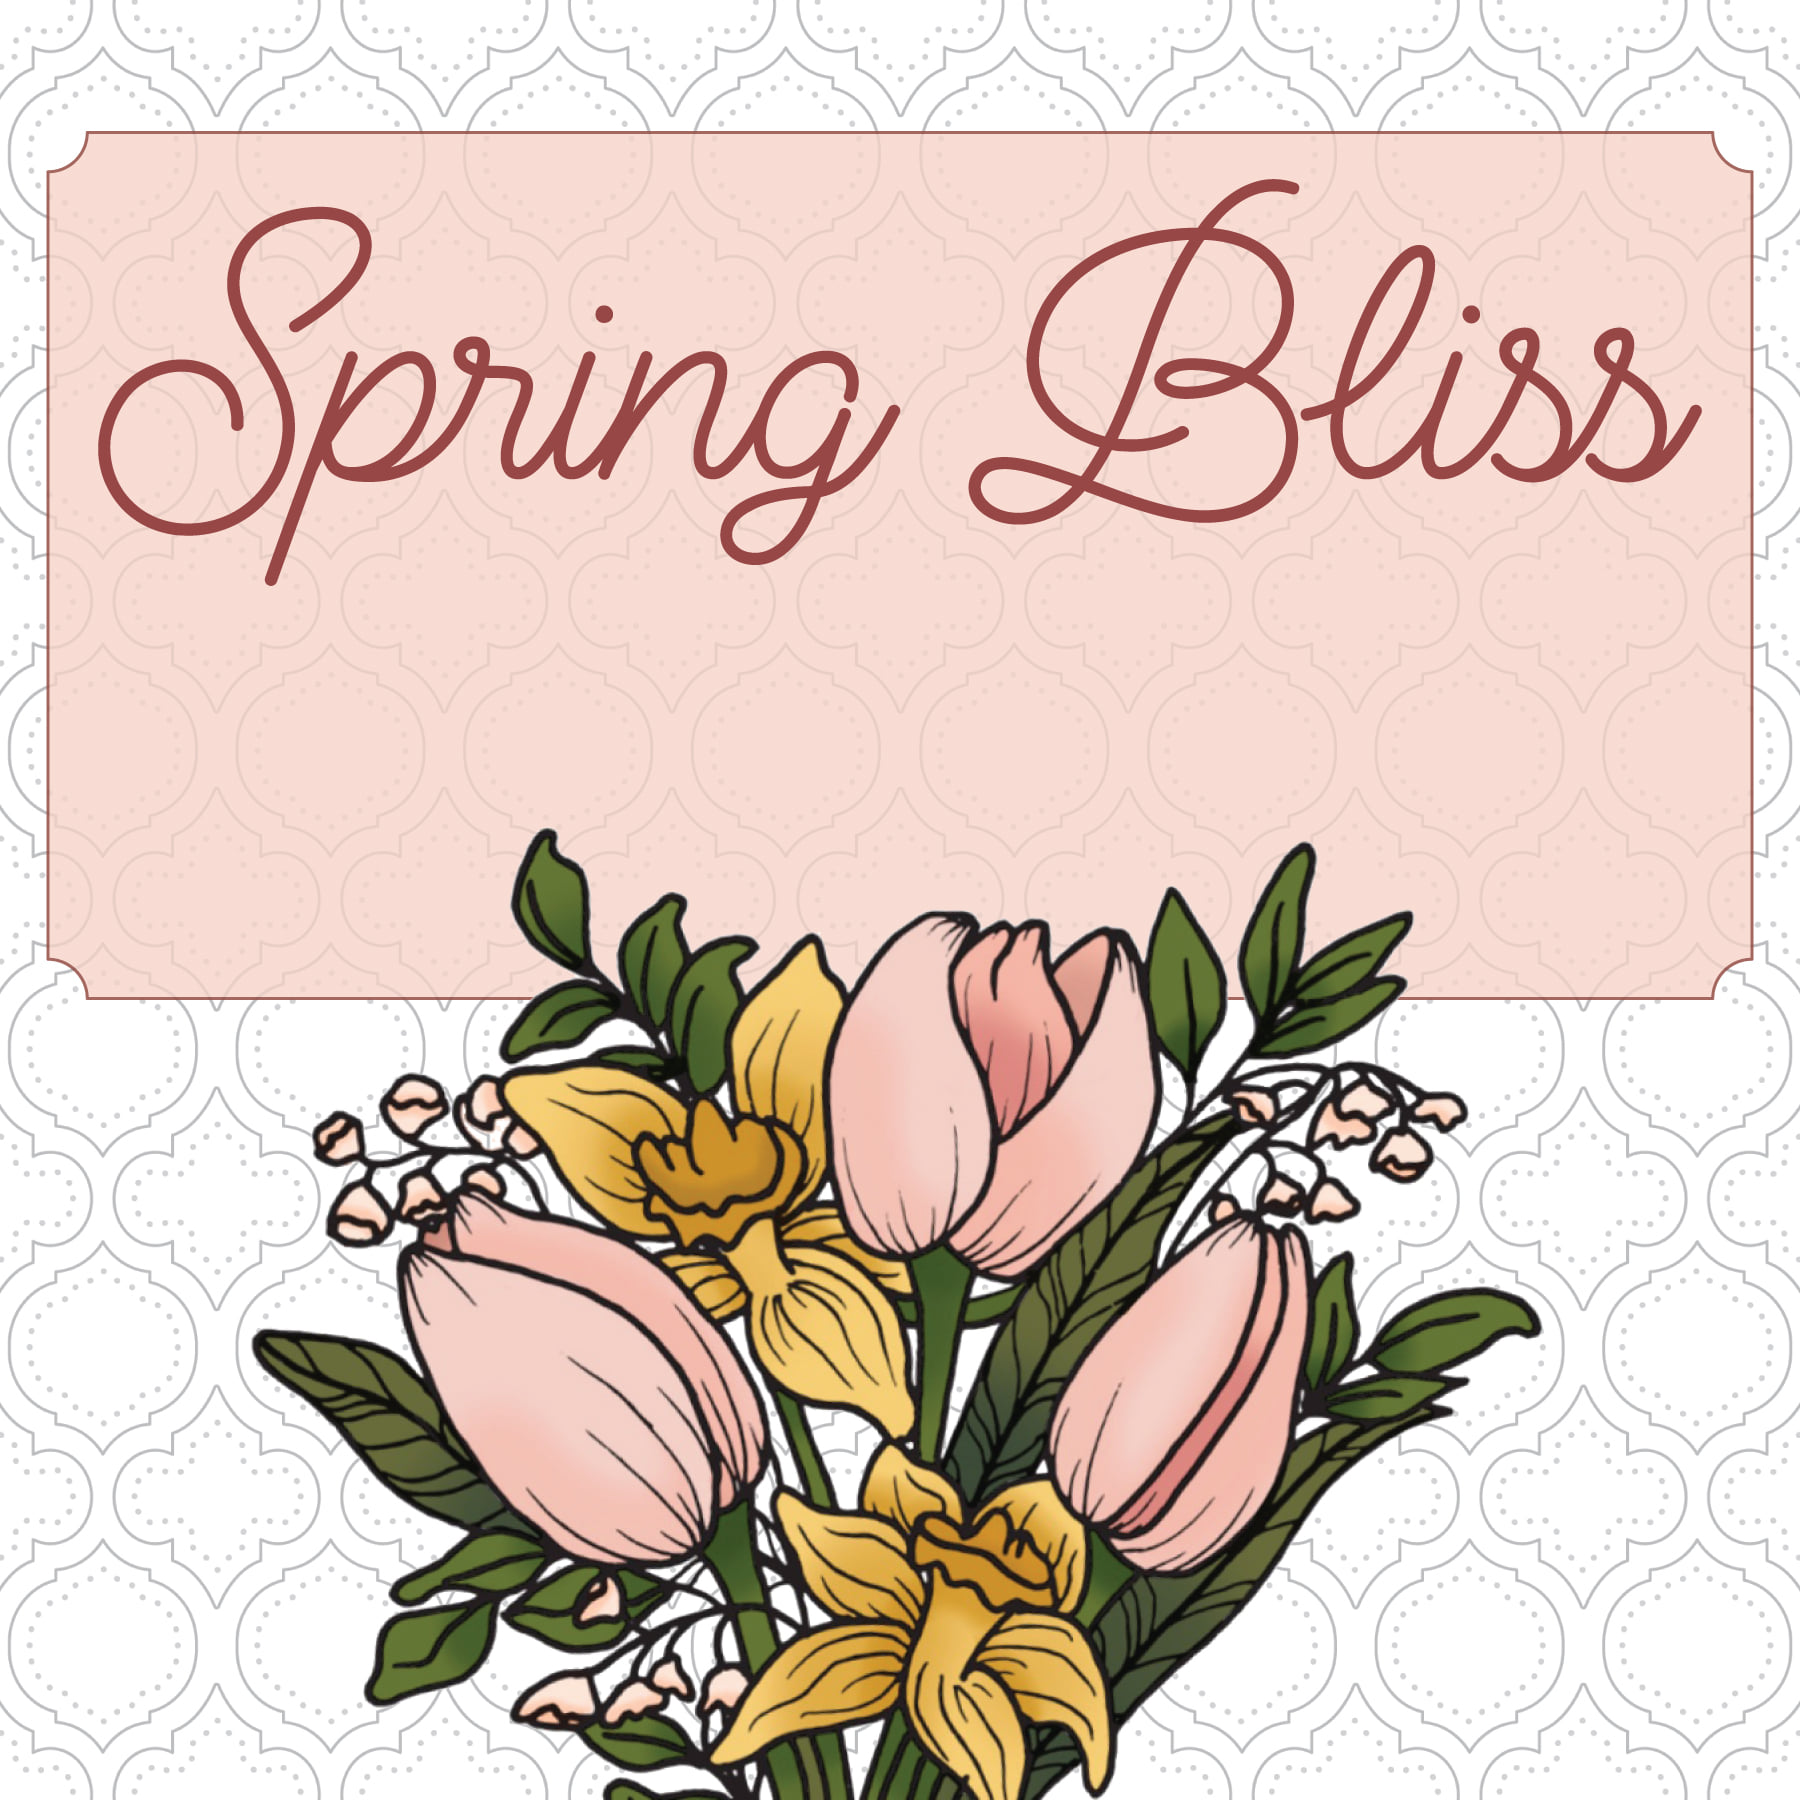
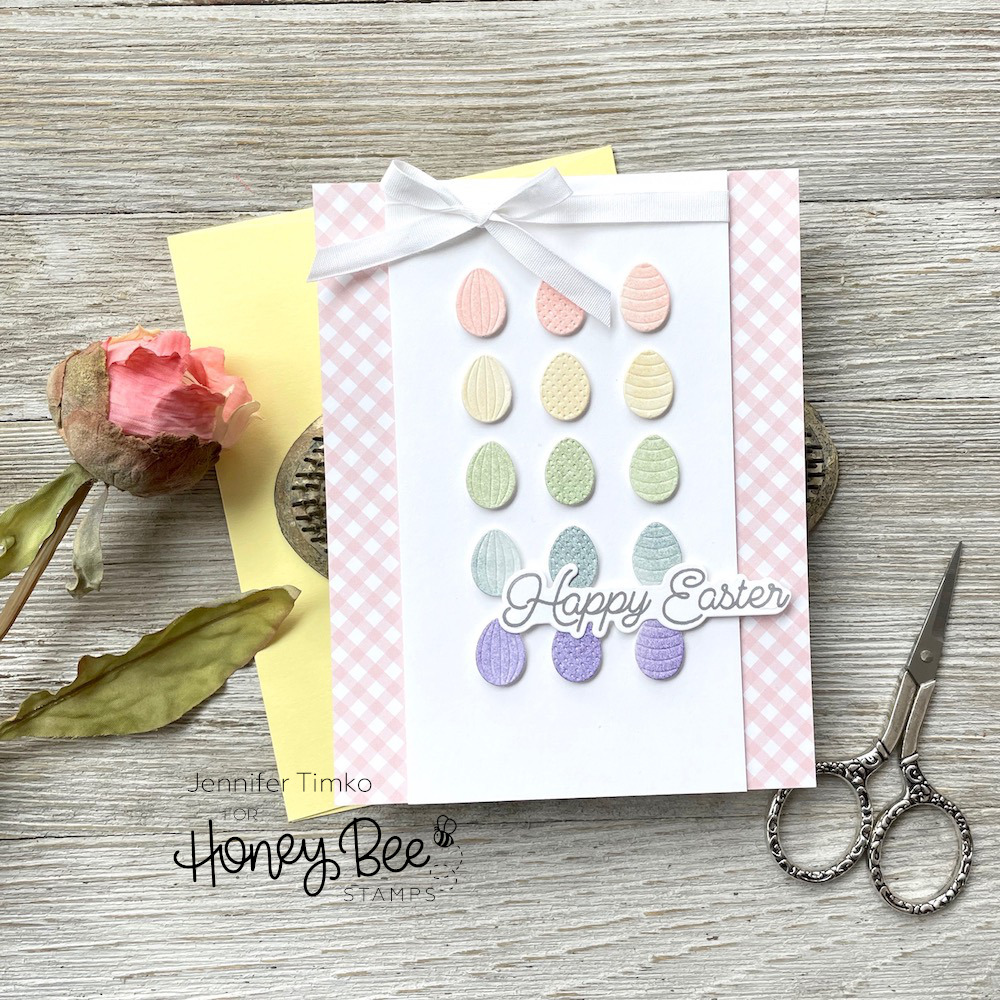
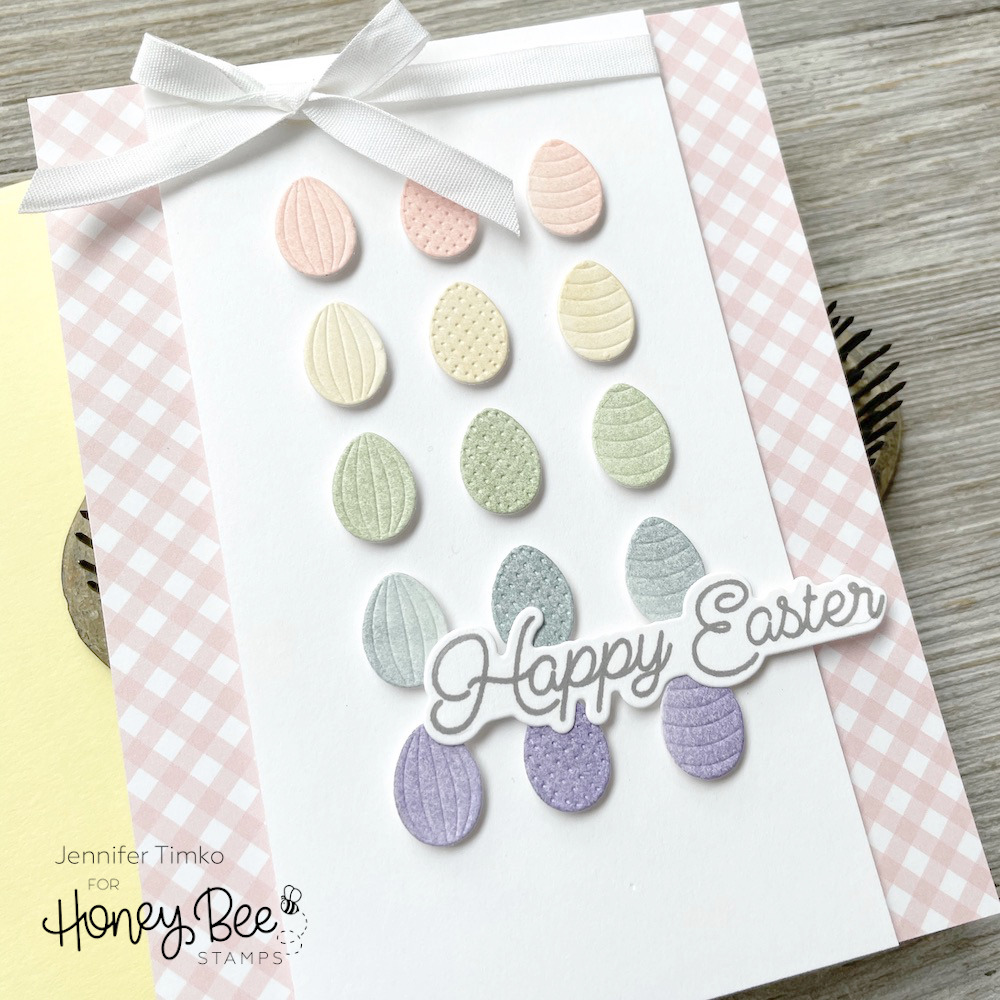
I’m so excited to share a sneak peek of the new Spring Bliss Release from Honey Bee Stamps. The release goes live today, February 16th at 11p Eastern.
Today I’m sharing with you an adorable die set, the Itty Bitty Eggs Honeycuts, along with the Easter Buddiesstamp set and dies, and introducing today’s new product, Playful Pastels Paper Pack. ** Links will not be live until the release launches at 11p tonight **
This little set of dies is just too fun! I took distress ink in different colors and brushed it onto Bristol paper. Then I just got to cutting out the eggs. Super fast and easy! On one of the cuts, I made sure the three eggs were evenly spaced and then I used that negative as a template for placing the eggs on the panel.
I chose a sentiment from the new Easter Buddies set that I thought was the perfect size to not cover the eggs too much. I stamped in Versafine Clair Morning Mist in keeping with the pastels. Finally I just tied on some ribbon from my stash to make it feel more finished.
So glad you stopped by today! Don’t miss the LIVE Release party at 9p Eastern followed by the actual release at 11p.
Primary Sidebar
We use cookies on our website to give you the most relevant experience by remembering your preferences and repeat visits. By clicking “Accept”, you consent to the use of ALL the cookies.
This website uses cookies to improve your experience while you navigate through the website. Out of these, the cookies that are categorized as necessary are stored on your browser as they are essential for the working of basic functionalities of the website. We also use third-party cookies that help us analyze and understand how you use this website. These cookies will be stored in your browser only with your consent. You also have the option to opt-out of these cookies. But opting out of some of these cookies may affect your browsing experience.
Necessary cookies are absolutely essential for the website to function properly. This category only includes cookies that ensures basic functionalities and security features of the website. These cookies do not store any personal information.
Any cookies that may not be particularly necessary for the website to function and is used specifically to collect user personal data via analytics, ads, other embedded contents are termed as non-necessary cookies. It is mandatory to procure user consent prior to running these cookies on your website.