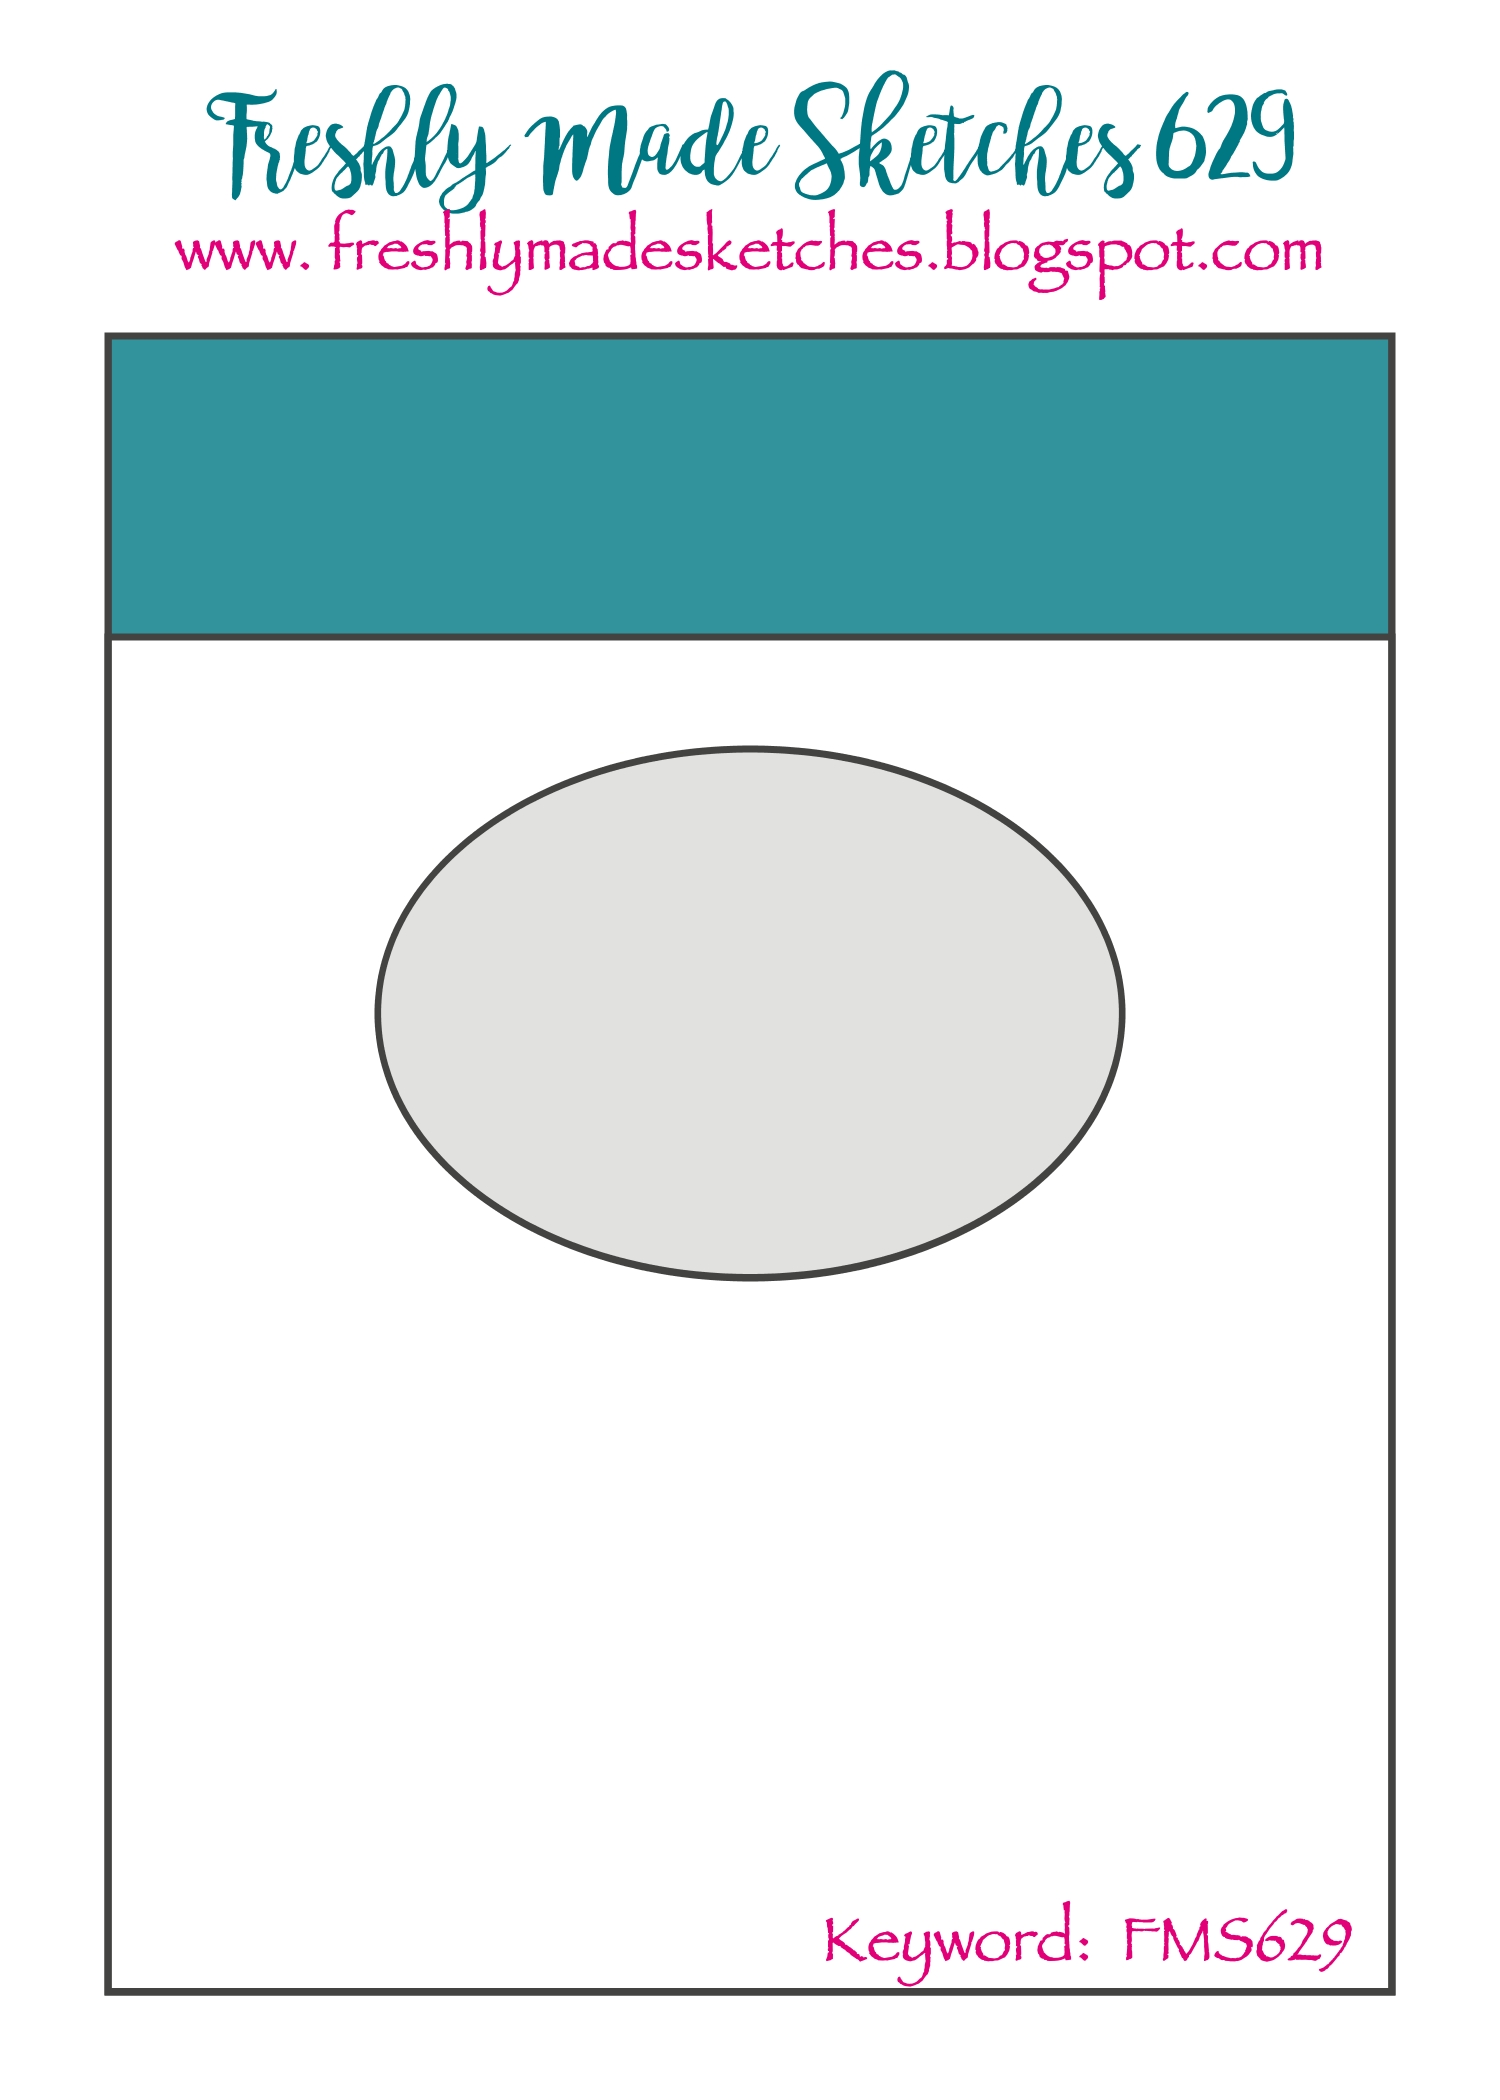
Happy Wednesday, friends! Happy to see you today. I’m so happy to share the latest from Freshly Made Sketches. Our lovely Amy O’Neill is the sketch designer and I love her simple take this week.
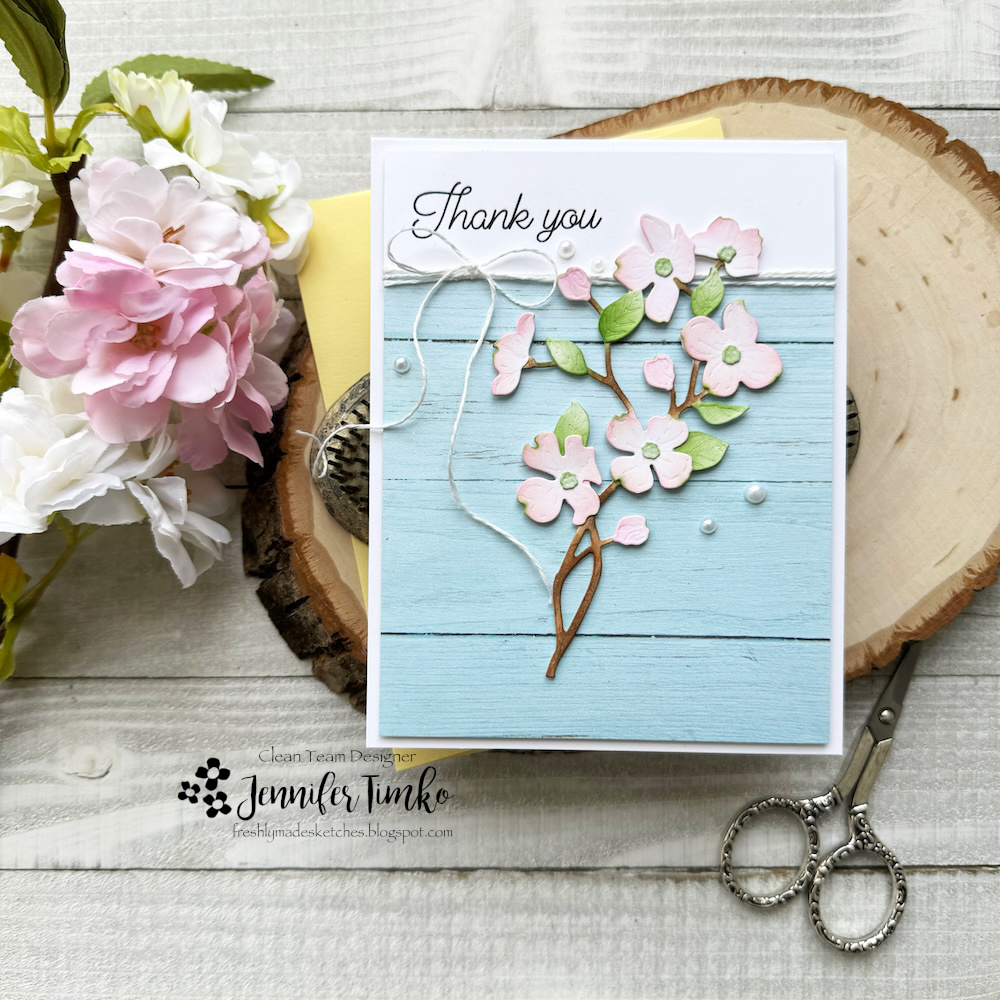
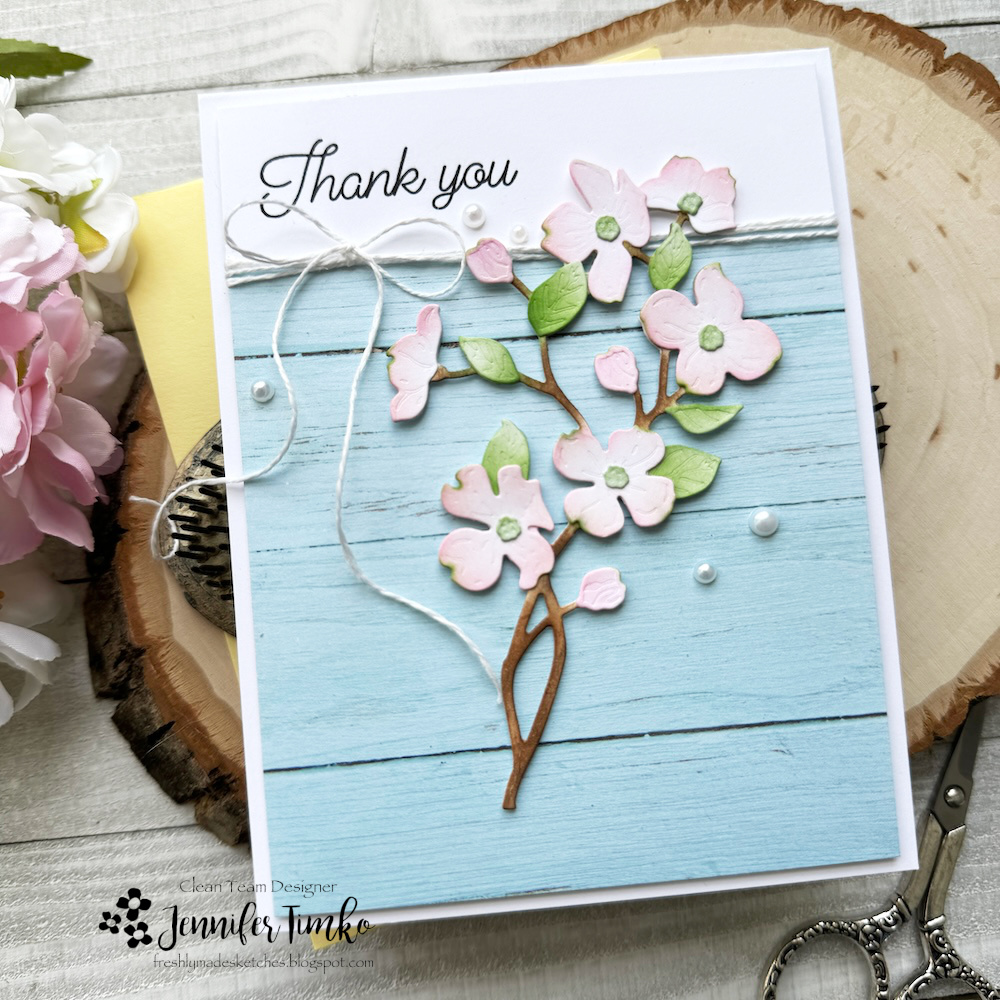
My beautiful cherry tree is blooming in my front yard (just like the famous ones at the Tidal Basin in DC) and that inspired my card. I pulled out the Lovely Layers: Dogwood dies (they are a little less fussy than my Cherry Blossom die) and started playing with ink. Using Bitty Blender Brushes, I added Distress Ink on all the layers and then built the stem. Something about this always makes me happy, especially when I’ve been away from the craft room too long (like lately).
I chose one of the woodgrain prints from the Grain and Grunge paper pack and added a white strip to match the sketch. The sentiment is from Spring Joy (retiring) and I love the pretty font. I added a bit of twine and some pearls to finish it off. So happy to be back to the craft room…and I think I actually have a few weeks where I can get inky!
I hope you will come over to see the beautiful work done by the team and can spend a little time joining us this week. Thanks so much for stopping by! See you soon!
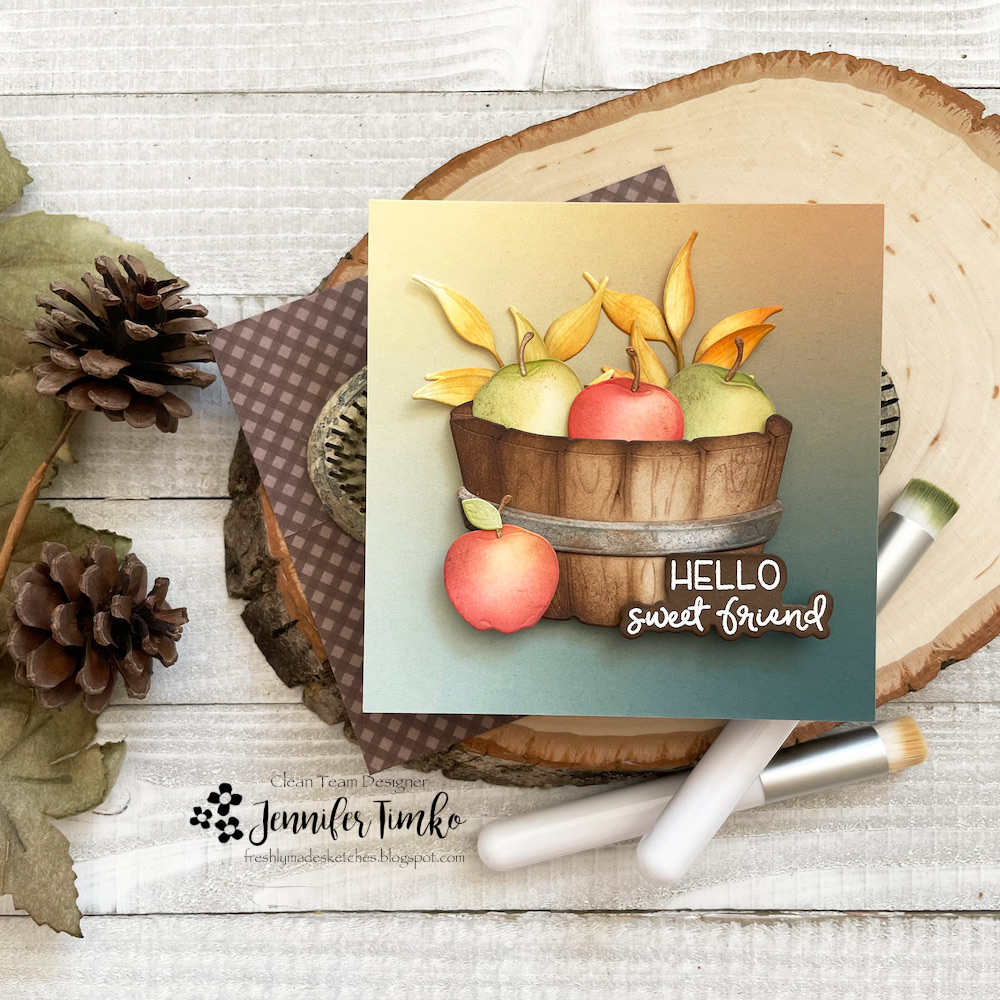
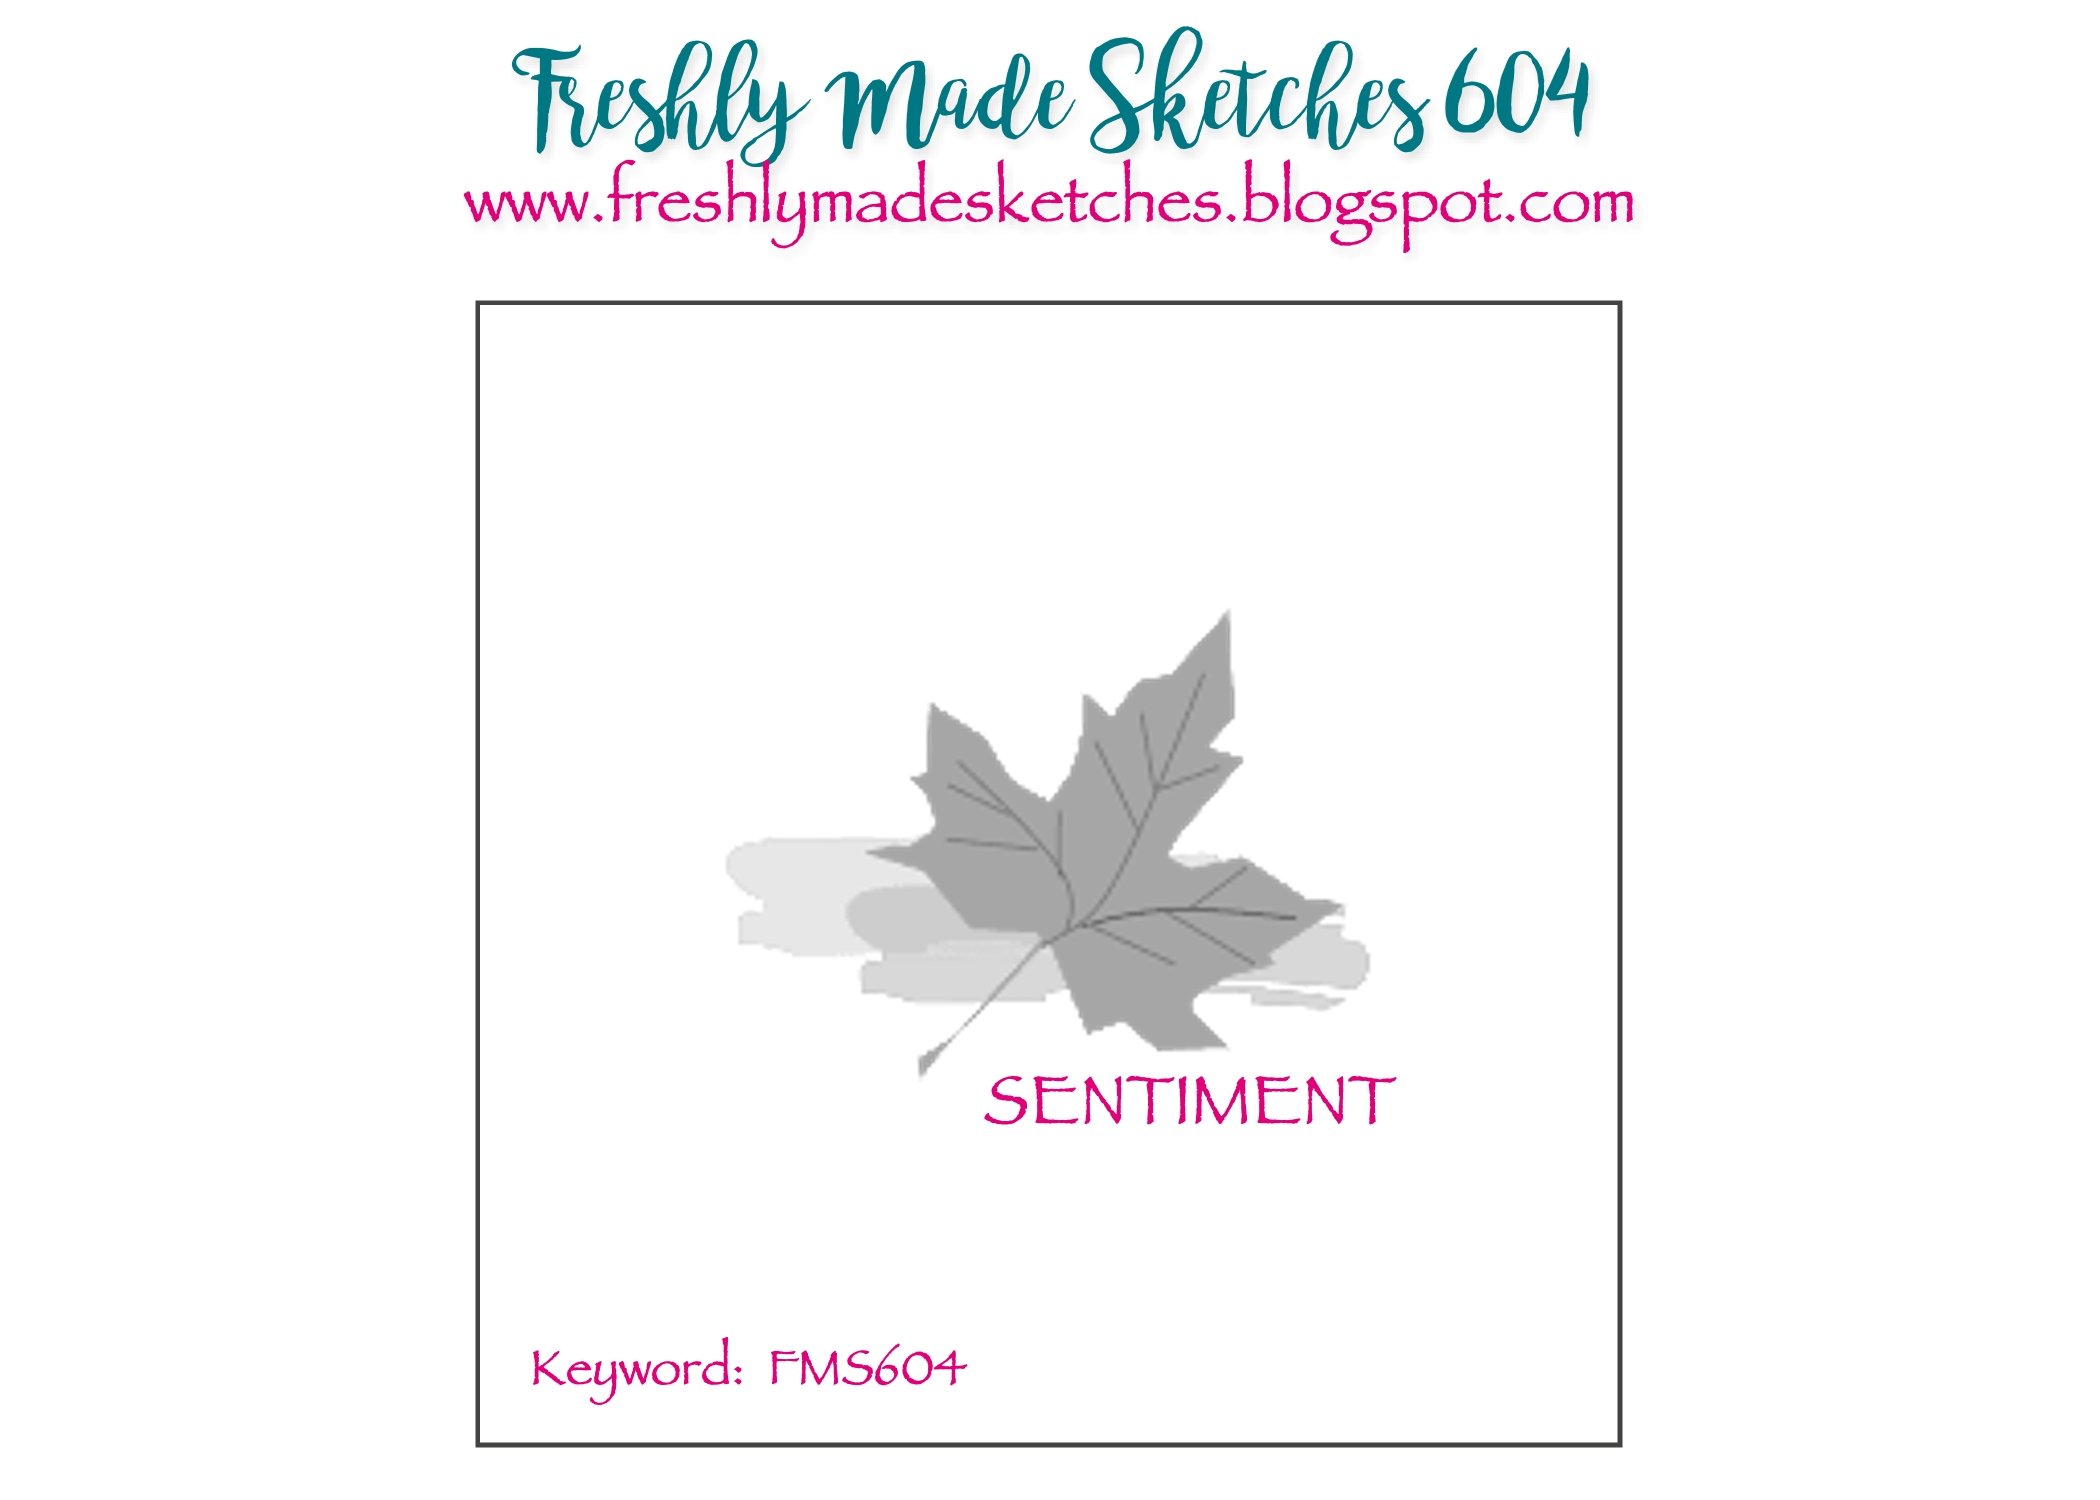
I love sketches with a clear focal point and that is just what we have for you this week! Our talented Cécile Ribon created a gorgeous challenge for Freshly Made Sketches!
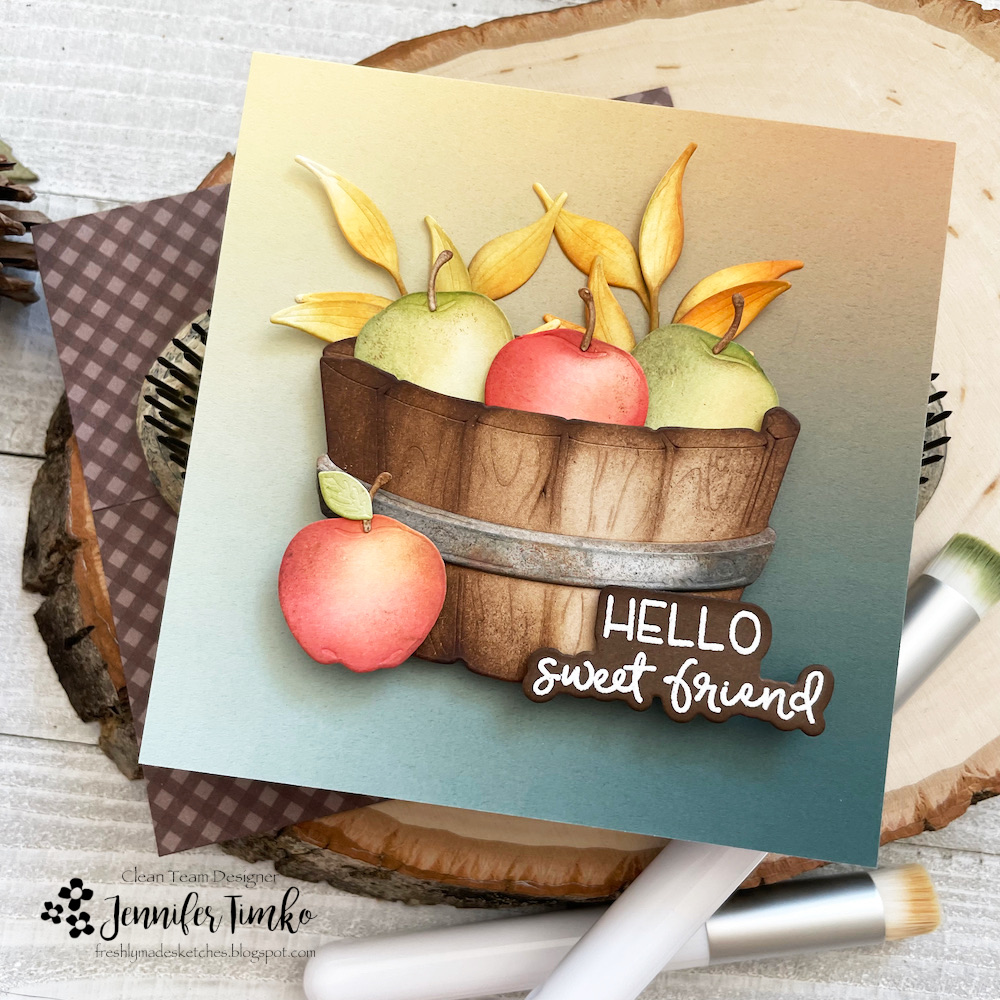
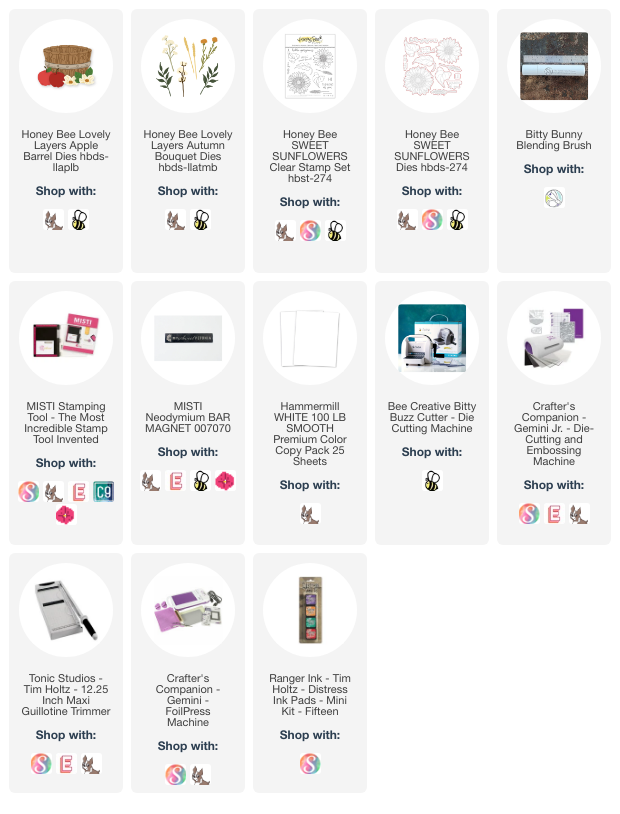
The sketch has a big leaf and that put me right into fall creating mode! I pulled out my new Lovely Layers: Apple Barrel Dies and wow. Just wow. The details on these are incredible. I would love to say my shading was all my own idea but I watched the always amazing Dawn Woleslagle use these and I just went right ahead and mimicked her shading. I cut the pieces from Hammermill White Card Stock and then used Distress Inks for the shading. I cannot even tell you how much fun this was to do!! I didn’t have the same colors as Dawn so I just kind of winged it using some of the apples I got from a local orchard as my guide.
The key to the blending is all in those little blending brushes! The Bitty Bunny Blending Brushes are fabulous! You can color these little die cuts and add shading and nuance. So great! The background paper is from one of the “Free Bee” packs that come with orders from Honey Bee Stamps. The prints are always varied and so usable! Something about this one just made the apple barrel jump off the page. I heat embossed the sentiment onto brown card stock (another idea I stole from Dawn!). I added some leaves from the Lovely Layers: Autumn Bouquet set to try to comply with the sketch a little more.
I hope you like this one as much as I do. And please, do yourself a favor. Click Dawn’s name above and go watch her video. She is a genius! I hope you are having a wonderful week. See you again soon!
Happy weekend to you all! Sorry for the quiet around here. I don’t know about you but I find that summer is actually a bit busier for me on many things that keep me from stamping. Work, of course, but also having the boys around all the time. Which is awesome. And loud! But when it comes to a release, like this new one from Picket Fence Studios, everyone in the house knows to give mom some creative time!
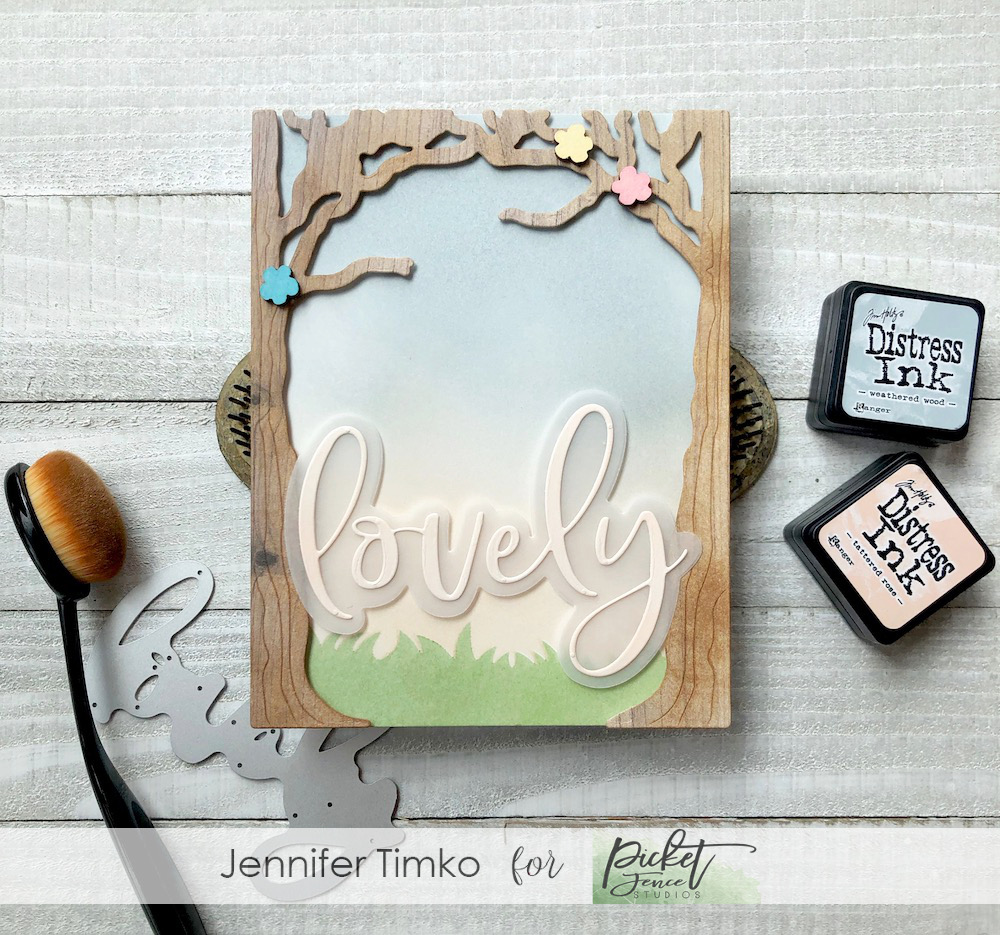
My first card today shares the new Woodsy Forest Die. I love the pretty framing effect this gives and also the detail in the die itself. I used a woodgrain paper from my stash and cut out the trees. It was pretty in itself but then I added a bit of distress ink with my Life Changing Blender Brushes to help highlight the details. To create a background (like peering through the trees), I started with the Layers of Grass Stencil on Bristol Paper with the brushes again. The best part of this stencil is that is has both the positive and the negative. You can create the grass and then add the sky without messing it up. Such a nice touch for a stencil! I kept this pretty simple with just a couple of wooden flowers (again from my stash) that were colored with the inks and then decided that a word die was the way to go. This Lovely Word Die from last month’s release called out. I used the Tattered Rose (like on the sky) again and simply cut out the word. I like the softness of vellum in the background since it keeps to the same feeling of the sky.
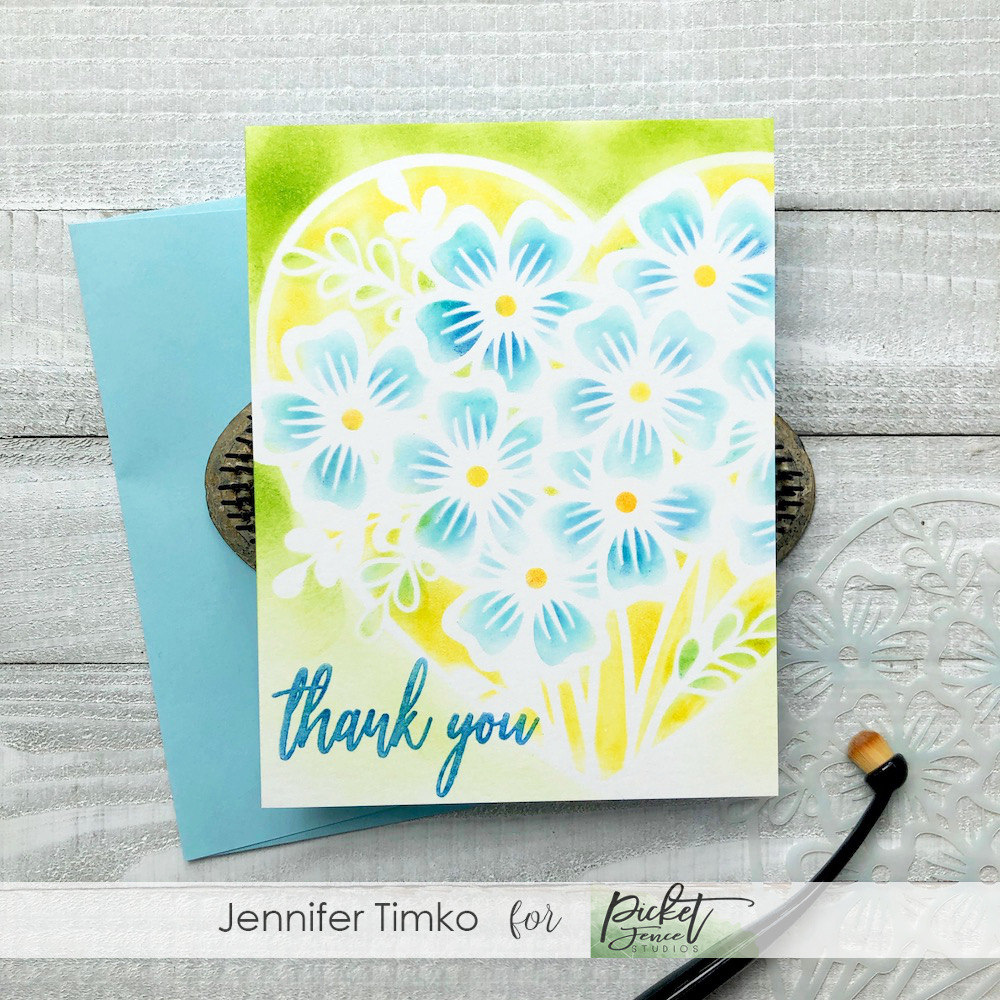
Next up, I went all in on coloring this gorgeous new stencil called Heart of Flowers. It is SOOOO pretty! I found that the little round Blender Brush was perfect (actually I used two of them) to get into the nooks of the stencil. Also super helpful was a product called Pixie Spray. This is a much needed thing if you love stencils as much as I do. What is it? A spray that adds a bit of tack to the stencil so that it stays in place while you color. It made this detail work a breeze with no slipping while I colored. On this one, I used Catherine Pooler inks and the colors blended on so easily. I added a sentiment from the Small Ways to Say Thanks set.
Ok, that is it for today! I’ll have another card to share tomorrow with another set from the release. You are sure to love all the products so hop over to the site to see them all by clicking here: Picket Fence Studios
Thanks so much for stopping in today. Hope you have a great day and I’ll see you again soon.
Primary Sidebar
We use cookies on our website to give you the most relevant experience by remembering your preferences and repeat visits. By clicking “Accept”, you consent to the use of ALL the cookies.
This website uses cookies to improve your experience while you navigate through the website. Out of these, the cookies that are categorized as necessary are stored on your browser as they are essential for the working of basic functionalities of the website. We also use third-party cookies that help us analyze and understand how you use this website. These cookies will be stored in your browser only with your consent. You also have the option to opt-out of these cookies. But opting out of some of these cookies may affect your browsing experience.
Necessary cookies are absolutely essential for the website to function properly. This category only includes cookies that ensures basic functionalities and security features of the website. These cookies do not store any personal information.
Any cookies that may not be particularly necessary for the website to function and is used specifically to collect user personal data via analytics, ads, other embedded contents are termed as non-necessary cookies. It is mandatory to procure user consent prior to running these cookies on your website.