Skip to content

Delightfully Dazzling

Delightfully Dazzling published on No Comments on Delightfully Dazzling

As promised, today’s card is actually not made by me but came all the way from Australia to my little mailbox in Virginia.  What a lovely, lovely treat!!  Monica made this beauty and I must say that, while it is stunning in the picture, it is spectacular in person!  The camera simply can’t capture the sparkle of the Dazzling Diamonds on the ornament.

I just love how that ornament from Delightful Decorations is suspended in the oval.  Make sure you go over and check out the other wonderful things she has made on Monica’s Blog and don’t forget to leave her some comments about this card. 

I’ll be back tomorrow with a new color challenge from ColorLab that uses one of my all time favorite colors (it returned because I think I wasn’t the only one!)…hint, hint!  Have a great Wednesday!

SUOC8 – Garnet and Gold

SUOC8 – Garnet and Gold published on 9 Comments on SUOC8 – Garnet and Gold

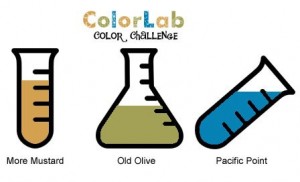
Ok, it isn’t really Garnet and Gold but when you went to The Florida State University that is what Bravo Burgandy and More Mustard look like to you!!  While it wasn’t an auspicious football year, at least we beat the Gators and that is something to cheer for (Gators, please hold your comments…it has been quite a while since we have won!). 

Alright, back on task…the challenge this week for the SUO Challenges is Embossing with a Color Challenge:  Bravo Burgandy, More Mustard and Very Vanilla.  The easiest way I know of to add dry embossing to a project is to pull out the Big Shot and there is no better way to add dimension to a simple layout than using the Square Lattice Embossing Folder!  For any new readers, this had been my favorite embossing folder and I have used it heavily since I bought it.  You just can’t go wrong with it!  I stamped out some leaves from my Day of Gratitude set and stamped them in Mustard and Burgandy.  I cut one out and popped it up on Dimesionals and put on a sentiment from the same set. 

I tied on the button from the Regals Collection with some thread.  I took the thread and colored it with my Burgandy marker to give it that finished look.  Amazing how such a small (and easy) detail can complete the coordination!

I don’t know about you but I get so focused on making all my Christmas cards that I forget about all the thank you cards I’m going to need after the holidays!  At least one is done now!  Don’t forget to go see all the fantastic projects from the rest of the team at SUO Challenges…you’ll be impressed with the wide variety of styles with this color set!  The challenge is open for two weeks so you should have plenty of time to join in.  Can’t wait to see what you make!

I’ll be back later this week with a beautiful card that I received Australia (imagine my excitement!)!!  Until then, have a great week!

Stamp:  Day of Gratitude (Holiday Mini); Paper:  Bravo Burgandy, More Mustard, Very Vanilla; Ink:  Bravo Burgandy, More Mustard; Accessories:  Vanilla Satin Ribbon, Regals Designer Buttons, Thread (non-SU)

All products are Stampin’ Up unless otherwise indicated.

Rejoice!

Rejoice! published on 14 Comments on Rejoice!

Yesterday was Gaudete Sunday, the third Sunday of Advent.  Gaudete is taken from Phillipians 4:4,5 which says, “Gaudete in Domino semper” or “Rejoice in the Lord always”.  The third candle in the Advent Wreath is rose instead of purple to signify this attitude of joy.  I thought it appropriate, therefore, to make a card expressing this simple feeling.  I will post the card first but please continue on to see another wonderful reason for me to celebrate.

This uses the Mojo Monday 169 sketch.  It has been forever since I have done this challenge and the rounded corners really step up the layout!  I am also participating in The Paper Players Challenge 28 to use a favorite color combination.  I’m not sure how to really choose a favorite but I have to say that Early Espresso and Cherry Cobbler have been my go-to colors as I make my Christmas cards this year.  Today I added in Crumb Cake but I also love Soft Suede with them.  I should be making “easy to duplicate” cards right now but this is what I was inspired to do this morning.  I cut the flowers from the Deck the Halls DSP and used more of it as the layers.  The Cherry Cobbler Seam Binding makes another appearance and may have a lot to do with my choosing Cherry Cobbler as a favorite!  Finally, I used the Splitcoaststamper TLC303 challenge to sponge.  I sponged around the flowers and the DSP layers to add some dimension.

Now for the rest of my reason to rejoice.  Last week, my oldest son was busy on something when I asked him what he was up to.  He said that he was making an Advent Wreath for his room and to wait until he was finished to look.  Candles in a little boy’s room concerned me but I waited.  Take a look at what he made:

As you can see, he tucked the “flame” behind the candle so that each one could be lit during the correct week.  Now why didn’t I think of that??!!  Yesterday morning, he came in to tell my husband and I that we needed to come to the lighting ceremony for the third candle in his room.  This is what he wrote for the ceremony:  “This week is the week of joy.  We want to have joy in our hearts.  And if you see someone that is lonely, play with them.  Why, because they will have joy.” (Printed with his permission)  So you see, in this season where it is easy to lose focus on why we celebrate, my son has given me reason to rejoice!!  I celebrate the kindness in his heart! 

Thanks for joining me today.  I’ll be back tomorrow with my first challenge as a design team member with SUO Challenges!  I hope that you, too, have many reasons to rejoice this week!

Card:  Stamp:  All Holidays; Paper:  Deck the Halls DSP, Early Espresso, Cherry Cobbler, Whisper White (inside); Ink:  Early Espresso; Accessories:  Cherry Cobbler Seam Binding, Neutrals Buttons, Linen Thread, Dimensionals, Corner Punch, Sponges

Wreath:  Non-SU construction paper (yes, now I wish I had given him some of my good paper)

All products are Stampin’ Up unless otherwise indicated.

SUO Challenges Design Team

SUO Challenges Design Team published on 6 Comments on SUO Challenges Design Team

You may notice today that I have a new little blinkie on my sidebar.  I was asked to be one of the new members of the SUO Challenges Design Team and I couldn’t be more thrilled!!  If you are not familiar with the SUO Challenges site, you really should take a look.  They post challenges every other Tuesday demonstrating wonderful ways to showcase the fabulous products offered by Stampin’ Up!  It isn’t too late to join in the current challenge, SUO Challenge 7 Clean & Simple Christmas Cards.  We all have those in our repetoire and I would love to see them (because I still have to finish mine…she says quite selfishly looking for more ideas). 

My sincere thanks to the whole team for choosing me to join their ranks.  Go take a look at their blogs and you will see some amazing talent!!

Amy Fink

Cindy Coutts

Deb Hoekstra

Karen Barber

Melina Pylant

Michelle Laycock

Patricia Weitzel

I look forward to my first challenge with them starting next Tuesday.  Make sure you drop by the challenge site then to see what everyone has to show you!  I hope you have a great Friday!

ColorLab 20 – Joyful Wreath

ColorLab 20 – Joyful Wreath published on 12 Comments on ColorLab 20 – Joyful Wreath

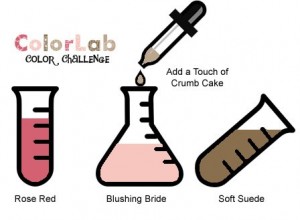
The team at ColorLab is back with a challenge!  Take a look at this great holiday combination:

I got back into my Christmas stamping with this one!  I pulled out my Season of Joy set which, I must admit, has been sitting in the bottom of my drawer waiting its turn.  Not only did I stick to one stamp set today, I actually stuck to one stamp.  I know…say it isn’t so!  The collage stamp in that set is so wonderful when used all together but there are elements in it that are great too.  I used the snowflake (just the right size!) and inked it with my Old Olive and Garden Green markers to form the wreath.  The sentiment at the bottom comes from the stamp too and was also inked with markers.  I used my Regals Designer Buttons as flowers for the wreath and also to tie the Cherry Cobbler Seam Binding (did I mention enough yet how happy I am that I replenished my stock?!).  The positioning of the snowflakes was easy with my handy-dandy Stamp-a-ma-jig.  Not sure how I ever stamped without it!  I added some of the Brights Paper Pack behind the image panel.  The layout is courtesy of Mary-Jo and her Techno Stamper Monday Sketch Challenge 151.

As you finish up your own holiday cards, don’t forget that you can “repurpose” branches, snowflakes and other sets into wreaths.  I love it when I can use a set in a way that is a little different!  Thanks for stopping in today.  If you have time, tell me your favorite set to use for making wreaths.  See you again soon!

Stamp:  Season of Joy; Paper:  Brights Paper Pack DSP, Cherry Cobbler, Whisper White; Ink:  Cherry Cobbler, Garden Green, Old Olive; Accessories:  Regals Buttons, Cherry Cobbler Seam Binding, Stamp-a-ma-jig, Thread

All products (other than the thread) are Stampin’ Up!

A moment for the scarlet tanager

A moment for the scarlet tanager published on 5 Comments on A moment for the scarlet tanager

Yes, the scarlet tanager.  At least by me, this is an under-appreciated bird.  In fact, I didn’t know anything about it until I was looking for bird colorings.  It seems appropriate that he should get his own post as an apology.  What is this bird??  Here is a picture:

Cute little fellow, isn’t he?  I was looking up red birds because I was using the color challenge from Splitcoaststampers CC300.  The challenge was to use an old challenge and I chose CC233 Real Kraft Chocolate.  I admit that I used the colors a little loosely and I actually used Cherry Cobbler, Crumb Cake (Kraft) and Early Espresso.  I think I hit the spirit of the challenge but wanted to use my current papers.  I also used the sketch challenge from the Sweet Sunday Sketch Challenge 95.  Karen outdid herself again with a really usable sketch!  I changed it to a rectangle instead of a square.  It seems I had a hard time following directions today!

I stamped my image on Watercolor Paper and chose the phrase from the set too.  I watercolored with my blender pen using Cherry Cobbler, Crumb Cake, Soft Suede and Early Espresso.  I am so in love with this stamp set and can’t wait to make more cards with it!  I chose papers from my Deck the Halls DSP (Holiday Mini).  Isn’t it great that it works so well for a non-holiday card??!!  I had run completely out of Cherry Cobbler Seam Binding and finally received my replacements….can you tell?  Love that ribbon and I’m happy to tell you that there are new colors coming in the Occasions Mini (yes, those are on the way, too!).  I chose an Antique Brad and bunched the ribbon, punched a small hole with my 1/8″ hole punch and attached the brad to the image panel. 

This is a birthday card and I try to make sure that the December birthday people in my family get a distinctively non-Christmas card.  I think this accomplishes the goal!  I’ll be back to Christmas stamping for the rest of the week and you can expect to see my Color Lab card next.  See you again soon!

Stamp:  Every Moment; Paper:  Deck the Halls DSP, Cherry Cobbler, Watercolor paper; Ink:  Crumb Cake, Soft Suede, Early Espresso, Cherry Cobbler; Accessories:  Antique Brads, Cherry Cobbler Seam Binding, Blender Pen, Dimensionals, 1/8″ Hole Punch

All products are Stampin’ Up!

Here comes Santa…

Here comes Santa… published on 6 Comments on Here comes Santa…

And he is all ready for your presents.  This is another of my tags for my class last week.  It is a pretty direct CASE of “Melbarkwith” over at Splitcoaststampers.  Melissa’s blog is great and here is the card I used.  I love that these are perfect for my kids’ presents.  Even better, some of my class members are going to use them for teacher gifts.  I added the Dazzling Diamonds with my Two-Way Glue Pen to give ol’ Santa a little sparkle.  His face has a little Blush Blossom to make him rosier.  I am just in love with stamp set and all of the possibilities.  While the previous tags I posted were my favorites, my boys liked this one the best.  I guess Santa just has that effect on children! 

Thanks for stopping in today.  I hope to see you again soon!

Shimmer rewash

Shimmer rewash published on 10 Comments on Shimmer rewash

I’m back to work on my Christmas cards this week and there were some challenges to get me on track.  The first is the SUO Challenge 7 for Clean & Simple Christmas Cards.  Over at Splitcoaststampers there are two challenges today, the first is the CAS challenge to use bows and the other is the Technique Lovers Challenge for emboss resist.  Finally, Shelli Gardner over at So Shelli asked for techniques as her challenge this month.  I have to say that after all the classes I have been having that my creative level is a little low.  I’m sure that will be fixed soon enough but I was happy to have a little help from the challenges. 

I saw the technique called “emboss rewash” while I was at the Stampin’ Up Regionals in October.  Shannon West did a demo of the technique and I loved it!  It is a version of emboss resist using watercolor paper and an Aquapainter.  You emboss your image and then, instead of sponging, you “wash” the color around the image with your wet Aquapainter and ink.  I tried it on today’s card with the snowflake from Snow Swirled.  I stamped it in Versamark ink, embossed it with Clear Stampin’ Emboss Powder then washed over my Night of Navy ink.  It looks incredibly cool!  To add a touch of holiday feel, I then washed over some Frost White Shimmer Paint too.  Finally I stamped the words from All Holidays (one of my favorite sentiments for Christmas cards!) in Night of Navy ink.  I kept the layout simple and just added my Vanilla Satin bow and a Basic Pearl.  I love how the shimmer paint and ribbon make this feel special but that it is really easy to duplicate for a lot of cards!  The hardest part of this was getting a good picture since the shimmer kept reflecting back.

I know this picture is a bit dark but I had to take it in shadows so you could see the image.  Here are a couple more pictures where you can really see the pearlized look of the Frost White Shimmer Paint.

You can see all the reflection bouncing back in these two pictures.  I must say that this card is so much prettier in person!!

Now that I have this one done, I’m off to complete some more.  My Advent countdown calendar says 19 days and I have lots more work to do.  I will be back tomorrow with the rest of my tags from my class last week.  Hope your day is full of Peace, Love and Joy!

Stamps:  Snow Swirled, All Holidays; Paper:  Watercolor, Very Vanilla, Night of Navy; Ink:  Versamark, Night of Navy; Accessories:  Stampin’ Emboss Powder, Heat Tool, Frost White Shimmer Paint, Aquapainter, Vanilla Satin Ribbon, Dimensionals, Basic Pearls

All products are Stampin’ Up!

Hoopla Holiday Tree Tags

Hoopla Holiday Tree Tags published on 11 Comments on Hoopla Holiday Tree Tags

I have decided that I must use the word ‘hoopla’ more since it seems to perfectly describe the feeling I have during holiday preparation.  More tags today!  This may be my favorite for this year.  I used the tree from the Holiday Hoopla set and colored with my Old Olive and Cherry Cobbler markers.  The versatility of this set is just wonderful!!  And guess what…the Free for All Challenge over at Splitcoaststampers uses songs from the Nutcracker Suite as inspiration.  I chose Act 1:  Number 1 The Christmas Tree.  I love that music and will now be humming it all day! 

The tag base is the Two Tags die for my Big Shot and the paper used is the Jolly Holiday DSP from the main catalog.  I like that this is so cute but easy enough to make in quantity. 

Now that my tags are pretty much done, you can expect to see some more cards in the upcoming days.  It is crunch time and I still have some work to do to get my card list completed. 

Have a great weekend and take time to enjoy the hoopla!!

Stamps:  Holiday Hoopla, Short & Sweet; Paper:  Cherry Cobbler, Old Olive, Very Vanilla, Jolly Holiday DSP; Ink:  Old Olive, Cherry Cobbler; Accessories:  Big Shot, Two Tags Die, Dimensionals, 1/8″ Vanilla Tafetta Ribbon

All products are Stampin’ Up!

Deck the Halls with Two Tags

Deck the Halls with Two Tags published on 12 Comments on Deck the Halls with Two Tags

It may not show it from my lack of posting, but I have been busy, busy, busy!  I have a Christmas Tags Class tomorrow (actually two) and have been putting the finishing touches on the designs and cutting paper.  I’m so excited about the tags and will show the rest later this week but here is a sneak peek for those who are coming tomorrow.  Conveniently enough, Our Creative Corner has a tags challenge this week and Diva Coffee Break Designs has a layout challenge, DCBD#205.  I saw these trees from the fabulously talented Heidi Baks and I knew I had to try them.  I used two versions with my Two Tags die.  I can’t wait to make these with my stampers tomorrow!!

Aren’t these trees cool??!!  And not nearly so hard as they look!  I used my Deck the Halls paper along with Always Artichoke and Crumb Cake.  I particularly like the darker Cherry Cobbler background paper because it has the words for ‘O Christmas Tree’. 

Well, off to finish the last cutting.  Hope you are enjoying your first day of December!!

Primary Sidebar