Skip to content

With Sympathy

With Sympathy published on 6 Comments on With Sympathy

I’ll start with saying that today’s card is one that no one should ever have to receive (or make).  It is for a family at my children’s school who are suffering the loss of their 9 day old baby girl.  Certainly no words can ever come close so I thought that making a beautiful card might be meaningful.  Again, not sure this comes close but I hope it will at least let them know that we are thinking of them and praying for them.
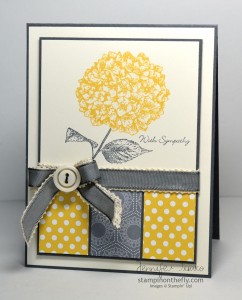
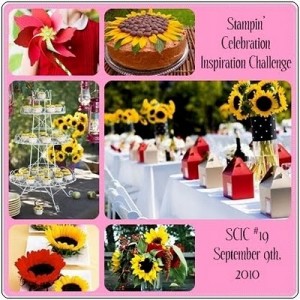
I had no idea how to approach this card and had been wanting to use the colors from this Stampin’ Celebration Challenge all month.  I am too late to link but I thank them for the inspiration.  Make sure you go see the winner’s card.  Heidi’s creation is beautiful.  I chose the hydrangea from the retired Because I Care since it is one of my favorite stamps. I hope the tone of this isn’t too “sunny” but it seems more subdued in person than in the picture.  I layered some retired Basic Gray Taffeta Ribbon on top of the Victoria Crochet Lace and I think it gives a pretty effect.  The sentiment is from my old go-to Teeny Tiny Wishes.

Thanks for stopping in today.  I’ll be back tomorrow with the latest Freshly Made Sketches challenge.

Stamps:  Because I Care (hostess, retired), Teeny Tiny Wishes; Paper:  Twitterpated DSP, Polka Dot Parade DSP, Very Vanilla, Basic Gray; Ink:  Daffodil Delight, Basic Gray; Accessories:  Victoria Crochet Lace, Basic Gray Taffeta (ret), Neutrals Buttons, Dimensionals


SCIC#54 – Inlaid circles

SCIC#54 – Inlaid circles published on 14 Comments on SCIC#54 – Inlaid circles

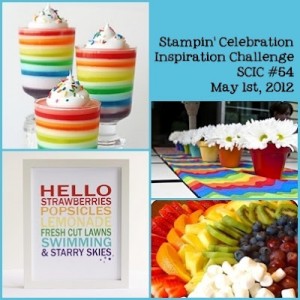
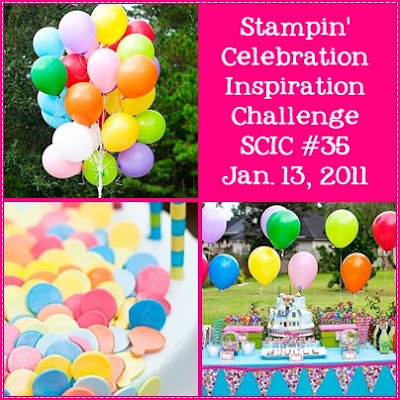
Stampin’ Celebration is back with a new challenge for May.  What a fun set of inspiration pictures, don’t you think?  I just love all the bright happy colors!

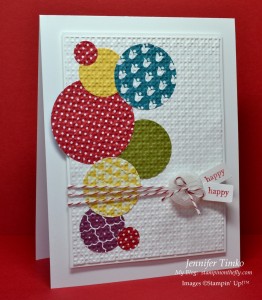
I thought it would be fun to incorporate all the colors into a card using my circle punches and this cool technique.  I have seen it called both embedded embossing and inlaid embossing, either seems appropriate.  I used every circle punch I have to make this one and just randomly punched the awesome Summer Smooches DSP (available again on June 1st), then played around with the pattern.  Once I attached them to a Whisper White layer they were run through my Big Shot using the Square Lattice Embossing Folder.  I let the one big circle hang over the edge for extra dimension.  Then I attached the embossed layer to another Whisper White layer and tied it up with Cherry Cobbler Baker’s Twine.  The twine goes really well with the Real Red in the DSP (and also with Cherry Cobbler, of course).  I added some little tags using just part of a sentiment from Teeny Tiny Wishes and the Jewelry Tag Punch.  I popped the layer up on Dimensionals and it was done!  I liked it so much that we made these at my Customer Appreciation Class last week.  They loved it too.  Perfect for kids and grown-ups alike!

I was so happy to see Stampin’ Celebration back from their break.  Make sure you go visit and give this one a try.  You have all month so there is no excuse!!

Thanks for stopping in today.  I hope your day is fantastic!  See you again soon!!

Stamp:  Teeny Tiny Wishes; Paper:  Summer Smooches DSP, Whisper White, Daffodil Delight, Old Olive; Ink:  Real Red; Accessories:  Big Shot, Square Lattice EF, Circle Punches (1-3/4″, 1-3/8″, 1-1/4″, 1″, 1/2″), Jewelry Tag Punch, Cherry Cobbler Baker’s Twine, Mini Glue Dots, Dimensionals
First Edition Moment

First Edition Moment published on 14 Comments on First Edition Moment

I had a little time today to play some challenges that I love.  What a bonus!  Stampin’ Celebration is one of my favorite inspiration sites and they have a really pretty piece this week.  At least on my computer, I saw River Rock, Early Espresso and Very Vanilla as the way to go.  I also found a great sketch over at the Sweet Sunday Sketch Challenge so off to stamping I went.

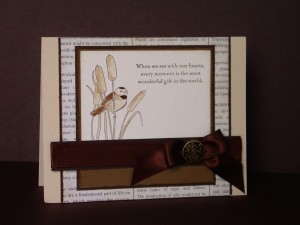
The colors really made me want to play with my Every Moment stamp set.  This was one of the first sets in this year’s catalog that I completely fell in love with!!  I have also seen the friends of this little chickadee on my bird feeder lately.  Hopefully I captured his colors closely.  I used some of the First Edition DSP in the background for some visual texture and sponged it with Soft Suede and Early Espresso on the edges.  The image was watercolored using River Rock, Soft Suede and Early Espresso.  I really LOVE those colors together!  For the last detail, some Espresso Satin Ribbon was cinched in a bow using an Antique Brad.

I had some trouble capturing this card.  It just seems prettier in person but you get the idea, at least.  So happy to have you drop in today.  I’ll be back tomorrow with another ColorLab Challenge.  Until then, have a great day!

Stamp:  Every Moment; Paper:  First Edition DSP (Occasions Mini), Early Espresso, Soft Suede, Watercolor, Naturals Ivory; Ink:  River Rock, Soft Suede, Early Espresso; Accessories:  Early Espresso Satin Ribbon, Antique Brads, Blender Pen

All products are Stampin’ Up!

Valentine-a-pa-looza!!

Valentine-a-pa-looza!! published on 12 Comments on Valentine-a-pa-looza!!

It was a busy weekend around my house.  In typical style, I was working last minute on Valentine’s Day treats for my boys’ classes and their teachers.  Not sure why but this always seems to be something I put off.  I started out with the treats for the kids by pulling out an old set called Mini Messages.  This is one that I bought early in my stamping life and never knew quite what to do with it.  Inspiration hit and off I went!

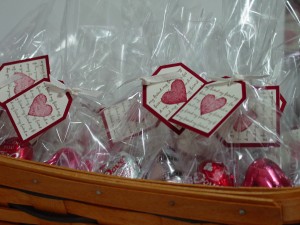
I stamped the “my friend” script in Soft Suede on Very Vanilla and punched it out with a Large Tag punch.  I then stamped the heart in Cherry Cobbler and cut it out.  Yes, it would have been loads easier if I had used any of our large variety of heart punches but sadly, none live at my house (this WILL be fixed!!).  The Extra-Large Tag Punch was used on Cherry Cobbler paper and I just had to assemble.  I put some chocolate into Medium Cellophane Bags, punched a hole in the tags with a 1/16″ Circle Punch and tied them closed with Vanilla 1/8″ Taffeta Ribbon.  Easy and done!

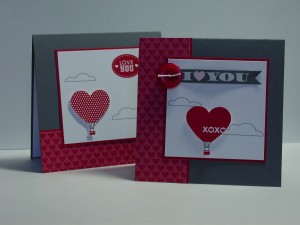
Being a demonstrator has so many cool advantages and one was that we received a sample of the Love Impressions Rub-Ons as a free gift from Stampin’ Up!  Before I went to work on cards for the teachers, I wanted to make two Valentine’s for my sweet sons.  The front card is one of those.  It uses the FTL127 layout which seemed perfect for this.  There is absolutely no stamping on either of these cards.  It is all rub-ons (even on the inside of the card)!  I put the heart balloons on Whisper White card stock and cut them out so that I could pop them up on Dimensionals.  The heart paper is from the Play Date DSP set.  When I saw Stampin’ Celebration’s inspiration piece this week, I knew I’d use the XOXO balloon for it!  Don’t forget to take a look at all the cool Valentine’s Day goodies they created!

Both of the cards here were used for my sons’ teachers (of course some treats were included for them too).  All of these cards qualify for one of my favorite challenges, Stampin’ Royalty.  Their SR#58 is Hearts, Hearts and More Hearts and that sums up my crafting this weekend!

Thanks for stopping by to see my crazy Valentine-a-pa-looza weekend results.  I hope your day is a happy one!

Cards:

Stamps:  None; Paper:  Whisper White, Basic Gray, Real Red, Play Date DSP; Ink:  None; Accessories:  Love Impressions Rub-ons (Occasions Mini), Dimensionals, Brights Buttons, Thread (non-SU)

All products are Stampin’ Up unless otherwise indicated!

First Edition Valentine

First Edition Valentine published on 14 Comments on First Edition Valentine

I got an order last week and I have been playing with my new products!!  Oh what fun!  Tonight is my 3rd Quarter Hostess Club Meeting and the club ladies will be making this.  I can’t wait!!  First things first, this card is a CASE from the very talented Debra Burgin over at Heartfelt Inkspirations.  I knew I had to make it as soon as I saw it.  In the effort to add my own touch, I did change the colors and the sentiment plus added a layer.  My colors were inspired by this week’s Stampin’ Celebration piece…a great Valentine’s Day palette! 

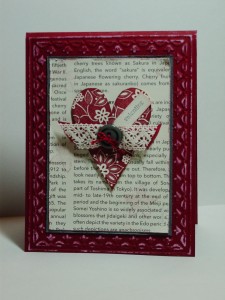
I pulled out my Framed Tulips Embossing Folder and my Big Shot and rolled the frame right onto the base.  I then added Whisper White Craft Ink.  I did not use a brayer like Debra did (although that would work, of course).  Instead I used another technique that I will cover in an upcoming Stampin’ Addicts Birthday Blog Hop (Feb. 25th – Feb. 27th).  I cut a section of the First Edition DSP that talks about Cherry Blossoms.  Somehow that seemed appropriate with my use of Cherry Cobbler!  The Be My Valentine heart was stamped in Cherry Cobbler and cut out (cutting off the banner) and I stamped the “valentine” from my Teeny Tiny Wishes “happy valentine’s day” stamp in Basic Gray on a 1/2″ strip of Very Vanilla and just snipped the corners.  Aren’t Stampin’ Write Markers handy??!!  The Cherry Cobbler Seam Binding and Victoria Crochet Trim were tied together with dyed thread (again with a marker) and a Basic Gray Button.  I used a barely inked flower from Fresh Cuts to add a little color to the First Edition paper.

Thanks to Debra for allowing me to CASE her.  Be sure to take a look at her many beautiful creations using the link at the beginning of the post!  I’ll be back tomorrow with the latest SU Only Challenge.  I hope your day is great!

Stamps:  Be My Valentine (122045), Fresh Cuts (111634), Teeny Tiny Wishes (115370); Paper:  Cherry Cobbler (119685), Basic Gray (121044), Very Vanilla (101650), First Edition DSP (121878); Ink:  Cherry Cobbler Classic Pad (119669), Basic Gray Marker (120966), Whisper White Craft Pad (101731); Accessories:  Big Shot (113439), Framed Tulips Folder (121809); Cherry Cobbler Seam Binding (120992), Victoria Crochet Lace (118481), Neutrals Buttons (119743)

All products are Stampin’ Up!

Birthday Party and a Blog Candy Winner!

Birthday Party and a Blog Candy Winner! published on 19 Comments on Birthday Party and a Blog Candy Winner!

Thank you, thank you, thank you to all who left comments last week for my blog-iverary!!  I am so thrilled that you have joined me on this creative journey and it was so nice hearing from you.  Right to the blog candy winner.  Using Random.org, here are the results:

True Random Number Generator

3

Jen Conrad, that means you are the winner.  I will e-mail you to get your mailing information and if you don’t hear from me today, please contact me. 

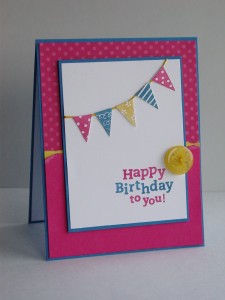
It seems that I’m not the only one with a reason to celebrate.  Stampin’ Celebration has madeover their blog and are throwing a bit of a party!  Here is their inspiration challenge for this week:

I also saw that the Operators over at Stampin’ 411 have a sketch challenge this week and it is a great one.  It includes tearing on the base layer.  Always a great way to add quick texture to a project! 

While I love the balloons, I also noticed the little pennants on the table of the inspiration piece.  I decided to pull out my Brights Patterns Designer Series Paper Pack and my Party Hearty stamp set to see what happened. 

The little hats turned into pennants!  Oh, I love this stamp set for the variety of cards it makes!  The words are from a retired A La Carte set called Birthday Wish.  These little sets really are super for specific stamp needs!  I colored a piece of thread with my Daffodil Delight Stampin’ Write Marker so I could “hang” the pennants.  I really love the torn Melon Mambo piece with the pop of Daffodil Delight torn above it. 

Thanks again to all my followers!  I’m looking forward to another fun year of stampin’ and blogging!  I’ll be back tomorrow to tell you about my new blog header and some fun with MDS.

Stamps:  Party Hearty (111532), Birthday Wishes (retired); Paper:  Brights DSP Pack (117155), Melon Mambo, Pacific Point, Daffodil Delight (Brights Card Stock 119706), Whisper White (100730);  Ink:  Brights Stampin’ Write Markers (119701); Accessories:  Brights Designer Buttons (119744), Glue Dots (103683), Dimensionals (104430), Non-SU Thread
All products are Stampin’ Up unless otherwise indicated.

Clean and simple fall colors

Clean and simple fall colors published on 10 Comments on Clean and simple fall colors

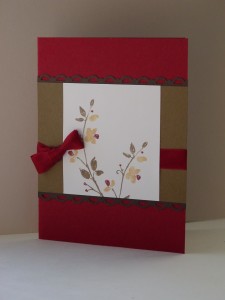
I’m still recovering a bit from my Operation Write Home extravaganza so this will be short.  This is one of the cards for my box being shipped to OWH later this week.  I’ll have a picture of the box all loaded up in tomorrow’s post.  The Clean&Simple layout 107 is a great one and I used it to create a card during my open house.  I also leaned on Stampin’ Celebration for some inspiration.  Believe me, with all that stamping, I needed the inspiration to keep the ideas moving!

I love the colors in this picture!  One of the things I did to help everyone maximize their stamping was to pull out all my sets (current and retired) and had people bring some of their stamping favorites.  You know the sets…the ones where every card is one you like.  One of my friends brought over her Watercolor Trio and I had to use it (I also used it in my previous post’s card).  I started with some Cherry Cobbler, added Soft Suede and Early Espresso, and then some Daffodil Delight as the yellow.  The card is pretty self explanatory so I’ll just show it to you.

I left off the sentiment because so that the recipient can use it for any purpose.  I found myself making more cards like this than usual to give our deployed heroes more options. 

Don’t forget to take a look at Operation Write Home to see if there is a stamping event near you this month!!  Have a great week.

Stamp:  Watercolor Trio; Paper:  Cherry Cobbler, Early Espresso, Soft Suede, Whisper White; Ink:  Cherry Cobbler, Soft Suede, Daffodil Delight; Accessories:  Cherry Cobbler Seam Binding (Holiday Mini), Scallop Trim Border Punch

All products are Stampin’ Up!

Ghirardelli box

Ghirardelli box published on 4 Comments on Ghirardelli box

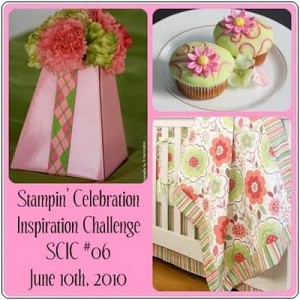
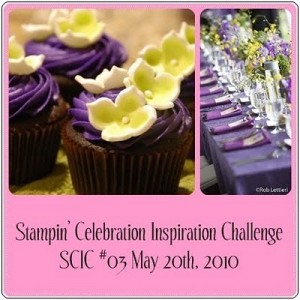
Happy Monday, everyone!  For those of you returning after the blog hop…welcome back!  I promised further details about the Ghirardelli candy box and here they are.  I realized that the black paper used in my original box was difficult to photograph so I made a different box for simplicity.  Since I was looking for lighter colors, it seemed like a great time to use the Stampin’ Celebration challenge for this week.  Just look at this beautiful picture:

It fits with my project perfectly!!  Now the original instructions for this box come from Splitcoaststampers and this tutorial.  I have altered some of the dimensions slightly and used my available tools instead.  You can click on any picture to see it larger.

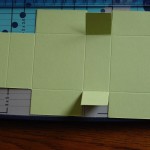
Start with a 4 1/4″ by 7 1/8″ piece of Certainly Celery paper.  Using my paper cutter, I scored 1″ away from both short sides.

Then I scored at 2″, 3″, 5″ and 6″, using my paper cutter again.

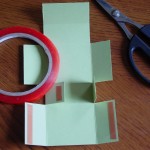
Now you have an end with a long rectangle and one with a short.  Use your paper cutter to remove the outer two sections on the short rectangle side.  The picture explains it better!

Cut the 1″ score lines and it will look like this:

Add Sticky Strip to the flaps as shown, attaching the little flaps first the then the rectangles so that the flaps folds towards the back.

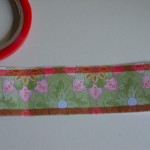
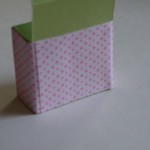
Once the box is together, I used the corner rounder punch on the flap.  Then use a 2″ by 7 1/2″ strip of DSP (I used Tea Party), attaching it around the box with Sticky Strip.

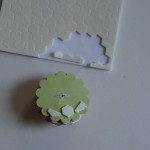
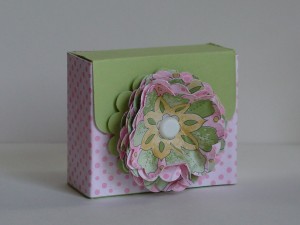
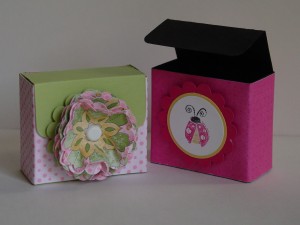
Where I used my Scallop Circle punch with the lady bug on my Blog Hop box, today I decided to use the puffy flower made with the Scallop Circle.  Corie over at Creations by Corie has a great tutorial on the flower.  I made sure that my bottom layer was not crumpled, however.  Using scraps from the Tea Party DSP, I made the flower and secured it together with a 5/16″ white Jumbo Brad.  Put dimensionals on the bottom of the Scallop Circle to attach it to the box (using those edge pieces is really useful here).

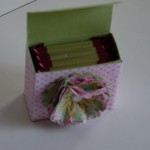
You can see that 4 pieces of the Ghirardelli chocolate fit in perfectly here.  Just tuck the little flaps on the packaging toward the back.

Here are the finished box and the two boxes together.

Thanks for dropping by!  Have fun with this little box…it is a cinch to put together!!

Almost time to say goodbye…

Almost time to say goodbye… published on No Comments on Almost time to say goodbye…

to Almost Amethyst!  I must admit that I haven’t been a big user of this purple but the Tea Party DSP has given me a new appreciation for this shade.  Yesterday over at Stampin’ Celebration, they posted this fabulous inspiration:

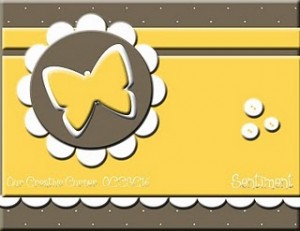
Beautiful, isn’t it??!!  As previously stated, I don’t have a lot of purple but Tea Party seemed to fit the bill nicely with the Saffron and Celery that are also in the paper.  I saw the newest sketch from the OCC Sketch Blog, their OCCSC16.  Love this one!! 

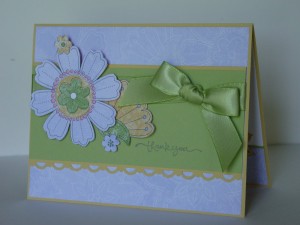
The big flowers on the DSP and the sketch seemed to be made for each other.  I cut out a couple of the flowers and pulled out my lovely Celery satin ribbon.  The scallop border will be available again soon (I got it FREE during Sale-a-bration!!) and I really like the lacy look it gives.  Here is the end result:

If your computer is like mine, the Amethyst looks a bit blue but I promise it really is purple!!  Something about the afternoon lighting in my house, I guess.  All the work on this card was really done by the DSP.  I put a matching strip at the bottom of the inside and cut out another flower to put in there.  Thanks for taking a look today (and don’t forget to give these challenges a try!).  Have a great weekend!

Stamp:  Short & Sweet; Paper:  Tea Party DSP, So Saffron, Certainly Celery; Ink:  Almost Amethyst; Accessories:  Celery Satin Ribbon, Scallop Border Punch, Dimensionals
All products are Stampin’ Up!

A new challenge and an old favorite

A new challenge and an old favorite published on No Comments on A new challenge and an old favorite

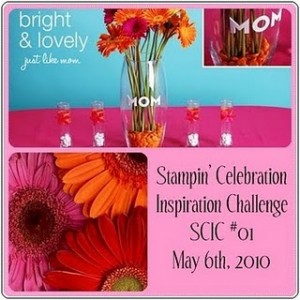
I was looking for inspiration for a thank you card today and I found it…times two!!  First of all, I found a brand spankin’ new challenge from Stampin’ Celebration!  You’ll recognize some of the names and faces, and you’ll be inspired by the fun colors.  Just look at this picture:

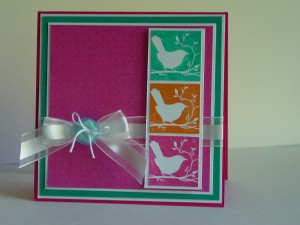
Conveniently enough, there is a compatible challenge over at Pals Paper Arts (PPA41).  For some reason I can’t link the picture so go take a look!  I used the colors from Stampin’ Celebration and the cool birds from the Pals to get my card moving along.  After I decided on the birds from Of the Earth, I played around with variations of using those squares.  As I started putting the card together, I realized that I had settled on a version of the Pals sketch from a few weeks ago (PPA38).  Well, a good sketch is one you can come back to over and over!!  I used the Melon Mambo DSP from the level 3 hostess set Lovely Flowers.  Can I tell you how happy I am that Melon Mambo is staying on as a new core color??!!  I’m not much of a pink girl but this pink really works for me! 

I’m using this as a thank you card for a friend.  I hope she like the happy colors, too!  Thanks for stopping by and I hope to see you again soon!

Stamp:  Of the Earth (hostess); Paper:  Lovely Flowers DSP (hostess), Taken with Teal, Melon Mambo, Whisper White; Ink:  Melon Mambo, Taken with Teal, Pumkin Pie; Accessories:  White Organza ribbon, Playground buttons, thread

All products are Stampin’ Up!

Primary Sidebar