Technically, my blog-iversary was last week (Jan. 5th) but this seemed a better week to celebrate. As promised, I am bringing you a box tutorial today and, as part of the celebration, some blog candy! Ohh, I love blog candy!! Since the box used to make the tutorial is already spoken for, I made another one with a little set of matching cards. Now in order to be in the running to win this set, you have to do two things. First you have to leave me a comment and (a little harder) tell me which of my cards has been your favorite over the last year (I love to see which ones are really hits!). I will randomly choose a winner from all the comments left through 10pm EST on Sunday, Jan. 16th and announce the winner on Monday. Winner must have a U.S. mailing address. I think my favorite is from the post Monochromatic Wish and I used this as a model for some of my Christmas cards this year. Now to the tutorial.
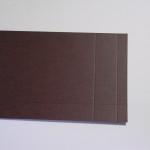
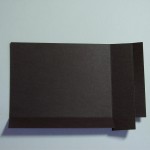
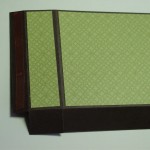
Start with 2 pieces of card stock measuring 4 1/8″ x 6″, 2 pieces of designer paper measuring 3 1/4″ x 4 3/8″ and 2 pieces of designer paper measuring 3 1/4″ x 7/8″. Any additional embellishments are up to you. Score the card stock along the long side at 4 1/2″ and 5 1/2″ and on the short side at 3/4″. Fold along all the score lines and cut off the little rectangle as shown in the picture.
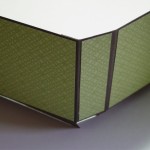
Attach the designer paper and then run a line of Sticky Strip down the narrow flap on each piece of card stock. Pull the red protection layer off of one strip and attach it to the inner side of the large rectange on the sister piece of stock. Finish the sides of the box by doing the same with the other narrow flap.
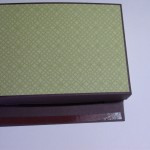 Tuck the little bottom flaps in first and then run another line of Sticky Strip along one of the bottom flaps (the one that will be at the outside of the box bottom). Now you can decorate the box however you want! This will hold 4-5 cards and their envelopes depending on the decorations on the cards. I like that you can see the top part of the cards and any stamping on the envelopes. It is also great because it is super quick to put together…perfect as a gift or blog candy!!
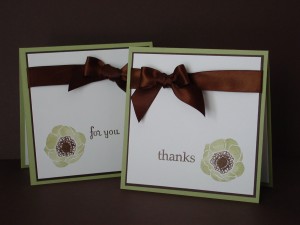
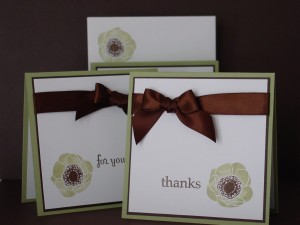
Oh, yes…back to the blog candy! Here are some pictures of the set you are entering for:
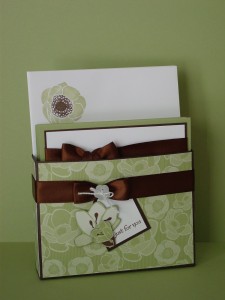
This is a four card set with two “thanks” cards and two “for you” cards. Only four fit in the box because of the size of the bow. That said, it would be easy to give the box more depth by simply making the stock a little longer and scoring wider apart. I used the Friends Never Fade stamp set and the Greenhouse Gala DSP to decorate this box and make the cards. They are done in Pear Pizzazz, Early Espresso and Whisper White.
I pulled out the tag punches and flowers cut from Greenhouse Gala to make the little tag on the box. It was stamped with Teeny Tiny Wishes, a wonderfully versatile set that I reach for all the time! The bow on the cards uses the technique I showed in a previous tutorial – Ribbons and Bows. The only difference is that I left tails on the cards’ bows. This is a bow I use all the time and I can show that further if there is enough interest (just let me know by your comments). The bow on the box uses a threaded button to cinch it down but is very similar. I tried to keep the embellishments down to a minimum since the simplicity is part of the joy of this project!
 This first year with the blog has had quite a learning curve and I so appreciate the lovely comments and support you have given. Things to look for in the upcoming year…a new Demonstrator Based Web Site (DBWS) where you can order from the comfort of your home (coming Jan. 17th), added features to help with the blog ease of use and, of course, more projects! Thanks for stopping by today. I can’t wait to see your comments!
Stamps: Say It Simply (Occasions Mini), Friends Never Fade; Paper: Greenhouse Gala DSP, Pear Pizzazz, Early Espresso, Whisper White; Ink: Pear Pizzazz, Early Espresso; Accessories: Espresso Satin Ribbon, Neutrals Buttons, Sticky Strip, Glue Dots
All products are Stampin’ Up!

24 Comments
I love your all of your cards which is why I became a follower of yours. The one that led me here was Garnet & Gold. Thanks for the box tutorial and these cards have become my new favorite!
WHoo HOO. Congratulations and this is a great tutorial.
Hi Jen! As you know, I love all of your cards but the one that caught my eye and had me following you is the Thinking of Saffron and Suede card that I CASEd 🙂 Thanks for all of the inspiration!
Yay! A one year anniversary to this blog site, love that you have it, I like to look at all the cool stuff you make! I think my favorite card was a red card-one of the new reds, forgot the name but it was layered and had a zigzaged scrunched background and also bigshot designed smashed onto the paper and of course a “ribbon” that was linen I think. Yes those are technical terms-haha, can you tell I don’t pay attention to what things are actually called. : ) I have fun stampin with you Jennifer, I am always inspired!
Another beautiful set!! Thank you for the tutorial!
Thanks for the great box tutorial! There is no way I could possibly pick which of your cards are my favorite, they are all great!
Wow, this is stunning. This set never spoke to me, but I love what you did with it!! Congrats on the blogaversary!! Hope you have many more. I thought I’d subbed to your blog during the blog hop, but I reckin I didn’t. I’m subbing now. Can’t say which is my fav from last year, ask me next year! lol
Thanks for the tutorial!! I love the design very classy and clean!
I really enjoy your blog and your stamping style. My favorite card was from January 23, 2010 and it was for the Haitiian relief effort. You used the “A Happy Heart” set and the card is beautiful. Thank you for the tutorial on the box. I’m going to attempt to make one. It seems so easy when you describe it.
Congrats on the blogaversary! I have enjoyed all your classes this year and the fact that I get adult time 🙂 You have taught me so much and I am now beginning to feel confident to design a card on my own. My favorite was actually a tag…..the christmas tree tag. Plan to use it for my Christmas card next year. Plus Delaney can help which makes mother/daughter time special.
I’m new to stamping and found your blog by accident with the latest blog hop. I immediately subscribed to your blog because of the beautiful things I saw! I love tutorials as I’m such a visual learner. Thank you for this one of the card box set!
Since I’m new to your blog I scrolled through a lot of your posts and immediately stopped when I saw this one: “Operation Write Home”. I knew instantly that this was my favorite! First, you made it out of retired papers and the ‘Branch Out’ stamp set was also retired. I love finding use for the older things as that’s what I have so far. The reason I chose this card was because I have never seen anyone make a card by cutting the stamped image into three panels. I love the look in artwork and especially love the way it looks in this beautiful card.
I’m so glad that I found your blog and hope that keep up the beautiful creating for many more years!
I absolutely loved the Valentine card you did in Feb of last year…Love is In the Air. But truth be known, I love most all of them. Thanks so much for what you do and sharing your talent.
Choose which card I like best? – impossible. It’s like a mom choosing which is her favorite child. I love them all!!!! … but I do have to say my direction is definitely vintage. I love the antique looking cards you do so well. We did one for mother’s day last year with the Cherry Blossoms and you past Christmas card with the Church. Lovely!!!
Your box is soooo polished! My favorite project of yours wasn’t a card, it was your fabric wreath!
I love reading your blog and seeing your beautiful projects. So choosing a project is next to impossible. I’ve got it down to two: the branch out card for the soldiers (so sorry I missed out on that set) and the advent wreath that your son did – just too sweat. Thanks for sharing and for the chance to win a little blog candy. Please keep crafting and sharing.
Sue
Beautiful ensemble, Jen. Love the whole thing!!
I love the card you featured here in the blog candy the best–the CAS look and the sharp lines with the bow got me thinking I can do this; the box tutorial is a plus. I’ve signed up to receive your newsletters going forward. TFS!
Happy blog-iversary to you! Wow, choose a favorite?! You know I love them all! However, when pressed to test, I’d have to say that the cracked glass on the winter church scene that we did for club was awesome. Clean and simple, my favorite. I also really liked the card with the corner bookmark. Still waiting to give it to that one really deserving person!
Jen,
I’ve enjoyed reading your posts over the several months. I really enjoyed fall mushrooms and your son’s advent calendar (although that wasn’t one of your cards), also the 9/11 post.
Keep up the fabulous work : )
Love this box and cards-thanks for the tutorial!! Congrats on the Blog-iversary! Love all your creations!! Haven’t seen one yet that I didn’t like in the time I’ve been stalking you 🙂 Thanks for all the inspiration!!
Happy Blog-iversary!
I like red a lot lol I believe Becky is also describing the card I like:
https://stampinonthefly.com/2010/12/03/hoopla-holiday-tree-tags/
That is a classic color combo right up there with red/white/black.
Thanks for all these great ideas! Can’t wait to see what you have in store for us in the coming years.
Love how you colored the poppy stamp! Beautiful colors too!!!
I love all the cards and classes. So happy my friend Cyndie thought to include me in her stampin journey and introduced me to your group of stampers! I really like Dasher cards but the monkey is too cute also. It’s too hard to pick a favorite.
Congrats!
Great cards! Love the little box!