Skip to content

Freshly Made Sketches #56

Freshly Made Sketches #56 published on 17 Comments on Freshly Made Sketches #56

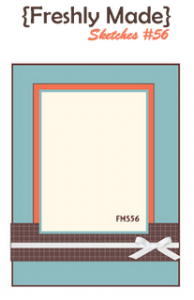
Happy Wednesday!!  So happy to see you!  I am so excited to share with you this wonderful sketch from the amazing Rita Wright.  Rita loves layers and this sketch gives so many options for how to layer that focal panel.  You will see that the design team has such pretty interpretations and I know you will love playing along this week.
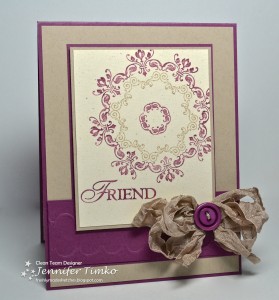
I started this card with one thing in mind…the bow!  One of our guest designers this month, the amazing LeAnne Pugliese, created this awesome tutorial on shabby bows.  I LOVE these bows and have never quite figured out how to make one.  Now I know!!  I thought that the Daydream Medallions stamps would be an appropriate style to go with bow.  I love Crumb Cake with Razzleberry (let’s face it, I love Crumb Cake with about anything) and I think the colors set just the right tone for the shabby bow.  Yes, it really is all about the bow!  I added a little detail to the crossing panel with my Adorning Accents Embossing Folder and the sentiment comes from the beautiful Affection Collection set.

I apologize for being mostly absent over the past couple of weeks.  I have a check ride (flying test) coming up this weekend.  Every 9 months, airline pilots are required to do one of these to prove our worthiness and maintain certification.  It is a really big deal and lots of studying is always a good idea.  Once that is done, I’ll be able to turn on my crafting brain again and hopefully get some more creating done.  I am planning on a fun surprise in the next week with a visit from a guest blogger that you are sure to love!

Until then, I know you will be amazed by the design team and our two guest designers this week!  Hop on over to Freshly Made Sketches and take a look!  Have a great day!!

Stamps:  Daydream Medallions, Affection Collection; Paper:  Rich Razzleberry, Crumb Cake, Naturals Ivory; Ink:  Rich Razzleberry, Crumb Cake; Accessories:  Big Shot, Adorning Accents Embossing Folders, Crumb Cake Seam Binding, Brights Buttons, Linen Thread, Dimensionals

Freshly Made Sketches #55

Freshly Made Sketches #55 published on 15 Comments on Freshly Made Sketches #55

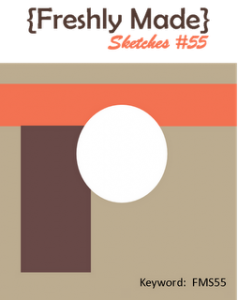
We have a wonderful new sketch for you this week and it comes from the super talented Jen Mitchell!  I love her clean style and this sketch gives so many avenues for interpretation!  Look no further than the design team’s examples for the variety possible!  So many pretty cards!  We also welcome Narelle Farrugia and LeAnne Pugliese as guest designers for the month of October.

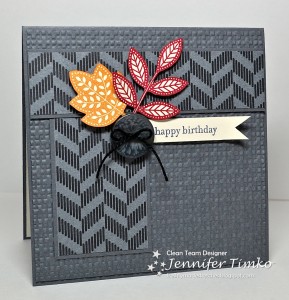
I thought that it would be fun to use the Howlstooth & Scaringbone DSP for a non-Halloween card and I love how this pattern is so great for lots of projects.  I had my Day of Gratitude out on the table from yesterday’s project and wanted to use the leaves from it.  What pretty leaves they are!!  I inked them up in More Mustard and Cherry Cobbler and cut them out.  Then I tucked them behind a Basic Gray button and added a sentiment.  As I was putting the card together I realized that it seemed a little blah.  Out came the Big Shot and the Square Lattice Embossing Folder to add that something extra!  I love the masculine feel to these colors!

Make sure you hop on over to the Freshly Made Sketches site to see all the inspiration both from the design team and then from the gallery as the week goes on.  So many talented designers every week!!

Back to studying today for a big flying checkride (test) that will happen next week.  I’ll be back next week with a fun surprise visit from an amazing stamper!  Until then, have a great week!

Stamps:  Day of Gratitude, Teeny Tiny Wishes; Paper:  Howlstooth & Scaringbone DSP, Basic Gray, Very Vanilla; Ink:  Basic Gray, More Mustard, Cherry Cobbler; Accessories:  Big Shot, Square Lattice EF, Neutrals Buttons, Black Thread

SUOC55 – Leaves and Brocade

SUOC55 – Leaves and Brocade published on 5 Comments on SUOC55 – Leaves and Brocade

This week at SUO Challenges, we are all about Textures!  If it adds texture, we want to see how you use it!!  So many wonderful ways to use your Stampin’ Up products!
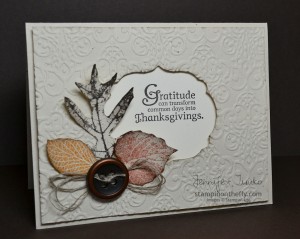
There are so many advantages to being a Stampin’ Up demonstrator!  One of them is the Stampin’ Success magazine that comes every month.  It is full of ideas from Stampin’ Up designers and from fellow demonstrators.  My card today is based on a card by Lisa Dolson.  I changed the stamp set and some of the elements to make it my own.  I used the Lacy Brocade Embossing Folder and the Labels Collection Framelits on the back panel.  The leaves are from French Foliage and are stamped in More Mustard, Cajun Craze, and Early Espresso.  After cutting them out, they were sponged with Early Espresso and the edges of the textured panel are sponged too.  It is finished with a Brushed Bronze Button and some Linen Thread.

The design team has such a variety of projects and you are sure to be inspired!  Can’t wait for you to join us!

I’ll be back tomorrow with the latest challenge from Freshly Made Sketches!  Hope you have a great day!

Stamps:  Day of Gratitude, French Foliage; Paper:  Naturals Ivory; Ink:  Early Espresso, Cajun Craze, More Mustard; Accessories:  Big Shot, Lacy Brocade EF,  Labels Framelits, Brushed Bronze Buttons, Linen Thread

Fighting “like a girl”

Fighting “like a girl” published on 5 Comments on Fighting “like a girl”

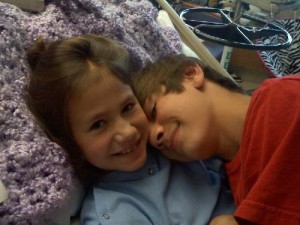
It is with a sad heart that I share with you the passing of Sydney Davies.  She was the inspiration behind my Ronald McDonald House Charities stamp drive and an amazing girl.  She battled her cancer and “fought like a girl”.  My whole community is grieving today.  While I never had the privilege of meeting Sydney, I am in awe of the hearts she has touched with her courage.

Sydney and her brother Tyler

Freshly Made Sketches #54

Freshly Made Sketches #54 published on 9 Comments on Freshly Made Sketches #54

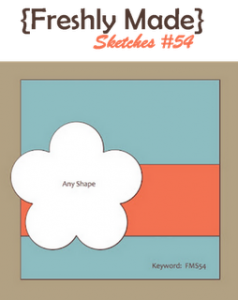
It is another fabulous Wednesday and I get to share a new Freshly Made Sketches Challenge with you.  This week’s sketch is courtesy of…me!  I know this is kind of a classic sketch but I love how it leaves room for lots of interpretation.  Just take a look at the design team to see what I mean.  All those wonderful cards from one sketch!  Love it!!

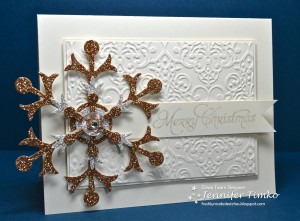
Leave it to me to design a sketch and then change it!  That is what happens when you design the sketch well before you make the card!  Hmmm….  In any case, I am so happy with this card.  We made this one at my Holiday Catalog Class last week and we all had a good time with it!  The star of the show are Stampin’ Up’s Glimmer Papers, both Silver and Champagne.  The Snow Flurry Die creates this amazing snowflake and is just perfect for the sketch.  I tried a number of colored backgrounds before I settled on this tone-on-tone Very Vanilla.  I always love this look and was so happy that it works well here.  The sentiment is from More Merry Messages and was sponged with Champagne Mist Shimmer Paint then stamped (I used a Sponge Dauber).  It keeps the sentiment subtle but adds another element of sparkle!  Because apparently all that shine wasn’t enough, I finished the snowflake with a Vintage Faceted Button and a Basic Rhinestone.  The button picks up the shimmer from the snowflake and is so awesome!

I can’t wait to see what everyone makes with the sketch this week!  Make sure you hop on over to the challenge site to see all the inspiration!  Thanks for stopping in today.  See you again soon!

Stamp:  More Merry Messages; Paper:  Very Vanilla, Silver Glimmer Paper, Champagne Glimmer Paper; Accessories:  Champagne Mist Shimmer Paint, Sponge Daubers, Big Shot, Snow Flurry Bigz Die, Lacy Brocade Embossing Folder, Vintage Faceted Buttons, Basic Rhinestones, Dimensionals
Birthday Banner

Birthday Banner published on 12 Comments on Birthday Banner


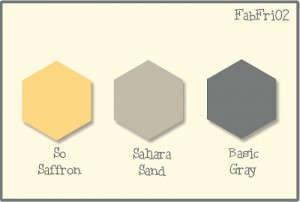
Like I said yesterday, I had a little extra stamping time this week and got to play along with some awesome challenges!  When I first saw the colors over at Fab Friday, I thought that Mindy and the team were a little crazy.  I mean really, Sahara Sand with Basic Gray??  Of course then I saw the team’s examples and knew they were on to something!!  I also saw that The Paper Players has a CAS challenge from Nance Leedy up this week for banners.  I knew exactly what I wanted to do!

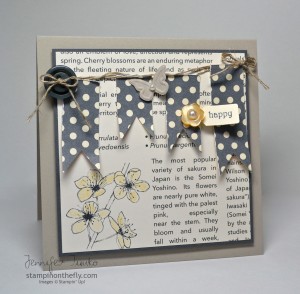
I started with the base of Sahara Sand and put a layer of Basic Gray next to it.  Wow, they are so great together and I had no idea.  I don’t normally use Sahara Sand but this has changed my feeling about that!!  I had some strips of this Basic Gray polka dot paper left over on my table from yesterday’s card so I started playing around with the idea of the banner.  Funny enough, incorporating in the So Saffron was the hardest part.  I played around with all kinds of backgrounds to the banner before I had the inspiration to try a piece of First Edition DSP.  I used my Blender Pen to add a little bit of color to the flowers and knew I had found the answer!  I thought it would be fun to add some little elements to the banner and pulled out some buttons, punches and embosslits to see what I could come up with.  I am so happy with the result!  Now I have a card all ready for a special birthday coming up in a couple of weeks (one of my sisters-in-law).  I love it when I get ahead!

Well this is certainly a recent record.  Four posts in a row!!  Sadly the pace will slow back down over the next few weeks.  I have had September on leave from United (due to my husband’s deployment) but will be back to work in October.  I have a big check ride (flying test) during the second week and need to hit the books and get ready for that.  Of course I will have my normal challenge posts and hopefully an extra one in there somewhere.

Thanks so much for dropping in today.  I hope the rest of your week is fantastic!

Stamps:  Teeny Tiny Wishes; Paper:  Howlstooth & Scaringbone DSP, First Edition DSP, Sahara Sand, Basic Gray; Ink:  Basic Gray, So Saffron; Accessories:  Blender Pen, Linen Thread, Neutrals Buttons, Subtles Buttons, Basic Pearls, Big Shot, Beautiful Wings Embosslit


Freshly Made Sketches #53

Freshly Made Sketches #53 published on 13 Comments on Freshly Made Sketches #53

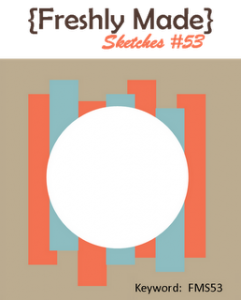
Wow, it was quite a week over at Freshly Made Sketches with the big one year anniversary!  The entries were all so spectacular and the design team ended up choosing two Queens of Clean (because it was just too hard to narrow it down any further!).  Congratulations to LeAnne and Narelle!  I’m so excited to work with them during October.  This week we are back to new sketches and wow does Tui have one for us!  The design team has come up with some awesome inspiration with this cool layout!

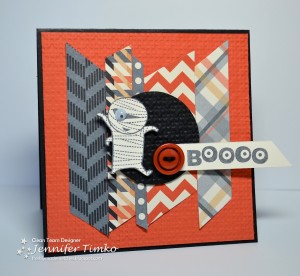
It seems that I can’t count because I obviously used the wrong number of strips behind the image but I think I kept to the intent of the sketch.  Somehow, these were just the sizes the panels “needed” to be and this is all the fit!  All the work here is really done by the Howlstooth & Scaringbone DSP.  I mimicked the angles in the patterns in my cuts to the DSP.  I kind of like the overall effect.  The mummy just called out to be used again so I popped him up on a Dimensional and added the sentiment.  The button is really a Cajun Craze button from the Regals set but it really goes well here.  The texture on the circle and the background is from the Square Lattice Embossing Folder.

Ok….I hope you enjoy this fun and challenge sketch!  You’ll be glad you tried it and we can’t wait to see what you make!

I got a little extra stamping time this week so I’ll be back tomorrow with another card!  Yea!!  Have a super Wednesday!

Stamp:  Googly Ghouls; Paper:  Howlstooth & Scaringbone DSP, Tangerine Tango, Basic Black, Very Vanilla; Ink:  Basic Gray; Accessories:  Big Shot, Square Lattice EF, Googlies, Regals Buttons

SUOC54 – For the Kids!

SUOC54 – For the Kids! published on 2 Comments on SUOC54 – For the Kids!

Our theme over at SUO Challenges this week is near and dear to my heart – For the Kids!!  Let’s face it, kid projects and cards are always such fun to make.  They bring out the kids in all of us who create, I think!  The team has come up with all kinds of awesome ideas so get ready to pin and CASE!

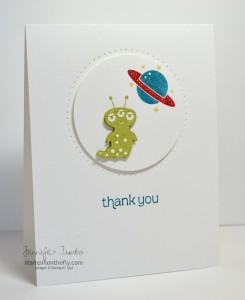
I went with a really clean card for this one.  Why?  Because these were mass produced!!  I made them as birthday thank you cards for one of my sons and needed to make quite a number of them.  The best part is that while it is clean, it still has some great little elements that make it special.  First of all, I am in love with this little alien from Blast Off.  My guys love this set and they actually helped me choose this fellow and his color (Lucky Limeade).  I stamped him and the planet on Whisper White and the punched them out with my 2-1/2″ Circle punch. Then I stamped another alien, fussy cut him and popped him up on a Dimensional.  I used the new Essentials Paper-Piercing Pack to pierce a circle and then put the punched circle up on some more Dimensionals.  The sentiment is from Made For You.

Making cards like this is fun, especially when the kids pitch in to help.  I hope you will share your projects for the kids with us this week!

Back tomorrow with a new Freshly Made Sketches challenge.  I hope you are having a great week so far.  See you soon!

Stamps:  Blast Off, Made For You; Paper:  Whisper White; Ink:  Lucky Limeade, Island Indigo, Real Red, Daffodil Delight (all Stampin’ Write Markers); Accessories:  Essentials Paper-Piercing Pack, Paper-Piercing Tool, Stampin’ Pierce Mat, Stamp-a-ma-jig

Triple Time Snowflakes

Triple Time Snowflakes published on 4 Comments on Triple Time Snowflakes

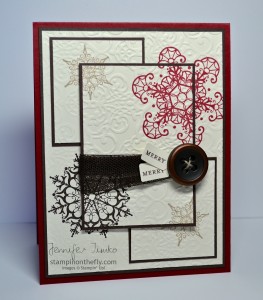
I am so excited to be a Monday Guest over at the Pink Paper Bakery!  This is a group of Stampin’ Up demonstrators who work together on this fun blog!  So much inspiration and talent!  They asked me to share a card with them and I think I have just the right one.

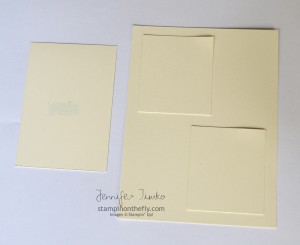
I have been seeing the Triple Time technique everywhere and finally gave in to trying it after seeing a card by the amazing Ann Schach.  She changed up the layout a bit from some others and I loved the effect!!  I knew that the snowflakes from Snowflake Soiree would be fantastic for this technique and got right to work.  Another super talented stamper, Dawn Olchefske, has a tutorial on the technique that I viewed before giving this a go.  The key to the technique is the illusion that you have stamped multiple times and and magically lined them up perfectly.  While I do love my Stamp-a-ma-jig, even I would not have the patience to line everything up for multiples of this card!!  LOL!  So I started with a base of Very Vanilla (3-7/8″ x 5-1/8″).  I cut two rectangles of Very Vanilla to 1-7/8″ x 2-1/8″ and another one rectangle to 2-3/8″ x 3-3/8″.  As per the tutorial, attach them to the base using a repositionable glue since you will need to pull them back up and attach their “frames”.

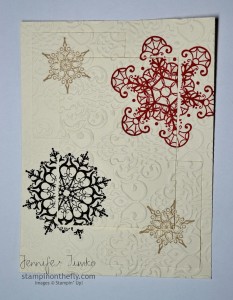
Once you have these in place, stamp your images.  You will need to apply a little extra pressure to the stamping to minimize the gap that will happen where the layers meet.  Now I like to use 1/8″ borders (and did here) but a wider border is a bit more forgiving in the “magic” of this technique.  You may need to play with it a bit to find what works best for you.  After I stamped, I embossed the image using the Lacy Brocade Embossing Folder.  I found that this helps in the reassembly part since you can use the embossing pattern as an additional guide.

You can see the gaps I was talking about in this picture.  Now, you carefully (take your time) pull the layers apart and then attach the back border panels (frames) to the layers.  I used Early Espresso for this with the panels as follows:  4″ x 5-1/4″, two panels 2″ x 2-1/4″, 2-1/2″ x 3-1/2″.  I’m guessing this makes the measurements above make a bit more sense.  *smile*  The base of the card is Cherry Cobbler.

I folded a small piece of the Early Espresso 3-1/2″ Tulle Ribbon in thirds and tied on a Brushed Bronze Button with some Linen Thread.  The middle panel is raised up on Dimensionals.  Finally, I added the sentiment from Teeny Tiny Wishes (I inked only part of the stamp with a Stampin’ Write Marker) that was punched with the Jewelry Tag Punch and attached with Mini Glue Dots.

I hope you like this card as much as I do!  I made this with my Holiday Catalog Class last weekend.  We all agreed that the technique takes a little patience but is well worth it!

My thanks to the Pink Paper Bakery for letting me be a guest!  I’ll be back tomorrow with the latest SUO Challenge.  Have a great day!

Stamps:  Snowflake Soiree, Teeny Tiny Wishes; Paper:  Very Vanilla, Early Espresso, Cherry Cobbler; Ink:  Early Espresso, Cherry Cobbler, Crumb Cake; Accessories:  Big Shot, Lacy Brocade Embossing Folder, Early Espresso 3-1/2″ Tulle Ribbon, Brushed Bronze Button, Linen Thread, Dimensionals, Mini Glue Dots

Freshly Made Sketches First Anniversary

Freshly Made Sketches First Anniversary published on 10 Comments on Freshly Made Sketches First Anniversary

Happy Wednesday to you all!!  It is a very exciting day and the whole team at Freshly Made Sketches is celebrating the first anniversary of the challenge!  You’ll notice that I don’t have a sketch posted….hmmm.  That is because we are opening up EVERY sketch from the last year as a choice.  Good luck with that because I had a very hard time choosing!!  Click on over to the blog and there is a link to all the previous sketches.  Not surprisingly, the team has outdone themselves.  We are even welcoming back Rita Wright and Linda Callahan for this one!

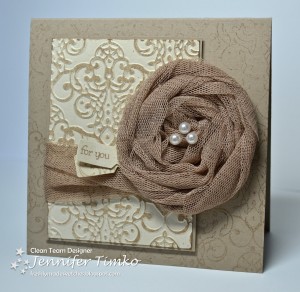
I went with this awesome sketch originally created by Linda Callahan.  I loved so many cards that were made with this sketch and I thought it would be fun to make one really different than my original.

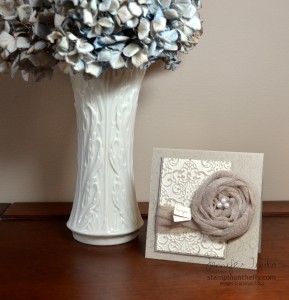
I am so completely in love with the new 3-1/2″ Scalloped Tulle Ribbon and have been wanting to make one of these flowers with it.  It is so easy now that Stampin’ Up has the new 2-1/2″ Jumbo Sticky Rounds.  I simply tied a knot in the end of the ribbon and stuck it to the middle and started wrapping in circles.  You twist the ribbon as you wrap and I love how some of the loose scallops add to the look of the flower.  I applied the ribbon straight from the roll of ribbon so I don’t have a length for you.  I do recommend this technique, though, since you won’t waste one little bit of the ribbon that way!  A Naturals Ivory panel was embossed using the Lacy Brocade Embossing Folder and then lightly brayered with Crumb Cake ink to highlight the pattern.  Now that background panel on the base…you’ll notice it matched the embossing folder perfectly.  Nope, it isn’t a stamp….I used the embossing folder to stamp it!  Just brayer the ink onto the folder and carefully stamp it down.  Now of course it doesn’t hold ink like the rubber but the effect is pretty for a card like this.

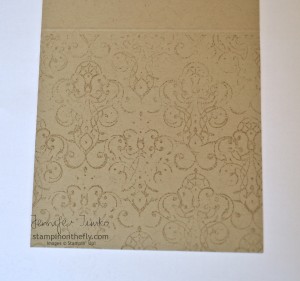
This is what it looks like when the panel is stamped with the folder.  Cool, huh?  I love so many of the patterns on our embossing folders so I think I’ll be using this technique again.

I want to take the time to thank Lesley Croghan and the whole team at Freshly Made Sketches!  I am so inspired by your artistry and so grateful to have the privilege of working with you all.

I was looking back to my post for the first challenge and my card was for the 10th anniversary of 9-11.  I guess that is fitting since my post yesterday reflects on that in a different way.  What a great year it has been for this challenge and I am looking forward to seeing what everyone makes for this one (and all the challenges in the upcoming year!).  Hope you will be able to join us!

Stamps:  Teeny Tiny Wishes; Paper:  Crumb Cake, Naturals Ivory; Ink:  Crumb Cake; Accessories:  Brayer, Big Shot, Lacy Brocade EF, 3-1/2″ Crumb Cake Tulle Ribbon, Jumbo Sticky Rounds, Jewelry Tag Punch, Basic Pearls, Dimensionals
Primary Sidebar