Skip to content

SUOC41 – Spring or Fall

SUOC41 – Spring or Fall published on 7 Comments on SUOC41 – Spring or Fall

This is the time of year for seasonal changes and we want you to show us your cards inspired by those.  At SUO Challenges, spring fever has definitely set in.  But we know that many of you live in the Southern Hemisphere and we want to see your beautiful fall cards.

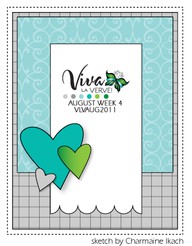
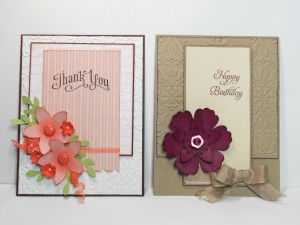
When I got to go to Cindy Elam’s house a couple of weeks ago, one of the most fun things we did was prepare for this challenge.  We used the same sketch to create our cards.  She chose spring and I chose fall.  Here are the cards side-by-side.  Fun, huh??!!
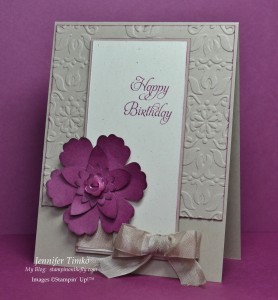
I started by embossing a Crumb Cake panel with Cindy’s Vintage Wallpaper Embossing Folder.  So pretty!  With that lovely background I wanted to keep the rest pretty clean so I went to Cindy’s punch rack and started punching out flowers to layer.  Aren’t they pretty together?  All I did was sponge the layers of the flower and the edges of the Crumb Cake panels.    I chose this lovely sentiment from the Sale-a-bration set Elementary Elegance.  Finally, the bow was the one I made for the bow tutorial we created.  I thought this had a bit of a fall feel with the color choices, especially when put next to Cindy’s amazing spring card!  This sketch was one Cindy had saved and I really like both results with it.

I hope you will be able to join us at SUO Challenges with this fun theme!  The design team has created some fabulous cards for inspiration so make sure you drop by to see them.

I will be back tomorrow for another Freshly Made Sketches Challenge.  Make sure you check back in because it is a cool sketch…unlike any that I have used before!  Until then, have a great day and thanks for stopping in.

Stamps:  Elementary Elegance (SAB); Paper:  Crumb Cake, Rich Razzleberry, Naturals Ivory: Ink:  Rich Razzleberry; Accessories:  Big Shot, Vintage Wallpaper EF, Regals Button, Crumb Cake Seam Binding, Dimensionals, Punches – Blossom, 5-Petal Flower, Boho Blossoms

Quilted Bow

Quilted Bow published on 21 Comments on Quilted Bow

Guess what our theme is over at SU Only Challenges this week??!!!  RIBBONS AND BOWS!!!!!  Sorry to shout but I think we can agree that ribbon is one of the best ever accessories from Stampin’ Up!!  I love them all.  So then I was presented with a dilemma.  How do I choose which ribbon??!!  After much debate I simply went with the newest ribbon to my “collection”…Early Espresso Quilted Satin Ribbon.

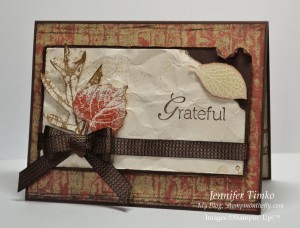
I made the bow here using the same method as some previous cards and I will give you all the details further down in the post.  The card started with the new-to-me set French Foliage.  It was first introduced in last year’s Holiday Mini and when it made the big catalog went on my first order.  I looked to the Well Worn DSP and found this wood print.  Perfect background for the leaves!  The Early Espresso lines on the bottom of the DSP are part of the print and I created a matching top by running the edge of my ink pad along the DSP.  The leaves were inked in Cajun Craze, River Rock and Soft Suede with a bit of Early Espresso added to the edges with a sponge dauber.  Now to the bow…

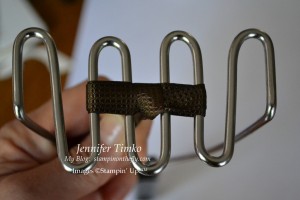
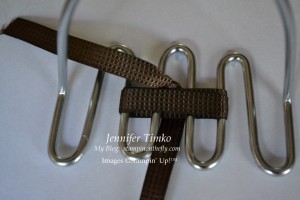
You saw my previous tutorial on the fork bow and this is another variation using a potato masher.  It happens to make just the right size bow!!  The bow I made today is a triple bow but you can also use this for a single or double version.  Since it is so similar to the fork bow, the picture above shows it wrapped three times, one tail pulled down and the other pulled over (if you need to see the first steps better, click to the fork bow tutorial).

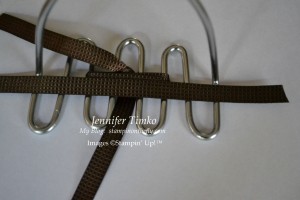
Turn over the potato masher and put it down on the table.

Add an additional piece of ribbon that long enough to go across the panel and wrap around a little to the back.  Position it so that the bow is in the correct place for your card.

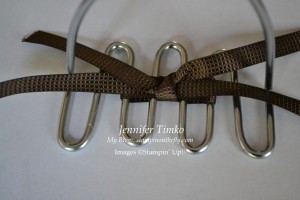
Tie the first half of a know and position the tails of your bow to hang correctly.  Make any adjustments to your wrap-around piece before further tightening (this is especially important with Seam Binding).  Tighten knot as much as you can then pull off the tines of the masher.   Hold the sides of the bow as you do any final tightening.

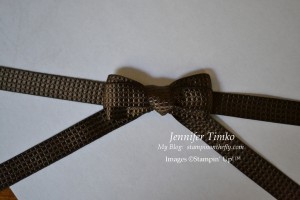
Here is your final bow.  If it is a triple version, pull one of the inner loops to the top and one to the bottom to make it look like this.  I used a double version of this on the Always Artichoke Bright Hopes Card from the SA Blog Hop.  I do recommend that you try this with Seam Binding first and get the feel of the technique.  The Quilted Satin Ribbon is a bit thicker and you have to work a little bit to get the knot tight.  It is definitely worth the effort though!!

This is part of my continuing search for the “perfect” bow.  I love how consistent these are and the more you do, the faster they get!  I can’t wait to see what you make with the Stampin’ Up ribbons this week.  Make sure you get right over and see what the rest of the design team has made…I’m in love with the ribbon flowers, the poofy bows, the scrunching…well, all of them!

Thanks for stopping in today.  I hope you had a wonderful weekend!!

Stamps:  French Foliage, Always Thankful; Paper:  Well Worn DSP, Early Espresso, Naturals Ivory; Ink:  Cajun Craze, River Rock, Soft Suede, Early Espresso; Accessories:  Espresso Quilted Satin Ribbon, Color Spritzer Tool, Sponge Daubers

All products are Stampin’ Up!

Bright Hopes Gift Box

Bright Hopes Gift Box published on 6 Comments on Bright Hopes Gift Box

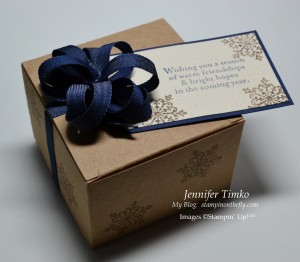
Today I am going to show you a little more detail about the Kraft Gift Box project from the Stampin’ Addicts Holiday Mini Blog Hop.  I love these little boxes and you really can’t beat the price!!  To start, I stamped the snowflake from Bright Hopes all around the sides of the box using Soft Suede and then assembled the box per the included instructions.

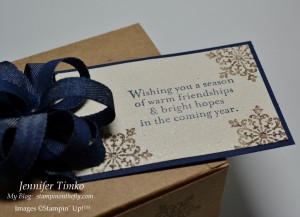
Next I created a tag using a Naturals Ivory.  I used my Champagne Mist Shimmer paint to create a Shimmer Spray.  All you have to do is fill a travel size spray container with about 1 ounce (half a bottle) of regular rubbing alcohol.  Then add drops of Shimmer Paint until it is as shimmery as you like (I use about 12-15 drops since I want some sparkle).  Shake well before each use.  I recommend you use this where the alcohol will not cause damage, either using the Color Catcher or other protective surface.  Spray your tag and set aside to dry.  Then I stamped with Soft Suede Ink again and Night of Navy.  You can see the sparkle if you click to look close-up but it is much prettier in person!

Next was the ribbon.  I used the Puffy Bow Tutorial from the extraordinarily talented stampers at Stampin’ 411.  I love their challenges but make sure you take some time to peruse their tutorials.  Fantastic information!!  The Denim Jean Ribbon is not quite as easy to cut as the Seam Binding shown in the tutorial but with a little patience you just follow the same instructions.  I left “tails” and attached the bow and tails to the top with Sticky Strip (I wrapped the ends around the lid).  I did the same with a length of ribbon around the box to make it look like a package.  Trim the ribbon to the right length and carefully, really carefully, seal the ends of the ribbon with a lighter so they don’t fray.

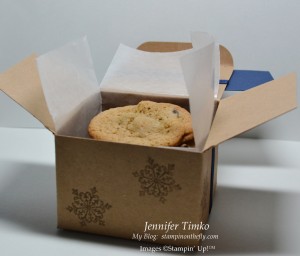
This allows you to open the box without having to take anything apart.  Just so you know, the box was perfect for five chocolate chip cookies.  Sadly, the cookies didn’t last much beyond this photo being taken.  My boys were waiting very patiently for me to finish and how could I say no??!!

I’m planning on ordering more packages of these little boxes and using them for all kinds of holiday gifts.  I can’t wait to make more of these bows using all kinds of other ribbon.  Just make sure you tell the Operators thanks for the tutorial and give them credit if you use it!!

I’m off to put some last minute touches on a project for tomorrow.  I look forward to sharing it and some fun news!  See you then!

Stamp:  Bright Hopes; Paper:  Naturals Ivory, Night of Navy; Ink:  Night Of Navy, Soft Suede: Accessories:  Kraft Gift Box, Blue Denim Jean Ribbon, Sticky Strip

All products are Stampin’ Up!

Fork bow tutorial

Fork bow tutorial published on 15 Comments on Fork bow tutorial

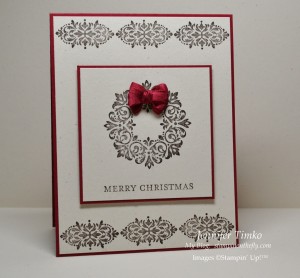
As promised in Friday’s post for the Stampin’ Addicts Blog Hop, I am here today with a tutorial on how to make the bow for the wreath card.  Supplies needed:  a salad fork and some Cherry Cobbler Seam Binding.  All pictures can be enlarged by clicking on the photo.

*Disclaimer* – This is in no way an original idea.  I have watched variations of this from very talented stampers and have simply taken pictures to show how I created the bow for my card.

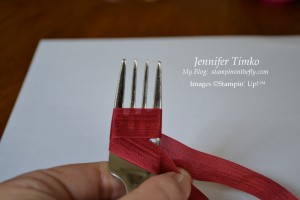
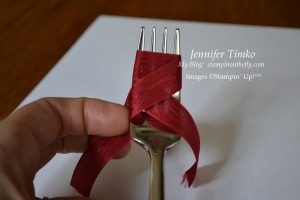
My bow is a “double” bow.  Cut your Seam Binding about 9 inches long.  Start with a tail in front of the fork and then wrap around twice.

When it has been wrapped around twice it should look like the picture above.

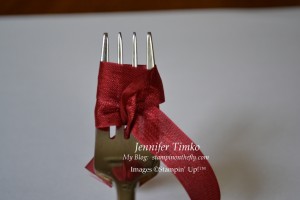
Next take the top tail and put it through the center of your fork.  Give a snug pull to get it seated at the bottom of your bow.

In the above picture I had not yet pulled the bottom tail enough (do as I say, not as I photograph  *smile*).  Next take the remaining tail and pull it through the center tines on the top.  How you see it now will be the front of your bow so now is the time to fuss with the center to make it look smooth.

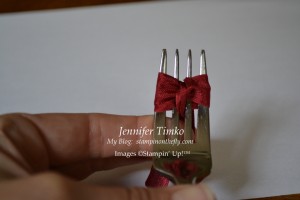
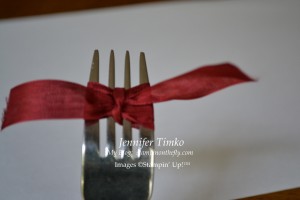
Turn your fork over and tie the two tails together as shown.  You will only make one tie and then pull it as tight as you like to make the front pretty.

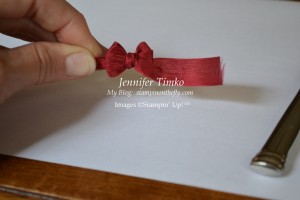
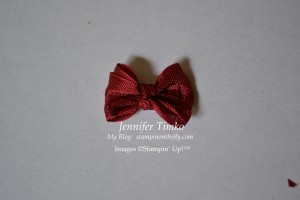
Take the bow off the fork and tighten/straighten as needed.  Your bow should now look like the picture above.

Finally, turn the bow over and cut off the tails.  I placed two Mini Glue Dots at the ends of the cut off tails and attached it to the card.  This helps to keep the bow attached securely and keeps the ends from coming loose.

Here is the final card again.  I did use my Stamp-a-ma-jig to line up the border detail on the top and bottom of the card.  The wreath panel is popped up on Dimensionals.

I hope these pictures help you make these cool little bows.  Please let me know if you have any questions about them!  I’ll be back later in the week to show you the bow for the tree card that uses yet another commonly found kitchen utensil.  Tomorrow, I have a fun birthday card for you so come on back by!  Hope you have had a safe weekend and that the storms have not affected you adversely.

Stamp:  Bright Hopes; Paper:  Naturals Ivory, Cherry Cobbler; Ink: Early Espresso; Accessories:  Cherry Cobbler Seam Binding, Mini Glue Dots, Dimensionals, Stamp-a-ma-jig

All products are Stampin’ Up!


Primary Sidebar