Skip to content

Seasonally Scattered in Gold

Seasonally Scattered in Gold published on 2 Comments on Seasonally Scattered in Gold

10494554_10152594044857329_7043287500476660222_n

The day is finally here!  I can start sharing projects I created for the display boards at Stampin’ Up’s Annual Convention in Salt Lake City.  While I was not able to go this year (and yes, I am really missing out on lots of fun), at least some of my work is there.  So without further ado…I introduce to you…..Seasonally Scattered!

Seasonally Scattered - Take out box

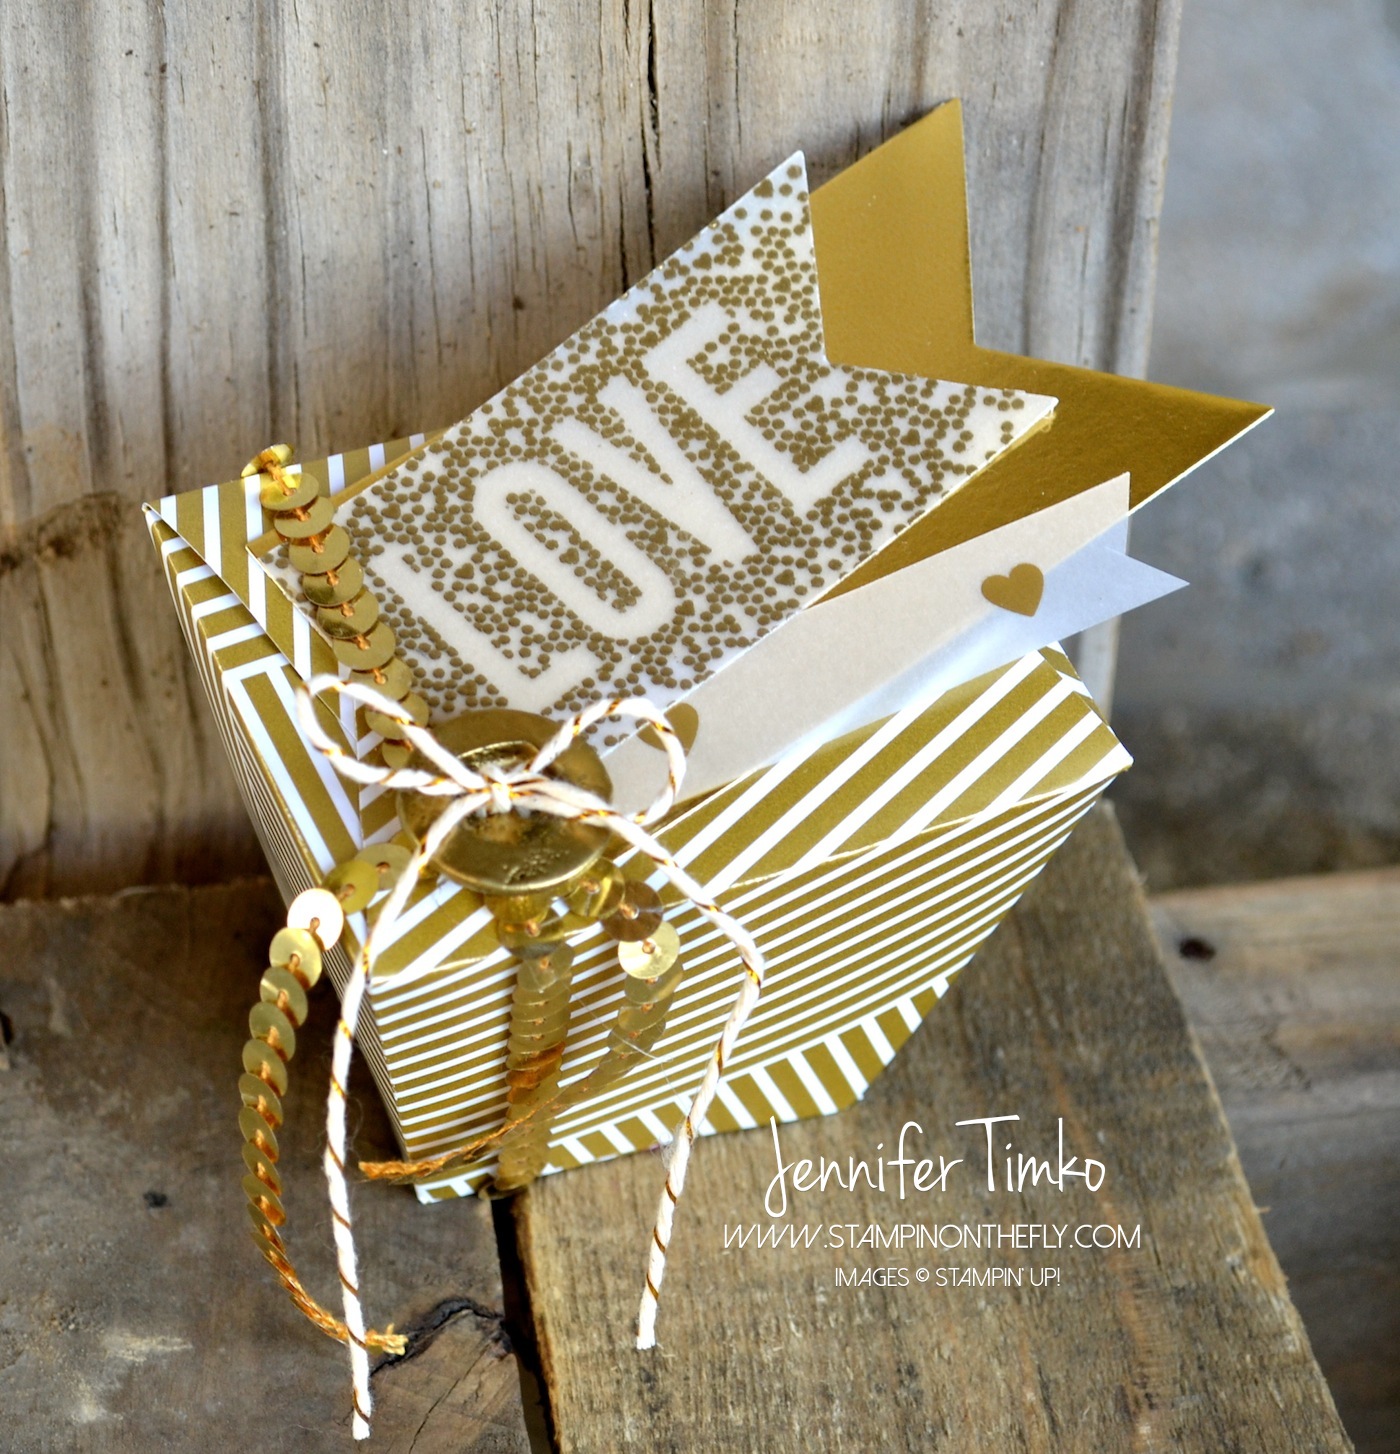
Today I am sharing a group of projects all made with this fun stamp and the suite of gold products that Stampin’ Up has available.  While this stamp won’t be available for customers until August 28th, the rest of the products are in the new 2014-15 Catalog.  This takeout box is just the same as last week’s Artisan Team project.  I printed the template onto the back side and cut it out of Gold Soiree DSP.  Super easy.  But guess what, in the new Holiday Catalog, there are new (and even EASIER) box options for DSP (takeout boxes, a box punchboard, and more!).  Yep…no excuses not to create boxes with your DSP!  I stamped with Gold Encore Ink onto White Vellum Card Stock and then embossed with Gold Stampin’ Emboss Powder.  I used my Banners Framelits to cut it into a tag.  Using Gold Foil, I cut a bigger banner with the framelits and then hand cut a little one out of Fancy Foil Designer Vellum.  I took a Vintage Faceted Button and inked it up then embossed it with Gold Stampin’ Emboss Powder too.  (Be careful on that one…trust me)  I tied some Gold Sequin Trim around the box and then added on the button tied with Gold Metallic Baker’s Twine.  Cute, shiny and fun!

Seasonally Scattered - Gold Love

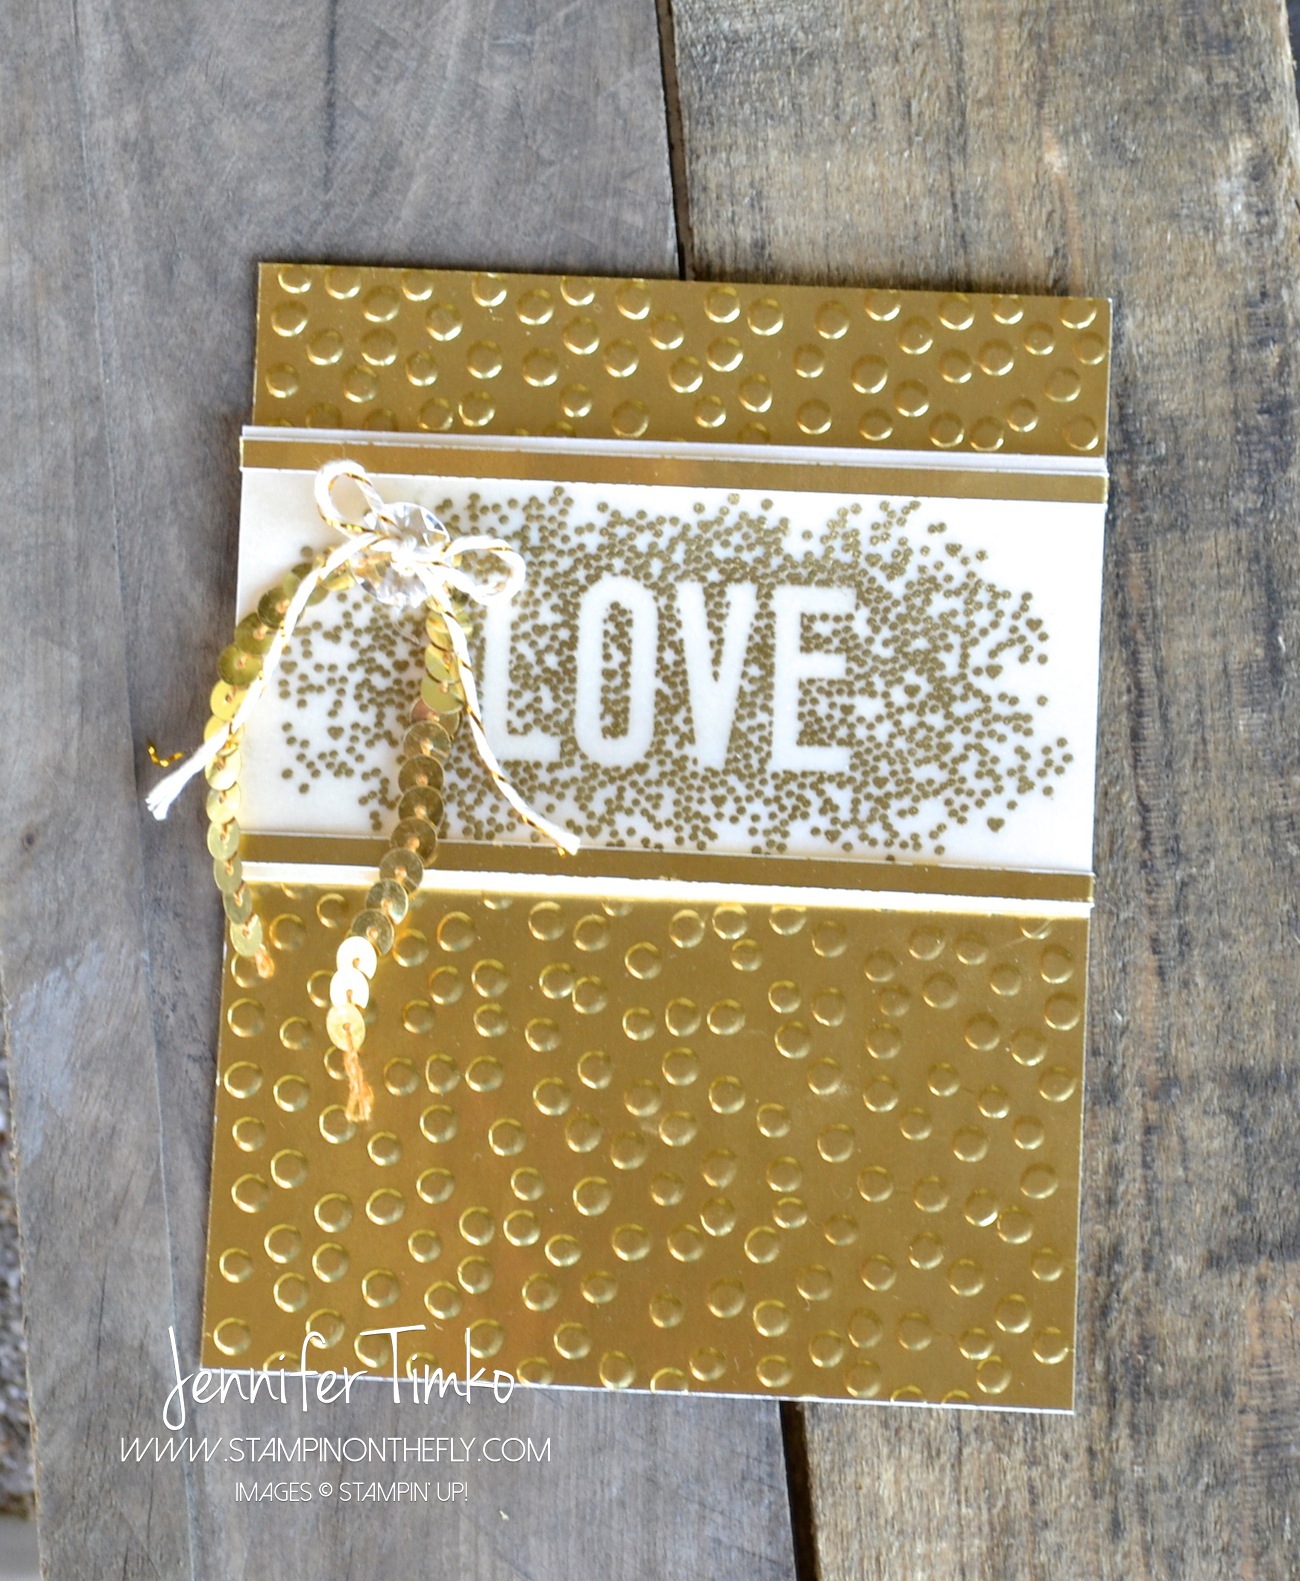
Next up a “sister” card to the box.  I created the image panel the same way as the tag above.  I layered it onto a Gold Foil panel and wrapped the narrow gold pieces around the back to help hide glue and keep it together (it is all about concealing with Vellum).  Then I tied up the Vintage Faceted Button with Baker’s Twine again and added it to the sequin trim.  The main panel is embossed with Decorative Dots.  Perfect card to go with your little gift!

Seasonally Scattered - Merry Scrapbook

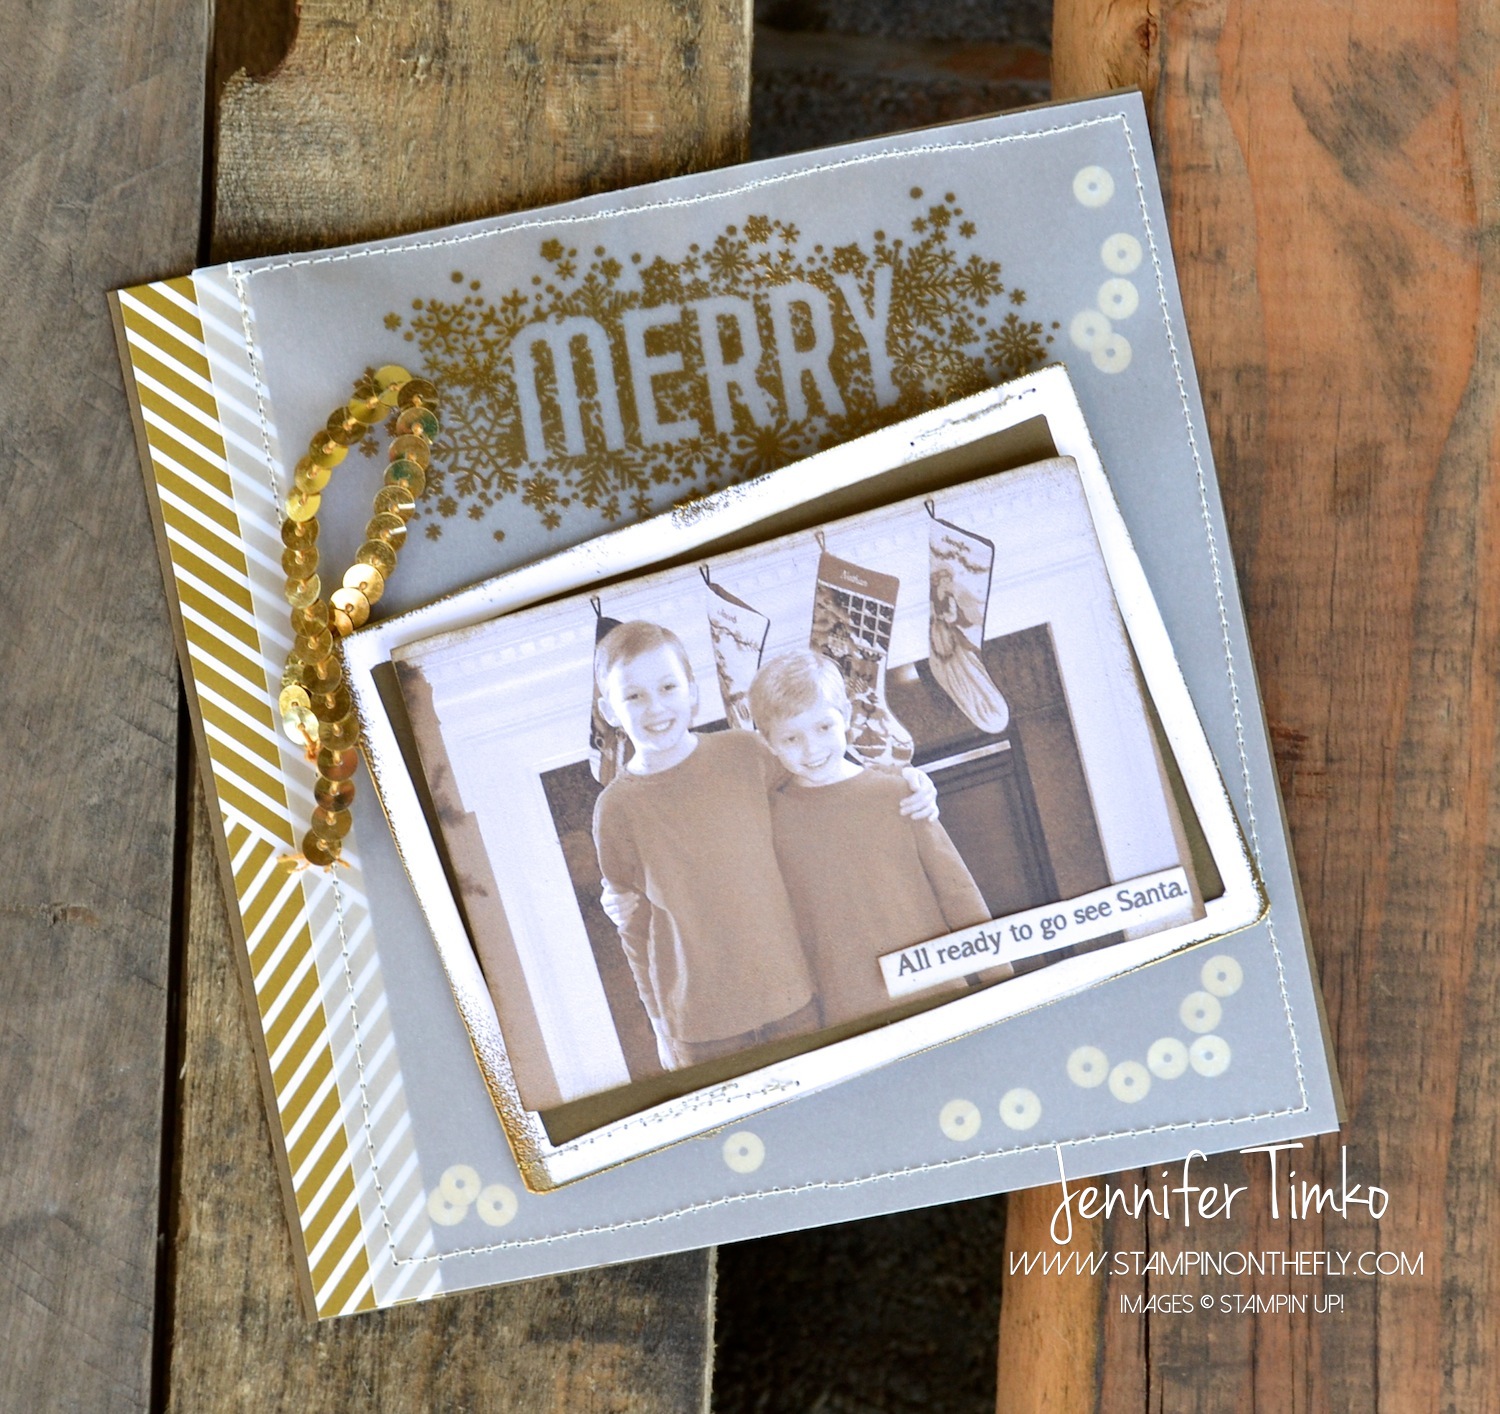
Finally a fun scrapbook page.  Yes, it is a shaker page.  Because why not?!  I stamped the sentiment in gold and embossed again.  Using an 8″ x 8″ base of Soft Suede Card Stock, I added a strip of Gold Soiree DSP  Then attached the vellum panel but starting to sew around the edges.  Before finishing I added some sequins loosened from the Gold Sequin Trim and finished the pocket part of the page.  I cut a frame from Whisper White and “distressed” it with gold ink and embossing then added some extra stitching.  I added a picture of my boys that I had edited in My Digital Studio and threw on a little more of the sequin trim.  I love this page.  I had a hard time sending it in.  Good thing it isn’t too hard to duplicate!

Now for more info on display stamping.  While we were all hard at work making our samples, this amazing group of stampers cheered on each other’s progress.  We eventually decided to create a group Pinterest page so that you could see all this stamping goodness in one place.  We will use the logo above (at the top of my post…linked to the page too) to help you find us and also link our work to the page as we post on our blogs.  I recommend you just follow that board.  Seriously.  You are going to be in awe!!

I’ll be back soon with more projects and stay tuned for my last two weeks of Artisan team work. Until then…see you soon and happy stamping!

Click HERE to purchase these amazing products from Stampin’ Up!

Stamp:  Seasonally Scattered; Paper:  Gold Soiree DSP, White Vellum Card Stock, Gold Foil, Whisper White, Soft Suede, Gold Fancy Foil Designer Vellum; Ink:  Gold Encore Ink; Accessories:  Gold Stampin’ Emboss Powder, Heat Tool, Gold Sequin Trim, Gold Metallic Baker’s Twine, Vintage Faceted Buttons, Big Shot, Banners Framelits, Decorative Dots Embossing Folder

Blog Signature 2014-001


Merry Monday #105

Merry Monday #105 published on 11 Comments on Merry Monday #105

105

I hope that your Easter weekend was full of family and lots of blessings!!  I had such a wonderful Sunday.  The boys had fun with their baskets, we all went out to a local winery in the afternoon with dear friends and then came home and had a lovely ham dinner with them.  Perfect!

This week’s challenge at Merry Monday is super fun and lends itself to all kinds of creativity!  There are so many ways to decorate letters!

MM105 - Holly Jolly

I have to confess that I was a bit pressed for time this week.  I was out on a four day trip and that means no stamping.  Or does it??!!  I had my computer and therefore I had My Digital Studio with me.  So I went in and started thinking about making hybrid card.  Using the Holly Jolly Greetings download I played with the sentiment to get it the right size.    I printed it twice so that I could cut out the little banner.  The background DSP is from the same download and I just printed it off, cut it to size and attached it to a card base.  I tied on some retired grosgrain ribbon and attached a Vintage Faceted Button to it.  The rhinestones on the card and the button were all colored with the new Blendabilities (yes…..I just got them….stand by for more because they are awesome).  The design team has all kinds of fun ways to show off you letter and word stamps/dies.  Hope you’ll play along this week!

Now about that retired stuff….  Today is the day.  The Stampin’ Up Retirement List is out and everything is available only as supplies last.  You need to move fast!!!  Check out the list by clicking here:  Stampin’ Up Retirement List

Back tomorrow with the latest Artisan Wednesday Wow and BLOG CANDY!!!  Come back to get all the details!

Click HERE to purchase wonderful Stampin’ Up products.

Digital Stamp: Holly Jolly Greetings; Paper: Very Vanilla; Accessories: MDS, Rhinestones, Grosgrain Ribbon (ret), Vintage Faceted Buttons

Blog Signature 2014-001

New blog look from MDS 2

New blog look from MDS 2 published on 7 Comments on New blog look from MDS 2

For those of you who subscribe by email, you will need to pop over to the actual blog to see!!  Yes, I gave a quick update to my blog look using the new MDS 2.  I started with the custom sized project to create my blog header.  The dimensions were in the WordPress theme and all I had to do was type them in to MDS in pixels.  Well, THAT was easy!  Then I added the Travel Log print with the clouds and one of the Travel Log embellishments.  I covered over the words on the embellishment with some Very Vanilla “paper” then added a stamp from the set.  The stamp is colored using the new coloring tool.  How much I love that feature!!  This went so fast that I decided to create a new Shop with Me button for my sidebar.  It was done in a similar fashion using the embellishment and I just added text boxes for the words.  Finally, a signature block to match.  All in under an hour…in a hotel…on a layover!!

Can’t wait to hear what you think!  Let me know and also let me know if you have any questions about MDS 2.  I’m in love with it already!

Don’t forget that Freshly Made Sketches has a new sketch as of yesterday.  I am absent this week with it being my boys’ last week of summer vacation.  The design team has come up with awesome cards using a great sketch by Jen Mitchell and I know you will want to play along.

Have a great day!

MDS Shadow Box

MDS Shadow Box published on 5 Comments on MDS Shadow Box

I’m back today with more details on the My Digital Studio shadow box project from the blog hop last weekend.  I did find that getting a good picture of this was hard!  The picture to the left gives a better idea of how much dimension there is.

I started in My Digital Studio (MDS) and pulled up the Up, Up and Away digital stamp.  I played around for a while with the colors and sizes of the balloons until I settled on these.  Daffodil Delight is the focal color since it is the color of my youngest son’s walls in his room.

This page shows the basic layout I came up with (without the balloons) and was used as my page for cutting out the clouds.  I created the clouds with the digital Cloud Punch.  The bigger cloud was augmented with a Circle Punch.  I just added circles until it looked right.  I created another page (not shown) that had only the Basic Black elements on a white background.  I did this by copying the page, deleting the clouds and changing the background color (really fast to do).  This was then printed on Marina Mist card stock.

The next page was just the balloons and some additional elements from Big Top Birthday Embellishments that I thought I might use.  I put the Marina Mist circles behind the balloon baskests so that they would blend into the sky when cut out.  All I had to do with this page was cut the balloons and the elements out.  Once everything was cut out, all I had to do was attach them to the Marina Mist base.  I put some things flat, some up on Dimensionals and the big balloon up on a double layer of Dimensionals.

Once I had everything put together inside, I started working on the outside of the frame.  I took the two Daffodil Delight strips and layered them on top of Real Red Wide Grosgrain Ribbon (retired).  The ends were covered with Marina Mist buttons from the Subtles Designer Button Pack.  I attached all those accessories with my trusty Sticky Strip and was done.

I knew I was on to something when my older son complained that he did not have anything this cool in his room.  Guess what I’ll be making again soon??!!  The great thing is that I can change many of the colors in a flash and have a project that matches his room!!

I’ll be back tomorrow with a new ColorLab Challenge.  I hope your day is great.  Thanks for dropping by!

Stamps:  Digital Up, Up and Away; Paper:  Marina Mist, Whisper White; Accessories:  My Digital Studio, Dimensionals, Subtles Buttons, Real Red Wide Grosgrain (retired), Shadow Box (non-SU), Black Thread (non- SU)

All products are Stampin’ Up unless otherwise indicated.


Reach out and "touch" the dolphins

Reach out and "touch" the dolphins published on 1 Comment on Reach out and "touch" the dolphins

I promised that I would occasionally show you some of the pages I created for calendars at Christmas.  This is one of my favorite pages with one of my favorite pictures!!  We went to Sea World – Orland0 during a summer visit to see family.  It was a fantastic day and I love the curiousity this picture shows.  One of the fantastic things about My Digital Studio (MDS)  is the ability to work with the colors until they are just right!  I found that Bermuda Bay was perfect with the water in the photo.  Then I expanded a circle punch a couple of times to get the layered circles, added the fill and had a great effect!  The words are from the “Enjoy every moment” stamp set that is available digitally in MDS.  This is an easy breezy page but I feel like it is a wow.  Of course, maybe that’s because it focuses on my wonderful sons!  Thanks for dropping by…I appreciate and value any comments!

Dolphin page

My Digital Studio!

My Digital Studio! published on No Comments on My Digital Studio!

I can finally share some of my pages from some My Digital Studio (MDS) projects I did for Christmas presents!  I made calendars for my mom and for my mother-in-law and what a hit they were!  I have never really scrapbooked before so this was an entirely new thing for me.  I am here to tell you that the program from Stampin’ Up just makes it look easy!  Stamps, papers, accessories, and (most importantly to me) colors are available digitally!!  I obviously have a calendar full of pages but thought I should share one of my favorites. 

November Leaf Page


I just love that I was able to put together this kind of page in my very first project!  Even if you are a traditional paper scrapbooker, MDS could be the perfect planning tool for you.  You can design your perfect page before you ever cut into your paper.  I’ll be sharing more of my favorites over the next few weeks!  Have a great week!

Primary Sidebar