Skip to content

Creative Crew Tree Tag

Creative Crew Tree Tag published on 8 Comments on Creative Crew Tree Tag

Hi everyone!  I am here today with another of my Creative Crew Challenge projects.  The Creative Crew Gallery is so inspirational this month.  You’ll be amazed by the variety of projects!  Staying within my chosen colors of Early Espresso, Cherry Cobbler and a neutral, the challenge is to create a home decor item (keyword:  CCREW1211HF, CreativeCrew).

The amazing and talented Connie Babbert from Inkspired Treasures created a card for one of the Freshly Made Sketches challenges that had a cool Christmas tree on it.  Immediately I knew I wanted to turn it into a tag.  I contacted her to make sure it was okay to CASE (Copy and Share Everything) for a class.  Not only did she say yes, she had a brilliant suggestion.  Her card used real buttons but for a tag class (5 tags of each design) that isn’t practical.  She said to use the Buttons #5 Die.  Problem solved!!  Stampin’ Up demonstrators are really some of the most generous people I know!  I adjusted the measurements a little from hers.  My largest triangle is a 1 3/4″ square cut on the diagonal and then a 1 1/2″, 1 1/4″ and 1 ” square cut the same way.  The sentiment is pulled from the Season of Joy word stamp and the tree trunk is Early Espresso Quilted Satin Ribbon.

Now just look at my little bag on my entry way table.  Isn’t it great??  I stamped the tissue paper with the snowflake from Bright Hopes to make it coordinate with the colors of the tag.  I also found some wrapping paper that matches this tag for my presents so cross another thing off of the Christmas to-do list!


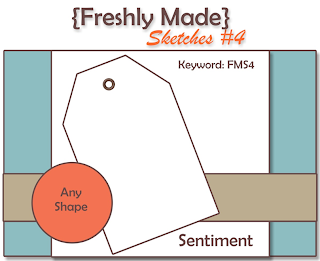
I hope you enjoy this little tag idea as much as my class did!  Thanks again to Connie for the idea!  I’ll be back tomorrow with the latest Freshly Made Sketches Challenge.  This week is my turn on creating the sketch!  Thanks for stopping in today.  Hope your week is great!

Stamps:  Season of Joy, Bright Hopes; Paper:  Frostwood Lodge DSP, Crumb Cake, Early Espresso; Ink:  Early Espresso; Accessories:  Big Shot, Buttons #5 Die, Early Espresso Quilted Satin Ribbon, Baker’s Twine, 1/8″ Hole Punch, Dimensionals, Crystal Effects (on the button)

All products are Stampin’ Up!

Fun Flowers Hair Band

Fun Flowers Hair Band published on 13 Comments on Fun Flowers Hair Band

I mentioned before that the Creative Crew Challenges this month required us to choose a color group for all of our projects.  I almost stumbled on the wearable art challenge.  What to make with Early Espresso, Cherry Cobbler and a neutral??!!  Then I remembered the Deck the Halls fabric!

I found a cool tutorial on these poofy flowers at Jones Design Company and I thought it would be fun to use on a hair band.  Now their tutorial has you hand cut flowers out of felt.  I let my Big Shot do all the work and it cut my fabric with the Fun Flowers Die (I cut about 5 layers at a time).  She also cut the little corner before adding the hot glue and I did not do this step.  I did not take pictures (unfortunately) because this was my first try and a big experiment.  Wish I had because it was easy!  The first thing I did was take my Cherry Cobbler Seam Binding roll and grab the end of the ribbon.  Found a center thread and started pulling until I had enough scrunched ribbon to double up for the center.  I simply folded it in half, added some hot glue to the ends and stuck it to the center of my felt piece (I did use felt as the base like in the tutorial…might try just the fabric next time).  I gave it some time to set up and then started adding the folded up flowers until the base was full.  Then I set it aside to dry.  I cut a slightly smaller circle from the felt and created a “sandwich”.  First the smaller felt piece, then the hair band, finally the decorated felt piece.  I attached the two felt pieces with hot glue and smooshed the hair band in-between.

My next critical step was to check it with the toughest critics of all…two 8 year old girls!  I knew they would be honest!  Two of my oldest son’s best friends helped me out and they are both “pictured” here with permission of their moms.  Now I thought about this as a hair band, of course, but apparently one of the new trends in the young girl crowd here is to wear the hair bands on their wrists.  I have to say, this is really cute that way!!  I am starting to debate other options including velcro.  These could be interchangeable but then just making a bunch to go with every outfit is easy enough.  I think I may make more for some nieces as a fun treat!  I knew was on to something by the reaction of one of the girls.  I took the hair band to a workshop at her mom’s house on Tuesday night.  I had promised her that it was hers as soon as I was done with pictures and the party.  In my packing up I inadvertently put the hair band in my bag and brought it home.  She was none too thrilled with me in the morning when she expected to get up and wear it to school.  Needless to say, I have fixed my error and saw her wearing it the very next day!

I will give you the cautionary tale of the hot glue gun.  Ummm, the glue is hot.  Yep, I was a little too quick to touch the glue while sealing the two felt circles and burned my finger.  Don’t let it happen to you!  My finger is fine…no worries.

Tomorrow is one of my favorite classes of the year, the Christmas Tag Class.  I will be back next week with some of the samples!  Until then, I hope you have a fantastic weekend!  Thanks for stopping in today!

Accessories:  Deck the Halls fabric, Cherry Cobbler Seam Binding, Big Shot, Hair Band, Hot Glue Gun, Felt

Creative Crew Sketch

Creative Crew Sketch published on 7 Comments on Creative Crew Sketch

Happy December everyone!  Today I am bringing you the first of my Creative Crew projects for the month.  Our overall theme this month is Color My World and the whole team chose different color combinations for their work.  My colors choices were Early Espresso, Cherry Cobbler and a neutral.  Yes, yes…I chose to work with some of my very favorite colors for the holidays!

I thought this sketch was so much fun and really unique.  You have to go see all the different variations that the Creative Crew team came up with!

My card has a very clean feel to it.  The contrast of the dark rich Early Espresso and Cherry Cobbler snowflakes against the Very Vanilla really appealed to me.  I love that this is a card that can be made in large quantities and mailed without extra shipping charges!  Perfect for those last minute Christmas cards!  The sentiment is from Season of Joy.  I isolated one of the phrases from the big stamp of words.  Basic Pearls seem to be just the right finish for these snowflakes.  So glad they come in packs of a lot of pearls!!  I seem to be using them on everything!

I hope you will be able to join us at Splitcoastampers this month.  If you use this sketch the key words are CCREW1211DF and CreativeCrew.  I will be posting more projects over the next couple of weeks but if you want to see them all go check out my gallery.

Thanks for dropping by today.  I hope that you have a wonderful day!

Stamp:  Season of Joy; Paper:  Early Espresso, Cherry Cobbler, Very Vanilla; Ink:  Early Espresso; Accessories:  Big Shot, Northern Frost Die, Basic Pearls

All products are Stampin’ Up!

Creative Crew Scrapbook Challenge

Creative Crew Scrapbook Challenge published on 10 Comments on Creative Crew Scrapbook Challenge

I told you on Friday a little more about the Creative Crew at Splitcoaststampers and I am back today with the scrapbook page challenge for the month of November.  We were to take this pocket card tutorial and utilize it on our page (or make a whole page based on it).  During the last two months I have escaped the scrapbook challenge because they were 3-D projects instead but there was no more hiding this month.  Yes, I am not a scrapbooker.  I don’t know why but it scares me…the whole permanent nature of a page thing, finding the right picture, actually choosing a picture, something.  I have made pages in My Digital Studio (MDS) which have been my lead-in to making a traditional page.  I confess that I needed inspiration and went to one of the best possible sources…a Stampin’ Up Artisan Award Winner.  Jenn Picard is inspirational and I looked to this page as a starting place.  I’m sure you can see the influence on my page.

I started with the picture and took it over to MDS.  I added the Define Your Life digital stamp and then adjusted the picture to sepia.  This really seemed to set the tone for the rest of the page.  I figured the safest thing to do was stick with colors and stamps that are squarely in my happy zone so I went with the Well Worn DSP and French Foliage.  I am so in love with those leaves!  I created the little pocket like the challenge asked for out of Cajun Craze and wrapped some Linen Thread around the fold.  I was still missing something so I added some Early Espresso Satin Ribbon (retired) and the Antique Brad.  The little pull-out tag got a Mini Library Clip and some more Linen Thread.  Funny how this wasn’t nearly as hard as I was making it out to be.  I may even end up with a whole scrapbook one day…

Well, off to work on my cards for a “Wow Christmas Card Class” I am holding next week.  I’m sure I will have lots to share from that one.  I’ll be back on Wednesday with another fun layout from Freshly Made Sketches.  Thanks for stopping by today!

Stamps:  French Foliage, Day of Gratitude; Paper:  Well Worn DSP, Natural Ivory, Cajun Craze, Early Espresso; Ink:  Early Espresso, Cajun Craze, Soft Suede; Accessories:  Mini Library Clip, Antique Brad, Early Espresso Satin Ribbon (retired), Linen Thread

Stocking Easel Card

Stocking Easel Card published on 8 Comments on Stocking Easel Card

I’m here today to share one of my projects from the Creative Crew at Splitcoaststampers.  For those not familiar with the Creative Crew, it is a group of designers that are chosen to provide inspiration with Stampin’ Up products.  Each month we have four challenges to complete and then you have all month to join in the fun.  This month the overall focus is fancy folds and each of our projects incorporate something a bit unique in the design.  You saw my tall/long card on Tuesday and today I am going to give you a bit more information about the Easel Card I made.

The basic tutorial for the easel card is here.  Now mine is modified a bit and made lots simpler because I have the new Stampin’ Up Simply Scored Scoring Tool.  My card front is 5 1/4″ x 5 1/4″.  This made my base 5 1/4″ x 10 1/2″ with score lines at 5 1/4″ and 7 7/8″ (really quick with the 1/8″ spacing on the tool).  I chose the Old Olive pattern from the Brights Designer Paper Pack since we were also asked to use colors from the Letters to Santa DSP.  I cut a stocking out with the new Holiday Stocking die and ran it through the Big Shot again with the  Snow Burst Embossing Folder.  The toe, heel and cuff are cut from Early Espresso card stock.  I ran a really thin line of Multipurpose Liquid Glue (Tombo) along the dotted perforations and attached the Early Espresso Baker’s Twine to it.  Next came some snowflakes from my brand new (to me) Northern Frost Die.  Oh, how I love these snowflakes!!  In the center of each I attached some Mini Jingle Bells using Crystal Effects as the glue.  I created the sentiment using a small part of the collage stamp from Season of Joy.  This is my first easel card and I have to say there will be more!

You know, I was a slow adapter to the whole Big Shot trend but wow, I’m not sure what I would do without it now!  If you have considered becoming a demonstrator, Stampin’ Up has extended the Big Shot offer until November 11th.  When you sign up, you will get your Big Shot free!

I will be back next Monday with another project from the Creative Crew.  Until then, have a great rest of your week and weekend!  Thanks for stopping in today!

Stamp:  Season of Joy; Paper:  Brights Designer Paper Pack, Early Espresso, Riding Hood Red, Old Olive, Whisper White; Ink:  Old Olive, Early Espresso; Accessories:  Big Shot, Snow Burst EF, Holiday Stocking Die, Northern Frost Die, Simply Scored, Mini Jingle Bells, Early Espresso Baker’s Twine, Crystal Effects, Mini Glue Dots, Tombo Multi

All products are Stampin’ Up!

SUOC31 + Creative Crew Challenges

SUOC31 + Creative Crew Challenges published on 8 Comments on SUOC31 + Creative Crew Challenges

Happy November!!  I hope you have recovered from the sugar overdose of October!!  Today we have another SU Only Challenge that I know you will love – Thinking of You.  I love cards made with this sentiment because they can be used in a variety of ways.  When I don’t have anything specific in mind for a card, this is a lovely way to go!

When I need a pretty card, one of the first sets I turn to is Day of Gratitude (especially in the fall).  The images in the set are so wonderful!  As I was playing around with some paper to put in the background, I noticed how similar the design in the Spice Cake DSP is to this flower.  Well, that was all I needed to get going!!  I stayed with Spice Cake colors when I chose the Stampin’ Write Markers for the image.  I love them together!  All that was needed was a Scallop Edge strip and a button.  The thread in the button is also colored with the Espresso marker.

My second card today is for the Creative Crew Challenges (CCREW1111CF, CreativeCrew) over at Splitcoaststampers.  One of the challenges is to create a tall/long card (about 6 1/2″ x 3 1/4″).  We were given inspiration pages from the catalog and I chose pg. 167 (the Cheers card).  You can see that both of my cards today use the same layout but really feel like totally different cards (and are both different than the catalog sample).  This is a bit what I was talking about last Friday in my Christmas 101 post.  I am completely in love with the Holiday Mini set Always Thankful.  I chose the pear basket because it hadn’t seen ink yet (horrors!!).  I inked the image with Versamark Ink and then with my Early Espresso Classic Pad and stamped onto Watercolor Paper.  It was then embossed with Clear Embossing Powder and colored with my Blender Pens.  I finished it with the Color Spritzer Tool to give it a little more detail.  The beautiful paper from Well Worn DSP provided the perfect background!

I hope you have liked both of these.  I look forward to seeing you join both challenges!  You have about 10 days for the SUO Challenge and a whole month for the Creative Crew Challenge.  There are 3 more projects in my gallery for the Creative Crew and I will be giving more details on those as the month goes on.  Come back tomorrow for a new Freshly Made Sketches challenge!  You are going to like it!

Card 1:  Stamp:  Day of Gratitude, Silhouette Sentiments (hostess, retired); Paper:  Spice Cake DSP, Early Espresso, Pool Party, Very Vanilla; Ink:  Pool Party, More Mustard, Early Espresso; Accessories:  Scallop Edge Punch, Regals Buttons, Dimensionals

Card 2:  Stamp:  Always Thankful; Paper:  Well Worn DSP, River Rock, Early Espresso, Watercolor; Ink:  Versamark, Early Espresso, Cajun Craze, Old Olive; Accessories:  Blender Pen, Color Spritzer Tool, Scallop Edge Punch, Regals Buttons, Linen Thread

All products are Stampin’ Up!


Decorate your door with bling!

Decorate your door with bling! published on 10 Comments on Decorate your door with bling!

As we approach the end of October, I wanted to show you one more card for the Creative Crew at Splitcoaststampers.  This one is for the All Things That Glitter challenge, CCREW1011.  I have been making this all week with my Christmas 101 Class and they have LOVED it!  The point of Christmas 101 is cards that can be easily duplicated in bulk.  For me, they need to have something special that LOOKS hard but really isn’t.

The door idea is nothing new but when I saw this door from LeAnne Pugliese I knew I needed to make my own version!  I kept the white on white because I thought it was so striking.  But I decided to add a wreath made out of the amazing Silver Glimmer Paper.  The picture doesn’t even come close to capturing the real sparkle!  I started with a 1″ Circle Punch and then punched the 1 3/4″ Scallop Circle around it.  It really is much easier this way (thanks, LeAnne)!  The little Cherry Cobbler bow uses the fork bow method just like I showed you in this tutorial.  The only difference is that I left the tails on.  A Silver Brad is the door knob and I added a sentiment from Teeny Tiny Wishes to complete the visual triangle.  The large rectangle is attached directly to the base and the door panels are popped up on Dimensionals.  The wreath, too, is up on Dimensionals (cut in half or use the little side pieces) and the bow is attached with Mini Glue Dots.

The hardest part about the card was figuring out the dimensions of the door panels so I will share those with you:

  • The base rectangle is 3 5/8″ x 4 7/8″.
  • The door panels start with a rectangle that is 3 1/8″ x 4 3/8″.  Cut the rectangle in half long ways at 1 9/16″.  Then cut each of those rectangles at 2 1/2″.  You will be left with two panels that are 1 9/16″ x 2 1/2″ and two that are 1 9/16″ x 1 7/8″.

Yes, yes, I know they are a little odd.  I tried to make them a bit easier (for class purposes) but they were either too big visually or too small for the sentiment.  When I did them in bulk, it went really fast.

I hope you have fun with this one!  Don’t forget to come take a look at my gallery at Splitcoaststampers on Tuesday for the big reveal of the new Creative Crew Challenges for November.  You’ll have a whole month to join in!

I’ll be back tomorrow with another card from my Christmas 101 Class.  Until then, have a great day!

Stamp:  Teeny Tiny Wishes; Paper:  Whisper White, Silver Glimmer Paper; Ink:  Cherry Cobbler; Accessories:  Silver Brads, Cherry Cobbler Seam Binding, Dimensionals, Mini Glue Dots

All products are Stampin’ Up!

Treats (and no tricks!)

Treats (and no tricks!) published on 7 Comments on Treats (and no tricks!)

This week at SUO Challenges – SUOC30 we want to see how you create your treats!  Show us the packaging, the cards with surprises or anything else that includes a treat!  We can’t wait to see all the creative things you make!

One of the things that first drew me to Stampin’ Up was the ease with which you could make cute things.  Everything matches, products are meant to go together and it simply works!  That is how I feel about the new 1″x8″ Cellophane Bags from the Holiday Mini.  They are meant to make your life easier…and they succeed!  They are the perfect size for pencils, small candies and Pixy Stix!  I chose the Pixy Stix option since these can be so messy when given out individually.  Using the pumpkin from Button Buddies (another item meant to make cute, fast projects) I stamped two different versions.  I used a Basic Black base for the boys and a Rich Razzleberry base for the girls.  The nice Pixy Stix people are kind enough to make candy in Pumpkin Pie and Rich Razzleberry to coordinate!!!

I am one of the room moms for my youngest son’s class and these will be for their class party.  I know that many of you, like me, have a hard time spending hours on things that will be destroyed in a matter of seconds by little ones.  Well, these were done in a flash and are still cute enough to feel like a special treat!  Once I sealed the Pixy Stix in the bags with the self-sealing strip, I attached the bag to the back of the Scallop Circle with a little bit of Sticky Strip.  Cross one project off of the to-do list!!

I was a little late on one of my Creative Crew projects so this is my fourth for the month of October – Holiday Focus (create a holiday decoration or gift).

I hope that you have fun with this challenge.  Make sure you go check out the fabulous ideas from the rest of the design team!  There are lots of time-saving (and spectacular) projects!   See you again tomorrow with the next card for Freshly Made Sketches!

Stamp:  Button Buddies; Paper:  Basic Black, Whisper White, Pumpkin Pie, Rich Razzleberry; Ink:  Pumpkin Pie, Basic Black, Rich Razzleberry, Old Olive; Accessories:  1″x8″ Cellophane Bags, Scallop Circle Punch, 1 1/4″ and 1 3/8″ Circle Punches, Sticky Strip

All products are Stampin’ Up!

Spice Cake for Thanksgiving

Spice Cake for Thanksgiving published on 10 Comments on Spice Cake for Thanksgiving

Did you enjoy the Operation Write Home Blog Hop yesterday??!!  Amazing cards!!  If you missed it, just go back to yesterday’s post and the  link is there!

Yesterday was also the launch day for the Creative Crew’s October Challenges at Splitcoaststampers.  My card today is for the DSP/Color Focus Challenge of the month – use any holiday themed designer series paper.  I combined it with the sketch from Freshly Made Sketches #4.

This is another great one and it was perfect for the challenge!

I chose to make the tag an oval  and I love how the big panel let the DSP do the work.  In this case, I used Spice Cake DSP and I am still in love with it!  I thought it would be perfect with the leaves from Day of Gratitude!  I created the tag by threading a small piece of More Mustard card stock through the button.  Then I created nesting loops of the thin slices of card stock, securing them together with Mini Glue Dots.  I got the idea to do this from my clever stamping friend Cindy at Heart’s Delight Cards and incorporated it here.  I treated the other button the same way and attached it to a piece of Pool Party Ruffled Ribbon for symmetry.

The cool weather in VA this weekend has it feeling like Thanksgiving so this seems perfect!  I hope your weekend has been good.  As promised, I’ll be back tomorrow with more details about my OWH Christmas card.  Thanks for stopping by and hope to see you again soon!

Stamps:  Day of Gratitude, Teeny Tiny Wishes; Paper:  Spice Cake DSP, More Mustard, Pool Party, Early Espresso; Ink:  More Mustard, Early Espresso; Accessories:  Neutrals Buttons, Big Shot, Ovals Die, Pool Party Ruffled Ribbon, Dimensionals, Mini Glue Dots

All products are Stampin’ Up!

OWH Sneak Peek

OWH Sneak Peek published on No Comments on OWH Sneak Peek

Tomorrow is World Card Making Day and Opereration Write Home is celebrating with a big blog hop showing holiday cards.  There are over 100 blogs participating and I am extremely proud to be one of them!!

Here is a little sneak peek of my card.  Make sure you come back tomorrow to see the reveal and to link into the whole hop.  I’m sure it will be amazing!

Tomorrow is also the launch of the October Creative Crew Challenge.  I won’t be able to post the projects here because of the hop but they will all be posted at Splitcoaststampers tomorrow afternoon.  More on each of those during the week.

I hope you have a wonderful Friday and I look forward to having you drop by again tomorrow!

Primary Sidebar