Skip to content

Fancy Friday – Spring Inspiration

Fancy Friday – Spring Inspiration published on 5 Comments on Fancy Friday – Spring Inspiration

Jen Timko - FF Mar - Butterfly HelloWelcome to this month’s Fancy Friday Blog Hop!  Our team is a group of demonstrators who love to make beautiful things.  Sometimes they are clean, sometimes they are layered but the one thing I can say for sure is that our projects will be fancy!  If you hopped over from my dear friend Cindy, welcome to the next stop.  For March, we decided to have an inspiration challenge.  Wow, inspiration is the word!

12829361_10205494643597837_8157772420674638890_o
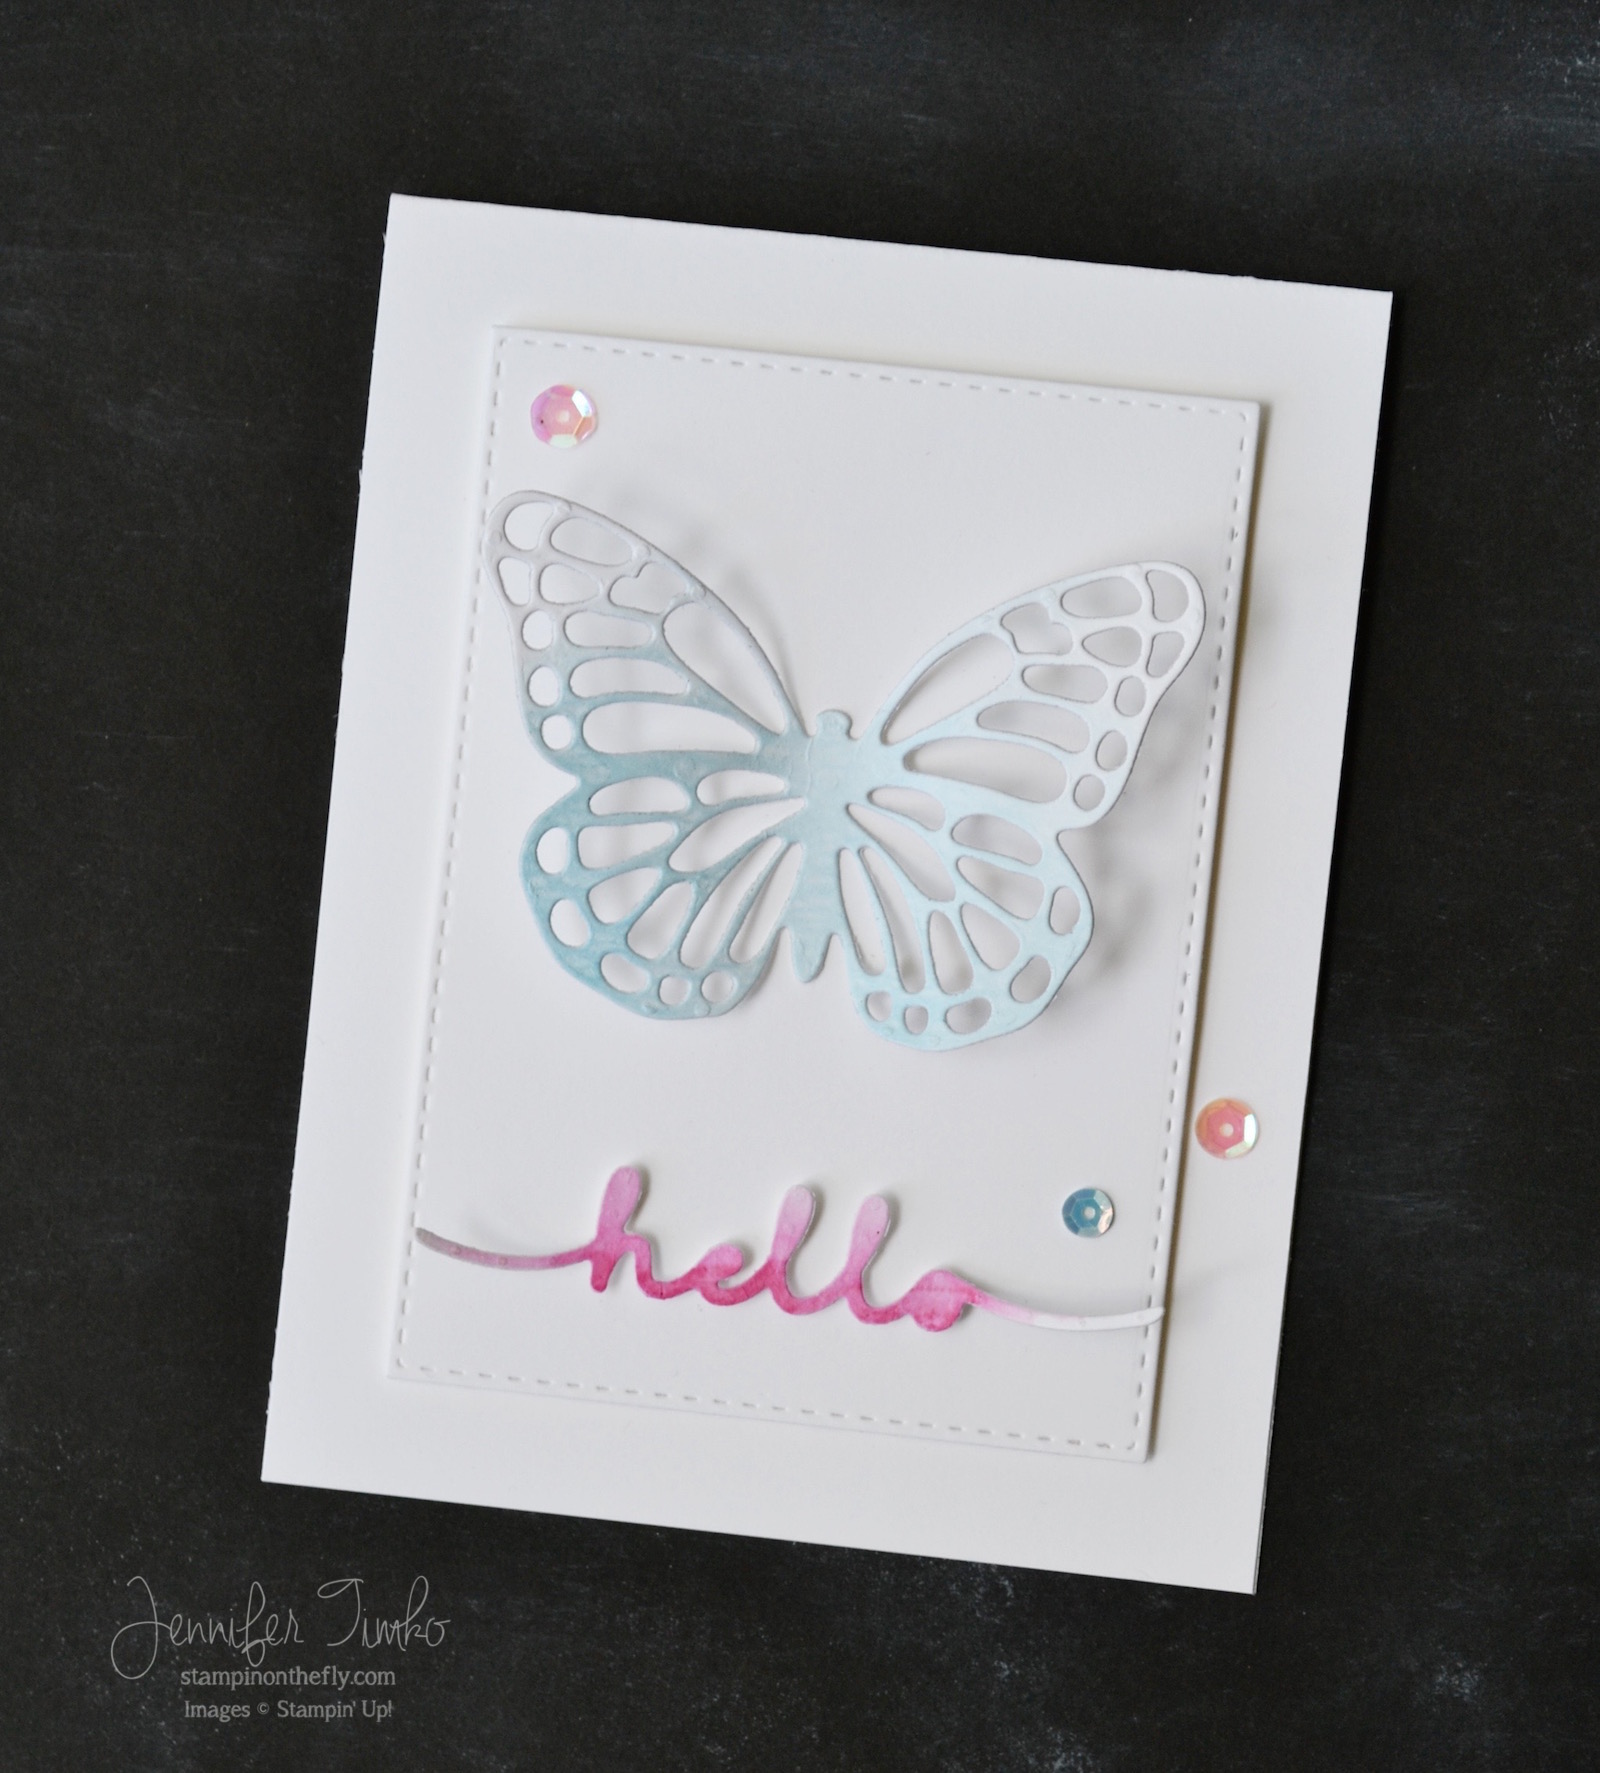
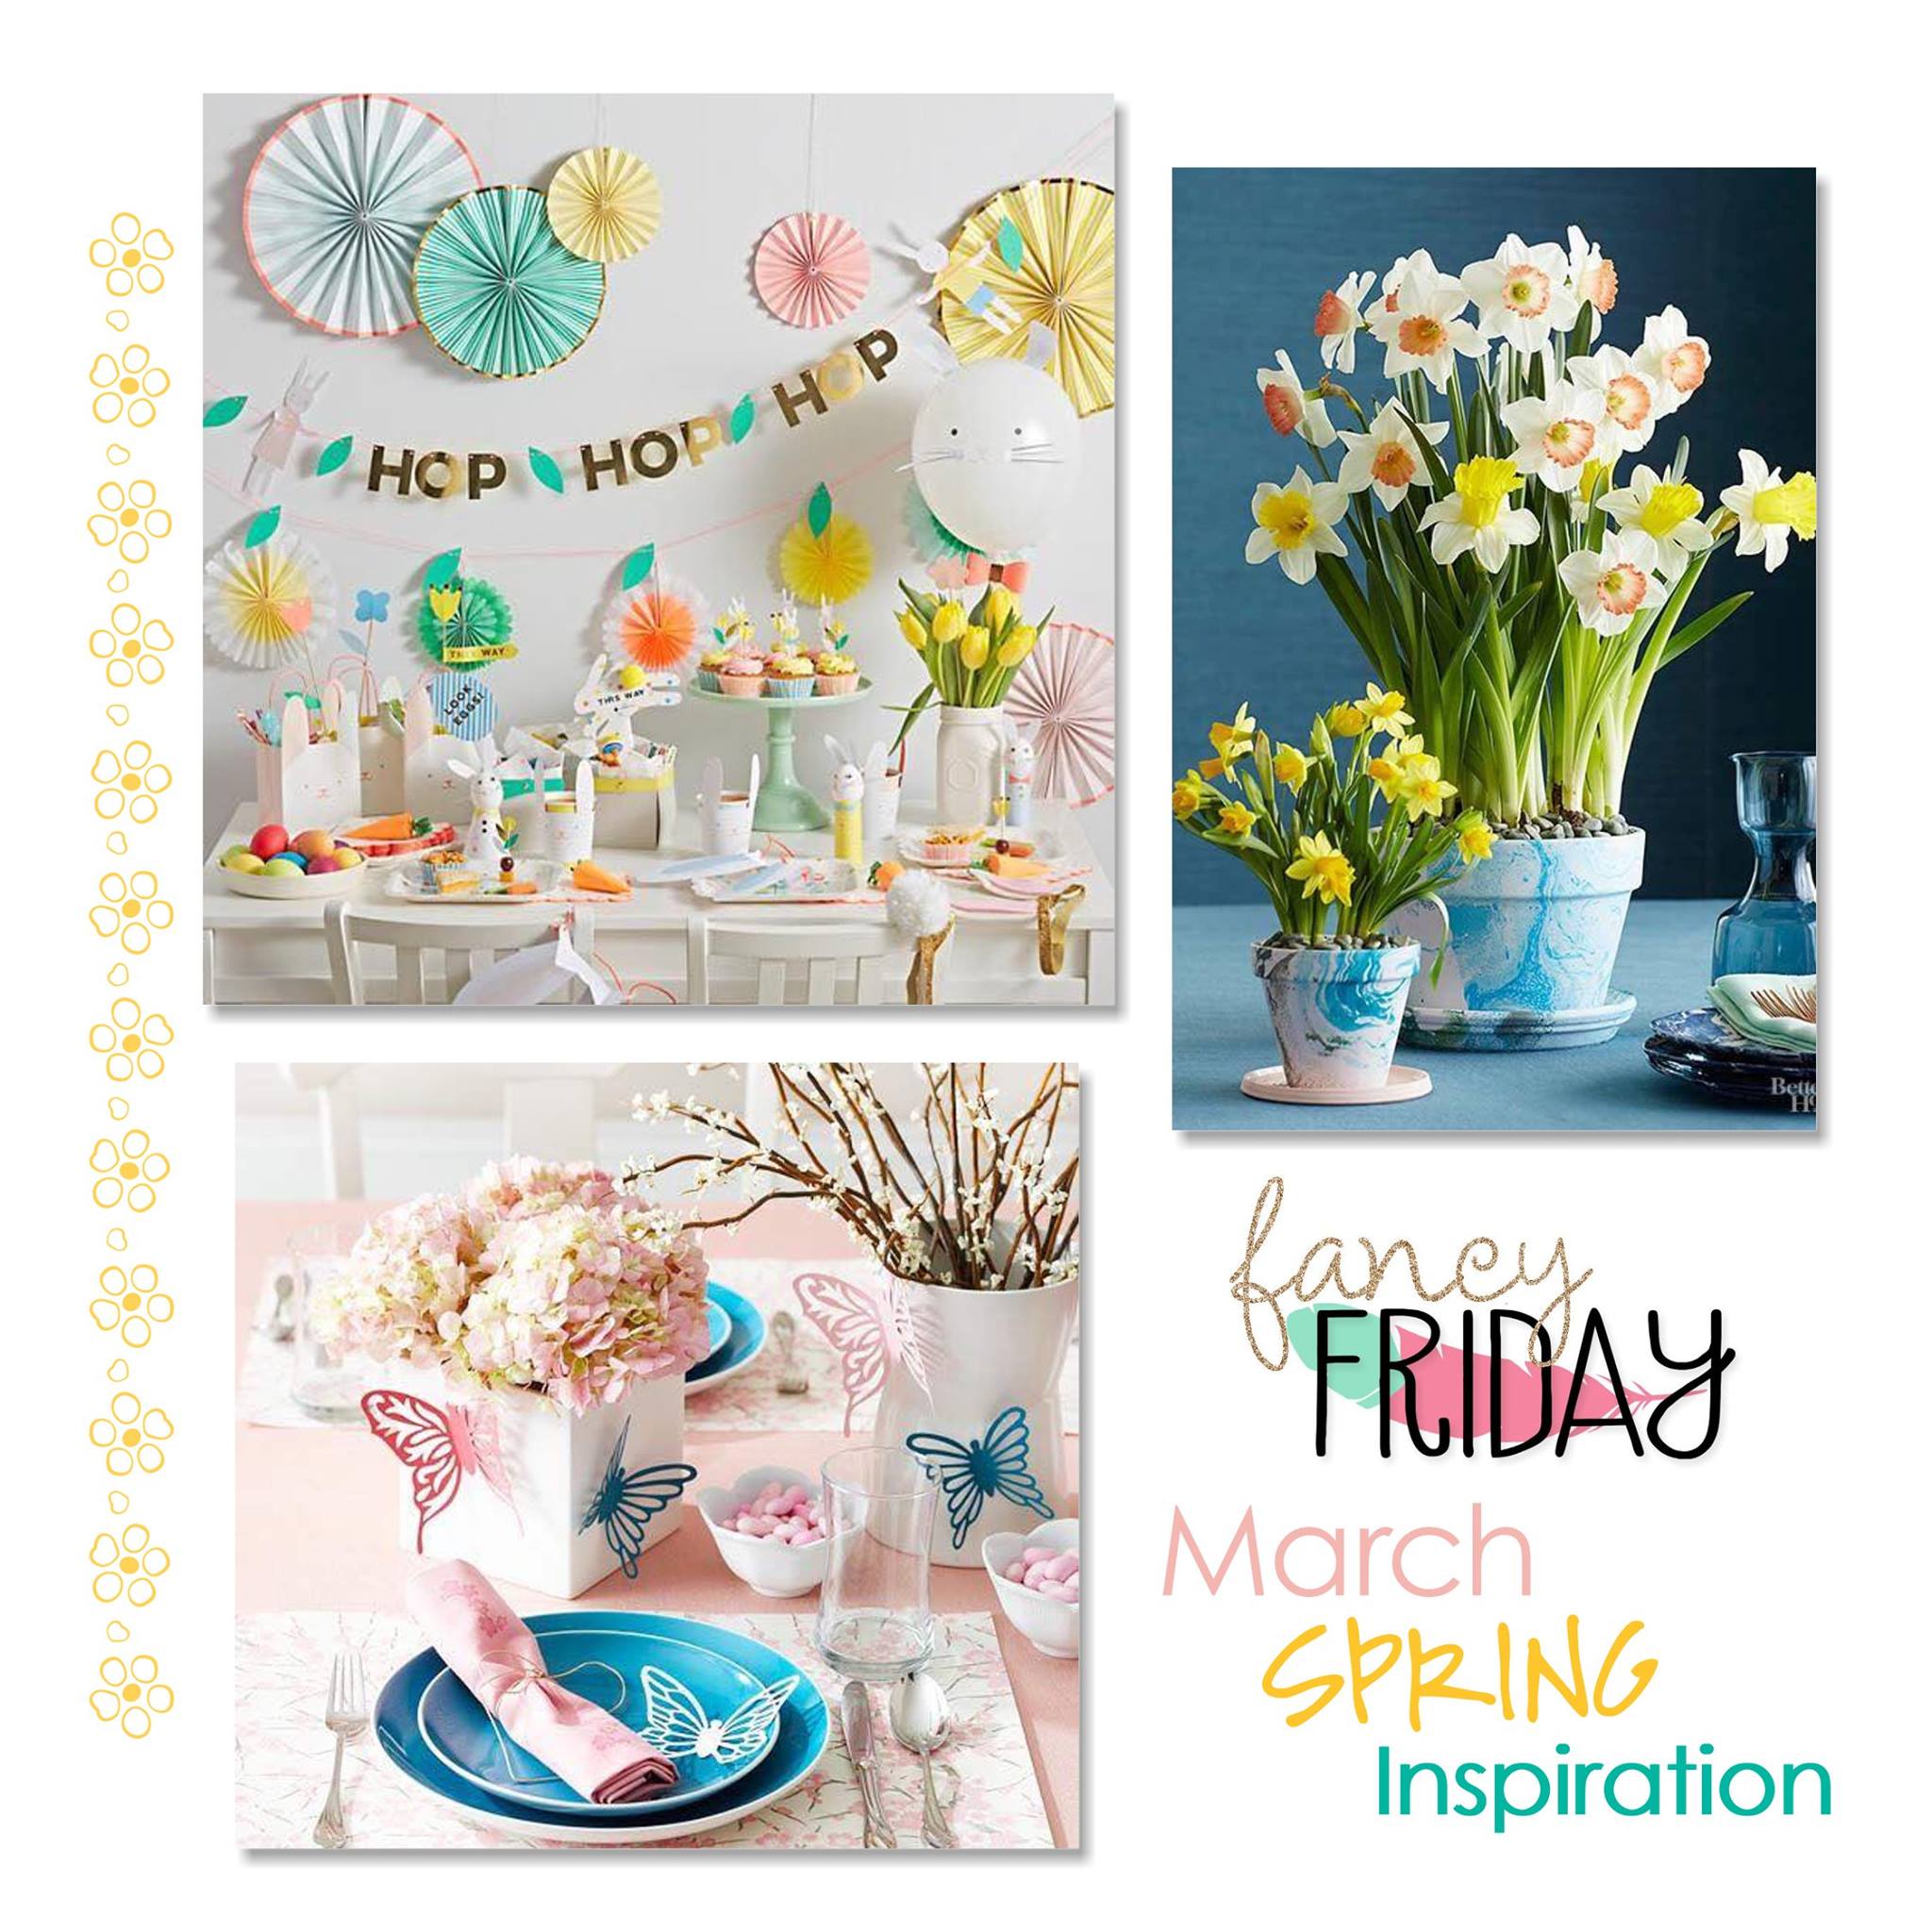
Isn’t this gorgeous?!  How to choose what to focus on with all that spring beauty?!!  I know it isn’t any great shock that I was drawn to the butterflies first.  I do love a butterfly!  And the pink and blue setting on the bottom left is just so pretty!  I pulled out watercolor paper and used some Distress Inks to create an ombre effect on the paper.  Then, using my Greetings Thinlits and my Butterfly Thinlets, I positioned the dies on my Big Shot to cut them out.  I made sure on both cuts that I had a little bit of white left to add interest to the cut-outs.  Don’t you love it when a little bit of ink and some dies do all the work?  Yeah, me too.  I used a Stitched Rectangle as a focal layer and then pulled out my sequins.  I have become quite the sequin hoarder and it pays off!  The little blue sequin is from the Watercolor Wishes kit and the pink ones are from the February Paper Pumpkin kit.  I just love the little bit of sparkle and fun that they add!  And these colors are so fabulous together….totally channeling the Pantone colors of the year (a combination of pink and blue).

Fancy-Friday-08

I love using these little sentiment dies and I seem to be obsessed with “hello” on my cards lately….just noticed that as I was scrolling down some of my latest posts.  Just like a “for you”, it is such a workhorse sentiment.  You can make the inside anything from a birthday to a thank you to a thinking of you.

I hope you love all the spring loveliness from the team this month!  If you find yourself inspired by our picture, make sure to let us know!!

My lovely friend Jeanna Bohanon is up next!   As always, she will wow you!

And you can click our logo above to get to the Fancy Friday Pinterest page!

6a00e54f94e01b883401b8d05f0bdc970c-320wi-2

Click HERE to purchase these wonderful Stampin’ Up products!

Paper:  Watercolor (Ranger), Thick Whisper White;  Ink:  Tim Holtz Distress Ink (Picked Raspberry, Spun Sugar, Tumbled Glass, Broken China); Accessories:  Aquapainter, Sequins (Feb Paper Pumpkin and Watercolor Wishes kits), Big Shot, Stitched Rectangles (SSS)

Signature 2016 - 1

Freshly Made Sketches #221

Freshly Made Sketches #221 published on 9 Comments on Freshly Made Sketches #221

FMS221 - Thank YouQuick post today.  I just got back from a long day of sledding. Taking advantage of the snow while we have it!  The neighborhood sports complex has some fabulous hills that are simply crazy for the boys!  Good stuff.  Speaking of good stuff, Freshly Made Sketches has an awesome one for you this week courtesy of the wonderful Karren Johnson.  I just love it.

Had no stamping time this week due to the snow madness here.  I was able to put this together quickly yesterday.  I tried a technique I had seen on a card made by Tasnim over at Altenew to create the flower.  Her’s, admittedly, is far more spectacular but I think this creates a nice effect.  I simply used Distress Ink in Spun Sugar, Picked Raspberry and Hickory Smoke on wet watercolor paper and then added more water with my Zig Water Pen to move ink a little more.  The sentiment comes from Another Thank You stamped in Basic Gray ink (SU).  Despite using my Misti to overstamp multiple times, the sentiment just would not stamp completely clean.  Ah well….that is how it goes sometimes.  I cut the panel out with my Stitched Rectangles Die (SSS) and put the image panel on a Smoky Slate base.

Hope you have a fun time with the sketch this week!  So much room for fun and interpretation!


Stamps:  Beautiful Day (Altenew), Another Thank You (SU); Ink: Basic Gray, Tim Holtz Distress Inks; Paper:  Ranger Watercolor, Smoky Slate; Accessories:  Zig Water Pen, Misti, Big Shot, Stitches Rectangles Dies

Signature 2016 - 1

Freshly Made Sketches #220

Freshly Made Sketches #220 published on 11 Comments on Freshly Made Sketches #220

FMS220 - Sending Hugs

Do you hear the panic in my typing??!!!!  The snow is coming, the snow is coming!!!  And apparently lots of it to Northern Virginia.  So I did what any reasonable stamper would do…..I created a happy spring card with not a snowflake in sight!  Over at Freshly Made Sketches this week we have an awesomely fun one for you to try.  It comes courtesy of the lovely Jen Brum who has clearly decided to embrace her fears as a new year’s resolution.  She notoriously does not like it when we put circles in the sketch and then she went and created this one!  Bravest woman I know, haha!

I played around with the idea of flowers and was looking through the stash when I saw this little floral spray in my Beautiful Day stamp from Altenew.  I thought it would be perfect to use in the corner and I just love how this turned out.  Using WPlus9 Black Dye Ink, I stamped the image onto Shimmery White Paper (SU) then added a couple more little flowers from the set to fill out gaps.  With my Zig Water Pen, I colored using Tim Holtz Distress Inks.  Easy and so pretty!  Then I lined up the sentiment on my Misti and stamped in the WPlus9 Ink again.  I stamped another few flowers inside the card (you can see them peeking out) and colored them up to.  Fast and oh so happy!

FMS Final 220-001I hope you enjoy this one as much as I liked making it.  Now hop right on over to the challenge and let’s see what you make of the circles!

Thanks so much for stopping in today.  Back on Friday with a fun Valentine card!  See you then!

Stamps:  Beautiful Day (Altenew); Ink: WPlu9 Black Dye Ink, Tim Holtz Distress Inks; Paper:  Shimmery White, Bermuda Bay (SU); Accessories:  Zig Water Pen, Misti

Blog Signature 2015

Fancy Friday – Snowflake Tags

Fancy Friday – Snowflake Tags published on 5 Comments on Fancy Friday – Snowflake Tags

I know it isn’t the last Friday of the month yet but, like last month, the Fancy Friday team decided to hop a little early in order to get ahead for the holidays.  Our team is a group of demonstrators who love to make beautiful things.  Sometimes they are clean, sometimes they are layered but the one thing I can say for sure is that our projects will be fancy!  If you hopped over from my dear friend Cindy, welcome to the next stop.  For December we are creating a Fancy Tags.  Always a last minute thing for me so I’m happy to see (and share) some ideas for you!

FF Dec - Snowflake Tags

The first thing you may notice about these tags is that they are distinctly different styles.  The second….they are all the same tag.  Just like the two cards I posted last week, at this time of year it is simply too hard for me to come up with totally new sketches and ideas.  So, I just kind of do a riff on one idea.  Totally what I did here.  The tags are created using the Scalloped Tag Topper Punch and the corner rounder from my Envelope Punch Board (but the Project Life Corner Punch works perfectly too).  I cut the paper to 3-1/2″ x 2″ and punched.  The two outside tags are Thick Whisper White and the middle tag is Fabriano Watercolor Paper.

Here are the specifics of each:

Gold Tag – Apply Embossing Buddy to whole tag.  Take your Versamark ink pad and dip the edges of your tag right onto the pad.  Apply Gold Stampin’ Emboss Powder on the inked edges and heat emboss.  Smoosh your Snowflake Element into Versamark and apply more Gold Stampin’ Emboss Powder, heat emboss that too.  Stamp sentiment from Santa’s Gifts with Versamark and add even more embossing powder.  Tie on some Gold Thread, add Gold Sequin Trim holding it on with a Gold Mini Metallic Clothespin.

Watercolor Tag –  Apply Embossing Buddy to whole tag.  Stamp sentiment with Versamark ink and add White Stampin’ Emboss Powder.  Heat Emboss.  Apply a little bit of water to the paper, using an Aquapainter apply Bermuda Bay Ink.  Ink up Snowflake Element with Versamark and add White Stampin’ Emboss Powder then heat emboss.  Tie on Bermuda Bay Sequin Trim with Bermuda Bay Baker’s Twine.

Sequin Tag – Using Tim Holtz Distress Ink in Chipped Sapphire, sponge on ink using the Mini Blending Tool (Tim Holtz).  Spritz on water and let dry.  Ink Softly Falling Embossing Folder with Versamark and stamp onto tag.  Add White Stampin’ Emboss Powder and heat emboss.  Stamp sentiment with Momento Tuxedo Black.  Emboss snowflake with white (like above).  Tie on Silver Baker’s Twine (this came from an old Paper Pumpkin).  Add sequins.

All the snowflakes were attached to the tags using the Fine Tip Glue Pen with a place for the To/From on the back.

6a00e54f94e01b883401b8d05ef236970c-500wi

Along with Allison, Kaitlyn, Krista and Marisa that joined in last month, we are also welcoming Sarah for December.  These ladies are seriously talented and totally fancy!!

The fabulous Mercedes Weber is up next!   Wait until you see what she created!

And you can click our logo above to get to the Fancy Friday Pinterest page!

6a00e54f94e01b883401b8d05f0bdc970c-320wi-2

Click HERE to purchase these wonderful Stampin’ Up products!

Stamp:  Santa’s Gifts; Paper:  Thick Whisper White, Watercolor (Fabriano), Tangerine Tango, Thick Whisper White (base);  Ink:  Bermuda Bay, Versamark, Momento Black, Tim Holtz Distress Ink; Accessories:  Scalloped Tag Topper Punch, Envelope Punch Board, Heat Tool, Gold and White Stampin’ Emboss Powder, Embossing Buddy, Aquapainter, Snowflake Elements, Gold Metallic Thread, Silver and Bermuda Bay Baker’s Twine, Sequins, Fine Tip Glue Pen, Softly Falling Embossing Folder (for stamping), Gold Mini Metallic Clothespin, Gold and Bermuda Bay Sequin Trim

Blog Signature 2015

Primary Sidebar