Skip to content

Freshly Made Sketches #10

Freshly Made Sketches #10 published on 20 Comments on Freshly Made Sketches #10

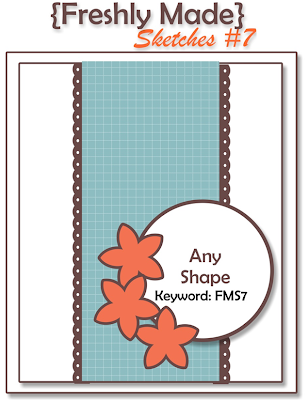
It is time for the Freshly Made Sketches latest challenge.  Oooh, take a look at this one!!  The fabulous layout is courtesy of the super talented Rita Wright at Rita’s Creations!  I love her style and her choice of the sketch shows why.  Just look at all the possiblities with this one!  If you have any questions, you just have to see the variety of projects from the team this week.  Lots of inspiration there!

Normally by November I am making all Christmas cards all the time.  Somehow this year, I continue to be inspired to make fall cards.  It might be because I LOVE fall in Virginia.  It might be because we are having lovely cold crisp mornings with warm afternoons.  Or it might be the Spice Cake DSP.  Hmmm!  I leave that to you to figure out!  More Mustard is, I admit, not a go-to color for me in general.  But this pattern called out to get used in this cool sketch this week.  I looked at my leaves (and I have lots), I looked at my flowers (lots there too) and then I realized that my Every Moment stamp was at the back of the stack.  That clearly had to be remedied!  I love this stamp set and the little bird here is awesome.  I have made him into several types of bird but today he is an orange fronted yellow finch.  Yep, look it up!  Of course I just colored him how I wanted and then figured out what he looked like but now we can all recognize a new kind of bird.  *smile*  I watercolored him with my Blender Pen after stamping him with Stazon Ink.  I added a sentiment from Teeny Tiny Wishes and a button to finish it.

The sketch does all the work here so it is perfect for beginning and advanced stampers alike.  Hope you will give it a try this week!  My boys are have some days off from school this week so I will be enjoying the beautiful weather with them.  I’ll be back next week though with lots of fun new things.  Thanks so much for stopping in today!

Stamps:  Every Moment, Teeny Tiny Wishes; Paper:  Spice Cake DSP, Early Espresso, Watercolor; Ink:  More Mustard, Early Espresso, Soft Suede, River Rock, Always Artichoke, Stazon; Accessories:  Blender Pens, Neutrals Buttons, Linen Thread, Dimensionals

Creative Crew Scrapbook Challenge

Creative Crew Scrapbook Challenge published on 10 Comments on Creative Crew Scrapbook Challenge

I told you on Friday a little more about the Creative Crew at Splitcoaststampers and I am back today with the scrapbook page challenge for the month of November.  We were to take this pocket card tutorial and utilize it on our page (or make a whole page based on it).  During the last two months I have escaped the scrapbook challenge because they were 3-D projects instead but there was no more hiding this month.  Yes, I am not a scrapbooker.  I don’t know why but it scares me…the whole permanent nature of a page thing, finding the right picture, actually choosing a picture, something.  I have made pages in My Digital Studio (MDS) which have been my lead-in to making a traditional page.  I confess that I needed inspiration and went to one of the best possible sources…a Stampin’ Up Artisan Award Winner.  Jenn Picard is inspirational and I looked to this page as a starting place.  I’m sure you can see the influence on my page.

I started with the picture and took it over to MDS.  I added the Define Your Life digital stamp and then adjusted the picture to sepia.  This really seemed to set the tone for the rest of the page.  I figured the safest thing to do was stick with colors and stamps that are squarely in my happy zone so I went with the Well Worn DSP and French Foliage.  I am so in love with those leaves!  I created the little pocket like the challenge asked for out of Cajun Craze and wrapped some Linen Thread around the fold.  I was still missing something so I added some Early Espresso Satin Ribbon (retired) and the Antique Brad.  The little pull-out tag got a Mini Library Clip and some more Linen Thread.  Funny how this wasn’t nearly as hard as I was making it out to be.  I may even end up with a whole scrapbook one day…

Well, off to work on my cards for a “Wow Christmas Card Class” I am holding next week.  I’m sure I will have lots to share from that one.  I’ll be back on Wednesday with another fun layout from Freshly Made Sketches.  Thanks for stopping by today!

Stamps:  French Foliage, Day of Gratitude; Paper:  Well Worn DSP, Natural Ivory, Cajun Craze, Early Espresso; Ink:  Early Espresso, Cajun Craze, Soft Suede; Accessories:  Mini Library Clip, Antique Brad, Early Espresso Satin Ribbon (retired), Linen Thread

Stocking Easel Card

Stocking Easel Card published on 8 Comments on Stocking Easel Card

I’m here today to share one of my projects from the Creative Crew at Splitcoaststampers.  For those not familiar with the Creative Crew, it is a group of designers that are chosen to provide inspiration with Stampin’ Up products.  Each month we have four challenges to complete and then you have all month to join in the fun.  This month the overall focus is fancy folds and each of our projects incorporate something a bit unique in the design.  You saw my tall/long card on Tuesday and today I am going to give you a bit more information about the Easel Card I made.

The basic tutorial for the easel card is here.  Now mine is modified a bit and made lots simpler because I have the new Stampin’ Up Simply Scored Scoring Tool.  My card front is 5 1/4″ x 5 1/4″.  This made my base 5 1/4″ x 10 1/2″ with score lines at 5 1/4″ and 7 7/8″ (really quick with the 1/8″ spacing on the tool).  I chose the Old Olive pattern from the Brights Designer Paper Pack since we were also asked to use colors from the Letters to Santa DSP.  I cut a stocking out with the new Holiday Stocking die and ran it through the Big Shot again with the  Snow Burst Embossing Folder.  The toe, heel and cuff are cut from Early Espresso card stock.  I ran a really thin line of Multipurpose Liquid Glue (Tombo) along the dotted perforations and attached the Early Espresso Baker’s Twine to it.  Next came some snowflakes from my brand new (to me) Northern Frost Die.  Oh, how I love these snowflakes!!  In the center of each I attached some Mini Jingle Bells using Crystal Effects as the glue.  I created the sentiment using a small part of the collage stamp from Season of Joy.  This is my first easel card and I have to say there will be more!

You know, I was a slow adapter to the whole Big Shot trend but wow, I’m not sure what I would do without it now!  If you have considered becoming a demonstrator, Stampin’ Up has extended the Big Shot offer until November 11th.  When you sign up, you will get your Big Shot free!

I will be back next Monday with another project from the Creative Crew.  Until then, have a great rest of your week and weekend!  Thanks for stopping in today!

Stamp:  Season of Joy; Paper:  Brights Designer Paper Pack, Early Espresso, Riding Hood Red, Old Olive, Whisper White; Ink:  Old Olive, Early Espresso; Accessories:  Big Shot, Snow Burst EF, Holiday Stocking Die, Northern Frost Die, Simply Scored, Mini Jingle Bells, Early Espresso Baker’s Twine, Crystal Effects, Mini Glue Dots, Tombo Multi

All products are Stampin’ Up!

FMS9 – Olive Pear

FMS9 – Olive Pear published on 18 Comments on FMS9 – Olive Pear

I am so happy to show you this week’s great sketch from Freshly Made Sketches!  This one was chosen by the amazing Tui Nathan and it is awesome!  I am also thrilled to tell you that the team is join by two guests for the month of November, Christy Q at SchnauzerCrafts Creations and Lauri Ingram of Paperville.  You are going to love what they bring to the team!

I am still working on replenishing my supply of thank you cards (always good before the holiday season) and today’s sketch kind of led me there.  I was looking through my stamps and realized that I had yet another stamp that needed ink.  My poor little pears had apparently been neglected.  This pear is the stamp that drew me into this hostess set and I knew it was perfect for this layout.  I inked it with Versamark, the Early Espresso (just like yesterday) and embossed it with Clear Embossing Powder.  This allows you to watercolor without blending the words of the stamp.  I colored the pear in with Old Olive ink, starting light and adding a bit more to darken the edges.  The inside is left plain or barely colored to give the illusion of depth.  For the ribbon, I ran a line of Sticky Strip across the card and scrunched the Early Espresso Satin across on top.  I left enough to tie on the end.  The thread is simply colored with my Stampin’ Write Marker.  An Espresso button conceals the other end.  Of course the Framed Tulips Embossing Folder was put to work again to add a little something to the base layer.

I hope you have as much fun with this sketch as I did.  Just look at the variety of cards from the team and you will see how much you can do with it!  I’ll be back tomorrow with another project from the Creative Crew.   See you then!

Stamp:  Faith in Nature (hostess); Paper:  Early Espresso, Old Olive, Very Vanilla; Ink:  Old Olive, Early Espresso, Versamark; Accessories:  Big Shot, Framed Tulips Embossing Folder, Heat Tool, Clear Embossing Powder, Blender Pen, Sticky Strip, Neutrals Buttons, Dimensionals

SUOC31 + Creative Crew Challenges

SUOC31 + Creative Crew Challenges published on 8 Comments on SUOC31 + Creative Crew Challenges

Happy November!!  I hope you have recovered from the sugar overdose of October!!  Today we have another SU Only Challenge that I know you will love – Thinking of You.  I love cards made with this sentiment because they can be used in a variety of ways.  When I don’t have anything specific in mind for a card, this is a lovely way to go!

When I need a pretty card, one of the first sets I turn to is Day of Gratitude (especially in the fall).  The images in the set are so wonderful!  As I was playing around with some paper to put in the background, I noticed how similar the design in the Spice Cake DSP is to this flower.  Well, that was all I needed to get going!!  I stayed with Spice Cake colors when I chose the Stampin’ Write Markers for the image.  I love them together!  All that was needed was a Scallop Edge strip and a button.  The thread in the button is also colored with the Espresso marker.

My second card today is for the Creative Crew Challenges (CCREW1111CF, CreativeCrew) over at Splitcoaststampers.  One of the challenges is to create a tall/long card (about 6 1/2″ x 3 1/4″).  We were given inspiration pages from the catalog and I chose pg. 167 (the Cheers card).  You can see that both of my cards today use the same layout but really feel like totally different cards (and are both different than the catalog sample).  This is a bit what I was talking about last Friday in my Christmas 101 post.  I am completely in love with the Holiday Mini set Always Thankful.  I chose the pear basket because it hadn’t seen ink yet (horrors!!).  I inked the image with Versamark Ink and then with my Early Espresso Classic Pad and stamped onto Watercolor Paper.  It was then embossed with Clear Embossing Powder and colored with my Blender Pens.  I finished it with the Color Spritzer Tool to give it a little more detail.  The beautiful paper from Well Worn DSP provided the perfect background!

I hope you have liked both of these.  I look forward to seeing you join both challenges!  You have about 10 days for the SUO Challenge and a whole month for the Creative Crew Challenge.  There are 3 more projects in my gallery for the Creative Crew and I will be giving more details on those as the month goes on.  Come back tomorrow for a new Freshly Made Sketches challenge!  You are going to like it!

Card 1:  Stamp:  Day of Gratitude, Silhouette Sentiments (hostess, retired); Paper:  Spice Cake DSP, Early Espresso, Pool Party, Very Vanilla; Ink:  Pool Party, More Mustard, Early Espresso; Accessories:  Scallop Edge Punch, Regals Buttons, Dimensionals

Card 2:  Stamp:  Always Thankful; Paper:  Well Worn DSP, River Rock, Early Espresso, Watercolor; Ink:  Versamark, Early Espresso, Cajun Craze, Old Olive; Accessories:  Blender Pen, Color Spritzer Tool, Scallop Edge Punch, Regals Buttons, Linen Thread

All products are Stampin’ Up!


More Christmas 101

More Christmas 101 published on 8 Comments on More Christmas 101

My Christmas 101 class this week was so much fun.  The point of the class was cards that are easily duplicated but that still feel special.  Yesterday’s card had the sparkle of the wreath.  Today we are working in a more subtle but elegant palette.

This card is perfect for the new stamper or if you want to limit your costs on creating your cards.  The beautiful detail on the Bright Hopes tree adds a certain elegance that is elevated by the bow.  The bow is created with my trust potato masher (instructions here).  My class looked at me with a bit of skepticism when we started these but all their bows ended up looking just like mine.  I may have some converts!  We talked a lot about visual triangles and how they make a card look complete.  We also discussed layouts that can use interchangeable stamps.  Imagine this card with Dasher in Cherry Cobbler and Early Espresso or in this same color set using the tree from Season of Joy and the matching sentiment from the set.  The card would feel different but you haven’t had to do any extra work.  All these are elements I use when designing my own Christmas cards.

I hope this helps you as you approach the holiday card making season.  It is not too late to start!!  I’ll be back next week with lots more…a new SUO Challenges, the Creative Crew November Challenges and of course a new Freshly Made Sketch.  Off to work on finishing those projects….  Have a great weekend!

Stamp:  Bright Hopes; Paper:  Crumb Cake, Always Artichoke, Natural Ivory; Ink:  Always Artichoke; Accessories:  Artichoke Seam Binding, Dimensionals

All products are Stampin’ Up!

Decorate your door with bling!

Decorate your door with bling! published on 10 Comments on Decorate your door with bling!

As we approach the end of October, I wanted to show you one more card for the Creative Crew at Splitcoaststampers.  This one is for the All Things That Glitter challenge, CCREW1011.  I have been making this all week with my Christmas 101 Class and they have LOVED it!  The point of Christmas 101 is cards that can be easily duplicated in bulk.  For me, they need to have something special that LOOKS hard but really isn’t.

The door idea is nothing new but when I saw this door from LeAnne Pugliese I knew I needed to make my own version!  I kept the white on white because I thought it was so striking.  But I decided to add a wreath made out of the amazing Silver Glimmer Paper.  The picture doesn’t even come close to capturing the real sparkle!  I started with a 1″ Circle Punch and then punched the 1 3/4″ Scallop Circle around it.  It really is much easier this way (thanks, LeAnne)!  The little Cherry Cobbler bow uses the fork bow method just like I showed you in this tutorial.  The only difference is that I left the tails on.  A Silver Brad is the door knob and I added a sentiment from Teeny Tiny Wishes to complete the visual triangle.  The large rectangle is attached directly to the base and the door panels are popped up on Dimensionals.  The wreath, too, is up on Dimensionals (cut in half or use the little side pieces) and the bow is attached with Mini Glue Dots.

The hardest part about the card was figuring out the dimensions of the door panels so I will share those with you:

  • The base rectangle is 3 5/8″ x 4 7/8″.
  • The door panels start with a rectangle that is 3 1/8″ x 4 3/8″.  Cut the rectangle in half long ways at 1 9/16″.  Then cut each of those rectangles at 2 1/2″.  You will be left with two panels that are 1 9/16″ x 2 1/2″ and two that are 1 9/16″ x 1 7/8″.

Yes, yes, I know they are a little odd.  I tried to make them a bit easier (for class purposes) but they were either too big visually or too small for the sentiment.  When I did them in bulk, it went really fast.

I hope you have fun with this one!  Don’t forget to come take a look at my gallery at Splitcoaststampers on Tuesday for the big reveal of the new Creative Crew Challenges for November.  You’ll have a whole month to join in!

I’ll be back tomorrow with another card from my Christmas 101 Class.  Until then, have a great day!

Stamp:  Teeny Tiny Wishes; Paper:  Whisper White, Silver Glimmer Paper; Ink:  Cherry Cobbler; Accessories:  Silver Brads, Cherry Cobbler Seam Binding, Dimensionals, Mini Glue Dots

All products are Stampin’ Up!

Freshly Made Sketches #8

Freshly Made Sketches #8 published on 19 Comments on Freshly Made Sketches #8

Happy Wednesday!  I hope your week is going well!  Like I said last week, I have been doing lots of stamping and now you get to start seeing some of it.  Freshly Made Sketches has another fabulous challenge up today and you are going to love working with this layout!

While I have been doing a lot of holiday stamping, today’s card was a bit of a departure from that.  I continue to just be in love with the colors in the Paisley Petals DSP and this is why.  The beautiful paper creates a card that looks hard but isn’t!  The flower is cut out of one of the designs and of course it matches the other papers perfectly.  I used my new Designer Frames Embossing Folder to frame the sentiment (from Precious Butterflies – hostess).  The “bow” is created by looping some Very Vanilla Seam Binding and cinching it with thread tied through the button.  The thread is concealed by a Basic Pearl.  I added a little trio of pearls to the corner to finish it off.  When your designer paper has this much beautiful detail, there is little need for extra embellishment.

Make sure you go check out the incredible work from the whole design team and our guest designer, Holly Endress.  As usual, the variety is amazing!

I’ll be back tomorrow with one of the cards from my Christmas 101 Class that I have been holding this week.  Get ready to sparkle!!

Stamp:  Precious Butterflies (hostess); Paper:  Paisley Petals DSP, Naturals Ivory, Early Espresso; Ink:  Early Espresso; Accessories:  Big Shot, Designer Frames Embossing Folder; Very Vanilla Seam Binding, Neutrals Buttons, Basic Pearls, Dimensionals

All products are Stampin’ Up!

Outside the box

Outside the box published on 8 Comments on Outside the box

Ok, I suppose this really should be named “Decorating the outside of the box”!!  The new Card Keeper box, that is.  My hostess club got together yesterday and this was one of our projects.

You may recognize the paper on top as the retired Walk in the Park DSP.  Stampin’ Up used to have a bulk buy feature for demonstrators and this was one of those paper sets.  Using the bulk buy paper allowed all of us to make the same design with the box.  The box comes with the lid already assembled.  The box is folded neatly within along with the hardware, templates and instructions.  I chose to only cover the top although there are template available for the covering the whole box.  Here are the tips that will help you:

  1. You have to make sure that the box is folded so that the tabs are inside.  They come folded the opposite way of the direction they need to go and you need to give them a firm fold the other way so that the seams lie correctly.
  2. The glue on the tabs is very strong!  Once in place, it it in place.  Practice putting together the box (complete with lid) before you glue it down.
  3. The lid has a snug fit.  When putting the box together it is important that the seams are really straight (especially near the top).
  4. Cut out the template you intend to use and then trace onto the back side of your DSP (or covering material).  Then cut out.
  5. The Simply Scored Tool is really helpful to score the lines as indicated on the template.
  6. Because of cutting variations and manufacturing tolerences, the template may need to be trimmed a bit.  Just put it up to your lid and check the folds before you glue.
  7. The Anywhere Glue Stick worked great with the DSP.  Apply the glue to the lid instead of the paper for even coverage.

The flower was made using the Fun Flowers Die.  I made one cut with the DSP and one with Basic Gray card stock.  I alternated the DSP.  Crystal Effects was used as my glue.  It has the added benefit of adding some substance to the base of the flower which is helpful when attaching it to the box.  I thought the addition of some Beautiful Wings butterflies added a little something special (the Kiwi Kiss paper is the back side of the Basic Gray design).  I found that the Lucky Limeade Ruffled Ribbon was a nice go-with to the Kiwi Kiss paper and used it to make the leaves.  Of course a couple of Basic Pearls were “needed” to finish off the butterflies.  The label for the front is a piece of 1″x2″ Basic Gray paper.  Once I commit to how I am using this, I will complete the label.

I initially thought that I would use this as a card organizer.  But as I mentioned a while ago, I had lost one of my Embossing Folders.  This may become the home for those and some other Big Shot items like the little Embosslits and I guess I’ll have to make a second one for cards.

Glad you were able to stop in today.  I am working on Christmas card for a class next week and the next Creative Crew Challenges.  The paper is flying and the ribbon is out of control.  I’ll be back next week to share some of these creations!  Have a great weekend!


FMS7 – Spiced up butterfly

FMS7 – Spiced up butterfly published on 18 Comments on FMS7 – Spiced up butterfly

It is time for the Wednesday sketch challenge from Freshly Made Sketches!  Yea!!  The team has another fun one for you!

Just look at all the possibilities with this one!!  Take note that the circle can really be any shape.

I knew that I wanted that shape to be a butterfly but needed something for the little trio.  I took inspiration from Heidi Baks over at RunningwScissorsStamper….her rolled flowers are always amazing.  They aren’t even as hard as I envisioned.  I started with a 1″ Circle Punch and followed the instructions here.  Multipurpose Liquid Glue (Tombo) was the adhesive to hold them together.  For my scalloped edges in the sketch I used Victoria Crochet Trim along the rectangular panel.  Basic Pearls were the last addition for the flower centers and the body of the butterfly (made with the Beautiful Butterflies Die).

Just wait until you see what the rest of the design team has made with this sketch.  Wow!  We are joined this week by guest designer Sandra Azzopardi and her card is amazing!

I’ll be back on Friday with a project I created for my Hostess Club.  Hint:  It is a little outside my normal design “box”.  Until then, have a great week!

Stamp:  None; Paper:  Spice Cake DSP, Early Espresso, Pool Party; Ink:  None; Accessories:  Big Shot, Beautiful Butterflies Die, 1″ Circle Punch, 1 3/4″ Circle Punch, Victoria Crochet Trim, Basic Pearls, Crystal Effects (to hold on butterfly), Multipurpose Liquid Glue, Dimensionals

All products are Stampin’ Up!

Primary Sidebar