
I am so excited to show you the last project from the Artisan Design Team’s January box of products. We are so thrilled to be sharing ideas using some of the latest and greatest from the Occasions Catalog. These are the projects that were featured on Stampin’ Up’s Facebook Page. If you have come over from amazing Jeanna, welcome to the next stop. If you are starting here, just continue around using the next buttons until you get back to me.
When I got my Sale-a-bration flyer, one of the things that stuck out was the statement to use the cute DSP to make fun little boxes. Well who am I to argue with a great idea?! It seems that the rest of the team agrees since there have been some amazing boxes (with instructions) in the hops this month. Mine is a modification of a gable box. The idea has been around for a while and I just modified measurements to meet my needs.
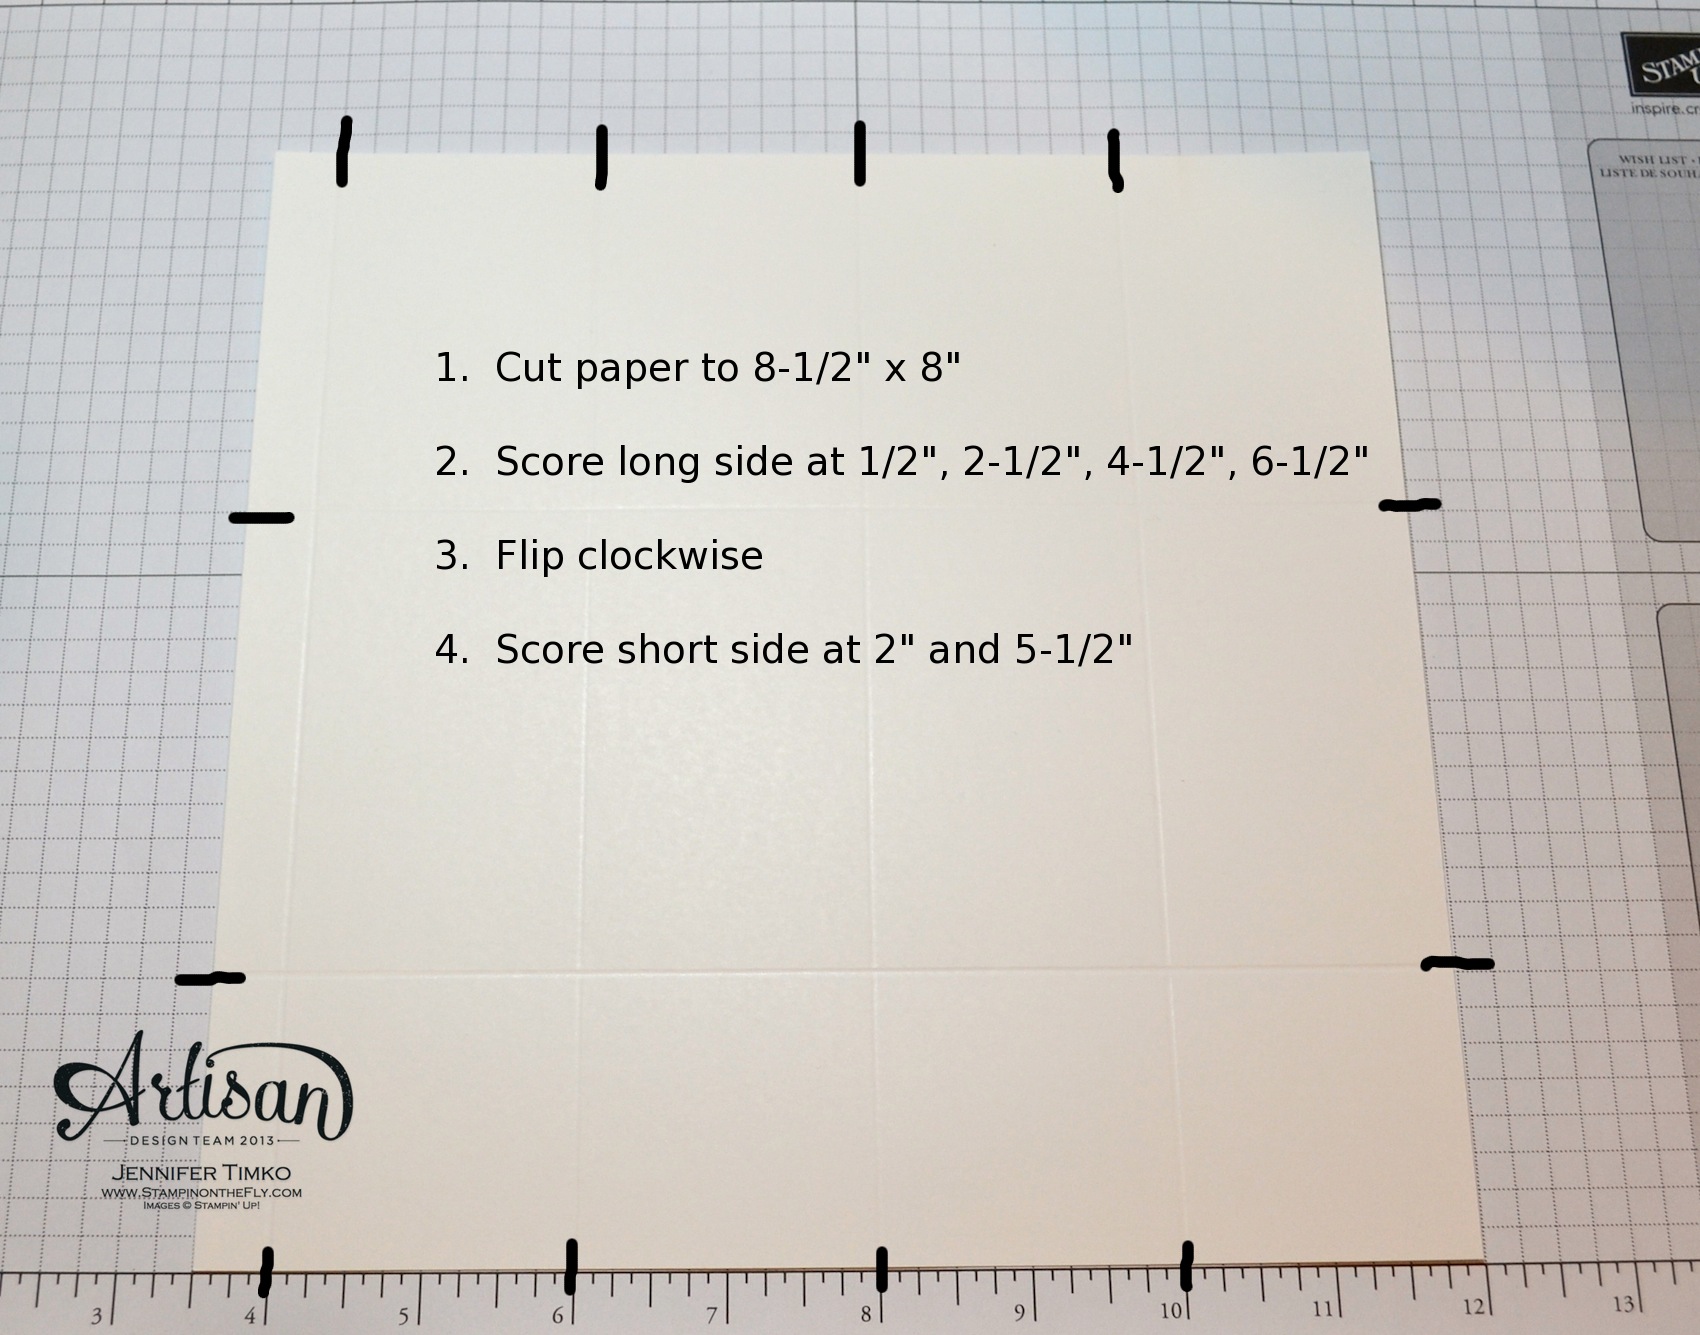
Start with a piece of paper (DSP is fantastic for this!) that is 8-1/2″ wide by 8″ deep. Score the 8-1/2″ side at 1/2″, 2-1/2″ 4-1/2″ and 6-1/2″. Turn the paper clockwise and score the 8″ side at 2″ and 5-1/2″. Cut down the vertical score line until you reach each horizontal score line.
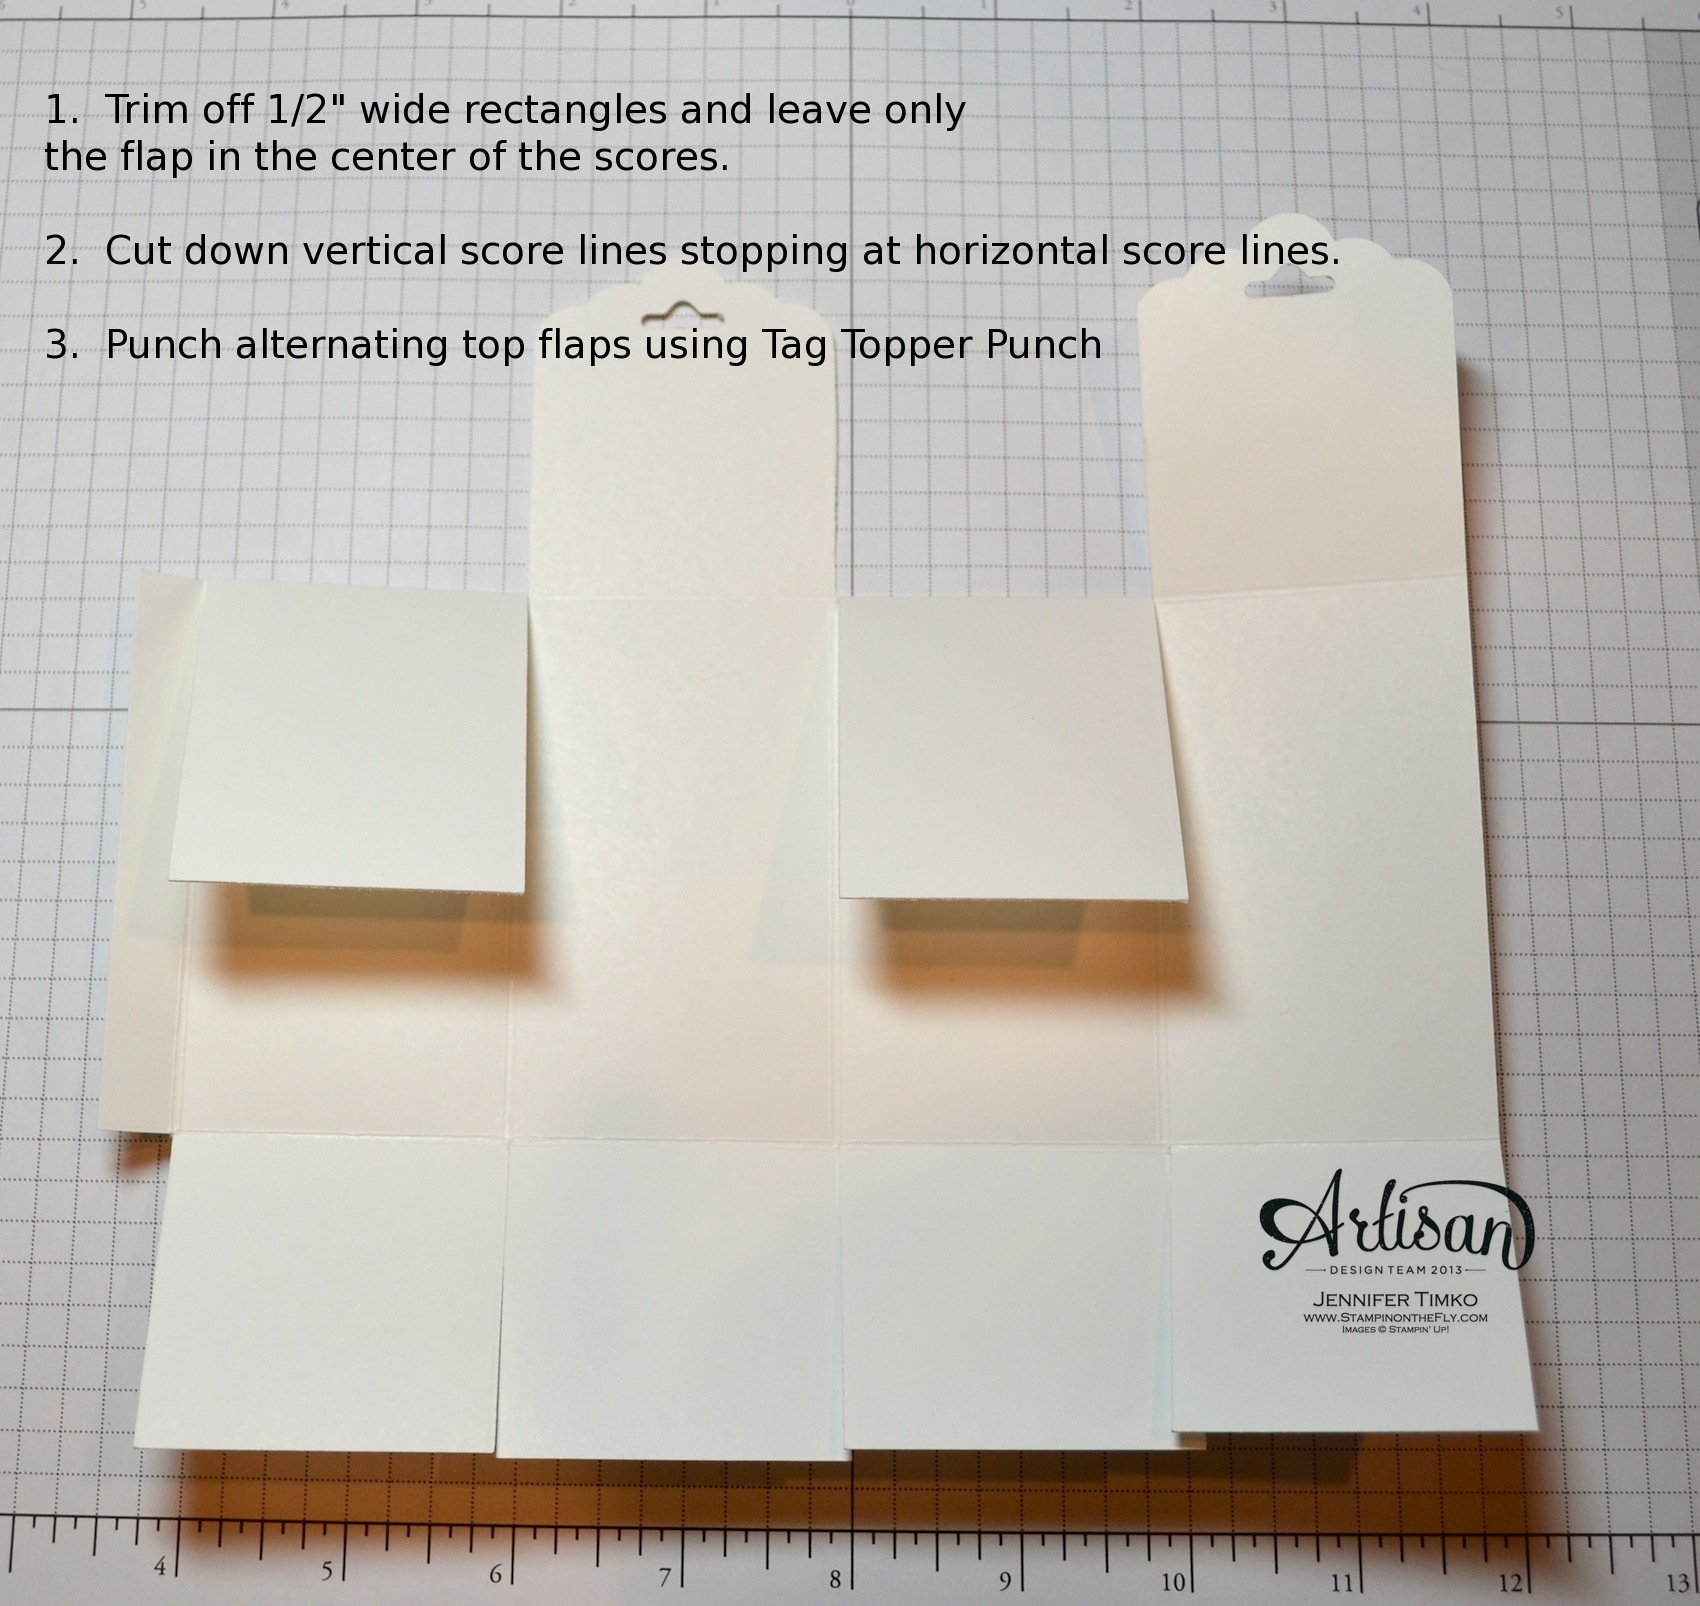
Then trim off the top and bottom tabs in the 1/2″ score section. This will leave you with one tab in the center that will help you glue the box together. On alternating top sections, use your Scalloped Tag Topper Punch to create the pretty tops. Fold the unpunched sections down and glue down to the center section. This gives your box a little more stability. Apply Sticky Strip to the outside of the 1/2″ tab and attach it to the inside of the opposing side. Fold your bottom sections up to form the bottom of the box attaching with Sticky Strip at each layer.
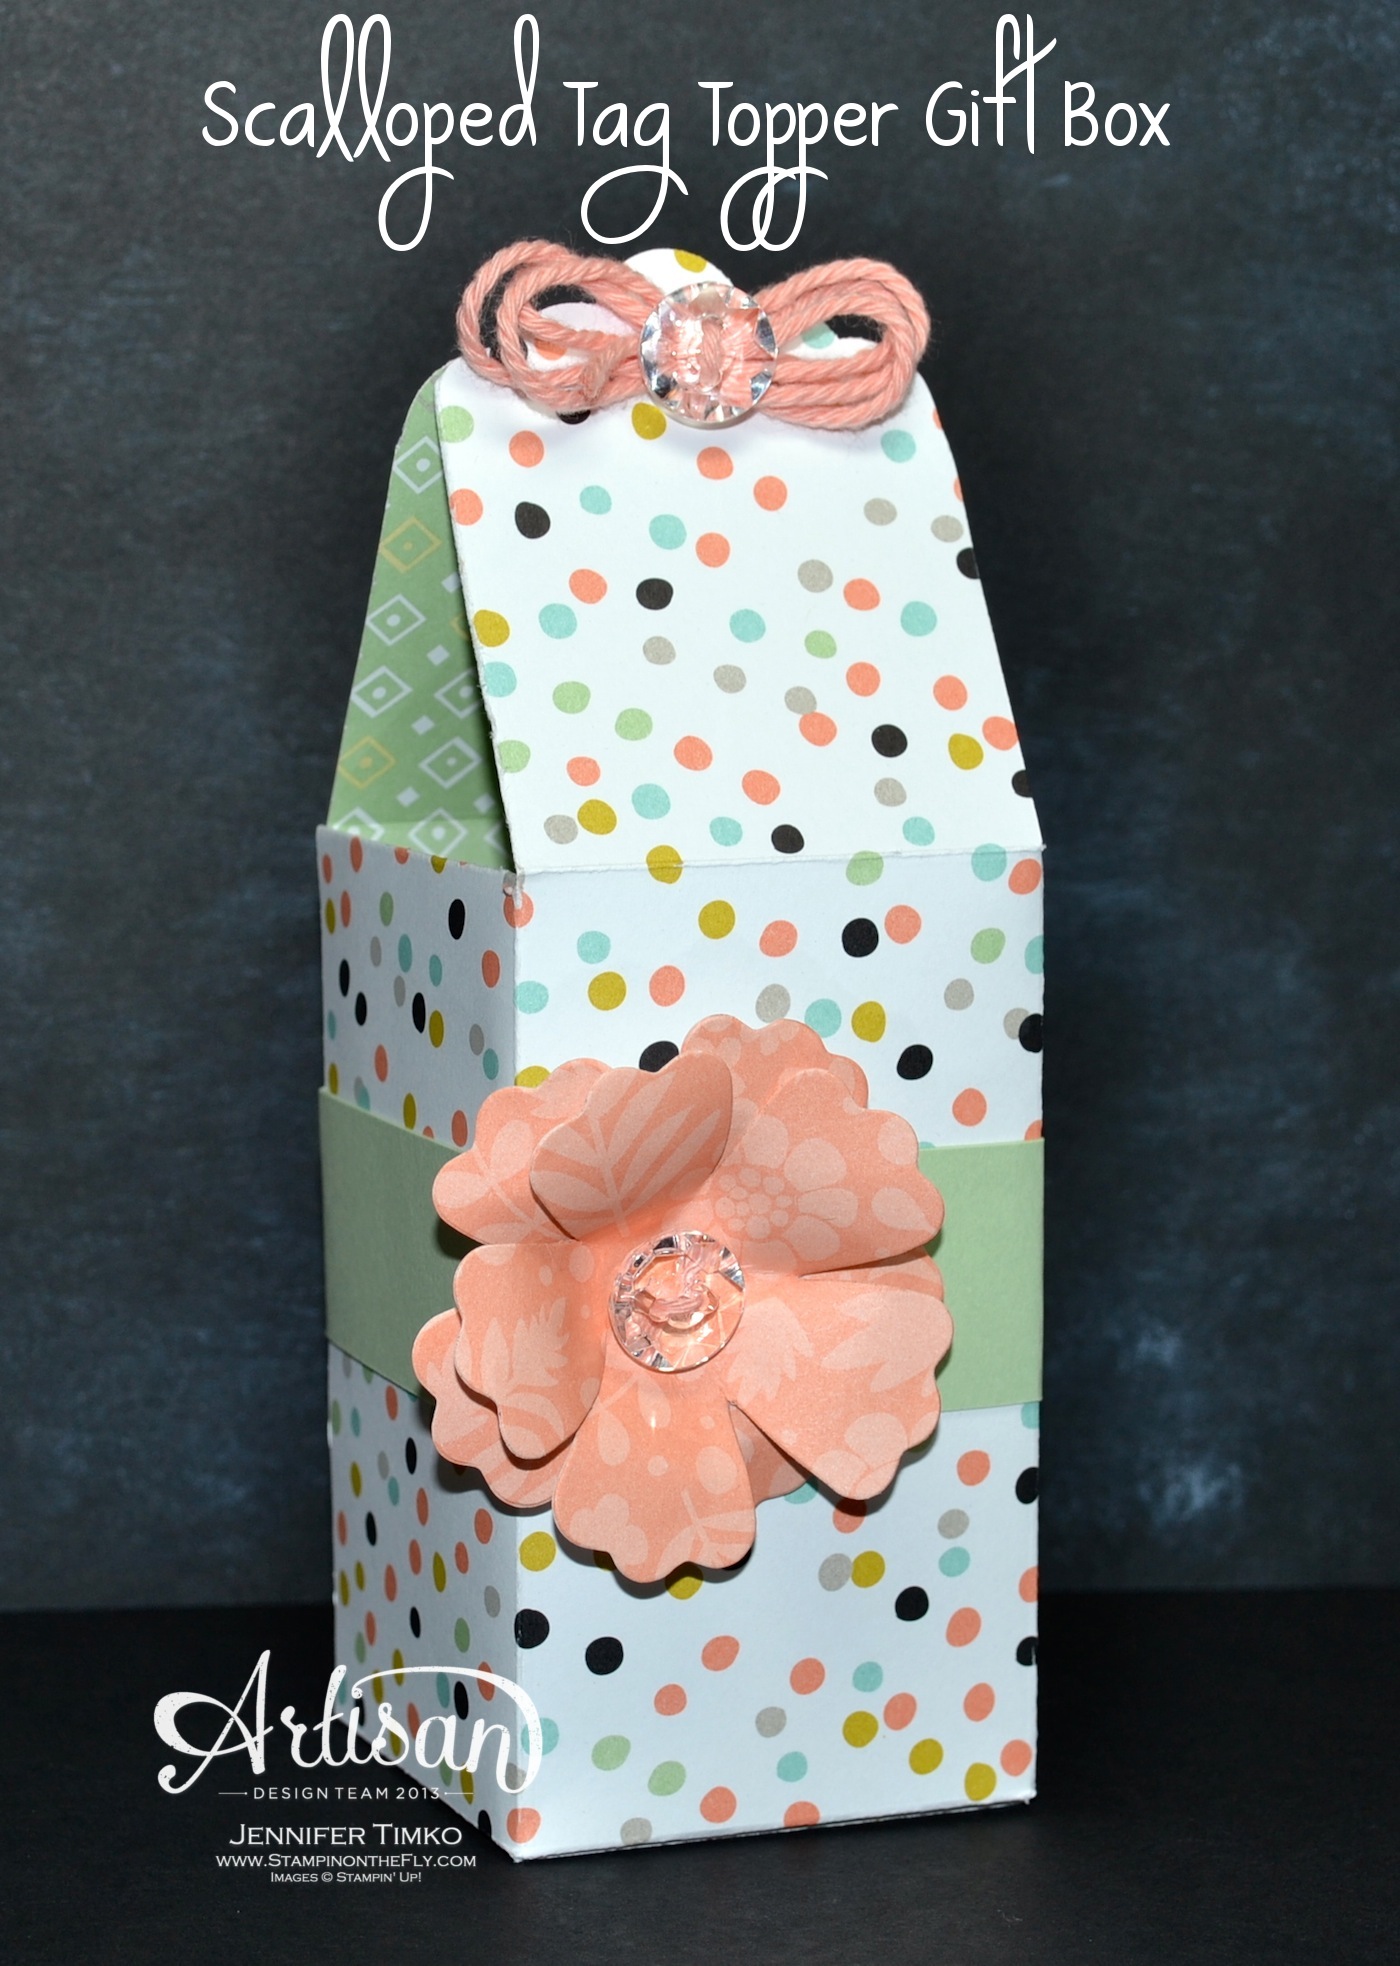
All that is left is decorating the box. I cut out some flowers using the Fun Flowers Die. All the designer papers on the box are from the Sweet Sorbet DSP pack..a Sale-a-bration offering. Did I mention that Sale-a-bration starts today??!! YEA!! Ok..back to the box. I created a belly band out of Pistachio Pudding card stock. I spritzed the flowers with water and formed them over the top of a Multipurpose Glue bottle. This gives them a little extra dimension. Glued together with Sticky Strip and I added on a Vintage Faceted Button tied with the Sweet Sorbet Accessory Pack twine. To close the box, I created a faux bow. Wrap the twine a 2-3 times around your fingers then tie on a button that has been threaded with another piece of twine. Knot in the center behind the “bow”. Take the ends of the piece you just knotted and thread through the punched holes. Tie another little bow to secure the top and make it easy to open.
This box is fast to make and perfect for even new stampers. I had some try this at a class and their projects were perfect!
Okay, off to go visit the awesome Mercedes Weber. I can’t wait for you to see what she has created! Make sure you hop around the whole loop to take a look at beautiful creations by the whole team…you’ll be happy you did!
Click HERE to purchase any of these wonderful Stampin’ Up products.
Paper: Sweet Sorget DSP, Pistachio Pudding; Accessories: Scalloped Tag Topper Punch, Big Shot, Fun Flowers Die, Vintage Faceted Button, Sweet Sorbet Accessory Pack, Sticky Strip

4 Comments
Such a great idea to use the new tag punch!
Love the idea of using the tag punch for the top of the box! Super cute.
This is just such a cute box! Thanks for both the inspiration and for the tutorial! Love it!
thanks for these wonderful tuorial…i have try it…
Hugs
Judith