Happy New Year and welcome to my new followers! I was so motivated by the weekend’s Stampin’ Addicts Occasions Mini Blog Hop and couldn’t wait to get stamping this week. My first job this year to show you how to make the square frame from my hop cards. While I would love to take credit for the idea, Sharon Field over at Created By You is the originator of the technique I used. I had been playing around with ways to do this but she figured it out first! I simply modified her instructions to make the square. Since many people are visual learners, I have taken pictures of what I did.
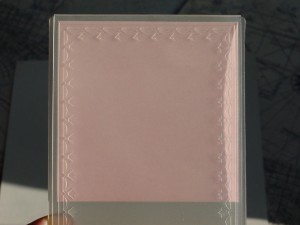
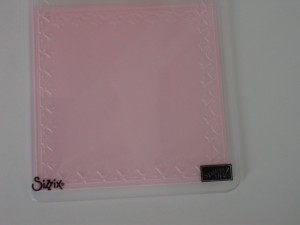
Start with a 4 1/8″ x 4 1/8″ square and line it up so that you have equal spacing on three sides. Roll it through the Big Shot and it will look like this:
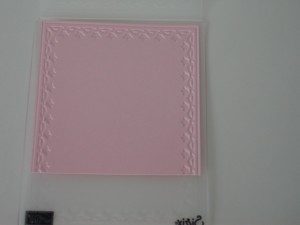
Next, take the card stock and slide it down so that the bottom lines up with the bottom design of the folder. You should be able to feel the design slide into the “grooves” and it will match up with the folder (except the unembossed bottom, of course).
It will look like this from the other side and you can check your placement.
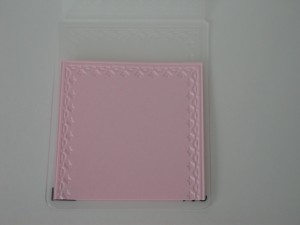
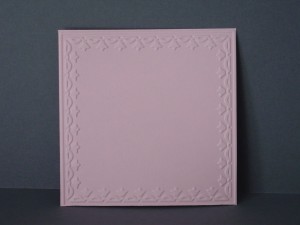
As Sharon specifies, start to roll it through your Big Shot but only a little bit. Estimate how much roll it takes to emboss only the bottom design (she says about 3/4 of a turn). Then back the design out. And here is the final square. The pressure of the Big Shot flattens the previous design and forms the corners nicely!
My card from the Blog Hop was given away as a card set for Christmas so I “had” to create a new one, of course.
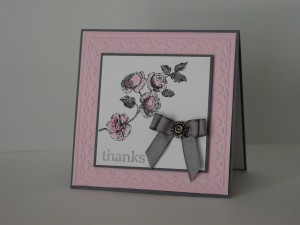 I inked up part of the image from the Elements of Style stamp and then colored it in with Pink Pirouette, Rose Red and Basic Gray. The sentiment is from the new set Say It Simply. I brought in an Antique Brad because it went so well with the gray. The ribbon, I must confess, is retired Basic Gray Taffeta. Given that I have a ribbon “collecting” (okay, hoarding) problem, I am trying to use up some of my retired items. To save you some time, the Basic Gray piece of the inner square is 3″ x 3″.
This is also for the Creative Crew Catalog Focus Challenge over at Splitcoaststampers. It is a challenge to use new items from the Mini. Check out the link to see more fabulous projects from the Creative Crew.
Thanks for stopping in today. I wish you a safe and happy new year filled with loads of creativity!
Stamps: Say It Simply, Elements of Style; Paper: Basic Gray, Pink Pirouette, Whisper White; Ink: Basic Black, Pink Pirouette, Rose Red, Basic Gray; Accessories: Big Shot, Framed Tulips Embossing Folder, Antique Brads, Basic Gray Taffeta (retired), Blender Pen, Dimensionals
All products are Stampin’ Up!

18 Comments
Super cool, Jen–and great photos too! Thanks!
That is awesome! Thanks so much for the tutorial!
Awesome! Who knew it was so easy! I tried for a while one night, but kept smushing mine! Now, I get the secret!
Thanks Jen! I was wondering about this!! Much appreciated!
Thanks so much for the tutorial! Just love the card!
Thanks for the pictures!! It is so helpful to “see” what you are doing. Can’t wait to try this technique out. Beautiful card too! Love the pink and gray together.
Wonderful card! Thanks SO much for the instructions and pxs.
I love it!! I could not have figured it out without your help. Thanks a million. Your’re the best.
I’ll have to try the technique as soon as I get my new folder (fingers tapping… waiting…).
how stinkin’ clever is that!!! Thank you so much for sharing in pictures too 🙂
Thank yew! I tried this last night, and it looks great!!! I have a customer who got the BS for Christmas, and she’s coming for BS lessons Friday – I can’t wait to show her this technique!
Thank you for the tutorial!! Love this 🙂 And your card is de-lovely!
Love that you did photo step by steps! Can’t wait to give this a try!
Thanks so much for the tutorial……now to get my hands on one of these folders! What a stunning result and your sample is fabulous! God Bless!
I LOVE YOU for revealing the secret and your step-by-step tutorial! TFS!
I love it! I was just thinking, I wish I could make this a square. Ha ha.
How great this is! Credit to both of you for your creations. Love Elements of Style – it’s a natural for the beautiful coloring you did. TFS the ef tip.
[…] up with a Basic Gray button. For a final touch I framed it with the Framed Tulips Die. I have a tutorial here that shows you how to make it a square. I would love to say that the border was part of my […]