Skip to content

New Year, New Craft Room

New Year, New Craft Room published on 28 Comments on New Year, New Craft Room

For the last two months, our family’s basement has been under construction.  If you have ever had any work like this on your home, you know that it is a mixture of chaos and anticipation.  Since I started stamping, I have been working on my dining room table and my things have been stored in the office area.  Needless to say, that meant that the dining room was always a mess with half-finished projects.  My husband gets the patience award for putting up with that for so long!  So when we decided to finish the basement this fall, we agreed that a craft room was needed.  YEA FOR ME!!!  So, here is our progression:

Stamp room 1

We started with a basement that was completely unfinished.  This is a picture of the area that was to become a small bathroom and the craft room.  The “wall” on the right was removed.
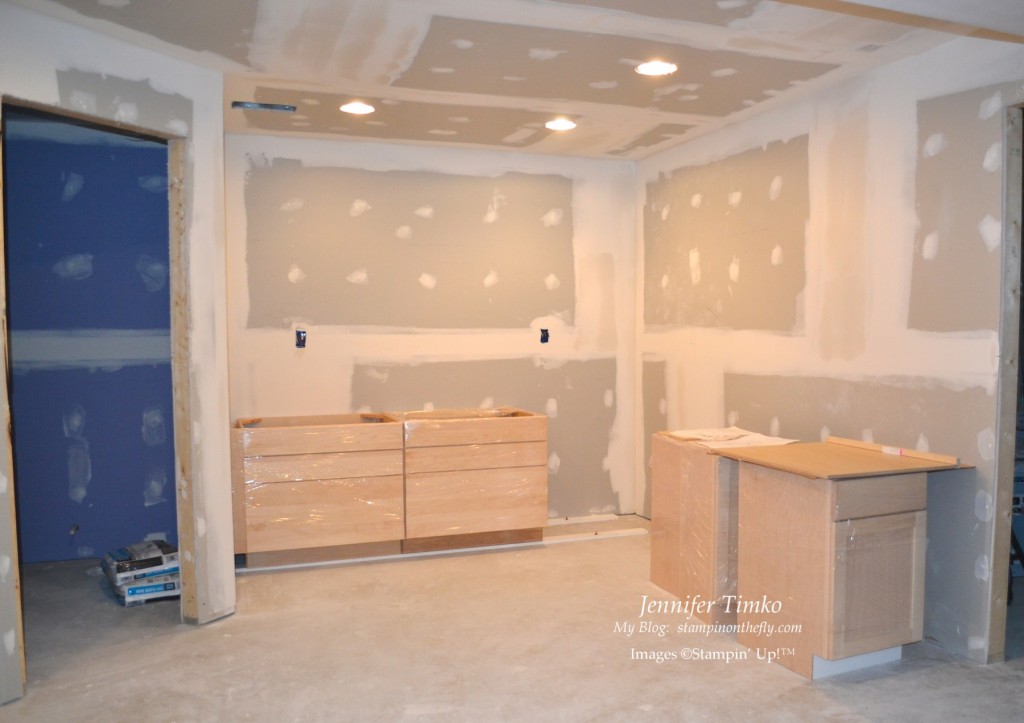
Stamp room 2When they got to this stage, I started to get really excited because I could visualize where it was going.
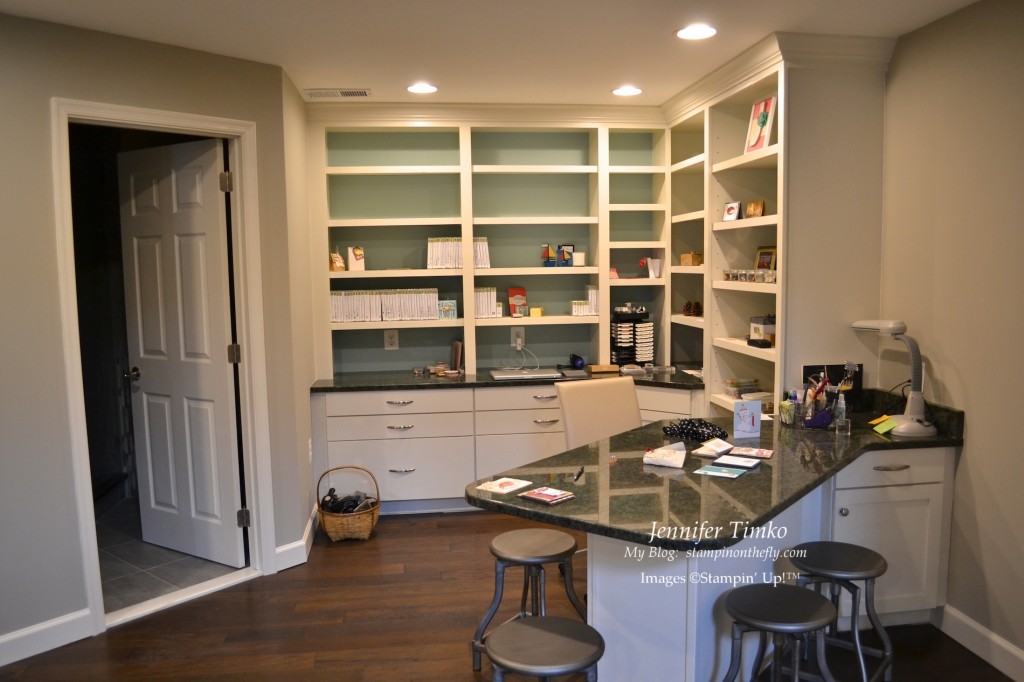
Stamp room finalAnd this the the finished result!!  As you can see, I’m still in the process of moving in.  I’m figuring out what storage I need and I’m sure I’ll be moving some of the shelves around to accommodate that.  Once I get everything in its proper place, I’ll take another picture to show you what I came up with.

I have to say that I always like seeing people’s craft rooms and ideas so I am really excited to share mine with you.  For my local stampers, we’ll have classes here from now on!  This space make me so happy and all of my January projects have been created here already (and I just moved in last week).  Starting next week, I should have lots to show you.  The two teams will be back and I have all the work that I did back in November that I can show you soon too!  Lots and lots of inspiration for the Occasions and Sale-a-bration Catalogs!

I hope that you have a happy and safe new year celebration!  See you next year!

Blog signature 2013-001

Background Thanks

Background Thanks published on 8 Comments on Background Thanks

I told you I had another post for today.  A little late getting it up but I have been working on a project for November.  Suffice it to say that there is lots of glitter and I may be wearing it for days, lol!

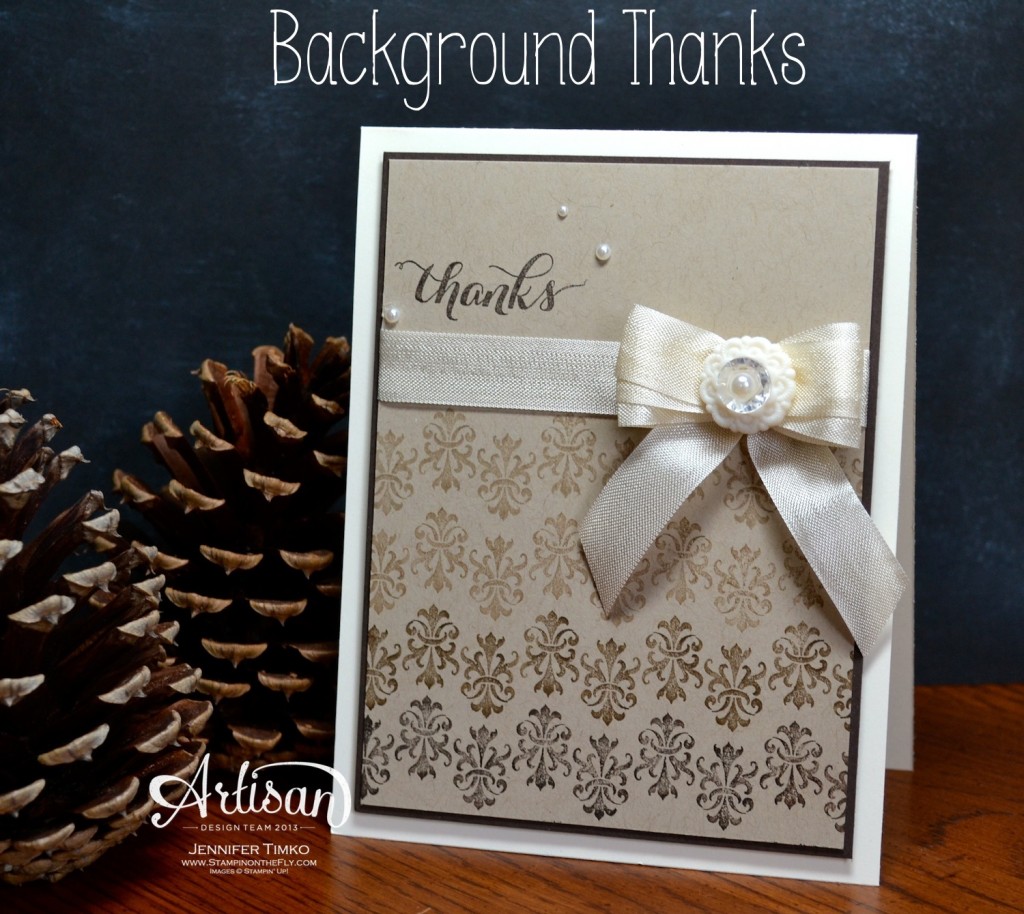
AWW Oct - Background Thanks -I had created this card for the 5th week of October for the Artisan Design Team.  Once Stampin’ Up asked us to create projects with the Pop & Place Tags, this was the one that was replaced. Sooooo….I thought I should bring it out anyways.  I used this cool stamp set called Background Builders and tried my hand at an ombre effect.  Using Early Espresso, Baked Brown Sugar, Soft Suede and Crumb Cake inks to go up the card.  I strongly recommend using a Stamp-a-ma-jig for this one.  I’m pretty sure it is one of the tools that I cannot be without when crafting!  Another Thank You was used for the sentiment.  It is one of the latest photopolymer sets and it is going to be a go-to for me.  I added in a bow tied with Very Vanilla Seam Binding and added a Very Vintage Designer Button topped with a Vintage Faceted Button.  Some Basic Pearls finished it off.

Now I have a great surprise to show you tomorrow.  Hint:  Keep an eye on the Stampin’ Up customer blog  during the day.  I get to introduce a new product over there!  What??!! You didn’t know about that blog?  Well, go take some time to look around.  There is lots of inspiration!  I’ll post here too but only after that one goes live.

So glad you dropped in today.  I hope your Halloween is safe and happy!  I can’t wait for my boys to get all dressed up tonight!  See you soon!

Stamps:  Background Builders, Another Thank You; Paper:  Crumb Cake, Early Espresso, Very Vanilla; Ink:  Early Espresso, Baked Brown Sugar, Soft Suede, Crumb Cake; Accessories:  Very Vanilla Seam Binding, Very Vintage Designer Button, Vintage Faceted  Button, Basic Pearls, Dimensionals, Stamp-a-ma-jig

Blog signature 2013-001

Happy September!

Happy September! published on No Comments on Happy September!

Happy September everyone!  I have to say that I love September with the turning of leaves and the crisp air that seems to come in.  Now Stampin’ Up has made it even better with a new product and a new special.

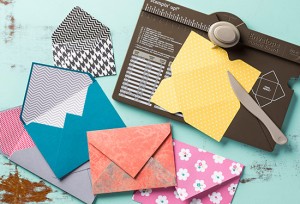
Envelope Punch Board

b1_EnvelopePunch_demo_aug1513_NA


  • It creates totally customizable envelopes in up to 66 different sizes (not to mention a million different color and pattern options depending on the paper you want to use). Even tried and true envelope sizes will only take you moments to create!
  • It’s super easy to use –  It looks intimidating at first glance, but when you see that all you have to do is measure for the first punch and from there you just turn and score you’ll go crazy (in a good way).
  • It’s small and lightweight –  It’s small and light enough that you could use it while watching a soccer match, at a park, at a friend’s for craft night-anywhere.
  • It even has a slick scoring tool as well as a punch that lets you create rounded corners on your envelopes.
  • It’s easy to keep it all together; the stylus storage compartment and two punches are designed into the tool so you don’t have a bunch of little pieces to keep track of (even the instructions are printed right on the tool so you won’t lose them!).
  • The price is terrific-especially for a tool that does so much!
Item Description Price
133774 Envelope Punch Board $19.95

Check out this video to see it in action:

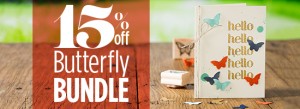
Butterfly Bundle

DemoHeader_Butterfly_Demo_8.29-9.30.2013_NA

Dates: August 29-September 30, 2013

Offer: Get 15 percent off when you buy this bundled butterfly stamp set and punch!


Screen Shot 2013-09-01 at 12.55.00 PM


I will have a fun project to show you with the bundle on my Artisan Wednesday Wow post this week!  Can’t wait!

If you have any questions about either of these, please don’t hesitate to ask.  You can shop with me by simply clicking on my signature flag below or on the Shop with Jennifer button in the sidebar of my blog.  Have a great rest of your weekend!

Blog signature 2013-001


Epic Father’s Day

Epic Father’s Day published on No Comments on Epic Father’s Day

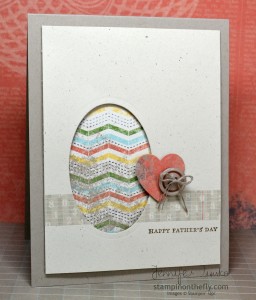
Father's Day - Dad TAs promised, I’m back today with another Father’s Day card.  This one is for my father-in-law.   I wanted to play with the Epic Day coordinating products and thought this might be fun.  So I put a strip of the Washi Tape across some Naturals Ivory card stock then popped out an oval with the Oval Framelits and placed a piece of the chevron print behind it.  I used the Hearts a Flutter little heart framelit to punch out this map-like Calypso Coral print and added a button tied with Linen Thread.  The sentiment is from Teeny Tiny Wishes.  I really liked this one but when I handed it to my husband to approve he noted that it looks like an Easter egg.  Hmm….maybe he has a point, lol!!  In any case, off it went in the mail and I hope that Dad likes it.

Short and sweet today.  Yesterday was a LOOOONGGGG airline day.  I was supposed to fly from Washington to Newark to Chicago and back home but no….not so much.  Lots of weather.  Lots of Air Traffic Control delays.  One tired pilot…only made it to Newark.  The rest of the trip today (I hope).

I hope your weekend is great!  Thanks so much for stopping in and I hope to see you again soon!

Stamp:  Teeny Tiny Wishes; Paper:  Epic Day DSP, Crumb Cake, Naturals Ivory; Ink:  Soft Suede; Accessories:  Big Shot, Ovals Framelits, Hearts a Flutter Framelits, Epic Day Washi Tape, Neutrals Buttons (ret), Linen Thread, Dimensionals

Blog signature 2013-001

Soccer Thank You

Soccer Thank You published on 5 Comments on Soccer Thank You

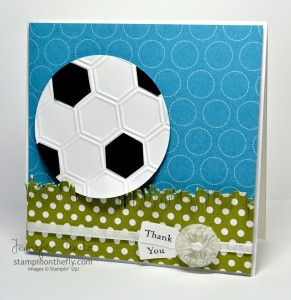
Soccer Thank YouJust a fun card today.  I have two sons that are soccer players and they have volunteer coaches that do so much!  My oldest son has been with his coach for 3 seasons and she is such a fantastic person!  He will be aging up next year and just made a travel team in our area.  We are very excited for him and much of the credit goes to his solid training.  The team’s end of season party was yesterday so I made this card for all the kids to sign.  Fun, isn’t it?!  I saw the idea of using the Hexagon Embossing Folder for a soccer ball somewhere but can’t find it now.  In any case, I embossed  a piece of Whisper White and a piece of Basic Black with the folder.  Following the lines, I cut the black hexagons out and attached them to the white in what looked like a soccer ball pattern.  Then I punched out the ball with a 2-1/2″” Circle Punch.  I used the Polka Dot Parade DSP to create the background.  First I used the Old Olive print and cut a fringe to create grass.  I attached it to a Marina Mist print to finish.  A little piece of 1/8″ White Taffeta Ribbon tied to a Neutrals Button (style retired) along with the sentiment on the little Jewelry Punch Tags (punch retired).  Now you know what to make for those soccer coaches!!

I’m sitting at the airport as I type this so I’m pretty sure no stamping will happen over the next couple of days.  Maybe, maybe the schedulers will be kind and I can get a little in at the beginning of the week.  Until then, I hope that your weekend is great!  Thanks for stopping in!  See you soon!

Stamp:  Teeny Tiny Wishes; Paper:  Polka Dot Parade DSP, Whisper White; Ink:  Basic Black Stampin’ Write Marker; Accessories:  Big Shot, Hexagon Embossing Folder, 2-1/2″ Circle Punch, Paper Snips, 1/8″ White Taffeta Ribbon, Neutrals Button, Dimensionals

Blog signature 2013-001

Today is the day!!!!!

Today is the day!!!!! published on No Comments on Today is the day!!!!!

Yes, today is the launch of the new 2013-14 Stampin’ Up Annual Catalog!!  If you don’t have a copy in hand, here are some links!

20130601_AC_en-US


Flash Version

PDF Version

Stampin’ Supplies

The catalog goes live a Noon Mountain Time today and you will be able to order from it using My Store after that time.  Also, today May 31st is a really special day.  For today only, you can order from the new catalog, the old catalog and the Spring catalog!!  Oh yeah!!!!  After today and through June 3rd you will be able to order from both of the main catalogs.  So take advantage and grab some retiring items along with your brand new products!!

I can’t wait to see what everyone loves about this new catalog (there is so much to love!!)!!  Happy shopping!

Blog signature 2013-001

Gingham Garden Butterfly

Gingham Garden Butterfly published on 5 Comments on Gingham Garden Butterfly

Washi Butterfly - Club

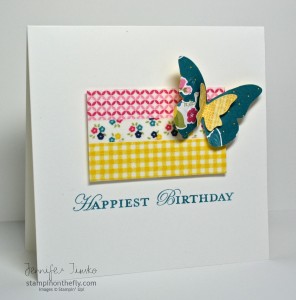
I am so glad to see you today…happy Friday!!  I have had a great “stampy” week and have to say it is fun to have something new to share.  I had one of my hostess club meetings on Wednesday and this is what we are making this time!  What was that????  Just look at the great patterns???  Oh yes…it is new catalog sneak peek time!!

The Gingham Garden Suite is one of the amazing new product offerings in the new catalog and I was so excited to get my hands on some of the items in the suite.  First on my list…the Washi Tape!!!  I have been watching this fun product for a while so I was thrilled when Stampin’ Up announced it would carry some of it.  I knew it would be high quality and gorgeous.  Boy was I right!  And as always there is a line of products that coordinates with it perfectly.

So I started with the tape itself…rather, all three.  I lined up the rolls and measures to see how wide they are together (1-1/2″ for the record) and then cut a little rectangle out using that measurement (1-1/2″ x 2-1/2″).  I placed the Washi Tape down in line and simply wrapped it around the back of the rectangle.  Really, it could not be easier!!  Then I took the coordinating Gingham Garden DSP and chose the Island Indigo flower pattern to pop out a butterfly with my Beautiful Wings Embosslit.  The yellow print is from the opposite side.  I stamped the sentiment from Apothecary Art, popped the washi panel up on Dimensionals and attached the butterfly using Crystal Effects (a very strong glue, too, by the way).  And done!

This card has made me so happy and my club ladies loved it too!!  This product line (and all the other new ones) are available in ONE WEEK!!!!  Yes, on May 31st the new catalog goes live.  Oh, and the old catalog will still be available until June 3rd.  Not enough for you??!!  The Spring Catalog is available through May 31st as well.  The perfect storm of stamping goodness happens on May 31st.  For one day only, all three catalogs will be available for ordering!!!  Plan now, be ready to be patient because like you, I’ll be ordering along with many of our stamping friends but it will be worth it!!  My online store will be open (just like always) and the new catty will be available after noon mountain time.

Can’t wait to see what you think about this fun and easy card!  More of these on the way for my stash!!  And I’m sure I will have a more masculine version using the Epic Day Washi Tape too.  Thanks for stopping in today.  I hope your weekend is amazing!!

Stamp:  Apothecary Art; Paper:  Gingham Garden DSP, Whisper White; Ink:  Island Indigo; Accessories:  Gingham Garden Washi Tape, Dimensionals, Crystal Effects

Blog signature 2013-001

Retirement Lists are here!

Retirement Lists are here! published on No Comments on Retirement Lists are here!

B1_RetiredList_Demo_4.24.13_NA

It is such a bittersweet time of the year at Stampin’ Up!  As we prepare for the arrival of the new catalog it is time to say goodbye to some old friends!  Yep…the Retirement Lists are here (just click on each to see them):

Retiring Stamp Sets and Accessories

60% off Digital Content Discs

40% off Accessories

25% off Accessories

Retired Stamps PDF

Retired Accessories PDF

While the stamps are available until June 3, 2013, the accessories are only as supplies last.  I strongly recommend that you order as soon as possible on those!  The online store is the best way to do this!  Link to my store here.

There really are some great deals here!  Let me know if I can answer any questions or help you in any way!

Blog signature 2013-001


Regionals Projects

Regionals Projects published on 2 Comments on Regionals Projects

I knew you would enjoy seeing a couple of the things we made at Stampin’ Up Regionals so I am bringing them to you today.

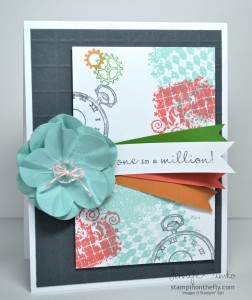
Baltimore Rgnl - M&TThe stamp set focus for the day was Clockworks.  It really is a fun set and perfect for collage stamping.  This projects was actually designed to be a cover of a notepad but I decided to change it into a card.  The Basic Gray background piece is scored using the Simply Scored Tool which adds a nice dimension.  The stamps were inked in Pool Party, Calypso Coral, More Mustard and Gumball Green.  The little strips were cut from coordinating colors and the pennant ends are hand cut.  Three flowers were punched out of Pool Party with the Fancy Flower Punch, spritzed with water and crumpled a bit.

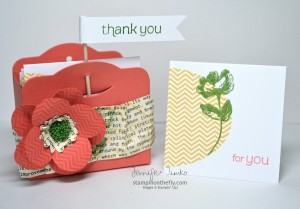
Baltimore Rgnl - Box and cardsOur second project is this cute little box made with the Two Tags Die.  Now their original design used Clockworks again but I did not make it at the Regionals.  Instead I used Oh Hello to create it and the matching notecards.  Calypso Coral, Gumball Green and Daffodil Delight are the colors.  I will be using this as a hostess gift for a customer…so excited for her to see it!

I hope you enjoy seeing these as much as I enjoyed making them.  Let me know if you have any questions about them!  I hope your week has been good.  Thanks so much for stopping in!!

Blog signature 2013-001


Primary Sidebar