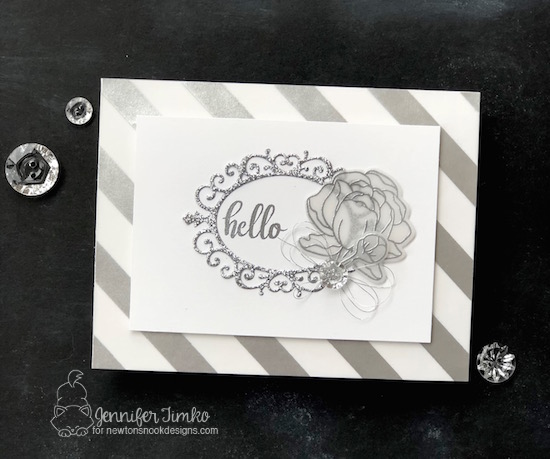
 This week Newton’s Nook Designs and Xyron are partnering for an awesome inspiration week! Each day there is fresh inspiration using Newton’s Nook Designs products with Xyron adhesives on the NND blog and on the Xyron facebook page! I am thrilled to be here on the lead off day to share with you.
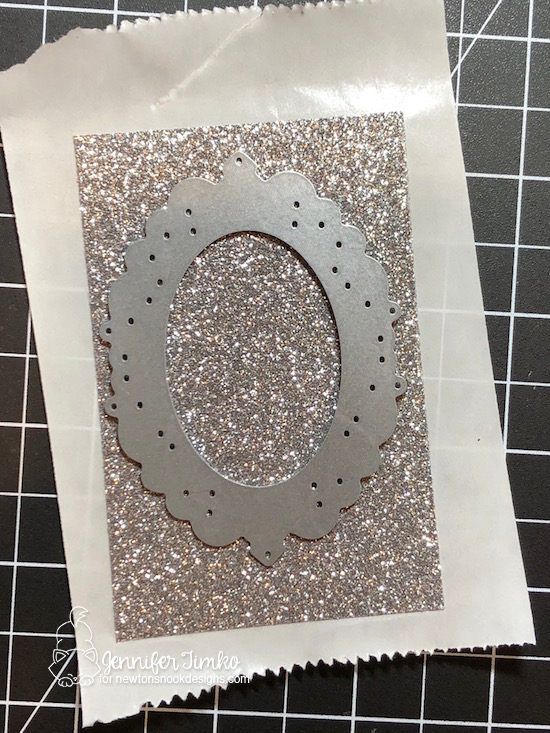
 Today’s card all started with the Cameo Frames Die Set. This intricate die is gorgeous but I will admit that dies like this (and word dies) sometime intimidate me because of how to adhere them to a card. So I was a stamper on a mission and took advantage of this collaboration to see what solution I could find. And you know what?? I found one! The Xyron sticker makers are a new to me product and I’m officially in love.
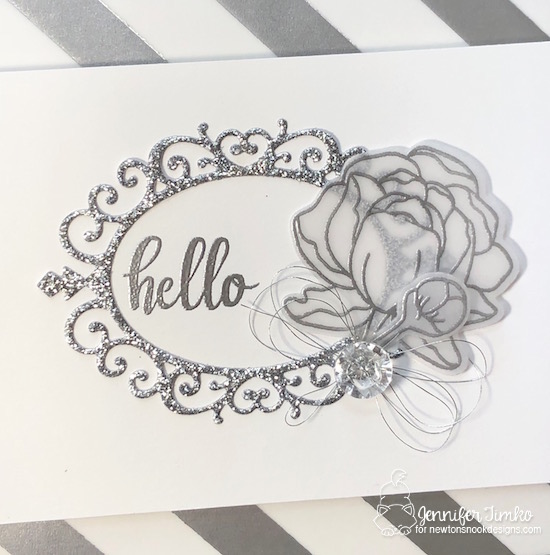
 I started by running some glitter paper through the sticker maker. That is certainly simple enough! I removed the top clear layer and then put my die down on the paper. Next up, the Big Shot. I shimmed this with some plain typing paper to force the cut a little more and then ran it back and forth a few times to make sure the cut was really complete. When you remove the die, you are left with a die cut that has a sticky backing. Talk about making things easier! Once I knew it was that simple, I got to designing the rest of the card. This frame is so pretty all alone that I didn’t want to cover it or take away from it. So I pulled out some vellum and did some Versamark stamping followed by silver embossing powder.
 I used the Peony Blooms stamp set (one of my all time faves) on the vellum. I added the sentiment from the same set off center. The backing was pulled off the frame and it adhered perfectly. I glued down the flowers and then added a clear button and some silver thread. To add to the silver (but trying not to take away from the gorgeous frame and images), I added a silver striped vellum to a white base. And that’s it.
It all started with the frame and the ability to glue it down simply. Xyron has so many wonderful products and you are sure to find tons of inspiration from the combined DT’s this week. And guess what…a chance to win!
Would you like to win a Prize pack including a Mega Runner from Xyron and a $25 store credit to Newton’s Nook Designs?
Here’s how to win:
Leave a comment on the NND & Design Team blog posts using Xyron products all week (June 25-29) to enter. One winner will be randomly chosen from blog posts throughout the week so the more posts you leave comments on the better your chances are of winning! You have until Friday June 29th at midnight EST to comment. The winner will be announced on the NND blog post on Monday, July 2nd.
Xyron will also be giving away a prize pack! Make sure to visit the Xyron facebook page each day this week for inspiration and leave comments there for another chance to win!
Stamps: Peony Blooms (Newton’s Nook Designs); Ink: Versamark; Paper: Thick Whisper White (SU), White Vellum (SU), Silver Striped Vellum (SU retired); Accessories: Big Shot, Cameo Frame Dies (Newton’s Nook Designs), Misti, Clear Crystal Button (SU retired), Silver Thread (SU), Neutrals Glitter Paper Pack (Concord and 9th), 3″ Disposable Sticker Maker (Xyron)


18 Comments
Your card is so elegant, Jennifer. I just love it! The bloom is so pretty in silver on the vellum. Perfection!
What a gorgeous and elegant card! Love the combination of shine with the softness of the vellum.
Your card is gorgeous! I love how you die cut the frame from glitter paper, and how you heat embossed the Peony Blooms stamps on vellum 🙂
WOW!!! This is so elegant and beautiful, Jen! I am so in love with stunning card!
Such great creation with the products from Xyron!
You have inspired me to get my Xyron out and show it some love. Thank you!
Wow! Such a beautiful and elegant card! Love it!!!
So elegant with the glittery frame.
What a fantastic card ! The silver and white combo is so elegant !
[margessw(at)icloud(dot)com]
The frame paired with the floral is so elegant on this card. Thanks for the inspiration.
Beautiful card! The sparkly frame is so pretty, and what a great way to adhere it to your card. I’m always worried my liquid glue will seep out behind delicate die cuts and words.
This card is so elegant. I love the simple color scheme. It would be perfect as a thank you, anniversary, wedding, birthday or just a fancy hello. I like that you ran the paper through before die cutting. I have cut first and then sometimes have too much sticky coming through where I don’t want it. For a more detailed cut like the frame, I will try it this way next for sure.
Gorgeous and oh so elegant. Love your card ♥
lovely card:)
so stunning and classy 🙂
Fabulous silvery card…so elegant and is perfect for this time of year. Love the Velum flower!
Gorgeous card! Love the peony on the vellum paper and the sparkle! Pretty details!
What a fun card. I LOVE that you used the frame dies for this card. I really going to miss your projects xx