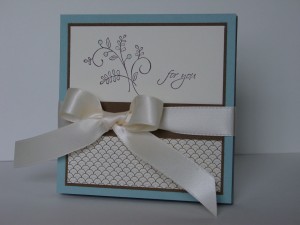
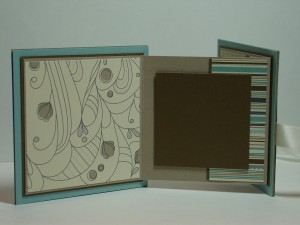
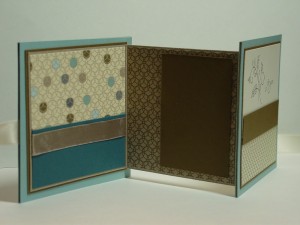
As promised in yesterday’s post, I am here with some more specifics on the Sweet Summer Photo Book.
 I started this with the tutorial posted by the talented Sarah Wills for her Scallop Square Die Mini Scrapbook. I used the same method as for her smaller version but changed measurements a bit. My goal was to be able to make this using 8.5″ x 11″ paper. I am going to give some of the basic measurements here and, using Sarah’s fantastic instructions, you will probably be able to figure this out. However, I am also creating a Word Document tutorial and will be happy to e-mail it to you. Simply leave a comment requesting it and I’ll get it out to you as soon as possible (I don’t know how to link it here…sorry). Yes, you club members don’t need to let me know…yours will be out the minute it is finished.
I started with On Board Chipboard Sheets cut 4″ square. The Tabletop Paper Cutter is really great for this! Cut 4 pieces of Baja Breeze Card Stock 4″ square. These will cover the chipboard. As noted on Sarah’s tutorial, make sure you leave one side of one piece of chipboard uncovered for ribbon attachment. I cut 3 pieces of Soft Suede Card Stock to 3 5/8″ square. Two of these are the “attachment points” for the center sheet and one is to decorate the front. Cut one piece of Crumb Cake Card Stock to 3 1/2″ x 10 1/2″. Score this Crumb Cake piece at 3 1/2″ and 7″. The rest of the decoration is really up to you.
 Since I designed this for my club members, I wanted to leave them maximum flexibility. I made the pages so that you can add only one picture on the front side and one on the back or add two pictures to both sides or any variation. What I found works best is to size your picture first (you don’t want to cut off any of those precious details). Measure your picture and add 1/8″ all around for your frame.
I used Sticky Strip on all the connection points that are likely to get stressed. Let’s face it, once Grandma has this, it is going places with her! The first version I made with Funky Four already has the Grandmom (my mom) seal of approval!
 Once the photo section is attached and the front decorated, attach your ribbon to the back of the chipboard (this will still be undecorated!!). You can align the ribbon with the front of your card if it matter for your design. Once the ribbon is in place, glue on the final piece of Baja Breeze. I used the Anywhere Glue Stick to attach the card stock to the chipboard. I like that it allows you a little time to position the paper and then sticks perfectly.
I personally think that the success of this project comes in using Stampin’ Up’s beautiful designer papers. In this I have used Elegant Soiree and the coordinating pieces work wonderfully together. I also love that the style of the Sale-a-bration set Sweet Summer matches this paper. Another well thought out combination!
Thanks for coming back by for the details today. I’ll see you tomorrow with a new ColorLab Challenge. Also, this weekend I will be participating in a birthday celebration for one of my favorite sites, Stampin’ Addicts. We are doing a Techniques Blog Hop starting on Friday! It is a birthday bash extraordinaire! Until then…have a great week!
Stamps: Sweet Summer (SAB), All Holidays; Paper: Elegant Soiree DSP, Baja Breeze, Soft Suede, Crumb Cake, Very Vanilla; Ink: Early Espresso, Baja Breeze; Accessories: On Board Sheets, Sticky Strip, Anywhere Glue Stick, Crumb Cake Seam Binding (inside decoration), Very Vanilla Taffeta, Stamp-a-ma-jig
All products are Stampin’ Up!

13 Comments
Great book. Love your clean and elegant style, too!
I LURVE your book! Can I CASE (with credit)….purty, purty please?
This is a fantastic book! Can’t wait to try one!
Please send me the Word tutorial….thanks!
What a great little photobook! I love it with that paper!
Great book, Jen! Love all the details and hidden surprises!
Hi Jen – Love the book and think I’d like to try it with my stampers. Would you please send me the word file? Thanks so much.
This paper is perfect for this cute little photo book!
Perfect to carry around as a brag book!
Love it! Would you please send me the word document? Thanks so much! This would make a great brag book for my mother of her grandbabies!
love it, yes please e-mail the directions. thank you so much
Can I please get the tutorial for this? I LOVE it!!
Thanks!
This is so “elegant”. Would you be so kind and forward me a copy of the Word tutorial please. Thank you.