Skip to content

Clear Block Brayering

Clear Block Brayering published on 4 Comments on Clear Block Brayering

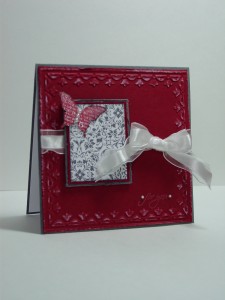
I hope you enjoyed the Stampin’ Addicts Birthday Blog Hop over the weekend!  As promised, I am back with some more details on using your clear blocks as a brayer.  You may remember that I made my “First Edition Valentine” a couple of weeks ago and told you that I had not used my brayer for the edges.  Instead I used my clear block there, too.  I used this technique with my Hostess Club members and they loved it as much as I do!  They, too, appreciate that you don’t have to have another tool and can use something you already have in your stamping repetoire.  It is amazing how much this distressing adds to an embossed area for almost no additonal work!  And, contrary to what you may see in this post, I promise it works on paper other than Cherry Cobbler.  *smile*
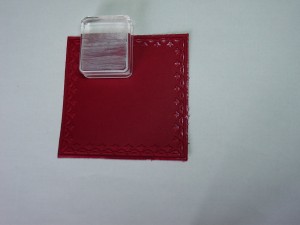
Since this is so easy, I didn’t really take a lot of pictures.  Here is my embossed panel during the process of working on it.  Simple take one of your smaller clear blocks (smaller is easier to control) and ink up one side with your Whisper White Craft Ink.  Rub the inked side on your embossing.  If the middle of your panel needs to be “clean” of ink, just use a scrap piece of paper to mask it while you work.  I did that on my butterfly card but not on my First Edition Valentine since the middle was covered up.  Just keep inking and applying until you have the desired effect.  It is really that easy!!

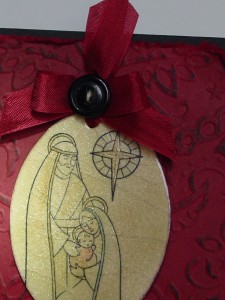
I actually used this techniqe way back in the Stampin’ Addicts Holiday Mini Blog Hop on this card.  After embossing, I inked up my clear block with Basic Black Classic Ink and added the touched of color on the background layer.  So to answer questions before they are asked, both kinds of ink work.  There is definitely a randomness to this kind of application because the ink will not be even.  I actually got this idea when I was watching a video produced by Stampin’ Up on the Distressing Essentials Kit.  They used a flat stamp in the same way. 

I hope you have fun using this!  Please let me know what projects you make because I can’t wait to see them!  Because the butterfly card uses that amazing SAB set Bliss (Joie – French), it qualifies for the So Shelli challenge this month.  I continue to be thrilled with the coordination between the SAB sets and the mini/catalog sets!!  Thanks for dropping back in today.  I’ll see you again soon!

Butterfly card

Stamps:  Clearly For You, Bliss/Joie (SAB), All Holidays; Paper:  Basic Gray, Cherry Cobbler, Whisper White; Ink:  Whisper White Craft Ink, Basic Gray, Cherry Cobbler; Accessories:  White Organza Ribbon, Basic Pearls, Clear Blocks, Heat Tool

All products are Stampin’ Up!

SU Only Challenge 13 – Joie

SU Only Challenge 13 – Joie published on 7 Comments on SU Only Challenge 13 – Joie

Over at SU Only Challenges we are celebrating our favorite time of the Stampin’ Up year!!  Sale-a-bration!!!  Truly, the only thing better than new stamps is getting new stamps FREE.  I actually had a hard time choosing which of my SAB sets to use for this challenge but decided I wanted to show you something you might have missed.  If you look at the bottom of each SAB set with words, you get a choice of language. 

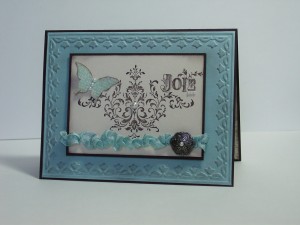
So as you look at this card and think, that looks like Bliss…it is…except in French!  I felt like “Joie” was a phrase I could find lots of uses for and this set has a French feel to me.  One of the best things I am finding with this set (especially in combination with the Framed Tulips Embossing Folder) is that a simple layout is best.  I stamped the flourish in Early Espresso and then put Joie in a place that felt like a continuation of the flourish.  Even with using a clear mount stamp, my Stamp-a-ma-jig was pulled out to make sure it was just right!  I inked up the butterfly in Baja Breeze and added some Early Espresso to the edges of the stamp with a sponge dauber.  After stamping, I cut it out and sponged a little more Espresso on the cut edges.  Additional sponging in Early Espresso was done on the image panel and on the embossed layer.  I used the thread pulling technique on the Baja Breeze Seam Binding.

Hint:  I find this works best if you simply leave the ribbon on the roll and pull the thread until you have enough scrunched ribbon.

The balance was a little off so I started looking at buttons and brads.  You know what I found??!!  This particular Antique Brad has a flower on it that is almost identical to the flower in Bliss/Joie.  And this, my friends is why Stampin’ Up products make me so happy!!  The type A personality in me knows that these items simply work….beautifully!!  This free set has just as much thought put into its design as any catalog set.  The attention to detail speaks for itself!

I wrapped the brad around the ribbon and attached it to the card with Mini Glue Dots.  Finally, I realized that Basic Pearls were “required” to complete the card.  The different sizes on the sheet really do make them a joy to use!  I attached one wing of the butterfly with Mini Glue Dots and let the other stay loose.  Finally, I popped the image panel up on Dimensionals.

This is the very first card I have made with this set but I think this will be a go-to set for a while!  Shelli Gardner, Stampin’ Up’s CEO, has a challenge on her blog this month for Sale-a-bration projects.  This card definitely qualifies so I am putting my name in the hat with it.   

Because I couldn’t quite make up my mind which project to feature today, I want to share this mini photo album with you too.  I had so much fun making the project for the Stampin’ Addicts SAB Blog Hop, I made another version using the SAB set, Sweet Summer.  I’ll post more details tomorrow since I changed the measurements on this one.

Thanks for stopping in today.  I can’t wait to see your Stampin’ Up Only projects using the SAB offerings.  Make sure you post them over at the SUO Challenge site!  Don’t forget to go see the fabulous things made by the rest of the SUO Challenge design team.  I hope you have a really great week!

Stamp:  Joie (French Bliss – 123242); Paper:  Baja Breeze (111342), Early Espresso (119686), Naturals Ivory (101849); Ink:  Baja Breeze Marker (120965), Early Espresso Pad (119670); Accessories:  Baja Breeze Seam Binding (122331), Antique Brads (117273), Basic Pearls (119247), Mini Glue Dots (103683), Dimensionals (104430), Sponge Daubers (102892), Big Shot (113439), Framed Tulips Embossing Folder (121809)

All products are Stampin’ Up!
Funky Photo Card

Funky Photo Card published on 2 Comments on Funky Photo Card

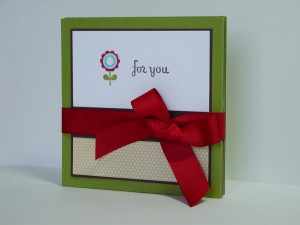
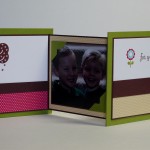
As promised, I am back with some more specifics about my photo book from the Blog Hop this weekend.  The tutorial I based this on came from the ultra-talented (and totally generous) Sarah Wills.  Her blog has tons of ideas and I used her Scallop Square Die Mini Scrapbook Tutorial as the basis for my card.  I thought it would be a fun little something to make for my mom since she came to visit this week.

I started with a base of On Board chipboard knowing she would keep this to show to her friends.  I cut the chipboard into two 4 1/4″ squares and then cut four pieces of Old Olive card stock to the same size.  Using my Anywhere Glue Stick, I attached three of the pieces to the chipboard and left the last one off to allow for ribbon placement.  Just like Sarah’s instructions, I cut a piece of Chocolate Chip stock to 3 3/4″ x 11 1/4″ and folded it concertina style.  I decorated the two pages on each side using Funky Four and the Play Date DSP that coordinates with it.

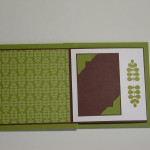
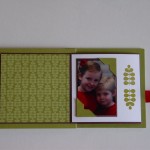
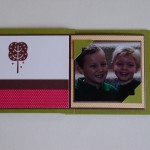
Here is the before and after of the front two pages.  I created a 2 1/8″ x 3 1/8″ panel for the picture I wanted to put in.  I then used the little leaf stamp from Funky Four as further embellishment.  I love that the DSP matches this image and simply cut a square for the facing page.

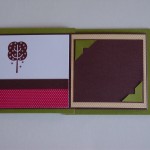
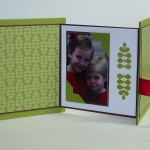
I then moved to the back and designed two more facing pages.  Again, I used some of the Play Date paper and a stamp from the set.  I initially made a square for the photo but then adjusted once I chose my picture.  I used a 1/8″ bigger panel behind it.

I connected these panels to my chipboard covered pieces using Sticky Strip (again, per Sarah’s suggestion).  I then decorated the front of the card.  All that was left was to attach my ribbon.  I lined up where the ribbon should go, attached it to the chipboard using Sticky Strip and then glued down the Old Olive Paper over the ribbon.

I love that this project comes together so quickly and makes such an nice little gift!!  Thanks, again, to Sarah for her generosity of ideas. 

Those who stamp with me know that I don’t make a lot of “3-D” projects.  I tend to be a little too practical, I think.  This went a bit outside the box for me so I’m going to enter it into the So Shelli Creative Challenge this month.  Shelli Gardner (CEO of Stampin’ Up!) challenged us to go outside our comfort zone.  I’m so glad I did!!  I think my mom is pretty glad too because she is already talking about showing this to her friends. *smile*

Thanks for stopping back in today.  I’ll see you later this week with another ColorLab challenge on Thursday and maybe something before then (if there are no snow days!).

Stamp:  Funky Four (113738), Say It Simply (122324); Play Date DSP (117168), Old Olive (100702), Chocolate Chip (102128), Whisper White (100730); Ink:  Real Red Marker (100052), Tempting Turquoise (100058), Chocolate Chip (100071), Old Olive (100079); Accessories:  Real Red Wide Grosgrain (109052), On Board Sheets (114320)

All products are Stampin’ Up!
Shimmer rewash

Shimmer rewash published on 10 Comments on Shimmer rewash

I’m back to work on my Christmas cards this week and there were some challenges to get me on track.  The first is the SUO Challenge 7 for Clean & Simple Christmas Cards.  Over at Splitcoaststampers there are two challenges today, the first is the CAS challenge to use bows and the other is the Technique Lovers Challenge for emboss resist.  Finally, Shelli Gardner over at So Shelli asked for techniques as her challenge this month.  I have to say that after all the classes I have been having that my creative level is a little low.  I’m sure that will be fixed soon enough but I was happy to have a little help from the challenges. 

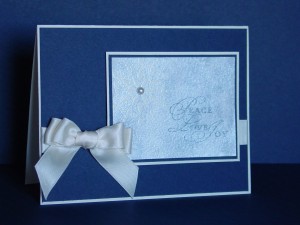
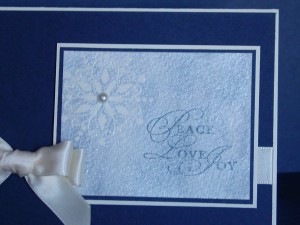
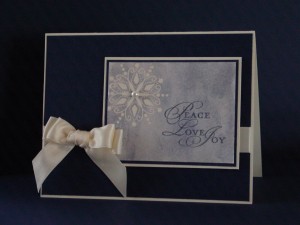
I saw the technique called “emboss rewash” while I was at the Stampin’ Up Regionals in October.  Shannon West did a demo of the technique and I loved it!  It is a version of emboss resist using watercolor paper and an Aquapainter.  You emboss your image and then, instead of sponging, you “wash” the color around the image with your wet Aquapainter and ink.  I tried it on today’s card with the snowflake from Snow Swirled.  I stamped it in Versamark ink, embossed it with Clear Stampin’ Emboss Powder then washed over my Night of Navy ink.  It looks incredibly cool!  To add a touch of holiday feel, I then washed over some Frost White Shimmer Paint too.  Finally I stamped the words from All Holidays (one of my favorite sentiments for Christmas cards!) in Night of Navy ink.  I kept the layout simple and just added my Vanilla Satin bow and a Basic Pearl.  I love how the shimmer paint and ribbon make this feel special but that it is really easy to duplicate for a lot of cards!  The hardest part of this was getting a good picture since the shimmer kept reflecting back.

I know this picture is a bit dark but I had to take it in shadows so you could see the image.  Here are a couple more pictures where you can really see the pearlized look of the Frost White Shimmer Paint.

You can see all the reflection bouncing back in these two pictures.  I must say that this card is so much prettier in person!!

Now that I have this one done, I’m off to complete some more.  My Advent countdown calendar says 19 days and I have lots more work to do.  I will be back tomorrow with the rest of my tags from my class last week.  Hope your day is full of Peace, Love and Joy!

Stamps:  Snow Swirled, All Holidays; Paper:  Watercolor, Very Vanilla, Night of Navy; Ink:  Versamark, Night of Navy; Accessories:  Stampin’ Emboss Powder, Heat Tool, Frost White Shimmer Paint, Aquapainter, Vanilla Satin Ribbon, Dimensionals, Basic Pearls

All products are Stampin’ Up!
All wrapped up!

All wrapped up! published on 12 Comments on All wrapped up!

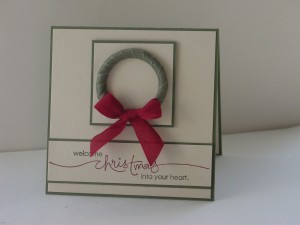
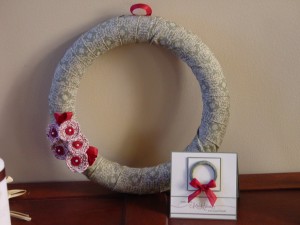
My planning for my gifts class next week, that is!  At least almost all wrapped up.  I am so excited to show you my card that is meant to go with the wreath posted here.  My initial inspiration for a wreath card came from Cindy over at Heart’s Delight Cards and her delightful work in the Holiday Mini Blog Hop.  Her wreath card is just stunning!!  After some playing with the idea, I realized that I needed a card that “matched” my wreath a little better.  I saw the SUO Challenge 5 for Punch Art and it got me thinking.  Here is the card that resulted:

So where, you ask, are the punches??  I am definitely not a punch art talent like so many you will see over on the SUO Challenge page, but I am pretty excited about this.  The wreath “form” is made using punches. 

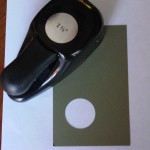
You start with a 1 3/8″ Circle Punch and pop your circle out of Always Artichoke paper.  Make sure you leave room for the larger punch to go around the circle.  Next, center your circle inside the 1 3/4″ Circle Punch and make your ring.

Cut approximately 12 inches of ribbon.  This may have to be adjusted based on the width of your ribbon choice.  My ribbon is the Always Artichoke Seam Binding which is 1/2″ wide.  Next, you attach one end of your ribbon to the back side of your ring.  I used Dotto so that I could reposition the ribbon a bit if necessary.  Then you just wrap the ribbon around the ring.

In the interest of space, I kept the pictures small but you can see them bigger simply by clicking on them.  Once I got all the way around, I attached the end to the back of the wreath with a Mini Glue Dot and trimmed the excess.  I put my bow on top of the beginning/end point to cover the overlap. 

The layout was still influenced by Cindy’s beautiful card and I used the Heard from the Heart sentiment.  I love the message in that one!!  I have to show you the wreath and its accompanying card together, of course, so here they are.

See how special it is to make a Handmade Holiday combination??  Stampin’ Up continues to celebrate the idea of the handmade gift with their Holiday Bundles (see sidebar).  On that note, Shelli Gardner from So Shelli (and the CEO of Stampin’ Up!, of course) has posted her Creative Challenge for November…Holiday Hellos.  I think this card fits the bill perfectly. 

I hope you have a great day!  Thanks for stopping by!  More from the Christmas Gifts Class coming soon!

Stamp:  Heard from the Heart; Paper:  Naturals Ivory, Always Artichoke; Ink:  Cherry Cobbler, Always Artichoke; Accessories:  Seam Binding in Cherry Cobbler and Always Artichoke, Mini Glue Dots, 1 3/8″ and 1 3/4″ Circle Punches

All products are Stampin’ Up!

Fall thank you

Fall thank you published on 14 Comments on Fall thank you

Thanks to the SUO Challenge team for choosing this as Top 3 Winner!!

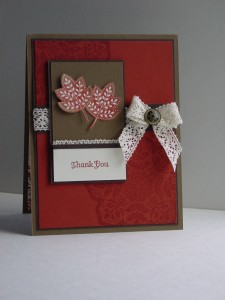
I mentioned yesterday how much I have to be thankful for and I continued on my thank you card trend today.  While I was at Regionals, my fabulous upline gave me some fun goodies to play with so I “had” to use them today.  Brandi knows that I can’t resist a pretty ribbon and she gave me a whole pack of samples to use (expect to keep seeing them).  One was the beautiful Victoria Crochet Trim.  How did I not already have this??  Rest assured, it has been ordered now!  She also included some Antique Brads which are particularly great with the Crochet Trim.  Of course I used the Day of Gratitude set again.  Here is the result:

The sketch comes from Stacey Schafer who is a guest designer at 2 Sketches 4 You this week.  I used her bonus sketch.  This card also meets the requirement for the Stampin’ Up Only Challenge #3 to use products from the Holiday Mini.  Finally, it is another card for Shelli’s October Challenge .

The leaves are stamped using a technique taught last weekend by the very talented Ilina Crouse from My Creations.  You ink up the image and then sponge another color on the edges using a sponge dauber.  Love the look!  I going to be playing with variations of color and this technique for a while. 

Hope your week is going well.  I’m going to be working on more fun stuff for my hostess clubs that meet next week so expect to see those soon. 

Stamp:  Day of Gratitude; Paper:  Cajun Craze, Soft Suede, Early Espresso, Very Vanilla; Ink:  Cajun Craze, Soft Suede, Versamark; Accessories:  Victoria Crochet Trim, Antique Brads, Dimensionals

All products are Stampin’ Up!

Day of Gratitude

Day of Gratitude published on 7 Comments on Day of Gratitude

This is, in fact, the name of a new stamp but the phrase means so much more.  Gratitude is an attitude!  I know that I run through my life so quickly sometimes that I forget to say thank you to the many people who bless my life.  Something about the change to fall weather reminds me of all the things for which I am thankful.  Today, I am infinitely thankful for my weekend.  I was so lucky to attend Stampin’ Up’s Regional in Baltimore on Saturday and have an entire day of stamping, fun, business training and swaps.  I know…that is a lot to be thankful for!  Now consider the fact that I got to be with my wonderful upline Brandi and I have even more to be happy about.  But the most amazing thing is what happened for me to have this opportunity.  My husband is in the Air National Guard and travel is the nature of his life.  Even with the best laid plans, many times he simply must be gone when we thought he could be home.  Last weekend was one of those times.  I had never been to an official Stampin’ Up function and could not miss the opportunity to go to a Regional so close to home.  I signed up knowing the risk that he wouldn’t be here.  Sure enough, that is what happened.  A dear friend and a wonderful sister-in-law stepped up to watch my boys so that I could take this time for myself.  How can I even express my gratitude to them??!!  Both boys had a fantastic weekend and I was able to enjoy my time knowing what good hands they were in.

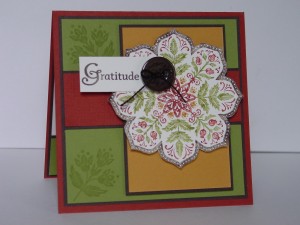
Fortunately, part of the package of goodies for Regionals was the Day of Gratitude stamp set from the Holiday Mini.  The entire set is so beautiful and the projects on Saturday that used it were so much fun to create.  There is nothing more inspirational to my stamping than a new set so of course I needed to use it right away.  Even better is that the set expresses exactly how I am feeling.  Here is one of the cards for my gracious helpers this weekend:

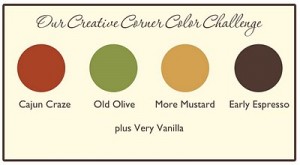
This card uses a few challenges.  The first is the So Shelli Challenge (from Shelli Gardner) to create a project using Fabulous Fall as the motivation.  The Our Creative Corner challenge this week uses these colors:

They pretty much say Fabulous Fall, don’t you think?  The sketch is from the Sweet Sunday Sketch Challenge and was so fun to use.

I hope you have a wonderful week and, just like the stamp says, your common days are transformed into Thanksgivings. 

Stamp:  Day of Gratitude (Holiday Mini); Paper:  Cajun Craze (smooth and textured), More Mustard, Old Olive, Early Espresso, Very Vanilla; Ink:  Cajun Craze, More Mustard, Old Olive, Early Espresso; Accessories:  Neutrals Designer Buttons, Dimensionals, Thread (dyed using Early Espresso marker)

All products are Stampin’ Up!
Stampin' Up! gives me a Happy Heart!

Stampin' Up! gives me a Happy Heart! published on No Comments on Stampin' Up! gives me a Happy Heart!

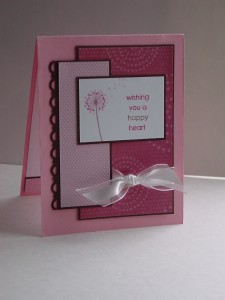
I used the Mojo Monday sketch challenge (Mojo122) for this card.  The sketch was created by the wonderful Mary Fish who is an amazing stamper!  I also wanted to participate in a challenge from Shelli Gardner, the CEO of Stampin’ Up!  She challenged us to make a Valentine’s Day project.  I used the set “A Happy Heart”.  When I saw the circles in this new Sweet Pea paper pack, I immediately thought of the dandelion stamp.  They are a natural combination.  Of course, I also just had to use the Sale-a-bration punch too!  The phrase from this stamp really fits how I feel about Stampin’ Up as a company right now. 
You have seen the devastation in Haiti and I know you, like me, want to help in any way you can.  Stampin’ Up has committed to donating $2 from every “I {Heart} Hearts” set sold from now until Feb. 28th to the American Red Cross’ Haiti Relief and Development Fund.  Wow, what can I say??!!  The spirit of giving at Stampin’ Up is a corporate philosophy that starts with the CEO and continues throughout the entire company.  You can see pictures on Shelli’s blog, So Shelli, of employees packing up supplies for 5,000 hygeine kits with supplies purchased by the company.  You see, now Stampin’ Up gives you a Happy Heart, too!!

Take a look at the flyer for this promotion for more details!!        I {Heart} Hearts promotion for Haiti

Thanks so much for visiting my blog!!

Mojo122 - Sweet Pea and Happy Heart


Stamp:  A Happy Heart

Paper:  Sweet Pea Paper Pack (Occasions Mini), Pretty in Pink, Chocolate Chip

Ink:  Pretty in Pink, Rose Red, Close to Cocoa

Accessories:  Scallop Trim border punch (SAB), White Organza Ribbon

Layout:  Mary Fish, Mojo122

Primary Sidebar