Skip to content

Freshly Made Sketches #173

Freshly Made Sketches #173 published on 8 Comments on Freshly Made Sketches #173


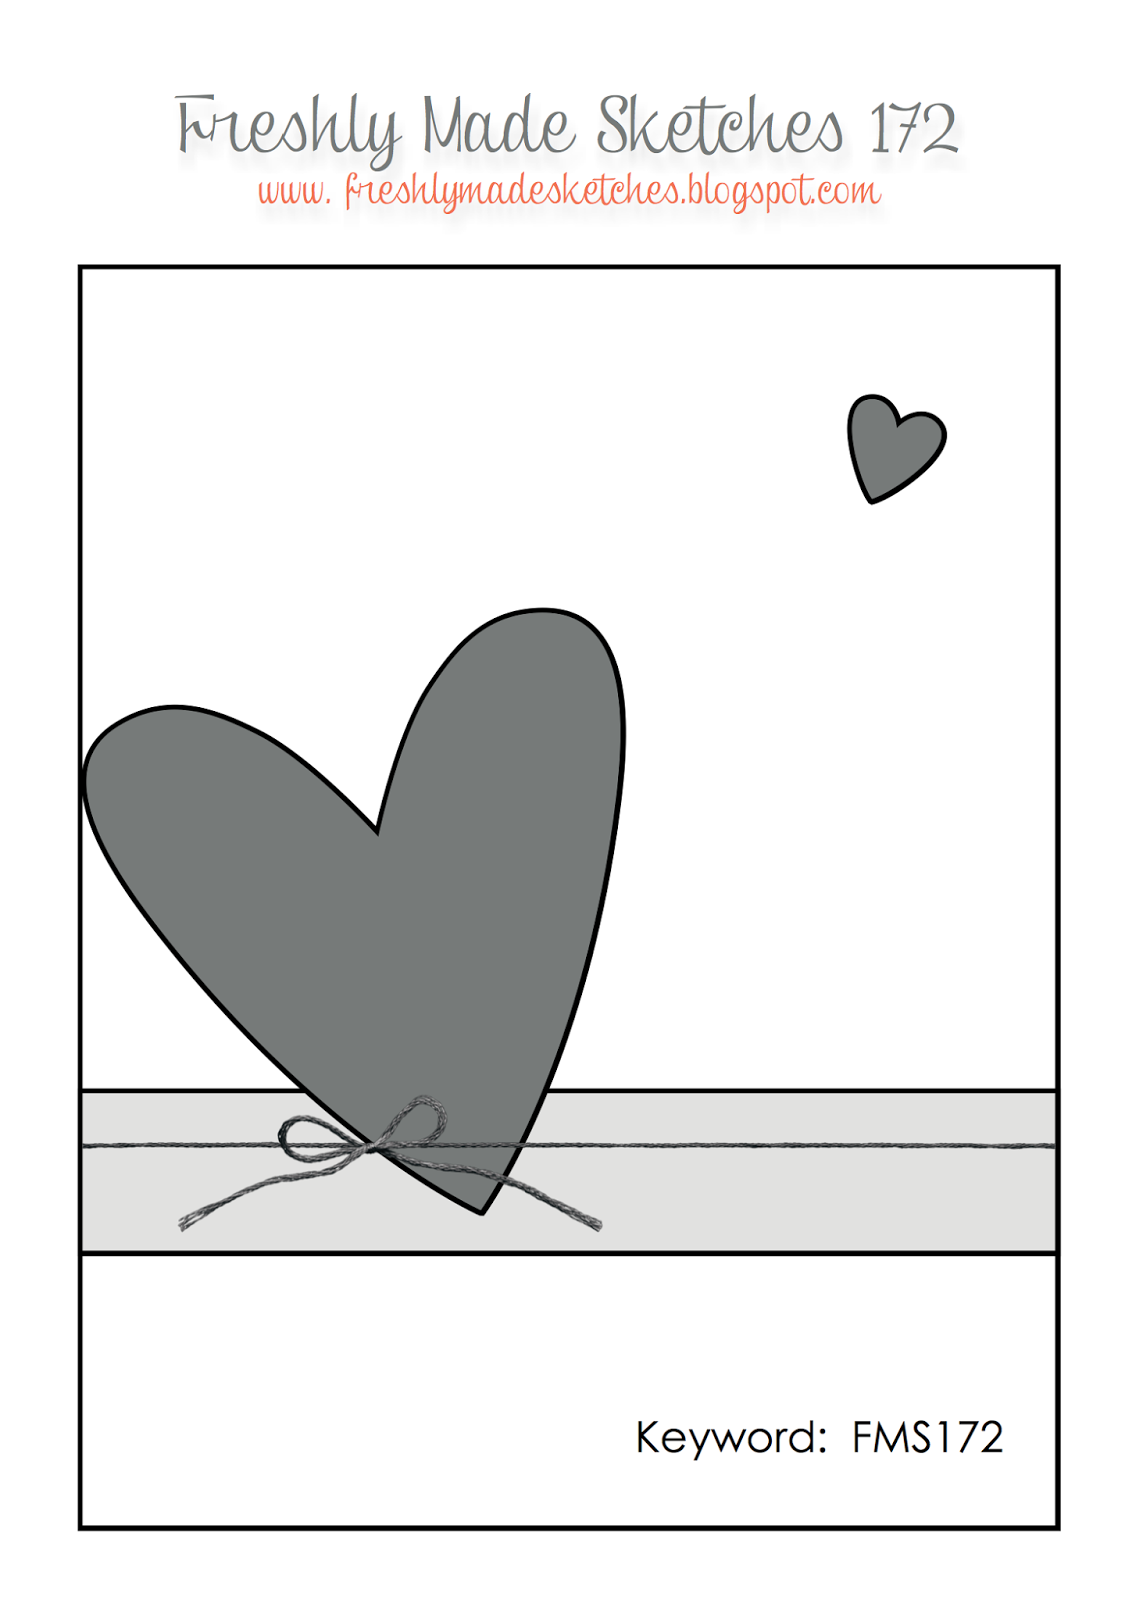
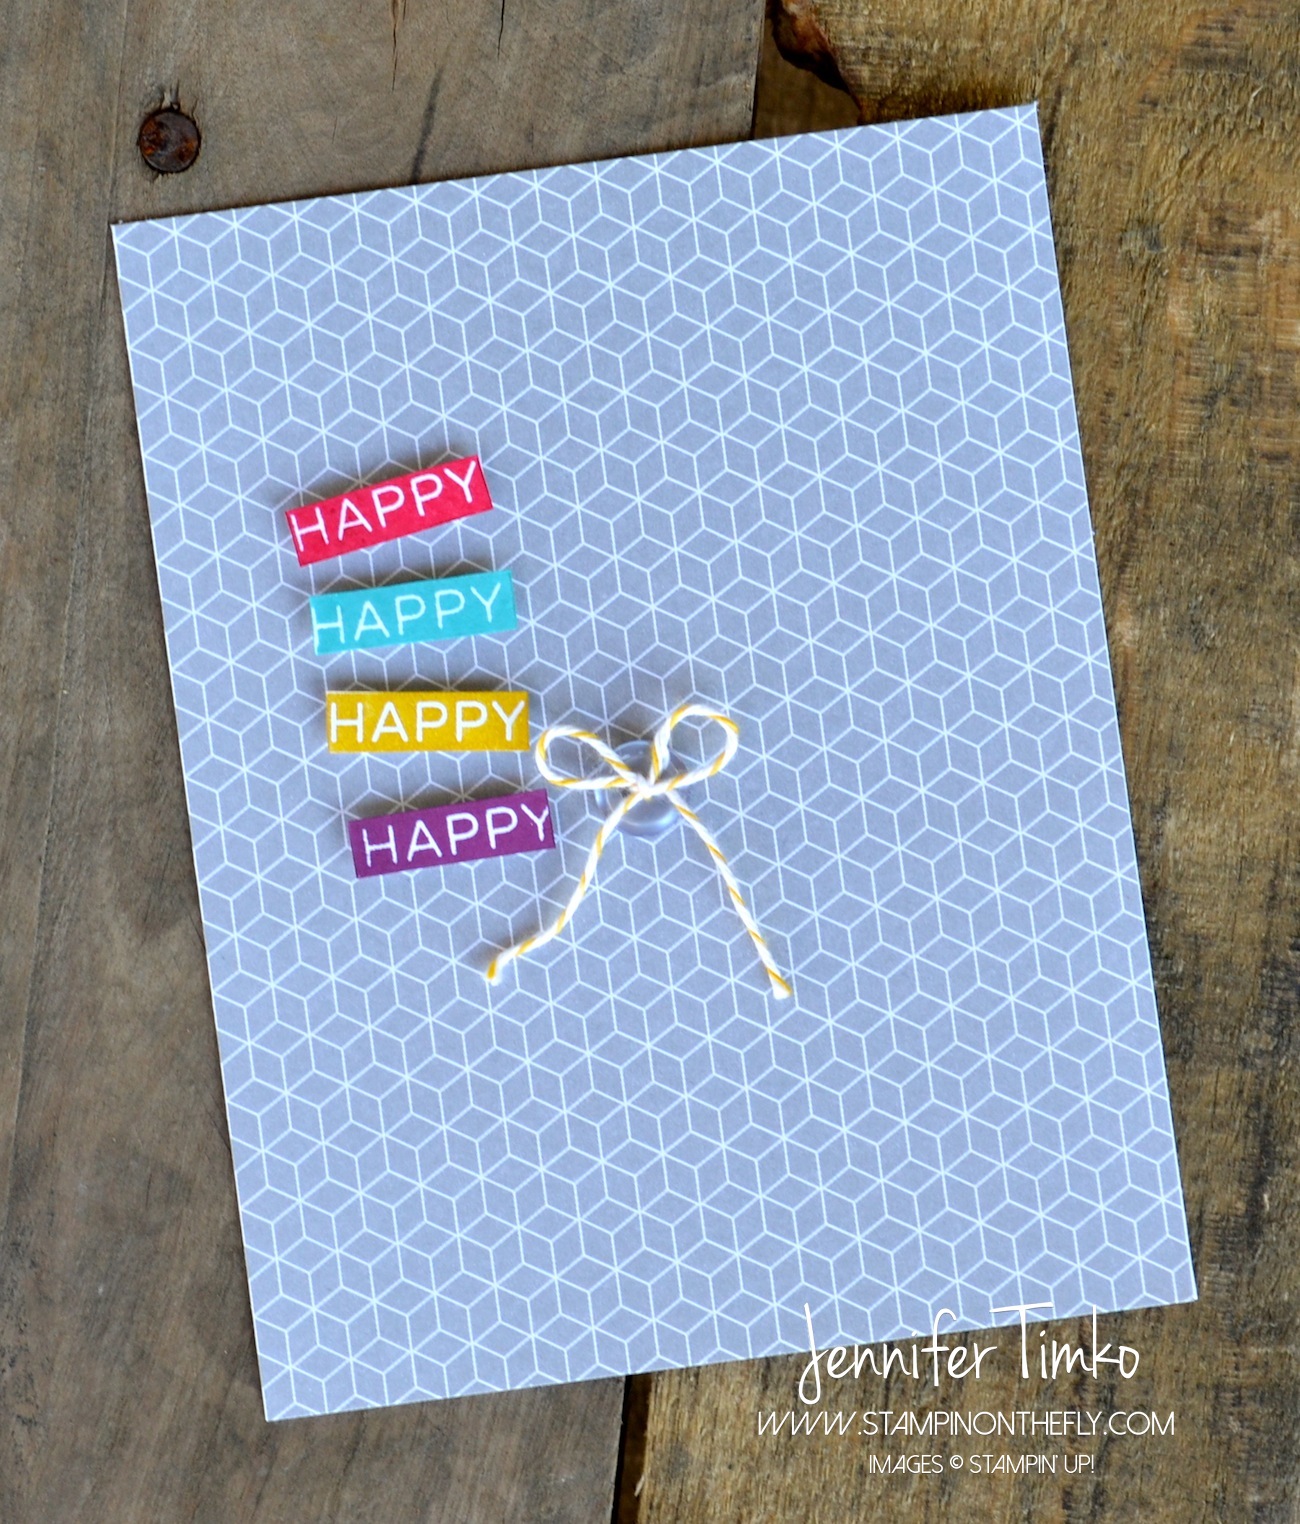
So a funny thing happened on the way to this week’s sketch.  Like many design teams, our Freshly Made Sketches team has a separate blog where we can upload sketches and challenges cards early in order to make the weekly challenge happen.  Kind of the magic behind of the scenes.  The team loads in their latest sketches and I convert them to final form in My Digital Studio.  Well, when Kim Singdahlsen uploaded her sketch, I got to work on getting it drawn.  After I got everything done and loaded on the DT page, I looked at the sketch and it was crooked.  Surely, I thought, I hadn’t mistakenly hit rotate??  Seriously??  So I went back to the sketch and no, I hadn’t.  I pulled out a real straight edge and held it to my screen and yep, it is straight.  So apparently Kim is so creative that she can not only concoct great sketches, she can invent optical illusions!!!  We all know she is a card making genius and now we just know that she is a multi-faceted genius!

FMS173 - Thank You


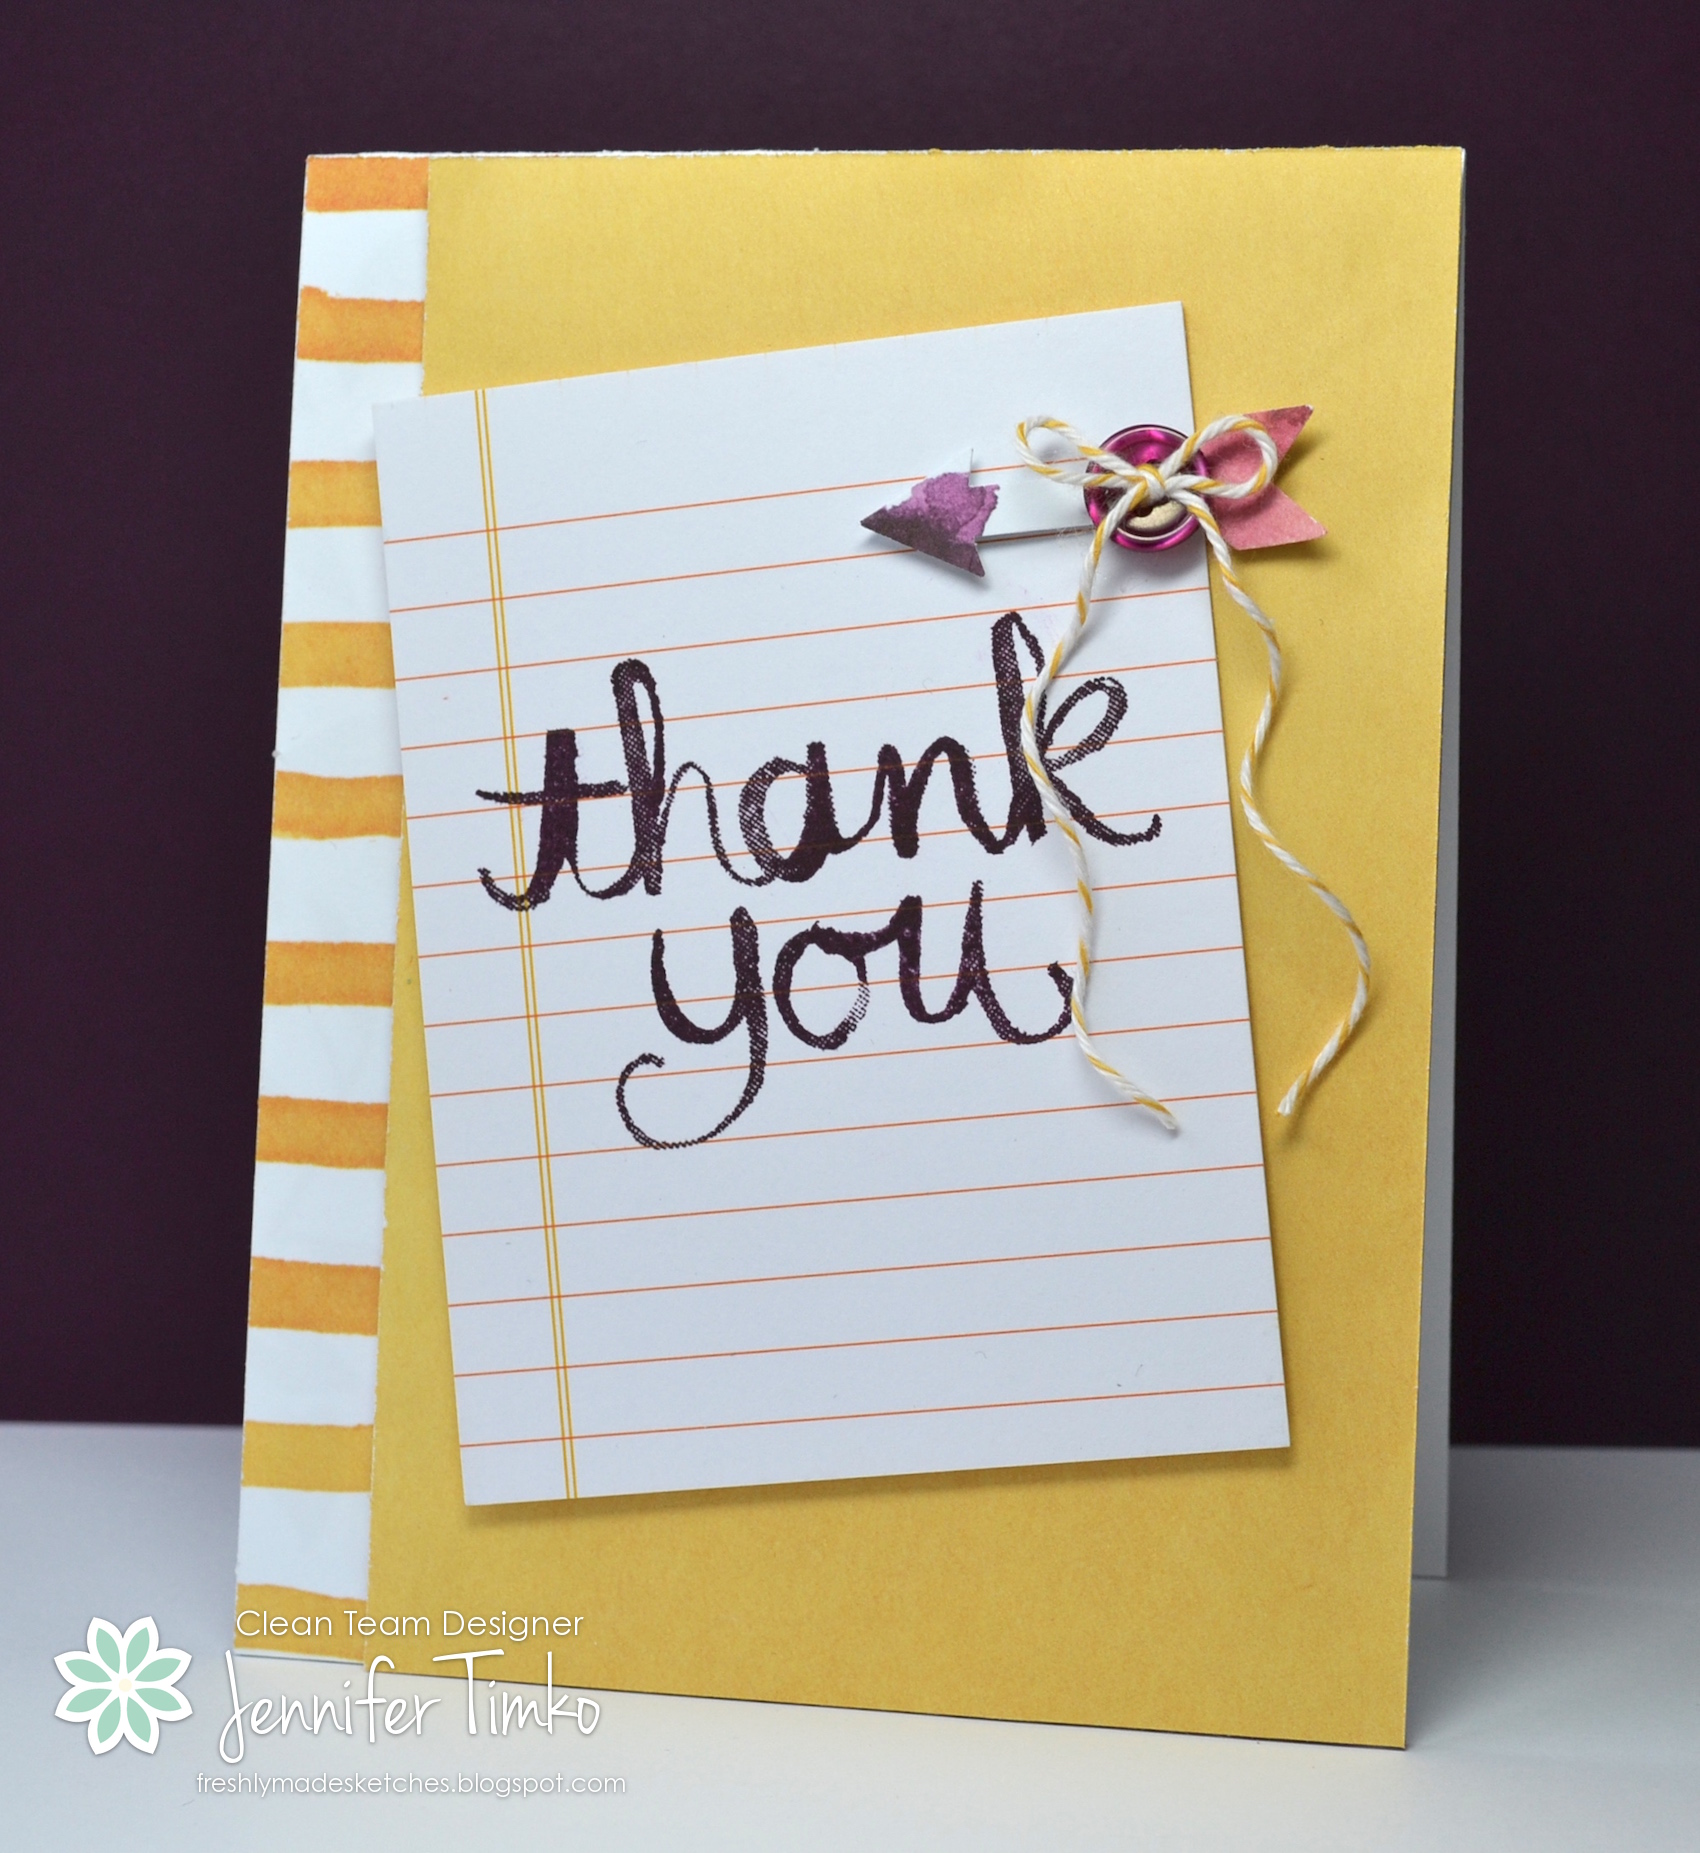
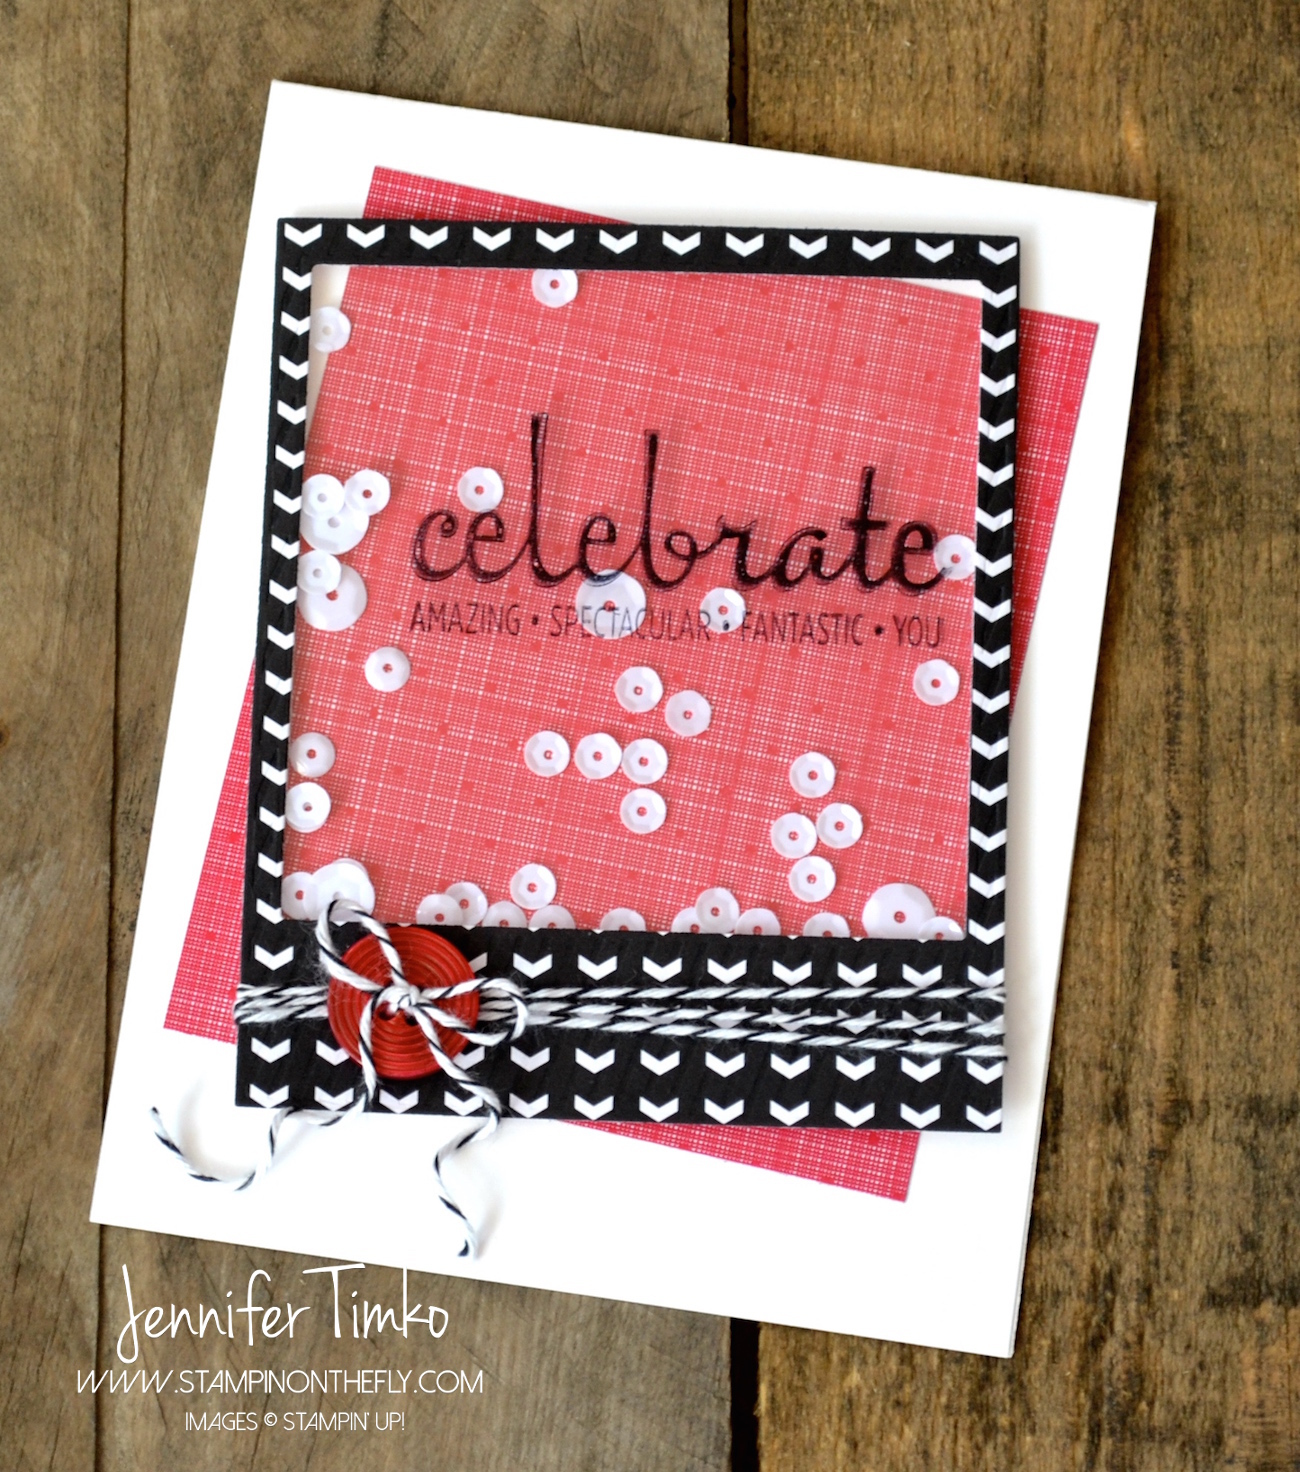
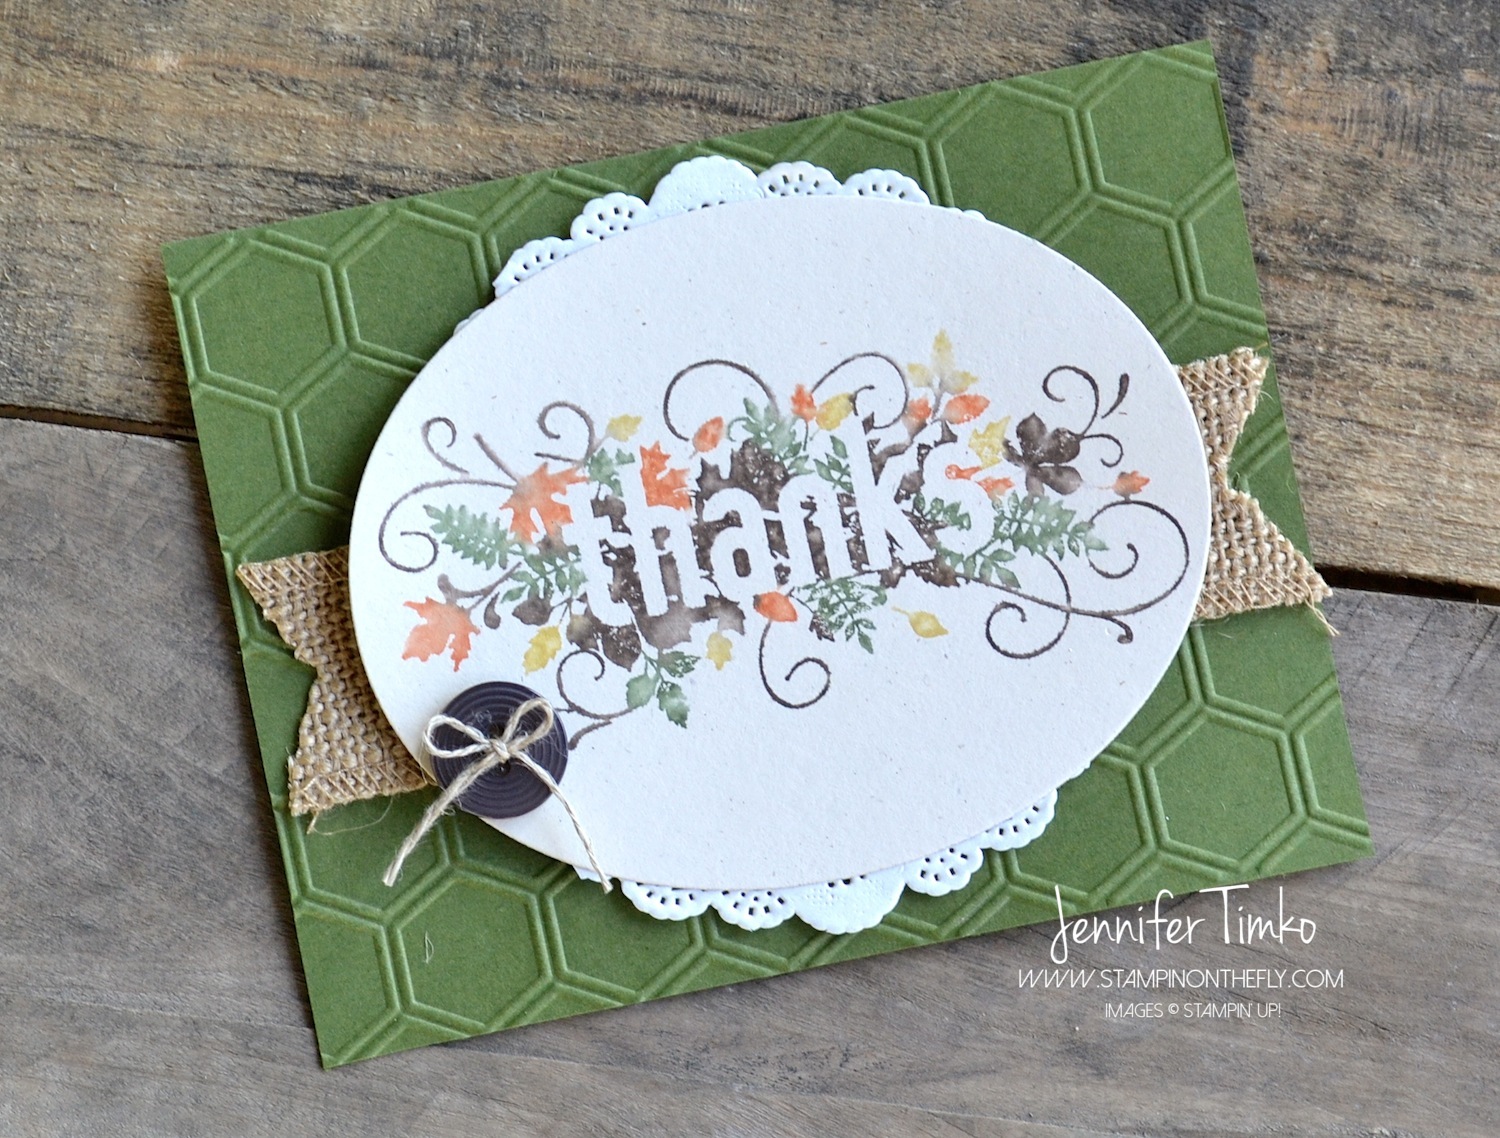
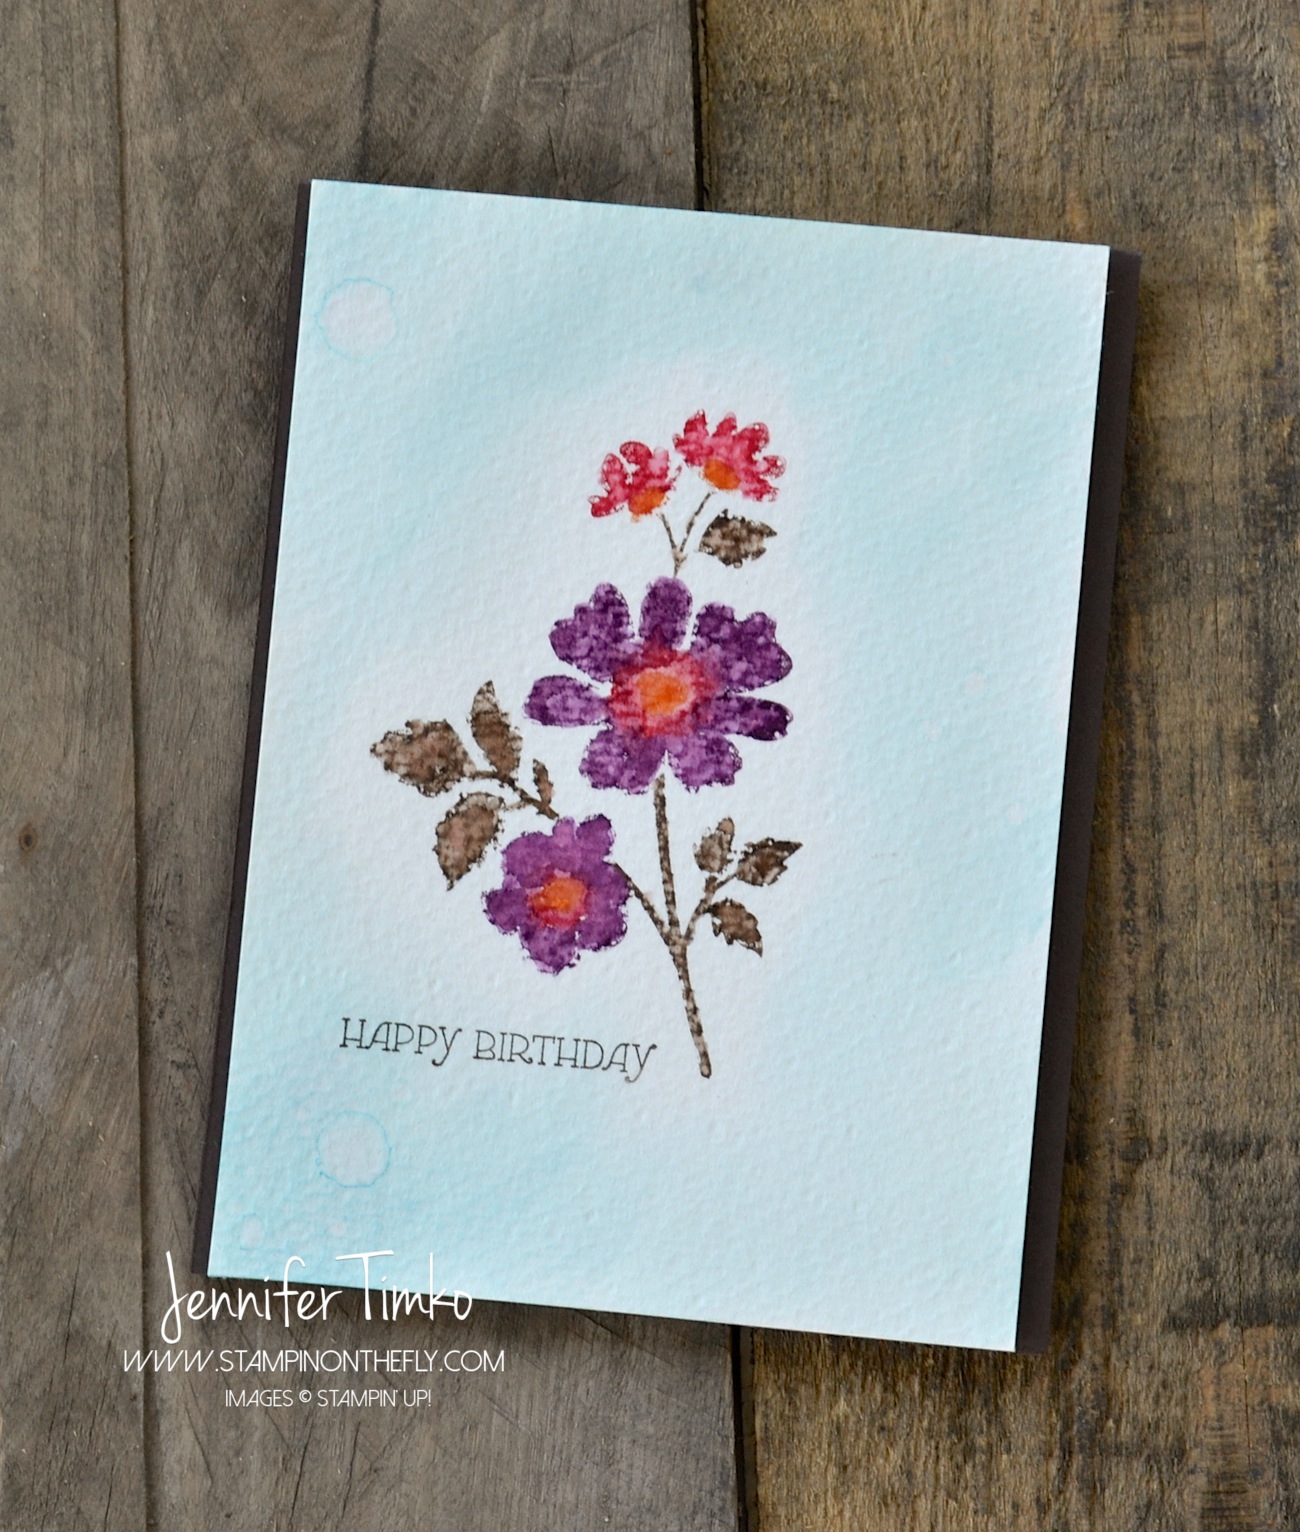
I started my card with the awesome new Painted Blooms DSP.  Both the stripe print and the Daffodil Delight background paper are from that pack.  Aren’t they pretty?!  I love the ombre variation in the stripes!  I decided to pair it up with a card out of the Project Life Everyday Adventure Kit.  That awesome little notebook paper print goes perfectly with the DSP and I didn’t have to cut a thing.  I stamped on the Watercolor Thank You stamp (a single) in Blackberry Bliss.  Then I added an arrow punched with the What’s Up Punch out of a flower print from the Painted Blooms DSP.  A Razzleberry button tied with Crushed Curry Baker’s Twine to finish.  I just love the look of this card….clean but with a sense of fun.

FMS Final 173-001

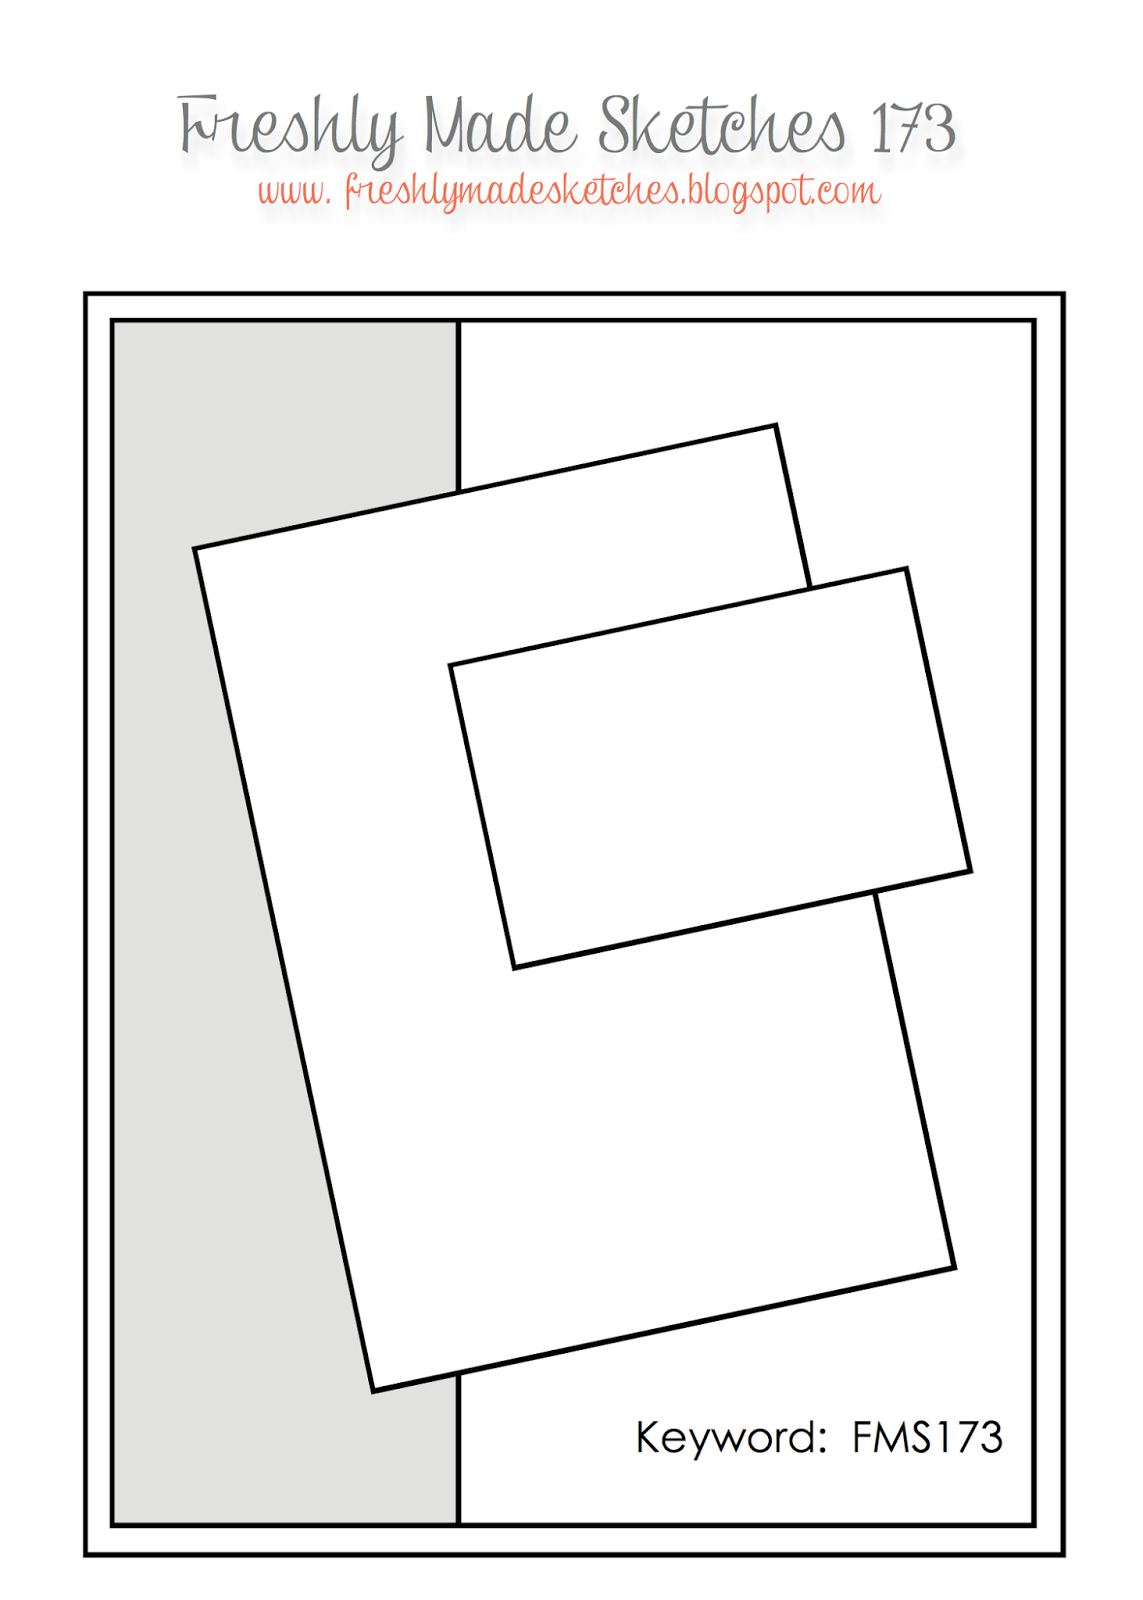
And here is our funny optical illusion sketch for the week.  I was relieved that the card itself didn’t take on the illusion of the sketch illustration!!  Ok, you KNOW you want to check it yourself.  Go ahead.  The outside rectangle is straight, I promise!!

The team has some fun inspiration for you and I think you are going to have a ball with this one….again.  I have to say (with only a little too much of a bragging voice) that the team has been on fire with the sketches lately!  And the gallery has been incredible as a result.  I am grateful for all the cool stuff I get to see every week as I see what you share.

Ok….so I have my make and take AND some cool samples from the Northern Virginia Regional Event I went to last week.  I finally got some pictures and have them edited so I really will have them up tomorrow.  Life just got away from me over the last couple of days and I could not seem to get the posts up.  But I did teach some awesome kids in 6th grade about the Women’s Airforce Service Pilots and did some other stuff for my boys.  Like working on Valentine’s!  I hope your week is going well and I look forward to having you stop in again tomorrow.  Until then, have a great day!

Click HERE to purchase these wonderful Stampin’ Up products!

Stamps:  Watercolor Thank You; Paper:  Painted Blooms DSP, PLxSU Everyday Adventure; Ink:  Blackberry Bliss; Accessories:  What’s Up Punch, Button,  Crushed Curry Baker’s Twine, Dimensionals

Blog Signature 2015


Celebrate

Celebrate published on 2 Comments on Celebrate

A quick and fun card for you today!  This was a card for my husband’s birthday last week.  Shaker cards are so great because they have an extra element of interest without being all “girly”.  While I love a girly card for sure, around my house I have a need for cards that skew to the masculine side.  I think this one hit the mark!

Celebrate


I used the Stacked with Love DSP Stack again.  Love these prints! Again, interesting but not too feminine.  I cut the frame out with the On Film Framelits and then cut a matching size out of the Window Sheets to fill the square.  I stamped the sentiment from Fabulous Four in Stazon Black Ink.  A little Black Baker’s Twine, a Cherry Cobbler Button and a fun bow (just like the one in my video tutorial from Wednesday).  Then I added some leftover white sequins from my December Paper Pumpkin and attached the frame with foam tape.  This is one of those cards that you could really tailor to the age and color preferences of the recipient.

Now….I’m off today to see my friend Rose-Ellen Eastman.  She is hosting a Northern Virginia demonstrator event tomorrow and I can’t wait.  I can’t wait enough that I’m going to go see what she is up to today.  *smile*  I’ll be back Sunday or Monday with one of the make and take cards from the event that I designed.  Until then, I hope you have a great weekend.  I appreciate you stopping in today!

Click HERE to purchase these wonderful Stampin’ Up products!

Stamp:   Fabulous Four; Paper:  Whisper White, Stacked with Love DSP Pack; Ink:  Stazon Black; Accessories:  Black Baker’s Twine, Cherry Cobbler Button, Big Shot, On Film Framelits, Sequins, Foam Tape

Blog Signature 2015

Freshly Made Sketches #172

Freshly Made Sketches #172 published on 8 Comments on Freshly Made Sketches #172

FMS Final 172-001

Well, didn’t I tell you that the sketch for this week at Freshly Made Sketches was great?!  My friend Linda Callahan  created this one for us and I love it.  The minute she sent it to me I knew we had yet another winner on our hands.  And we have so many cool variations this week from our team.

FMS172 - Love you

Have you ever had a technique that you’ve been wanting to try but somehow it keeps going to the back burner?  That is how I felt about partial die cutting with letter thinlits.  I know that there are products out there with certain words that create something like this but with this technique, you can use whatever word you want.  The Little Letter Thinlit Dies are PERFECT for this one!  I seem to have a bit of a theme going this week using the Stacked with Love DSP Stack.  I find that crafting seems to go like that for me sometimes.  I find something that works and I stick with it!!  As I was starting to figure out how to explain this technique I realized it was just easier to make a video tutorial.  So that is what I did!

As I said in the video, it took me a couple of tries to get the letters lined up just right so that I didn’t cut them out completely.  I recommend you practice once or twice with scrap paper before going to your DSP.  Having the thinnest held together with washi tape make it easy to repeat this and play with the idea.  Once you get the cutting part, the rest is easy and quick.

I have another card ready to share with you on Friday that uses this great paper again.  And then this weekend I’ll be going to a local demonstrator event and I’m sure I have fun things to share from there.  I have helped design a card for the get-together and plan to share with you on Sunday.  I seem to be getting back into the groove of stamping again and look forward to more this week.  Until Friday, I hope you have a great week!  Thanks for stopping in.

Click HERE to purchase these wonderful Stampin’ Up products!

Stamps:  Forever Florals (sentiment); Paper:  Stacked with Love DSP Stack, Whisper White; Ink:  Momento Tuxedo Black; Accessories:  Big Shot, Little Letters Thinlits, Black Baker’s Twine, Buttons

Blog Signature 2015


Amazing Birthday in Gold

Amazing Birthday in Gold published on 1 Comment on Amazing Birthday in Gold

10494554_10152594044857329_7043287500476660222_n

As I was working through editing some pictures, I realized that I had forgotten to share some of my Convention Display Board Samples.  So I thought it might be fun to pull one out and show you.  I am on “the road” right now (and most of the rest of the month) but don’t think I have forgotten about posting.  *smile*

Amazing Birthday - Amazing GoldI just love the gold on this!  I used Gold Soiree DSP as the starting point for inspiration and attached it to a Whisper White card base.  Then I stamped this awesome sentiment in Gold Encore Ink onto Whisper White and heat embossed it with Gold Stampin’ Emboss Powder.  The result is so pretty and much more dramatic in person!  I framed the sentiment with Gold Foil and added on Gold Sequin Trim and a Vintage Faceted Button tied with the gold filaments from the Gold Baker’s Twine.  Simple to make and so striking because of the gold shine!

I have gotten pretty luck with weather in the system over the last few days and have had some great flights!  I love seeing families reunited at the end of a day when I walk to our hotel transportation.  This is a magical time of year to be an airline pilot.  If you are traveling during this season I do have a selfish favor to ask of you.  Please, please be patient if there are weather, maintenance or system delays.  All of the airlines are flying full schedules and there are LOTS of crews who will not be home with their families on special holidays.  Even though we really know how important it is for you to get to your destination, we also know that the most important gift WE can give to you is safety.  So we will make hard decisions that might delay flights or even cancel them.  We do this because you matter!  I know that I have a simple criteria for flying.  If I would not put my family on the plane, I will not allow YOUR family to fly on it.  So I ask you patience if you encounter issues.  Really…we want everything to go on time too!  It gets us home sooner to our families!  I cannot tell you how much it means when people thank us for a safe flight.  We care about on time and we strive for no bumps or issues but mostly we want you safe.

Ok…back to your regularly scheduled stamping blog.  Thanks for humoring me!  I’ll be back on Wednesday with our last Freshly Made Sketches challenge of this year.  You are going to love our sketch!  And I’ll be here Friday with a Fancy Friday hop.  We have a great theme for you this month.  Thanks so much for stopping in.  See you again sooN!

Click HERE to purchase these amazing products from Stampin’ Up!

Stamp:  Amazing Birthday; Paper:  Gold Soiree DSP, Whisper White, Gold Foil, ; Ink:  Gold Encore Ink; Accessories:  Gold Stampin’ Emboss Powder, Heat Tool, Gold Sequin Trim, Gold Metallic Baker’s Twine, Vintage Faceted Buttons, Dimensionals

Blog Signature 2014-001


Follow my blog with Bloglovin

Blooms of Remembrance

Blooms of Remembrance published on 22 Comments on Blooms of Remembrance

I think by now most of you know that in my “day” job, I am a pilot at United Airlines.  Every year I feel compelled to write a post commemorating those lost on that horrific day 13 years ago.  (You can read them here:  9th Anniversary10th Anniversary,  11th Anniversary and 12th Anniversary)  Each year I feel the sadness creeping in and find myself a bit out of sorts.  While I know that we have distance on the event and that certainly dampens the emotions a bit, I can’t help but reflect back.  I know many people throughout the world feel the same and that is a good thing.  Those lost were husbands, wives, daughters, sons.  Meaningful lives cut too short.  They should be remembered and honored.

As usual, I turn to stamping to ease my heart and give my emotions a place to go.  This week was no different.  I found myself a little chaotic in the stamp room and having a hard time focusing.  Eventually I just gave in to it and created a card especially inspired by 9-11.

While I could not be there, I was proud that my pilot brethren could form an “honor guard” of sorts outside the ceremony to award three Congressional Gold Medals given yesterday in honor of the fallen victims.  Each medal was specially designed to commemorate the crash sites.  Each will be housed in the appropriate memorial at the sites.  The fact that pilots stood in honor of the fallen is fitting and makes me proud.  We do not forget.  Every time we go to work, we realize the responsibility given to us to protect the lives and well-being of our passengers.  We take it very seriously every single day.  We love the smiling children boarding planes on the way to their great adventures.  We love taking people to visit their loved ones.  We even love the harried business people who barely look up from their devices to acknowledge us.  Because we love to fly!  And we know in our hearts the trust you put in us.  We get to bring people together and what an amazing opportunity that is.  That togetherness flies in the face of the evil that showed itself 13 years ago.  The evil will not win over love, joy, family!  It will not win over the smiles and hugs I see every time our planes arrive.  And we are grateful for the privilege of being a part of that!

Remembrance Blooms

So here is my card for today.  The colors fit my mood so I just went with them.  The lovely Kraft Card Stock was stamped with Early Espresso Ink and then embossed with Clear Stampin’ Emboss Powder.  I colored the flowers with my Blendabilities (Night of Navy and Skin Tone Assortment).  That elegant striped paper is from the Under the Tree Specialty DSP.  The ribbon…one of my new favorites…Early Espresso Seam Binding.  It is gorgeous.  And I colored some Basic Pearls with my darkest Skin Tone Blendabilities Marker.

I appreciate you stopping in today and I appreciate all of my readers so much.  Thank you for letting me share this part of my heart.  I wish you a day of love and joy and togetherness!

In memory of:

United 93:  Jason Dahl, LeRoy Homer, Lorraine Bay, Sandra Bradshaw, Wanda Green, CeeCee Lyles, Deorah Welsh

United 175:  Victor Saracini, Michael Horrocks, Robert Fangman, Amy Jarret, Amy King, Kathryn Laborie, Alfred Marchand, Michael Tarrou, Alicia Titus

American 11:  John Ogonowski, Thomas McGuinness, Barbara Arestegui, Jeffrey Collman, Sara Low, Karen Martin, Kathleen Nicosia, Betty Ong, Jean D. Roger, Dianne Snyder, Amy Sweeney

American 77:  Charles Burlingame III, David Charlebois, Michele Heidenberger, Jennifer Lewis, Kenneth Lewis, Renee May


Blog Signature 2014-001


Click HERE to purchase these wonderful Stampin’ Up products!


Freshly Made Sketches #153

Freshly Made Sketches #153 published on 16 Comments on Freshly Made Sketches #153

FMS Final 153-001

Time for the middle of the week fun from Freshly Made Sketches!  Just take a look at this fabulous sketch from the lovely and talented Jen Brum.  I just know you are going to love this one!  So many fantastic ways to interpret it!

FMS153 - Grateful WreathI chose to stick with my fall theme and created a little wreath for the sketch.  I took a 1-3/8″ and 1-3/4″ Circle Punch to create the wreath form out of scrap card stock.  Then I cut the edge off a piece of Burlap Ribbon and simply wrapped it around the form.  It is secured with Glue Dots.  Then I used my Flower Fair Framelits leaf to punch out the three leaves from Champagne Glimmer Paper and Color Me Autumn.  I added some Linen Thread and the Gold Metal Button to finish the wreath (also secured with Glue Dots).  The sentiment is from the lovely set Truly Grateful and I added one more Gold Metal Button to try to match the sketch a bit more.  This is a simple card to make but I think that wreath is kind of a wow.  Hope you like it too…let me know what you think!

Today is the last day to sign up for Stamps on the Fly Bright & Beautiful Edition.  I hope you’ll join me!

Stamps on the Fly - Sep 14-001


Click HERE to purchase these wonderful Stampin’ Up products!

Stamp:  Truly Grateful; Paper:  Color Me Autumn DSP, Champagne Glimmer Paper, Naturals Ivory; Ink:  Soft Suede; Accessories:  Big Shot, Flower Fair Framelit, Gold Basic Metal Button, Linen Thread, Dimensionals, Glue Dots

Blog Signature 2014-001


Seasonally Scattered – Fall Thanks

Seasonally Scattered – Fall Thanks published on 5 Comments on Seasonally Scattered – Fall Thanks

10494554_10152594044857329_7043287500476660222_n

Today I have another card to show you from my Convention Display Board projects!  (Remember to click on the button above to link to all the other display stampers on our Pinterest board)

Seasonally Scattered - Fall ThanksI thought you would enjoy the fall colors of this card as we get more into fall mode.  These are such great ones too!  I started with my new In Colors and chose Mossy Meadow, Tangelo Twist and Hello Honey then added in some Early Espresso.  I markered up the stamp putting colors where they seemed to make sense.  Then I lightly spritzed the stamp with water to get the colors to bleed just a little.  The image was stamped onto Naturals Ivory paper and then cut with an Oval Framelit.  I good a piece of Mossy Meadow Card Stock and embossed it with the Honeycomb folder then layered some Burlap Ribbon and a Tea Lace Doily behind the image.  A button tied with Linen Thread completes it.

I am a little late on my post today.  It has been soccer madness for my family this weekend!  Two games for the oldest and one for the youngest.  Great playing and fun watching for all!  But whew…we are tired.  I hope your weekend was equally wonderful!  Until next time, thanks so much for stopping in!

Don’t forget….signs up are open now for Stamps on the Fly Bright & Beautiful Edition

Stamps on the Fly - Sep 14-001


Click HERE to purchase these amazing products from Stampin’ Up!

Stamp:  Seasonally Scattered; Paper:  Mossy Meadow, Naturals Ivory; Ink: Mossy Meadow, Tangelo Twist, Hello Honey, Early Espresso; Accessories:  Big Shot, Ovals Framelits, Honeycomb TIEF, Burlap Ribbon, Tea Lace Doily, Dimensionals, Linen Thread, Neutrals Button

Blog Signature 2014-001


Because I’m Happy….

Because I’m Happy…. published on 2 Comments on Because I’m Happy….

Why am I happy??!!!  In case you’ve been hiding, I need to remind you that the new Holiday Catalog is now live.  Yes…oh and the Big Shot special is still ongoing.  But today is the last day for that!  What does that mean?  You need to order and now!  I have links below to the Big Shot and the bundles so check them out.

Amazing Birthday - Happy happy

I’m also happy to share this card from my Display Stamper collection.  Can I confess that the Pharrell Williams song was in my head while I was making this?  And then I made variations of it as a swap card for the other display stampers.  That was a LOT of happy going on!  So I took the stamp from Amazing Birthday and inked the words with Real Red, Bermuda Bay, Daffodil Delight and Rich Razzleberry.  Then I just cut them apart.  Finally, I took the markers back to the edges to clean up my cutting.  They are up on Dimensionals with a background of Moonlight DSP.  Add in a Vintage Faceted Button and some Crushed Curry Baker’s Twine and you have a fun card!

Don’t forget….signs up are open now for Stamps on the Fly Bright & Beautiful Edition

Stamps on the Fly - Sep 14-001

And….I’m REALLY happy that you can get the Big Shot bundle (either the Big Shot with the Bright & Beautiful Stars Bundle or simply the Bright & Beautiful Bundle at the 15% discount) and still get the discount on my Stamps on the Fly program.  You can read about the whole thing HERE if you missed it.

Click HERE to purchase these wonderful Stampin’ Up products!

Stamp:  Amazing Birthday; Paper:  Whisper White, Moonlight DSP; Ink:  Real Red, Bermuda Bay, Daffodil Delight, Rich Razzleberry; Accessories:  Vintage Faceted Button, Crushed Curry Baker’s Twine, Dimsensionals

Blog Signature 2014-001


Fancy Friday – Faux Painting

Fancy Friday – Faux Painting published on 5 Comments on Fancy Friday – Faux Painting

6a00e54f94e01b883401b8d05ef236970c-500wi

10603969_507387439394481_1743873333853894643_oI am so excited to be able to share with you a new monthly hop!  If you just came over from the amazing Jeanna, welcome to the next stop.  My friends and I want to be able to share with you our ideas in a monthly format.  We will use different themes each month – sometimes colors, sometimes a sketch, sometimes a stamp set focus.  The one thing you can count on is that it will be fancy!  Over the last year “fancy” became our word to describe the best projects, the best new clothes, even the best pedicure colors.  Now we want to share with you our take on “fancy” each month.  This month we have a color challenge that the whole team will be using as inspiration.  And you know what?  You can join in too!  Just use our inspiration piece (all or some of the colors) and post a comment with your link on any of the team Fancy Friday team’s blogs.

FF Aug - Watercolor Kindness

For my card I wanted to show you this new technique I learned in a Watercolor for Card Makers class I have been taking.  I love the idea of being able to paint an image but that is definitely NOT my talent.  Thank heavens for the artists at Stampin’ Up who create them for me!  But I can cheat and look like I know how to paint.  How?  Well, I inked up my flower from Gifts of Kindness using my Stampin’ Write Markers in the colors from the challenge and stamped it on Watercolor Paper.  Then, using a paint brush dipped in water, I blended the colors and the lines to create this image that looks like I painted it by hand.  Then I took my Aquapainter and added the Island Indigo (really watered down) around the edges of the paper.  Once everything was dry, I added some water drops to it and the sentiment from the same stamp set.  The image here is the star of the show so I simply attached it to an Early Espresso card base using Dimensionals (a lot of them since the paper tends to curl after all the water was added).  I had so much fun with this that I’m looking for more stamps I can use with the technique!

Wanna chance to play along and with the challenge and have a chance to win the Seasonally Scattered stamp set? Be sure to leave a comment on any of our blogs with a link back to your creation, and ONE lucky participant will win! Here are the rules for the challenge: 1. Leave a comment on one of our blogs with a link to your creation, comments/links MUST be left by Friday, September 19th 7:00 PM MST in order to be eligible for the prize. 2. Please use the color palette provided. You can use any combination or all of the colors provided as well as any neutrals. Although SU colors are listed, you can use any colors you have on hand as long as they are similar. 3. You MUST put a link in your post back to the challenge.  **Winner will be announced during the September Fancy Friday Blog Hop! (the last Friday of September).**

Okay, off to go visit the awesome Mercedes Weber!  You will love her project!

1957690_10204755495435099_7817571099270491328_o

Don’t forget….signs up are open now for Stamps on the Fly Bright & Beautiful Edition

Stamps on the Fly - Sep 14-001

Click HERE to purchase these wonderful Stampin’ Up products!

Stamp:  Gifts of Kindness; Paper:  Watercolor, Early Espresso; Ink:  Real Red, Blackberry Bliss, Tangelo Twist, Island Indigo, Early Espresso; Accessories:  Aquapainter, paint brush, Dimsensionals

Blog Signature 2014-001


Cherry Cobbler Flowers

Cherry Cobbler Flowers published on 2 Comments on Cherry Cobbler Flowers

I showed you a Christmas card from my Blendabilities “on the Fly” class in my last post and today another of our cards.  This one is a variation of a card I recently posted but was colored instead with the main focus on one color — Cherry Cobbler.

Cherry Cobbler Thank You


I demonstrated to my class the virtues of using the “light to dark” and “dark to light” techniques of using Blendabilities.  The flower from I Like You was stamped in Momento Black Ink to start.  I then started with the largest flower.  I added ink from the lightest Cherry Cobbler Blendabilites marker using the paint brush end on the whole flower.  Make sure you err to the side of not going all the way to the edge of the image to account for bleed.  You can always fill it back in later.  Then I added the darkest color to the petal lines already draw on the image.  Using the medium marker I started blending with a circular motion and took that about halfway up the petal.  Then I went back to my light marker and continued blending.  I worked on only a few petals at a time.  On the medium sized flower, I started instead with the darkest marker.  I decided to use the dark color at the outside of the flower this time to help provide contrast.  I added the dark ink around the edges of the petals.  Then I moved to the medium marker and started blending, leaving a small section toward the center uncolored.  Finally the light marker blending through the petal again.  If you find the petal does not have enough contrast, use the Color Lifter and remove a little bit of the ink.  You can come back over with the light color again for blending if needed.  My little flowers were colored with the lightest marker and the leaves were colored in the light to dark way.  I had fun showing how much variation you can get simply using one set of markers!

I’ll be back on Wednesday with the latest from Freshly Made Sketches!  Until then, I hope you have a wonderful start to your week!

Don’t forget….signs up are open now for Stamps on the Fly Bright & Beautiful Edition

Stamps on the Fly - Sep 14-001


Click HERE to purchase these wonderful Stampin’ Up products!

Stamp:  I Like You (hostess); Paper:  Very Vanilla, Basic Black; Ink:  Momento Tuxedo Black, Cherry Cobbler, Old Olive and Daffodil Delight Blendabilities; Accessories:  Basic Pearls, Piercing Mat, Piercing Tool, Dimensionals, Multipurpose Glue

Blog Signature 2014-001


Primary Sidebar