Skip to content

OLW for OWH

OLW for OWH published on 6 Comments on OLW for OWH

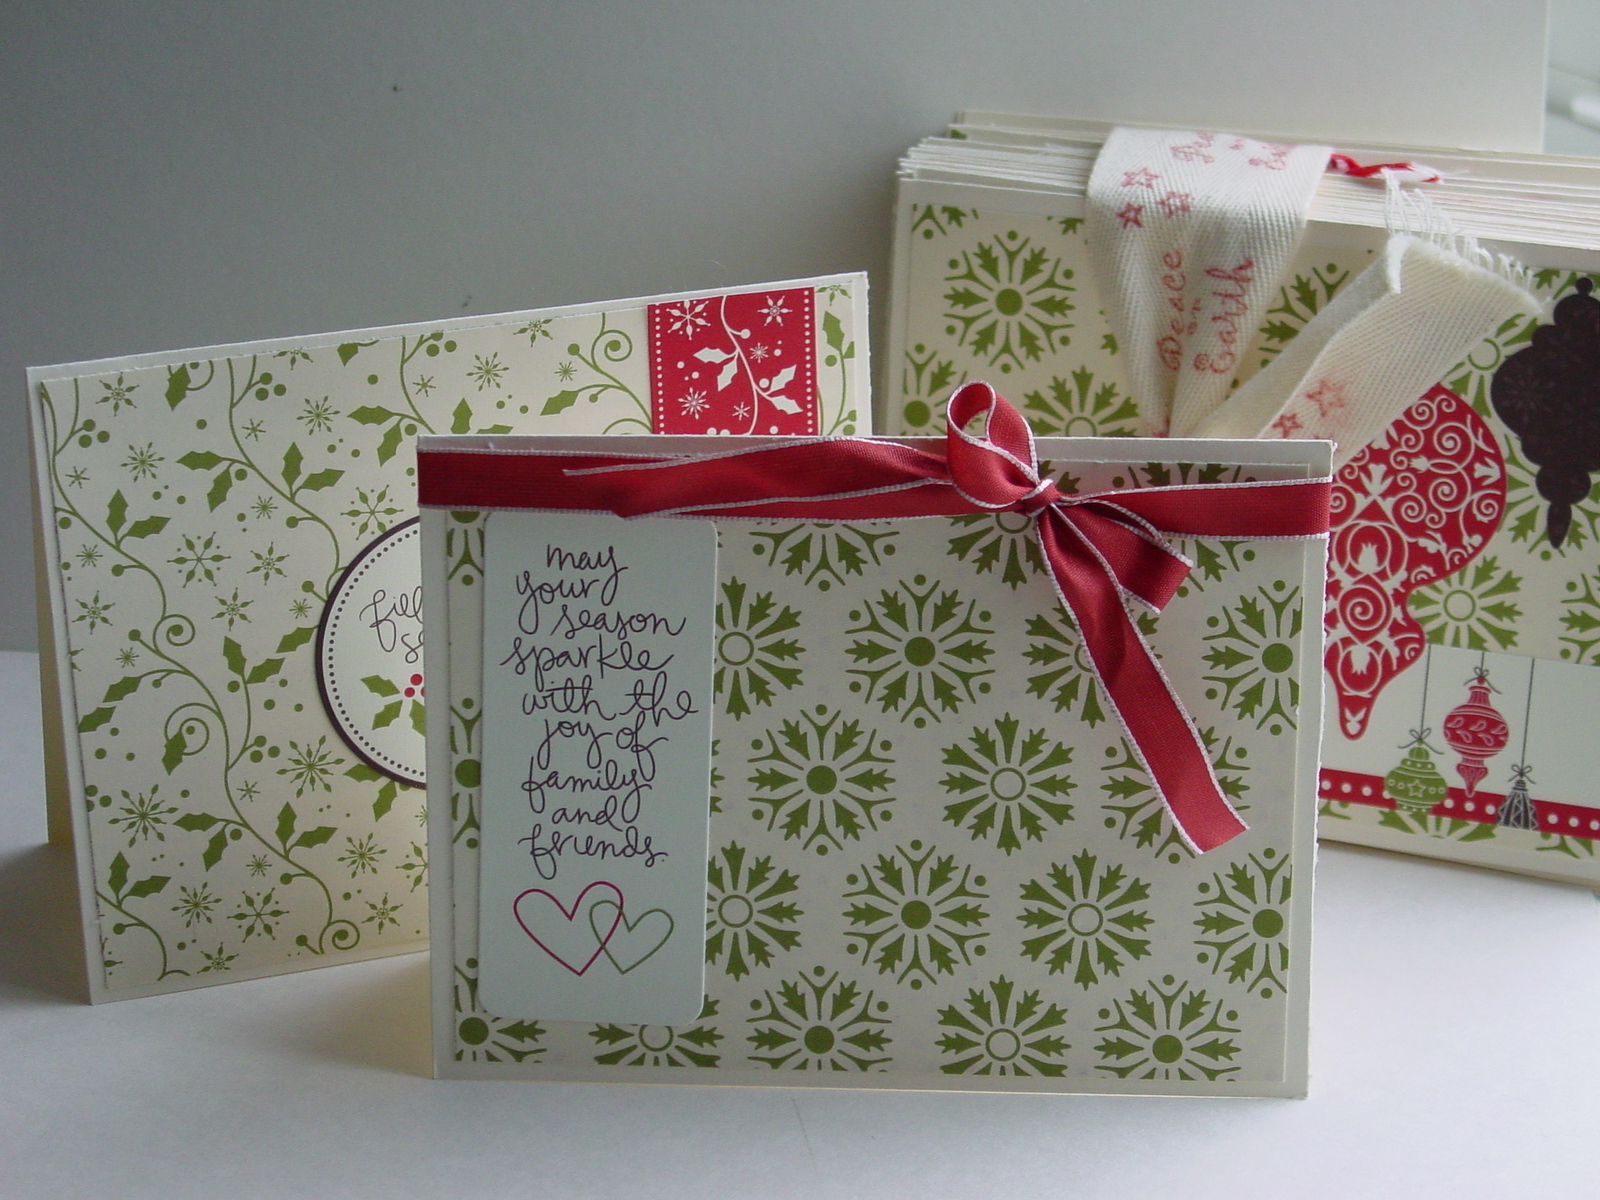
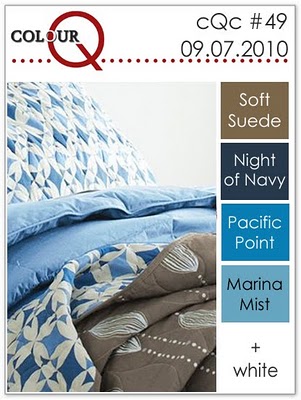
Translated:  One Layer Wonders for Operation Write Home!  Yes, you read correctly…one layer wonders.  These are definitely NOT my strong suit but I am preparing for tomorrow’s Operation Write Home Open House and wanted to design some cards that will be easily made by my new stampers attending.  The biggest thing I see in one layer cards that I love is dimension without adding bulk.  That, my friends, is what I was aiming for today.  I found the ColorQ challenge for the week and thought that it was perfect for what I wanted to do:

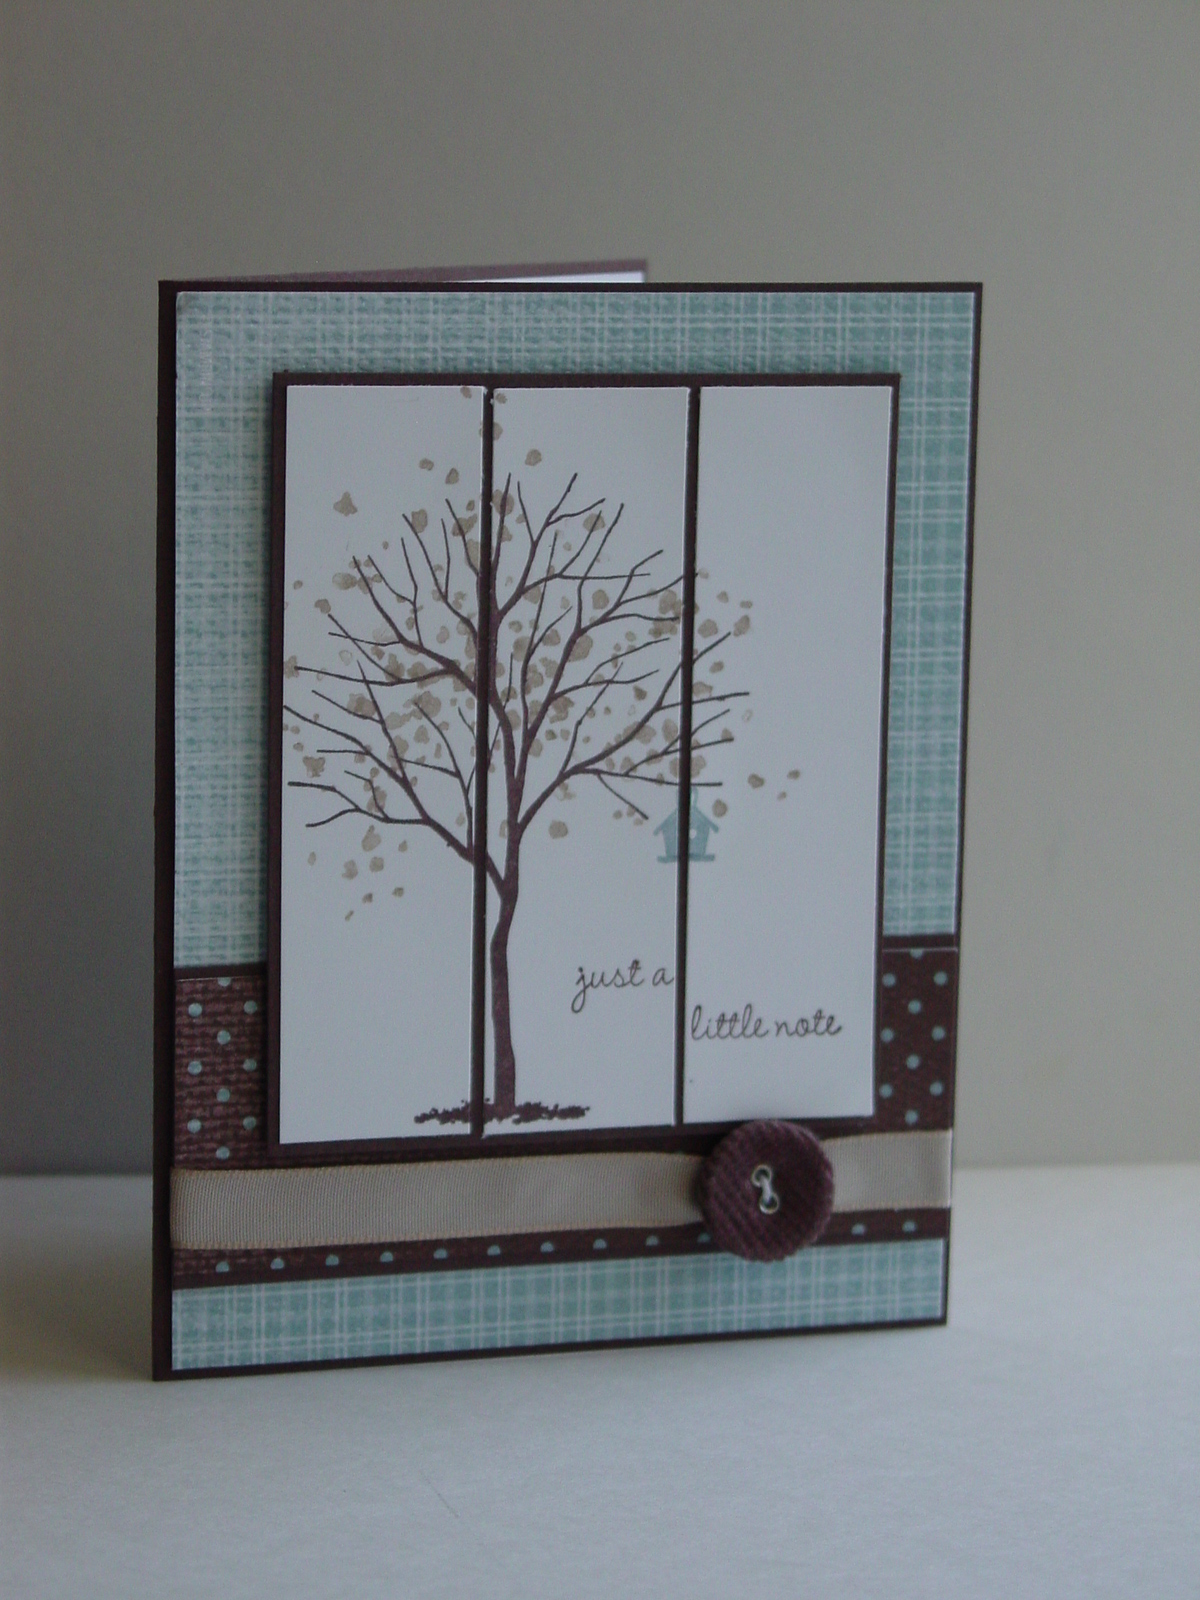
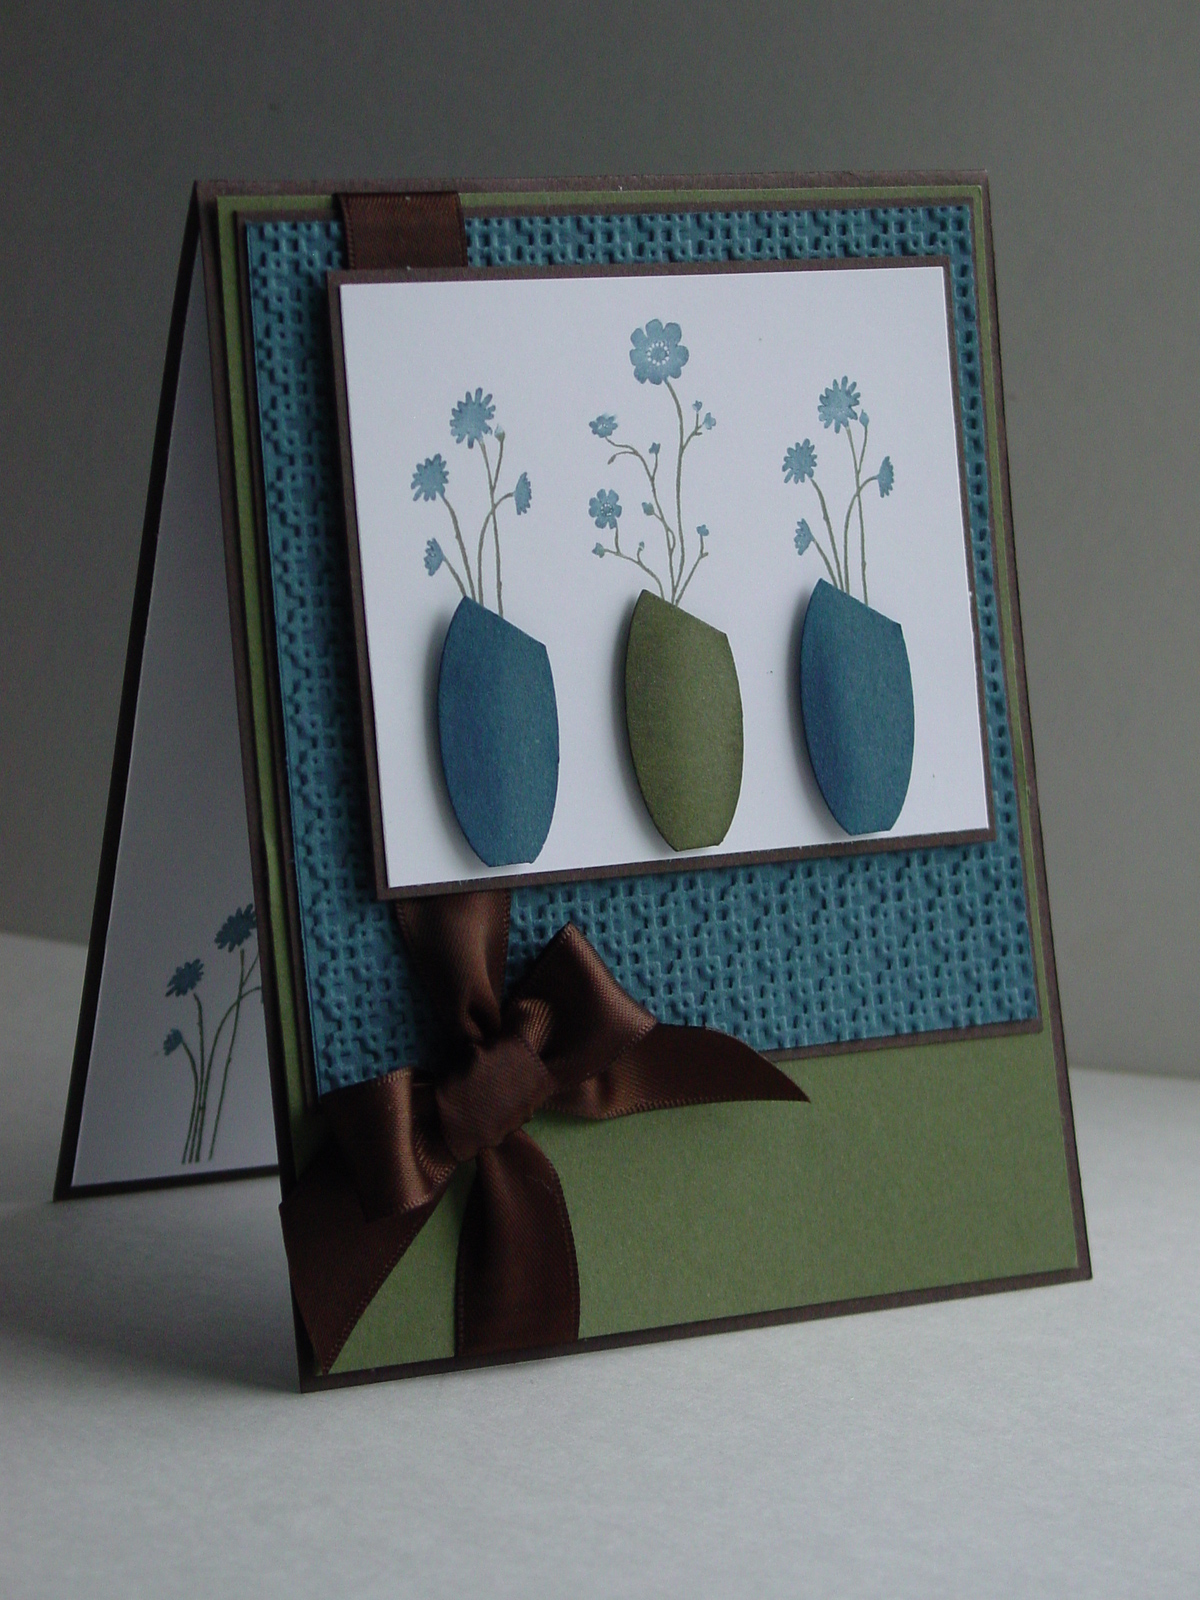
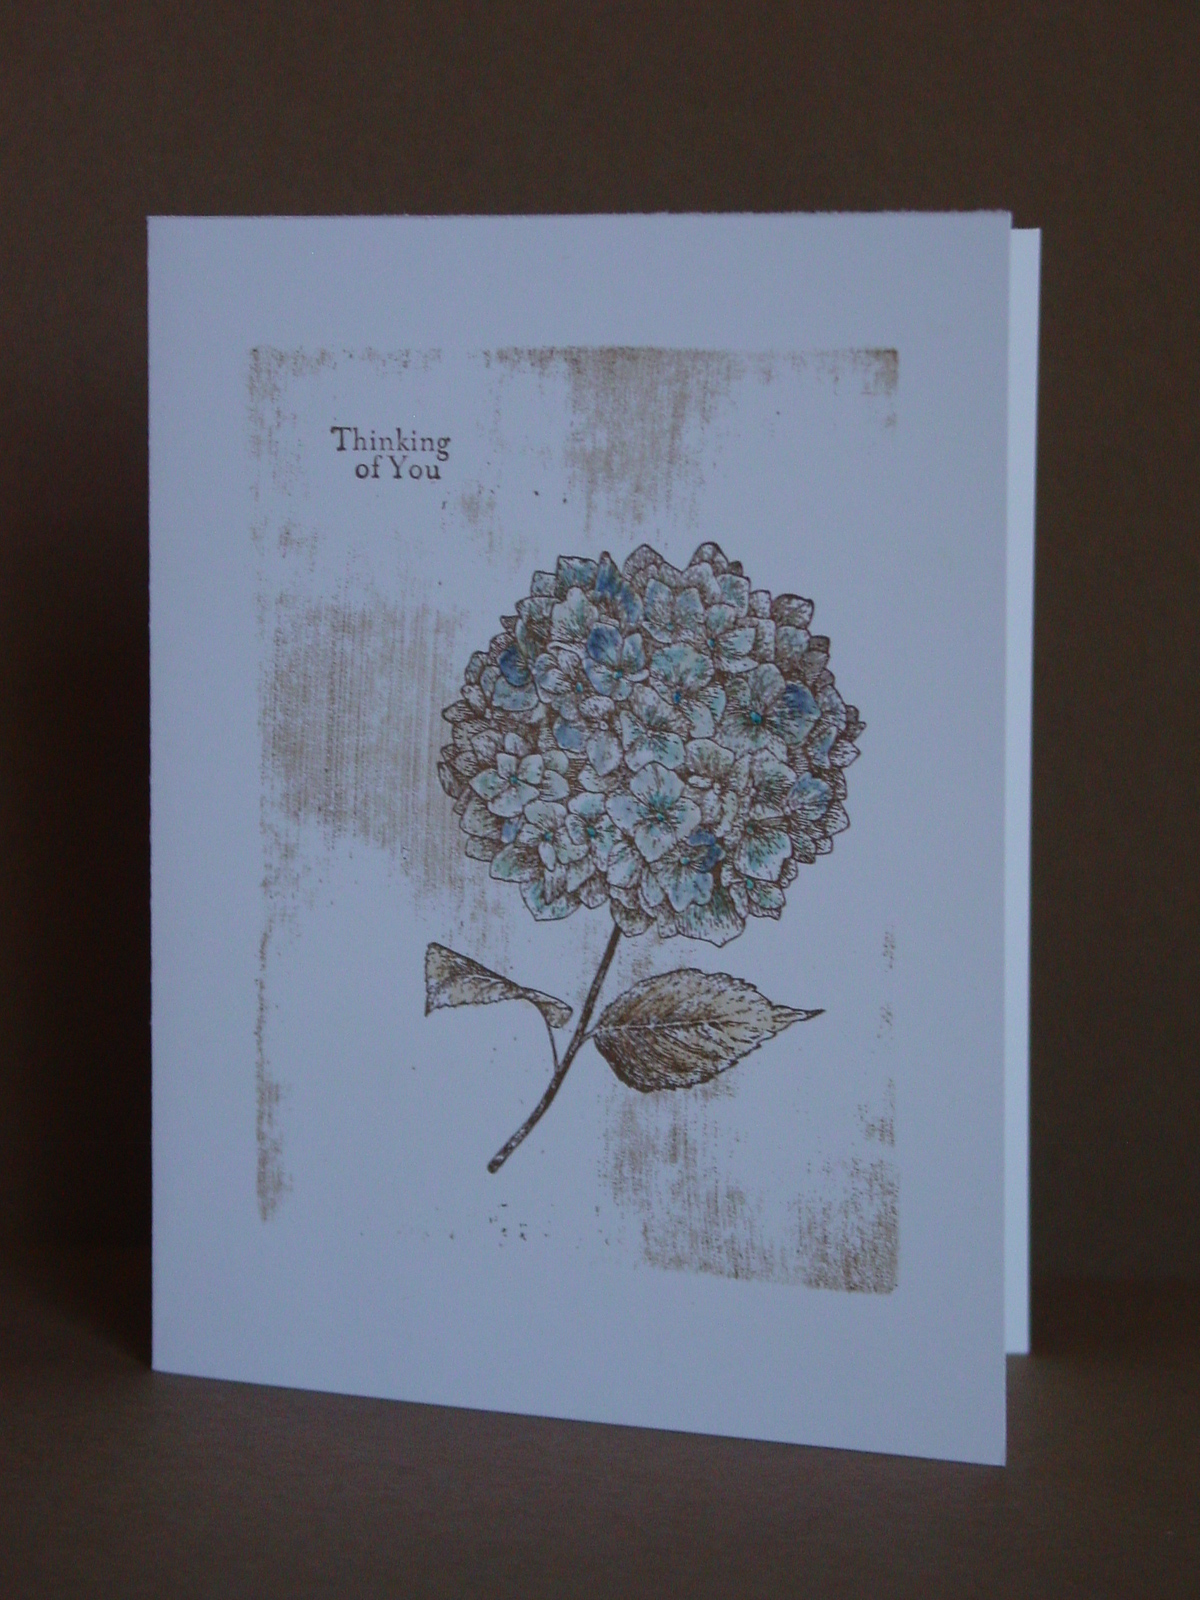
All those blues together made me think of watercoloring and the blue/brown combination made me think of my hydrangea.  Sadly, my real hydrangeas are a little more on the brown side because of the heat/lack of water this summer.  That brown, though, gave me an idea.  I wanted to add the depth so I inked up my Size E Clear-Mount Block with Soft Suede.  I purposely didn’t ink it very thoroughly so that it would have a patchy feel.  Then, I inked up the flower from Because I Care (Level 1 hostess) in Soft Suede.  Using my blender pen, I added some Marina Mist first, then the Pacific Point and finally the Night of Navy to the flower.  I finished with a touch of Soft Suede watercolored on the leaves.  I debated the sentiment and finally decided on the words from my Silhouette Sentiments set (also Level 1 hostess).

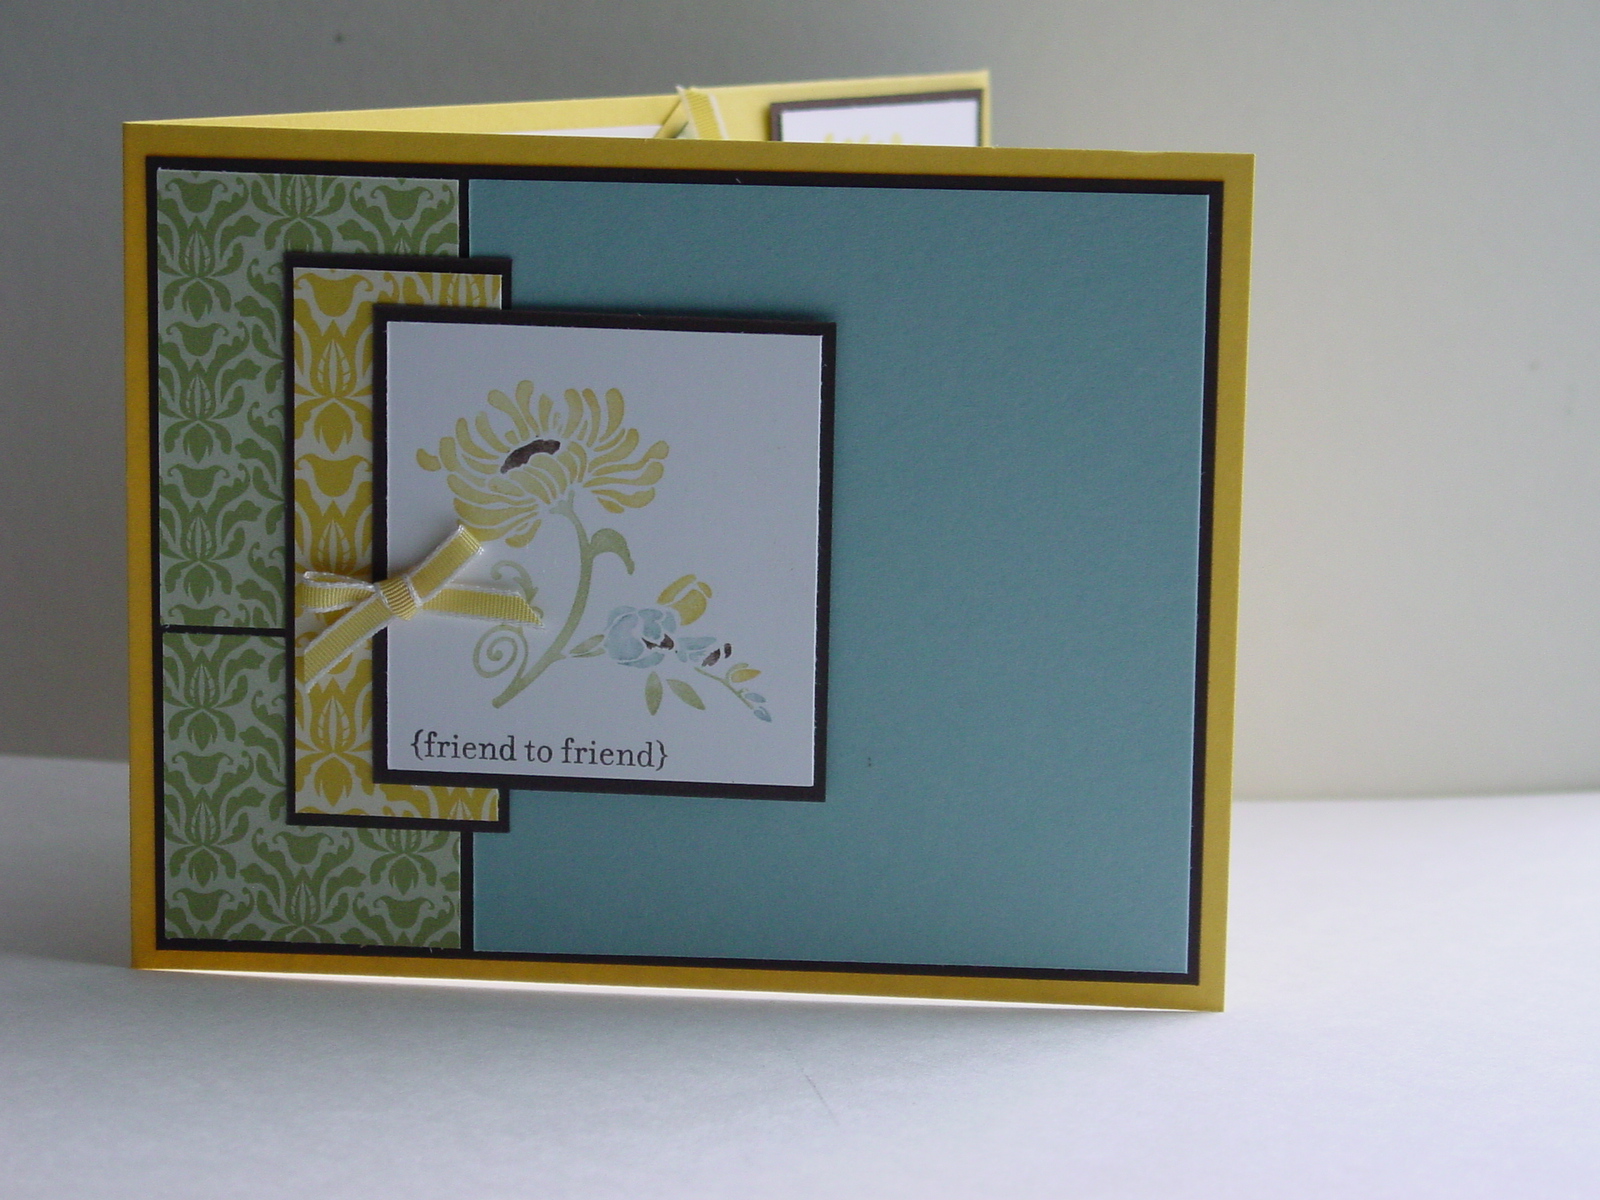
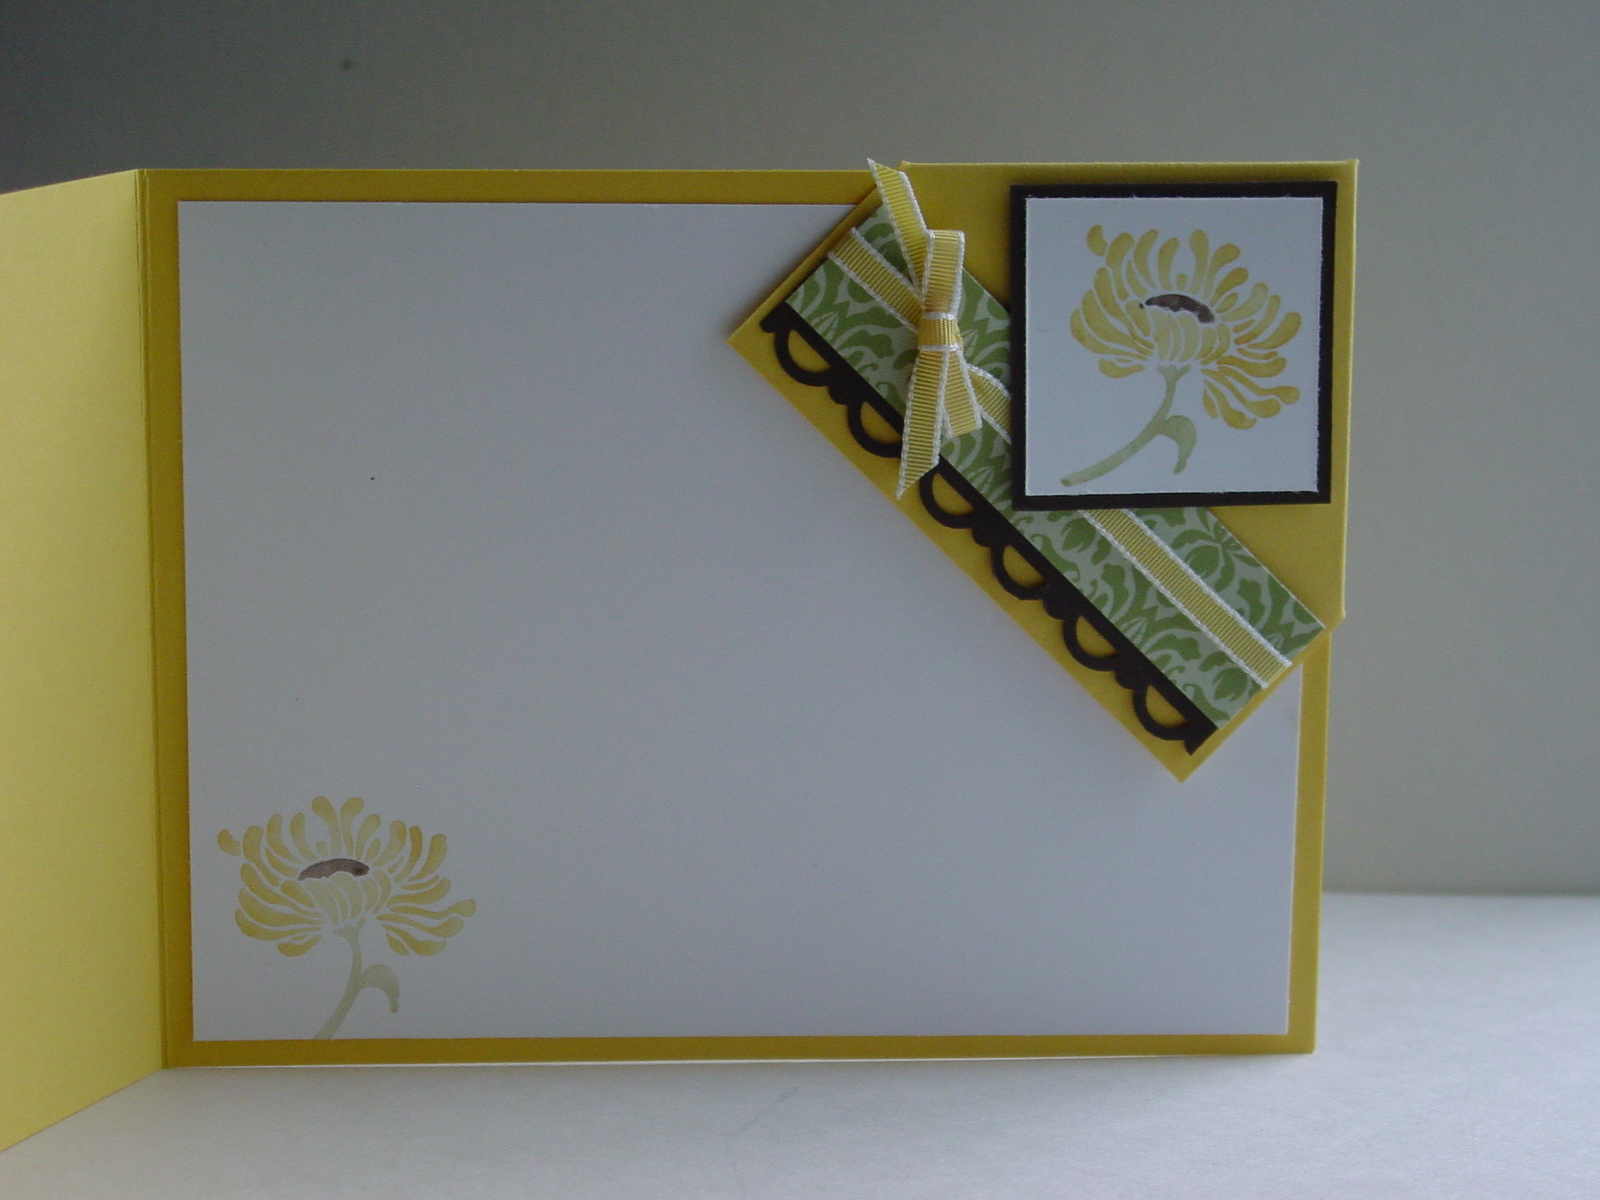
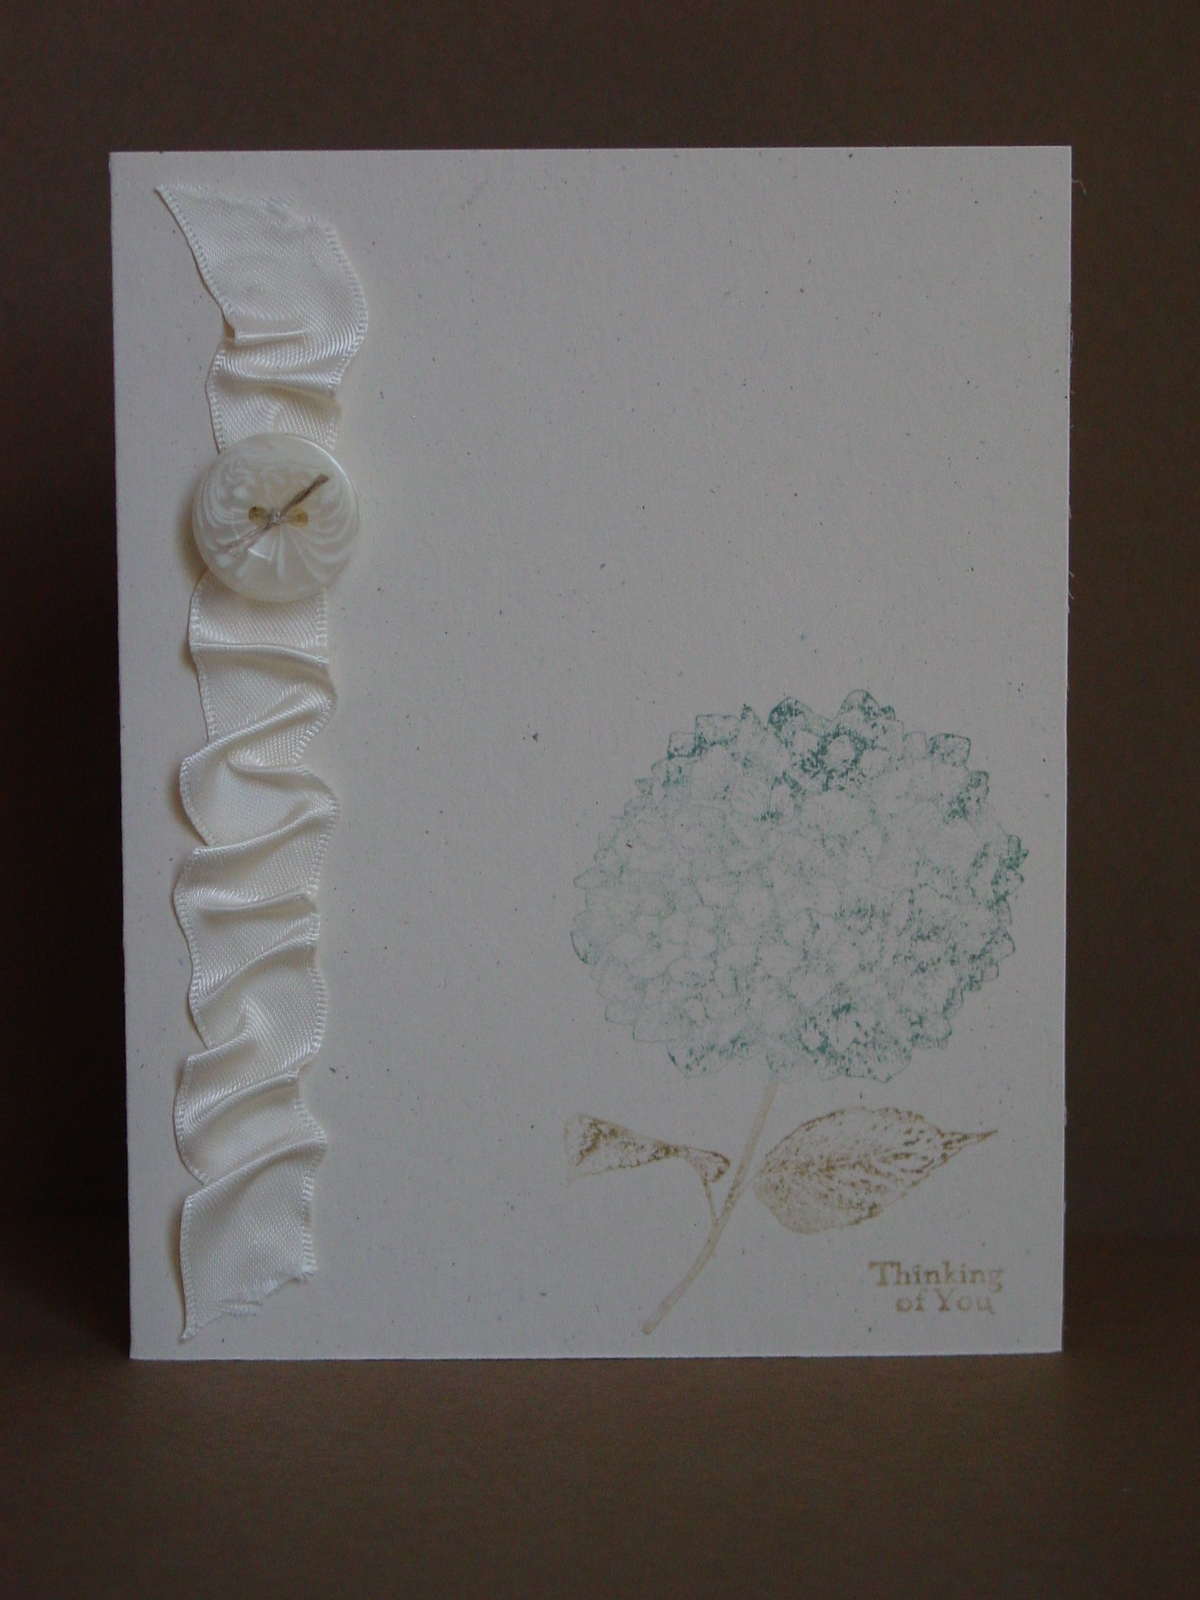
I was so motivated by this one, that I kept on stamping.  This time I kept the stamping easier and simply used my Baja Breeze and River Rock markers to color the stamp and stamped the flower again onto Naturals Ivory paper.  The same sentiment, too (hey, it was already out).  I wanted to try another way to add texture so I used the ruffled ribbon treatment that has become so popular.  I put down a line of Sticky Strip and, after tying on the button, just pushed the ribbon onto the strip in a random way.  I tied on the button using some twine and that qualifies for the WT287 challenge over at Splitcoast.  I left the ends a little frayed to go with the aged look of the colors.  The flower is pale in real life but the picture seems to make it look lighter.

I’m off to straighten my house or at least make room for lots of stamping tomorrow.  I hope you have a great day…thanks for stopping by!

Stampin' Royalty Guest Designer

Stampin' Royalty Guest Designer published on 9 Comments on Stampin' Royalty Guest Designer

Yep, that’s me!  A Stampin’ Royalty Guest Designer!  Wow!!  Imagine my surprise when I got the e-mail asking me to do this.  I have never had the honor of being a designer so this was really big for me! (Yes, lots of exclamation points)  After my immediate reply to say yes, I had to worry about living up to the standard set by the Goddesses.  Before I got too panic-stricken, Sandra sent me this lovely picture as an inspiration challenge (you’ll recognize it from the catalog) and I knew this would be fun:

These little pennants are so cute!  I loved them the first time I paged through the catalog.  I started thinking about what to make and I couldn’t get the Birthday Bash Suite items (p. 52-53 IBC) out of my head.  Soooo….I went with it.  Using the Party This Way pennant as my guide, I cut out some triangles from my Play Date DSP and strung them together much like the little bucket on pg. 52.  The thread was dyed using my Chocolate Chip marker and I punched holes with my Paper-Piercing Tool to make it easy (and uniform).  Before I attached my banners, the words from the tag punch in Party Hearty were stamped on the So Saffron panel.  I’m sure you can tell that I used my Stamp-a-ma-jig to make that happen (what would I do without it??).  I then attached each pennant with a dimensional.  Something was still missing and I realized that part of what I love about the inspiration picture was the buttons.  So out came my Brights and Neutrals Designer Buttons!  Finally, I cut another panel from the Play Date DSP and added a border with my Scallop Edge Border Punch to mimic the scallop edges of the large pennants in the picture.

I just love the colors in this!!  It will be going to a dear friend of mine for her son who turns 1 next week.  How fast that first year goes! 

Thank you so much to the Goddesses for letting me join them this week.  Make sure you go see all the lovely work they have done with this challenge!  Thanks for stopping by…have a great rest of your week.

Stamp:  Party Hearty, Party This Way (as a guide); Paper:  Play Date DSP, Real Red, So Saffron, Chocolate Chip; Ink:  Chocolate Chip; Accessories:  Brights and Neutrals Designer Buttons, Stamp-a-ma-jig, Dimensionals, Scallop Edge Punch, Thread

All products are Stampin’ Up!

A Note for our Heroes

A Note for our Heroes published on 17 Comments on A Note for our Heroes

Ok, the final push is on!  Friday is the Open House for my Operation Write Home card drive.  I am trying to step up the pacing and actually create a few more cards at a time.  I am not known to make cards quickly so this is harder than I thought.  The effort is made easier when you have a good sketch and a challenge to stay Clean and Simple.  The sketch comes from the Operators over at Stamping 411 and it is another great one.  They have added some wonderful features over there so please go and check them out.  What a wonderful resource they are!!  The Paper Players threw out a Clean and Simple challenge for the week…perfect for me!! 

One of the things I have been trying to do with my Operation Write Home card making process is use all my lovely (previously hoarded) retired designer papers.  In today’s card, I used some of my old Parisian Breeze Specialty Paper.  I also pulled out one of my very favorite retired stamp sets, Branch Out.  I don’t hold on to many of them but this one sure is a keeper!  All I did was stamp the main image panel (3″x3 3/4″) and then cut it into 3 one-inch strips.  It adds a lot of visual interest with almost no extra work…translated, simple.  The ribbon is retired Kraft Taffeta Ribbon and I just tied on a retired Chocolate Corduroy Button.  Tying on a button is WAY faster than any bow…yep, more simple.  The sentiment comes from the Apple Blossoms Hostess Level 2 set and, other than the actual card colors, is the only current thing on this card.  I think this is exactly the kind of card that will be perfect for one of our heroes to send home!

Now I don’t feel so bad for having kept these beautiful retired products.  I’m so glad they can go to a wonderful cause!!  If you haven’t ever thought about it, consider putting together your own box to send.  The wonderful volunteers at Operation Write Home make it very easy.  Have a wonderful and safe Labor Day!

Stamps:  Branch Out (ret), Apple Blossoms (Hostess Level 2); Paper:  Parisian Breeze Specialty DSP (ret), Chocolate Chip, Whisper White; Ink:  Chocolate Chip, Baja Breeze, Crumb Cake; Accessories:  Kraft Taffeta Ribbon (ret), Chocolate Chip Corduroy Button (ret), Dimensionals, Thread

All products are Stampin’ Up!

Cracked glass Christmas

Cracked glass Christmas published on 2 Comments on Cracked glass Christmas

I’m back today to give a little more detail on the cracked glass card I did for the Stampin’ Addicts Holiday Mini Blog Hop.  I talked a little bit there about the stamped image.  I think what made me the happiest was how the sparkle of the Shimmer Paint came through the “cracked glass”.  I wasn’t sure if that detail would be lost after all the embossing but instead it seemed to intensify.  Here are some more pictures of the card:

I recommend that you click on the first picture and then click again in order to see all the details.  I kept the colors muted in order to give it a faded/aged feel.  While I had put Champagne Mist Shimmer Paint over the entire panel with a sponge dauber, I also added more Shimmer Paint with a Blender Pen tip on the star and the halos.  I am considering making more of these and putting chipboard on the back of them to create ornaments as gifts.  I just feel like this would be lovely on a tree!

I want to give you a little more about how I made the background panel, as well, since I discovered something cool.  I got the idea from watching a training video made by Stampin’ Up about the new Distressing Essentials.  In the video, it was recommended to used the stamp in the kit to apply the ink in order to control the application.  I don’t have the kit (yet) so I used one of the clear blocks and “inked” it with a Soft Suede ink pad.  Then I rubbed gently over the embossed panel.  The ink was a bit random and highlighted the raised sections.  It was easy to control and I could add as much as I wanted without overdoing it.  Just another reason I am glad to have those clear blocks! 

After stitching the Linen Thread onto the black panel, I put a line of Sticky Strip across it.  The Seam Binding was then randomly ruffled across.  If you have a ruffle that sticks up a bit to much or won’t go where you want it, just add a Mini Glue Dot. 

I think everything else on the card is self-explanatory.  Thanks so much for stopping by today.  Hope you have a great rest of your week!

A Pals Sketch Birthday

A Pals Sketch Birthday published on 2 Comments on A Pals Sketch Birthday

The son of a dear friend turns one this week and I needed a card, of course!  In a dramatic turn from ALL of the Christmas cards I have been working on, I pulled out my Play Date DSP to see what I could come up with.  The Pals Paper Arts this week was designed by Margaret Moody so of course it is fantatic.  Make sure you go check it out!  I have done a similar card concept before with the numbers but, as I mentioned then, the  numbers are what made me buy this paper.  I love the idea of highlighting the specific birthday using the monochromatic and the mulitcolored papers!  That is what I did again on this one.  I love the bold colors in this DSP and I let the paper do most of the work.  After I got the numbers panel completed, I needed a little something for balance and tied on a button from the Brights Designer Buttons collection.  I layered the Oval Punches and used the phrase from Teeny Tiny Wishes. 

Didn’t this turn out cute?  The mommy of the little boy loved it and I’m happy that it highlights the special birthday.

Now, since I can’t let you go without SOMETHING from Christmas, I have a close-up of one of my cards from the Stampin’ Addicts Blog Hop last weekend.  I shined a light on the card so that I could capture all the shimmer from the Shimmer Paints I used.  I am not normally a “glitter girl” but the sparkle from this card is so pretty in person.  I hope this gives you more of a feel for it.

Thanks for stopping in today.  Tomorrow I will have close-up pictures and details about my cracked glass card from the hop.  Have a great day!

Stamp:  Teeny Tiny Wishes; Paper:  Chocolate Chip, So Saffron, Play Date DSP; Ink:  Chocolate Chip; Accessories:  Large and Small Oval Punches, Chocolate Chip Wide Grosgrain (ret), Brights Designer Buttons, Dimensionals

All products are Stampin’ Up!

Christmas is in the air!

Christmas is in the air! published on No Comments on Christmas is in the air!

It may be the end of August but Christmas is in the air around my house.  I continue to work towards making cards for my Operation Write Home challenge.  Only two more weeks until the big “stamp-a-palooza” known as an Open House.  Today I am posting two more cards made for my donation box.  But first, as promised in the Stampin’ Addicts Blog Hop post, I have some more pictures of the candle I made using Rejoicing in Christmas.  The picture shown over the weekend shows the subtlety of the colors but didn’t quite show the shine on the candle.  As I mentioned in that write-up, I watercolored the ink onto the tissue paper and then applied Champagne Mist Shimmer Paint on top.  One of the unexpected effects of this was that the Shimmer Paint took on a gold-leaf feel.  Here are some pictures that show this a little better:

Now on to my cards for today.    The first uses this week’s OCC Sketch Challenge 30 which is a super layout.  The start of this card was actully the tag.  As part of the “creative process” for the blog hop, this was a leftover piece.  Not one to waste a good scrap, I realized that it fit perfectly into the sketch.  I pulled out my friend Dasher again (really, I do have other sets but he works with so many things!).  The result is a card I really like and that isn’t too complicated to replicate.  The ribbon, I confess, is non-SU and was tied onto a gift box from Mother’s Day (perfume).  This nice piece of grosgrain was just waiting for the right card.  Here is the result:

The final card for today uses last week’s OWH Stars & Stamps Sketch Challenge 31.  This is one of those go-to layouts that will work time and time again.  They have a lot of super ideas over there, by the way, so check them out!  I pulled out some retired SU paper from last year, Christmas Cocoa DSP.  The snowflake paper immediately inspired another tone-on-tone card.  I sponged some Soft Suede on the Whisper White paper and then added a little Champagne Mist Shimmer Paint with a sponge dauber.  Dasher was out and I threw a little more ink on him.  While I certainly want each card for OWH to be special, I also need to make as many as I can.  For me that means staying with one “theme” per stampining session.  I am encouraging my participants to do the same so we can fill a nice big box for those heroes!!  Ok, the rest of this card explains itself so here it is:

Thanks for dropping by today.  Tomorrow I will have a birthday card (for a change of pace) and on Wednesday, some more details on my cracked glass card from the blog hop.  If you missed the hop, please go over to Stampin’ Addicts and take a look at all the wonderful projects from Stampin’ Up’s new Holiday Mini.

Candle:

Stamp:  Rejoicing in Christmas; Ink:  Early Espresso, Soft Suede, Not Quite Navy, More Mustard; Paper:  Tissue; Accessories:  Blender pen, Aquapainter, Champagne Mist Shimmer Paint, Heat tool, Espresso Satin Ribbon

Card 1:

Stamp:  Dasher, All Holidays; Ink:  Soft Suede, Cherry Cobbler, Basic Black; Paper:  Basic Black, Cherry Cobbler, Soft Suede, Naturals Ivory; Accessories:  Neutrals Designer Buttons, Ribbon, Shimmer paint (on tag with sponge dauber)

Card 2:

Stamp:  Dasher, Short & Sweet; Ink:  Soft Suede; Paper:  Christmas Cocoa DSP (ret), Soft Suede, Whisper White; Accessories:  Neutrals Designer Buttons

All products Stampin’ Up unless otherwise indicated.

Holiday Mini Blog Hop – Rejoicing in Christmas

Holiday Mini Blog Hop – Rejoicing in Christmas published on 42 Comments on Holiday Mini Blog Hop – Rejoicing in Christmas


Welcome to your next stop on the Stampin’ Addicts Holiday Mini Blog Hop!!    If you missed someone or want to see the whole hop list, just click on the banner above.  I am sure you loved Cindy’s projects with Jolly Bingo Bits!  If you missed it, jump right on over to her blog, Heart’s Delight Cards.  My chosen set for this hop is Rejoicing in Christmas and let me tell you, this set is worth rejoicing over!  I have been looking for the right Holy Family set for a while and this exceeds all my hopes.  You can see any project closer simply by clicking on the image.

My first project is a card that really puts the focus on the Holy Family itself.  I kept the card stock colors a bit subdued in order to shine the light on them…and I mean shine.  Yes, my shimmer paint has returned in full force for this set of projects!  I stamped the image on watercolor paper to start.  Using my blender pen and Crumb Cake ink I colored Mary’s dress and Joseph’s garments.  I used Night of Navy and Early Espresso on the borders of Mary and Joseph’s head coverings, respectively.  Some Cherry Cobbler was used for Jesus and So Saffron for the halos.  This is where the fun started.  I pulled out my Champagne Mist and Frost White shimmer paints.  Mary’s veil had no color on it and I used the Frost White to give it a beautiful shine.  I added a little that was left on my Aqua Painter to put some shimmer on Jesus.  Finally, I used the Champagne Mist on Joseph.  To up the wow factor, I sprayed my homemade shimmer mist (rubbing alcohol and Shimmer Paint) onto the Crumb Cake paper.  I tied on the richly colored Cherry Cobbler seam binding (p. 21 Mini) and was done.  The sketch is the Fall-to Layout 103 from last week.

My next project started looking towards holiday gifts for teachers.  As I say that, I have to admit that this one will stay right here at my house and I’ll just have to make more.  I have never stamped on a candle before but this set seemed tailor made for it.  I used white tissue paper and stamped the Holy Family, the star and the quote in Early Espresso ink.  Using my blender pen again, I gently applied Soft Suede, Not Quite Navy and More Mustard ink to the image.  On Jesus, the star, the halos and the headpieces I applied Champagne Mist Shimmer Paint.  I cut the image and used wax paper to hold the image on the candle.  Heat was applied with my heat tool to melt the paper into the wax.  Finally, I put on Early Espresso Satin Ribbon using Sticky Strip.  You can see the motivation for the colors in the candle in the picture beside it.  I will have a more detailed set of pictures on Monday so watch for that.

My next project is a card that takes advantage of the vintage trend.  I started by cutting out a large oval of watercolor paper with my Ovals die and my Big Shot.  I sponged the paper with Soft Suede and then applied Champagne Mist Shimmer Paint with a sponge dauber to the whole oval.  I stamped the star and the Holy Family with Black Stazon ink and watercolored them lightly using Soft Suede, Cherry Cobbler and Not Quite Navy.  I punched a hole in the top of the oval with my 1/16″ Circle Punch.  I then used the Cracked Glass technique on the oval.  Again using my Big Shot, I rolled out my Cherry Cobbler paper with the Backgrounds 1 Texturz Plate.  I hand-stitched linen thread onto my Basic Black paper strip and added the Cherry Cobbler Seam Binding.  Finally, I made the oval look more like an ornament by adding more Seam Binding and a black button from the Neutrals Designer Buttons.  I will have more available on this project on Wednesday.

My final project is probably my favorite of all.  Yes, it isn’t technically my project but I did convince my 7 year old son to make it for me so that should count for something.  As much as I love my “serious” items above, what drew me to this set was the friendliness of it.  So, using my Watercolor Pencils, he generously colored this beautiful image.  We chose Pacific Point paper to match his work when he was finished and tied on some old Chocolate Chip ribbon (I apologize for the one non-current item but he chose it and I couldn’t say no).  It is impossible not to smile after seeing this.  He is so proud of it that he is going to donate it to my Operation Write Home challenge

If you have any specific questions about any of these, make sure to leave it in the comments so I can address them in my posts next week.  I hope you love these projects as much as I do!

Now it is time to head on over to Barbara’s Creative Stampin’ Spot to see her wonderful things made with A Cute Christmas and the Candy Cane DSP.

<–Previous Post           Next Post–>

All products are Stampin’ Up!

Monochromatic Wish

Monochromatic Wish published on No Comments on Monochromatic Wish

I haven’t been posting this week because I have been working on some projects for a Blog Hop coming up this weekend.  I am participating in the Stampin’ Addicts Hop this weekend featuring products from Stampin’ Up’s new Holiday Mini.  My set is Rejoicing in Christmas and I have had so much fun it.  Here is a sneak peek:

Lots of sparkle, yes indeed!!  Make sure you drop back by this weekend.

Now for today’s post I have made another Christmas card using a beautiful set called A Wish for Peace.  I used the Sketch Challenge 295 from Splitcoaststampers and the Stampin’ Royalty challenge #34, Monochromatic Neutrals.  I chose brown as my neutral (big surprise) and started with Naturals Ivory paper.  I stamped the church image and then sponged on Sahara Sand, Soft Suede and Early Espresso ink for the sky.  Hard to see in the picture but I used Champagne Mist Shimmer Paint for the church and Frost White Shimmer Paint for the ground.  Finally, I used some Smooch Spritz on the whole image.  Pulled out the Square Lattice embossing folder (well, that would assume that it had been put away, but you understand), tied on the button with Linen Thread and attached the Espresso Satin Ribbon.  Here is the final result:

This card is going right into the stash for my Operation Write Home Challenge.  It came together quickly so I’ll probably make a few more just like it!

That’s it for today.  Make sure to stop back by on Friday (or during the weekend!).  Have a great Wednesday!

Stamp:  A Wish For Peace; Paper:  Naturals Ivory, Soft Suede, Early Espresso; Ink:  Soft Suede, Early Espresso, Sahara Sand; Accessories:  Big Shot, Square Lattice Impressions Folder, Shimmer Paints, Smooch Spritz, Espresso Satin Ribbon, Linen Thread, Neutrals Designer Buttons

All products are Stampin’ Up!

All dressed up

All dressed up published on No Comments on All dressed up

The wonderful team over at Pals Paper Arts have redesigned their website and it looks fantastic.  Their challenge this week is “Day into Evening”.  First you make a basic card and then you dress it up.  Fun!  My idea for the dress up was to add a little something to the card…a corner bookmark.  For the basic card, I found a cool layout over at Unscripted Sketches (their sketch #67).  I missed the deadline but I thought this was worth trying.  I pulled out my Friends Never Fade set again and the coordinating Greehouse Gala DSP.  Here is the result:

The card itself is pretty basic and would be lovely to send all by itself.  But to “dress it up” a bit, I created a surprise when you open it.  I found a tutorial over at Splitcoaststampers a while ago for these corner bookmarks and knew that I wanted to try them for my club.  I found that the 4″x4″ bookmark they show was a bit too big, so I modified it to 3″ square.  After playing with the decoration of the bookmark, my square turned into a 3″x2 5/8″ rectangle.  The Espresso piece is 2 7/8″ long which allowed for the perfect scallop with my Scallop Trim Border Punch and the Espresso square (diamond) is 1 1/2″ square.  I secured everything on the bookmark with Sticky Strip to make really sure that it stays together.  Here is the dressed up inside of the card:

I used this wonderful 1/8″ Taffeta again and it is just the right size for a little addition like this.  I’m not sure who will get this card yet but it is nice to have a card with a little present, all in one!  In keeping with my Operation Write Home Challenge, I made a second card for my ever growing box of cards to send to our heroes overseas.  Thanks for stopping in today.  Hope you have a great weekend!

Stamps:  Friends Never Fade, Teeny Tiny Wishes; Paper:  Daffodil Delight, Baja Breeze, Early Espresso, Greenhouse Gala DSP, Whisper White; Ink:  Daffodil Delight, Baja Breeze, Pear Pizzazz, Early Espresso; Accessories:  Scallop Trim Border Punch, 1/8″ Daffodil Taffeta, Sticky Strip, Mini Glue Dots, Dimensionals

All products are Stampin’ Up!

Silhouette vases

Silhouette vases published on No Comments on Silhouette vases

This week I am meeting with my clubs for the first time this year and what better way to celebrate than use a new hostess set??!!  I love the new Silhouette Sentiments and have wanted to try punch vases for a while.  Michelle Zindorf is an extremely talented Stampin’ Up demonstrator who kindly shares many tutorials.  I used her Punched Vases Tutorial as inspiration for my vases.  I also loved the OCC Sketch 28 and used that layout.  I am so happy with the result!

As you can see, I used the sponging technique to give a shadow to the vases and then popped them up on dimensionals.  My Square Lattice Embossing Folder came out again…told you that you would see it alot!  The best part is that this is pretty easy to make and yet the details make it special. 

Now, I had an extra surpise today.  One of my new club members, Nancy, brought me a lovely bundle of cards for my Operation Write Home challenge.  Just take a look at these!

How can I thank her enough for all these lovely cards?!  Aren’t they pretty?  She has certainly put me well on my way towards filling up a box for the OWH project. 

Thanks for stopping by today.  Hope you have a great rest of your week!

Stamp:  Silhouette Sentiments (hostess level 1); Paper:  Always Artichoke, Not Quite Navy, Early Espresso, Whisper White; Ink:  Always Artichoke, Not Quite Navy; Accessories:  Small Oval Punch, Sponges, Espresso Satin Ribbon, Dimensionals

All products are Stampin’ Up!

Primary Sidebar