Skip to content

ColorLab 28

ColorLab 28 published on 10 Comments on ColorLab 28

What a great set of colors ColorLab has for this week…just in time for your final Valentine’s Day cards!
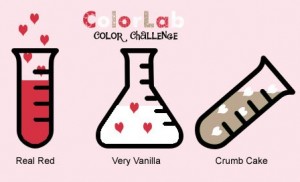
These are such classic colors for the season but I went a little non-traditional.  I didn’t use one of my heart images.  Instead, I wanted to play with my new Sweet Summer set.  I just love the flowers and all the little stamps that go with them!  I saw the Friday Mashup Sketch for this week and knew that was just what I needed to get started.
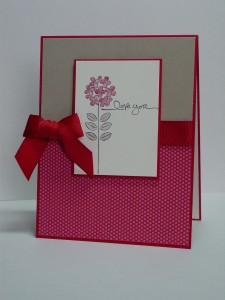
I stamped my little flower and stem in Basic Black using my Stamp-a-ma-jig to perfectly align the stem.  Even though I have the clear mount stamps, the Stamp-a-ma-jig is a great help when you want to stamp something “just so” (it was made for type A people like me!)!  I pulled out the Real Red polka dots from my Play Date DSP (your prints from the Brights Paper Pack would be great here too).  After I did a basic look at the layout, I colored the flower in Real Red and the stem in Crumb Cake using my blender pen.

Hint:  When coloring on Very Vanilla or Whisper White, think like you are placing color with the Blender Pen instead of swirling on the color.  If you want to really blend and mix colors, use Watercolor Paper instead.

The sentiment is from Short & Sweet, one of the best sentiment sets ever!  I tied my bow and wrapped the ribbon around the DSP layer, popped the image up on dimensionals and done with the front.  I didn’t take a picture of it but I used the little butterfly on the inside (colored red also), along with the “happy valentine’s day” sentiment from Teeny Tiny Wishes.  I’ll be making a few more of these and I think they are perfect for teacher Valentine’s from my boys.

So glad you joined me today!  I look forward to your creations with these colors and don’t forget to take a look at the other Color Chemists’ projects!  See you soon!

Stamps:  Sweet Summer (SAB), Short & Sweet, Teeny Tiny Wishes; Paper:  Play Date DSP, Real Red, Crumb Cake, Very Vanilla; Ink:  Basic Black, Real Red, Crumb Cake; Accessories:  Real Red Wide Grosgrain, Blender Pen, Stamp-a-ma-jig, Dimensionals

SUO Challenge 12 – Stampin’ Around

SUO Challenge 12 – Stampin’ Around published on 17 Comments on SUO Challenge 12 – Stampin’ Around

Over at SU Only Challenges this week, we are “Stampin’ Around”!!  Yes, we have pulled out our wheels and the variety of ideas is wonderful!  Wheels can add dimension to your background or can be the focal image on your project! 

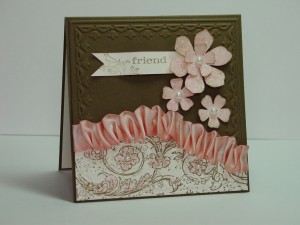
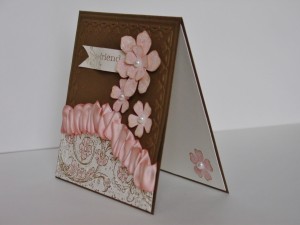
I saw the coolest layout last week, designed by the very talented SU demonstrator Mary Fish, over at Mojo Monday.  To start, the Very Vintage wheel was rolled on Very Vanilla paper in Soft Suede.  I lightly colored some of the flowers in Blushing Bride and cut the curve with my Paper Snips.  Vintage Vogue is a set that coordinates beautifully with this wheel so I pulled it out.  I inked the flowers in Blushing Bride and the sponged a little Soft Suede on the edges with a Sponge Dauber.  After I layed it out, something was missing so out came the Big Shot and my Framed Tulips Embossing Folder.  What a difference!!  I used my Stampin’ Write Marker in Soft Suede to only ink the “friend” part of the big F stamp and put it on a little banner.  Finally, the ribbon needed to be finished.  At first I tried just Very Vanilla Satin but it just wasn’t right.  So I dyed it!  Oh, no…it isn’t hard…really!!  Take your piece of ribbon and color it using a Stampin’ Write Marker (Blushing Bride in this case).  It will look a bit splotchy.  Next take your Aqua Painter and wet the ribbon (a spray bottle would work too).  The Aqua Painter will help you move the color around to make it even.  Let it dry and you have perfectly coordinated ribbon.

Hint:  I found that starting with a base color ribbon the same as my base color paper helped it match better.  When you stamp a light ink on Very Vanilla it will take on a slightly different hue than if you stamp on Whisper White.  Since I stamped on Vanilla paper for this, I used Vanilla ribbon as a base.

The Basic Pearls were the perfect finishing touch for this Vintage themed card!  I love those little jewels and it is amazing how much they add.  In fact, I stamped another little flower inside to card and added a pearl there to make the inside feel just as special as the outside.

I’m so glad to see you again and I look forward to seeing what your wheels create for this challenge!  See you again soon!

Stamp:  Vintage Vogue (117690); Wheel: Very Vintage (117693); Paper:  Soft Suede (115318), Very Vanilla (101650); Ink:  Soft Suede Classic Pad (115657), Blushing Bride Marker (In-Color Pack 119801); Accessories:  Big Shot (113439), Framed Tulips Folder (121809), Very Vanilla Satin (117291), Basic Pearls (119247), Sticky Strip (104294), Aqua Painter (103954), Sponge Daubers (102892)

All products are Stampin’ Up!

First Edition Valentine

First Edition Valentine published on 14 Comments on First Edition Valentine

I got an order last week and I have been playing with my new products!!  Oh what fun!  Tonight is my 3rd Quarter Hostess Club Meeting and the club ladies will be making this.  I can’t wait!!  First things first, this card is a CASE from the very talented Debra Burgin over at Heartfelt Inkspirations.  I knew I had to make it as soon as I saw it.  In the effort to add my own touch, I did change the colors and the sentiment plus added a layer.  My colors were inspired by this week’s Stampin’ Celebration piece…a great Valentine’s Day palette! 

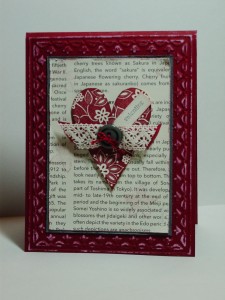
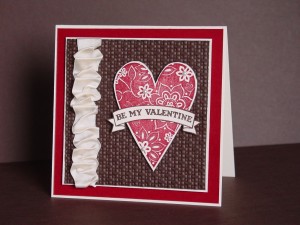
I pulled out my Framed Tulips Embossing Folder and my Big Shot and rolled the frame right onto the base.  I then added Whisper White Craft Ink.  I did not use a brayer like Debra did (although that would work, of course).  Instead I used another technique that I will cover in an upcoming Stampin’ Addicts Birthday Blog Hop (Feb. 25th – Feb. 27th).  I cut a section of the First Edition DSP that talks about Cherry Blossoms.  Somehow that seemed appropriate with my use of Cherry Cobbler!  The Be My Valentine heart was stamped in Cherry Cobbler and cut out (cutting off the banner) and I stamped the “valentine” from my Teeny Tiny Wishes “happy valentine’s day” stamp in Basic Gray on a 1/2″ strip of Very Vanilla and just snipped the corners.  Aren’t Stampin’ Write Markers handy??!!  The Cherry Cobbler Seam Binding and Victoria Crochet Trim were tied together with dyed thread (again with a marker) and a Basic Gray Button.  I used a barely inked flower from Fresh Cuts to add a little color to the First Edition paper.

Thanks to Debra for allowing me to CASE her.  Be sure to take a look at her many beautiful creations using the link at the beginning of the post!  I’ll be back tomorrow with the latest SU Only Challenge.  I hope your day is great!

Stamps:  Be My Valentine (122045), Fresh Cuts (111634), Teeny Tiny Wishes (115370); Paper:  Cherry Cobbler (119685), Basic Gray (121044), Very Vanilla (101650), First Edition DSP (121878); Ink:  Cherry Cobbler Classic Pad (119669), Basic Gray Marker (120966), Whisper White Craft Pad (101731); Accessories:  Big Shot (113439), Framed Tulips Folder (121809); Cherry Cobbler Seam Binding (120992), Victoria Crochet Lace (118481), Neutrals Buttons (119743)

All products are Stampin’ Up!

ColorLab 27

ColorLab 27 published on 11 Comments on ColorLab 27

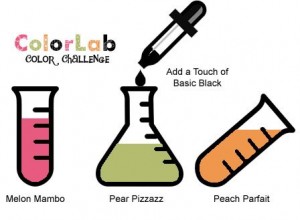
Snow, bad weather for our friends in the Southern Hemisphere, cabin fever…I have the solution!!  Bright, happy colors from ColorLab!!  At least your little stamping corner will have sunny weather.

As you can see from my previous card, the weather was affecting my stamping mood.  This color palette shook me right out of the icy colors.  After spending so much time with Funky Four on last weekend’s Stampin’ Addicts SAB Blog Hop, you would think I’d be done with that set.  But no…out it came again.  I’m so excited that you can earn it FREE with your $50 order!!  Of course, who can stop at just one of those free choices…believe me, I couldn’t.  My own free sets should be arriving later today so you can expect to see projects with them next week.

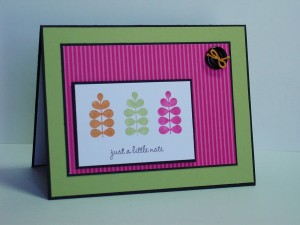
Ok, I digress.  Today’s card came together so quickly and is perfect for a little teacher note I need this week.  All I had to do was stamp the leaf image in the three colors and pop on a sentiment from the Apple Blossoms Hostess Set.  The striped paper is from the Brights Designer Series Paper Stack.  What a handy pack of paper to have!!  I seem to be using it all the time.  The final touch was a black button with a little bit of Peach Parfait thread.  Just take a little bit of white thread and color it with your Stampin’ Write Marker.  The sketch comes from the Splitcoaststampers Sketch Challenge this week.  I love the off-center panel and how it steps up a basic layout. 

 I can’t wait to see what you do with the colors this week!  Don’t forget to go see what the other Color Chemists have concocted (say that three times fast).  I’ll be back next week with a new SUO Challenge.  Have a happy and safe weekend!

Stamps:  Funky Four (120438-C), Apple Blossoms (Hostess-120139-C); Paper:  Brights DSP Stack (117155), Basic Black (121045), Pear Pizzazz (119795); Whisper White (100730); Ink:  Melon Mambo (121074), In Color Markers (119801), Basic Black (100082); Accessories:  Neutrals Designer Buttons (119743), Thread (non-SU)

Fresh Birthday

Fresh Birthday published on 19 Comments on Fresh Birthday

I wanted a little change of pace from the “clean” cards I made for the blog hop last weekend.  I must say that Funky Four pretty much demands a clean style.  For today’s card, I pulled out a set that has been languishing in my stamp drawer for far too long…Fresh Cuts.  I found yet another great sketch from the Operators at Stampin’ 411:

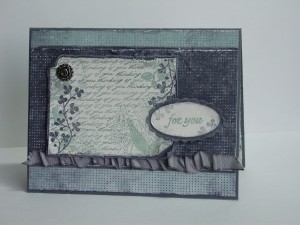
They really have a knack for a great layout!  I, like many of you, have a stash of designer paper.  When things retire, I hold on to my very favorites.  One of the DSPs from last year that I just loved was Nouveau Chic.  The colors are so pretty together and seemed to fit my stamping mood.  Gray, icy, a little distressed…just like the view outside my window today.

As a starting point, I stamped the “background” image from Fresh Cuts in Sage Shadow (retired) and then stamped the leaf image in Basic Gray over it.  After that I chose the papers for the panels and distressed everything.  It was still missing something so I stamped the words and punched them out with my Large Oval Punch and put on a Scallop Oval base.  Finally, I added some Basic Gray Taffeta ribbon using the scrunching technique and frayed the ends a bit.

Hint:  Once you have distressed the edges of your designer paper, sponge some color on the edges to finish the look (Basic Gray used here).

So glad you were able to stop in today.  I hope you are not adversely affected by the huge weather pattern crossing the U.S. today!!  See you again on Thursday for another ColorLab Challenge.

Stamp:  Fresh Cuts (111634); Paper:  Nouveau Chic DSP (retired), Basic Gray (121044), Very Vanilla (101650); Ink:  Sage Shadow (retired), Basic Gray (120966); Accessories:  Basic Gray Taffeta (retired), Large Oval Punch (119855), Scallop Oval Punch (119856), Antique Brads (117273), Sponges (101610), Dimensionals (104430)
All products are Stampin’ Up!

Funky Photo Card

Funky Photo Card published on 2 Comments on Funky Photo Card

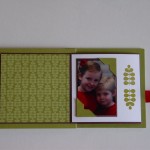
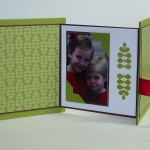
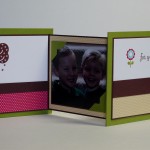
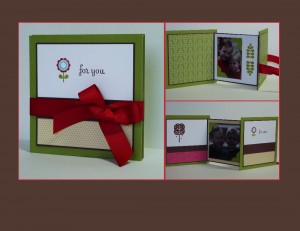
As promised, I am back with some more specifics about my photo book from the Blog Hop this weekend.  The tutorial I based this on came from the ultra-talented (and totally generous) Sarah Wills.  Her blog has tons of ideas and I used her Scallop Square Die Mini Scrapbook Tutorial as the basis for my card.  I thought it would be a fun little something to make for my mom since she came to visit this week.

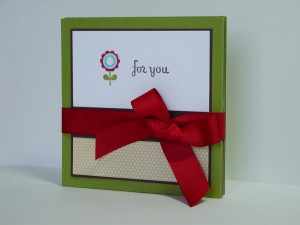
I started with a base of On Board chipboard knowing she would keep this to show to her friends.  I cut the chipboard into two 4 1/4″ squares and then cut four pieces of Old Olive card stock to the same size.  Using my Anywhere Glue Stick, I attached three of the pieces to the chipboard and left the last one off to allow for ribbon placement.  Just like Sarah’s instructions, I cut a piece of Chocolate Chip stock to 3 3/4″ x 11 1/4″ and folded it concertina style.  I decorated the two pages on each side using Funky Four and the Play Date DSP that coordinates with it.

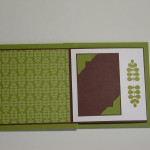
Here is the before and after of the front two pages.  I created a 2 1/8″ x 3 1/8″ panel for the picture I wanted to put in.  I then used the little leaf stamp from Funky Four as further embellishment.  I love that the DSP matches this image and simply cut a square for the facing page.

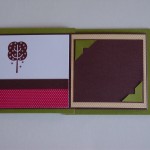
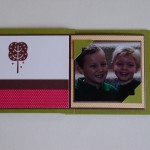
I then moved to the back and designed two more facing pages.  Again, I used some of the Play Date paper and a stamp from the set.  I initially made a square for the photo but then adjusted once I chose my picture.  I used a 1/8″ bigger panel behind it.

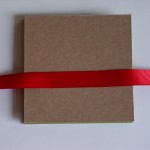
I connected these panels to my chipboard covered pieces using Sticky Strip (again, per Sarah’s suggestion).  I then decorated the front of the card.  All that was left was to attach my ribbon.  I lined up where the ribbon should go, attached it to the chipboard using Sticky Strip and then glued down the Old Olive Paper over the ribbon.

I love that this project comes together so quickly and makes such an nice little gift!!  Thanks, again, to Sarah for her generosity of ideas. 

Those who stamp with me know that I don’t make a lot of “3-D” projects.  I tend to be a little too practical, I think.  This went a bit outside the box for me so I’m going to enter it into the So Shelli Creative Challenge this month.  Shelli Gardner (CEO of Stampin’ Up!) challenged us to go outside our comfort zone.  I’m so glad I did!!  I think my mom is pretty glad too because she is already talking about showing this to her friends. *smile*

Thanks for stopping back in today.  I’ll see you later this week with another ColorLab challenge on Thursday and maybe something before then (if there are no snow days!).

Stamp:  Funky Four (113738), Say It Simply (122324); Play Date DSP (117168), Old Olive (100702), Chocolate Chip (102128), Whisper White (100730); Ink:  Real Red Marker (100052), Tempting Turquoise (100058), Chocolate Chip (100071), Old Olive (100079); Accessories:  Real Red Wide Grosgrain (109052), On Board Sheets (114320)

All products are Stampin’ Up!

Sale-a-brate with the Stampin’ Addicts!

Sale-a-brate with the Stampin’ Addicts! published on 29 Comments on Sale-a-brate with the Stampin’ Addicts!

Welcome to the Stampin’ Addicts Sale-a-bration Blog Hop!!  I hope you are enjoying the projects you can make with all the FREE stamps available with the SAB promotion.  I know you loved Holly’s projects over at InkPaperStamps with Forest Friends!  She always has the best ideas.

I am going to show you some things I made with Funky Four.  Talk about a fun set!!  It is part of the “Family Organization Suite” and has matching designer paper called Play Date.  I have used that on a couple of things today because, let’s face it, they are made for each other!  FYI, you can click on any picture to see it in more detail. 

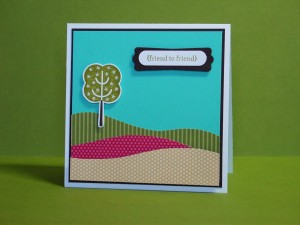
My first project is a quick card that uses the designer paper to create grass.  Ok, alternate universe grass but the bright colors are really perfect!  I just used my paper snips to create the hills using Play Date DSP and the Brights Paper Stack DSP.  I inked up the tree in Old Olive and Early Espresso, stamped on Whisper White and cut it out.  The sentiment comes from Teeny Tiny wishes and the punches (Word Window, Modern Label) are perfect for that set.  The sentiment, the tree and the yellow “grass” are all popped up on Dimensionals. 

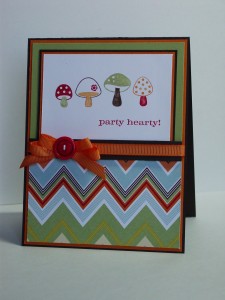
I’ll admit that the next card is for someone of a certain sense of humor.  I certainly did not originate the idea with the mushrooms but I find it really funny!  The psychedelic  rick-rack paper comes from the Greenhouse Gala DSP.  I used my markers to color the mushrooms and sentiment is from Party Hearty.  I created a bow with my Pumkin Pie Narrow Grosgrain and cinched it up with thread through a Brights Button.  The sketch comes from Mary-Jo Price and is perfect for these little mushrooms!


Since I am limited on the number of pictures for the hop, I created a collage of my last project using My Digital Studio.  This is a mini photo book that uses a variation of a tutorial from Sarah Wills (she is stop number 5 on this hop, by the way).  I will give more specifics on my variation, plus a link to her instructions, on Monday.

I’m so glad you stopped by today and that you like these fun projects!  Your next stop on the hop is Holly at Rubber Redneck.  You will be so impressed with what she made using Ornate Blossom!  Thanks for hopping with me today.  I look forward to seeing you again soon!

ColorLab 26

ColorLab 26 published on 12 Comments on ColorLab 26

You are going to love, and I mean LOVE, using today’s ColorLab Challenge colors.  They are seriously beautiful together! 

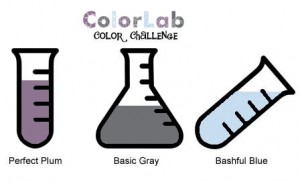
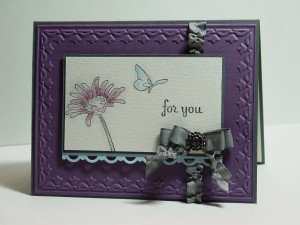
The Perfect Plum and Basic Gray pair so nicely and I loved adding a pop of Bashful Blue.  I found another great sketch courtesy of the Operators over at Stampin’ 411 and got to work.  Something about this color scheme compelled me to pull out my Every Moment set.  I just knew the flower and the butterfly would be fantastic on this challenge. 

I started with a base of watercolor paper for my image and stamped the flower and butterfly in Black Stazon Ink.  Using my lightest color first, I colored my butterfly with Bashful Blue and then the flower with Perfect Plum.  I have Stampin’ Write markers in these colors so I used the technique of coloring a bit on a clear block and pulling the color from there with my Blender Pen.  I added Basic Gray to the flower center and stem, and then to the butterfly.  With the little left on my Blender Pen, I shaded a little around the images with Basic Gray.  I used the sentiment from Say It Simply (again!)…it really is a great little set!

For the rest of the card, I rolled out a frame on Perfect Plum with my Big Shot and the Framed Tulips Embossing Folder.  I did use some retired Basic Gray Taffeta ribbon and scrunched it using the thread pulling technique.  All you have to do is rough up the end a bit and pick a center thread to pull.  I did the same on the tails of the bow.  The bow is held together with an Antique Brad.  The team over at Pals Paper Arts have a Bow challenge this week…how fun!  Of course, I love a bow so I am thrilled to join in. 

I hope you love playing with these colors this week!  I can’t wait to see your beautiful creations!  I’ll be back tomorrow for the Stampin’ Addicts Sale-a-bration Blog Hop.  I’ll be showing you projects with the SAB choice Funky Four.  Thanks for stopping in today!

Stamps:  Every Moment (120522-C), Say It Simply (122324); Paper:  Watercolor (105019), Basic Gray (121044), Perfect Plum (101889), Bashful Blue (105120); Ink:  Perfect Plum (100035), Bashful Blue (105111), Basic Gray (120966); Accessories:  Big Shot (113439), Framed Tulips Folder (121809), Antique Brads (117273), Blender Pen (102845), Basic Gray Taffeta (retired)

All products are Stampin’ Up!

SUOC11 – Cherry Espresso Valentine

SUOC11 – Cherry Espresso Valentine published on 5 Comments on SUOC11 – Cherry Espresso Valentine

Today’s challenge over at SUO Challenges is Valentine’s Day cards.  Appropriately enough, I am kicking off Sale-a-bration with a card class that includes a Valentine’s Day card.  I can’t wait to make this card with my classes this week! 

I started with two of my favorite colors and a new stamp set from the Occasions Mini called Be My Valentine.  I inked the entire stamp in Cherry Cobbler and stamped it on Very Vanilla paper.  Then I cleaned off the red and inked up the word banner in Early Espresso and stamped it again.  As a helpful hint, stamp your reds first and set them aside to dry.  Something about red inks take longer to dry, especially on Stampin’ Up’s ultra-smooth card stocks (like Vanilla and Whisper White).  I took my smaller Espresso piece and ran it through my Big Shot using the Square Lattice Embossing Folder and then did the ribbon scrunching technique on top of a line of Sticky Strip.  Once that layer was completed, I went back to the Cherry heart and cut it out leaving a little border and cutting the banner from the edges.  The Espresso banner was cut next to layer on top of the Cherry heart.  A couple of helpful hints:

1.  With any broad flat stamps, it is helpful to take a sanding block to the surface (gently, of course).  I sand in all directions and then clean it off with Stampin’ Mist on my Stampin’ Scrub.  This gets rid of the “too smooth” finish on the stamp and helps ink adhere better (yes, I noticed AFTER the card was done that I needed to do this…it is fixed now!).

2.  After the banner is cut, take a Stampin’ Write marker and ink the edges of the paper to finish the look.  If you work from behind the image, you reduce the chance of a mistake.

The banner was attached to the heart and the heart was popped up on Dimensionals, as was the inner panel.  Finally, I added some Basic Pearls to the flowers on the heart to add a little elegance.

I can’t wait to see your Valentine entries into the challenge.  Don’t forget to go see the amazing work of the whole design team!  I’ll be back Thursday with another ColorLab challenge and on Friday with Stampin’ Addicts Sale-a-bration Blog Hop!

Stylish Blogger?

Stylish Blogger? published on 6 Comments on Stylish Blogger?

Who would have thought that I could be stylish??!!  Apparently, two of my favorite stampers do and that means a lot to me!!  Cindy over at Heart’s Delight Cards and Heidi at RunningwScissorsStamper have awarded me this honor.  Thanks to both of them!!

Now the rules of this are:

I have to tell you 8 things that you may not know about me and pass this on to 8 of my favorite stampers.  So here goes with what you may not know:

1.  I grew up in Orlando, Florida and much of my family still lives in Florida.

2.  I was a Math major at Florida State University and was in Air Force ROTC there.  This is where I started flying and had the good fortune of being selected to go to Pilot Training.

3.  I lived in the country of Panama for three years.

4.  I have been qualified on lots of airplanes in my life:  T-37, T-38 (Instructor), C-130E/H, B727 (Flight Engineer), B737, B757, B767, Airbus 319/320.

5.  I look forward to the day that the pilots and other employees of United Airlines get reprieve from the bankruptcy contract where they took 50-65% pay cuts to save the company.

6.  I love stamping with my friends!  They make the most beautiful cards and they have a wonderful variety of styles.  I always learn something from them.

7.  I really, REALLY want to go to Stampin’ Up’s Convention this year so that I can meet in person some of the lovely stamping friends I have met through my blog.

8.  I have never been very artsy until the last few years.  While I was on maternity leave with my oldest, my husband deployed for the beginning of the Iraq war.  In order to fill time, I went to Stampin’ Up classes, sewing classes, cake decorating classes.  One of the reasons I love Stampin’ Up so much is that the products proved to me that I have a creative side and made it easy to make beautiful things!  Oh, and I still make cakes too.

Cindy and Heidi are a great source of inspiration.  Others whose blogs I love (in no particular order):

1.  Sarah Wills – http://sarahsinkspot.com/blog/

2.  Debra Burgin – http://heartfeltinkspiration.com/

3.  Krystal De Leeuw – http://krystalscardsandmore.blogspot.com/

4.  Yapha Mason – http://yaphamason.com/

5.  Lisa Young – http://addinkandstamp.blogspot.com/

6.  Jen Mitchell – http://www.jen-icreate.blogspot.com/

7.  Jennifer Weide – http://www.sunflowerstamper.com/

8.  Karen Barber – http://karenbarberstamps.blogspot.com/

I hope you have learned a little about me and maybe found a new favorite blog to go visit.  Thanks for stopping in today.  I’ll be back next Tuesday with SUO Challenge #11 and I’m busily working on my projects for the Stampin’ Addicts SAB Blog Hop that starts in a week.  See you soon!

Primary Sidebar