Skip to content

With Sympathy

With Sympathy published on 6 Comments on With Sympathy

I’ll start with saying that today’s card is one that no one should ever have to receive (or make).  It is for a family at my children’s school who are suffering the loss of their 9 day old baby girl.  Certainly no words can ever come close so I thought that making a beautiful card might be meaningful.  Again, not sure this comes close but I hope it will at least let them know that we are thinking of them and praying for them.
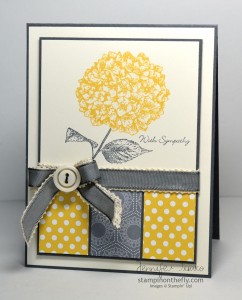
I had no idea how to approach this card and had been wanting to use the colors from this Stampin’ Celebration Challenge all month.  I am too late to link but I thank them for the inspiration.  Make sure you go see the winner’s card.  Heidi’s creation is beautiful.  I chose the hydrangea from the retired Because I Care since it is one of my favorite stamps. I hope the tone of this isn’t too “sunny” but it seems more subdued in person than in the picture.  I layered some retired Basic Gray Taffeta Ribbon on top of the Victoria Crochet Lace and I think it gives a pretty effect.  The sentiment is from my old go-to Teeny Tiny Wishes.

Thanks for stopping in today.  I’ll be back tomorrow with the latest Freshly Made Sketches challenge.

Stamps:  Because I Care (hostess, retired), Teeny Tiny Wishes; Paper:  Twitterpated DSP, Polka Dot Parade DSP, Very Vanilla, Basic Gray; Ink:  Daffodil Delight, Basic Gray; Accessories:  Victoria Crochet Lace, Basic Gray Taffeta (ret), Neutrals Buttons, Dimensionals


Control Freaks Sketch Challenge

Control Freaks Sketch Challenge published on 1 Comment on Control Freaks Sketch Challenge

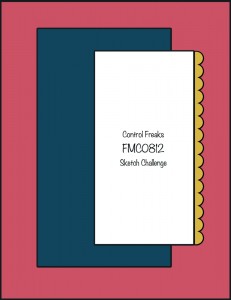
I know that I owe you another post about the blog hop projects from last week but I wanted to share a card that I made using the Control Freaks Sketch Challenge for this month.  This is just an internal challenge for the group but you know that I can’t resist a sketch!!

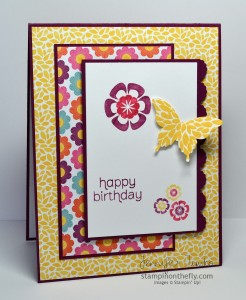
I needed a birthday card for one of my oldest son’s best friends.  Hmmm, stamping for a 9 year old girl….what to make??!!  Out came Betsy’s Blossoms and the Floral District DSP!  I mimicked the colors from the paper for the flower colors on the stamped panel.  Stampin’ Write Markers are so fantastic for creating these multi-colored images!!  Then I inked up the big blossom with Daffodil Delight and stamped it.  Using the new Elegant Butterfly Punch, I created this sweet butterfly.  By putting the top of the punch near the center of the flower, the pattern looks so pretty and directional.  My new favorite sentiment set, Made For You, was the perfect fit and a little scallop using the Adorning Accents Edgelit finished it off.  I am winding down on my “summer” color stamping and I seem to be transitioning to fall colors.  Glad I got this one done before that happens completely.  Yes, Seasonal Stamper’s Disorder is taking over.  *smile*

I have enjoyed my week with the boys so I thank you all for understanding the lack of posts.  We went to the apple orchard on Thursday and got 30, yes 30, pounds of apples!  YUM!  Made homemade applesauce that night and I think an apple crisp is on the menu tonight (recipe care of my lovely friend Rita Wright).  The boys met their teachers yesterday and school starts on Monday.  Always a bittersweet thing!  The good news is that I will have some more time for stamping (but I will miss the craziness around the house I’m sure).  Thanks for dropping in today.  See you soon with the paint can and tag details from the hop!

Stamps:  Betsy’s Blossoms, Made For You; Paper:  Floral District DSP, Rich Razzleberry, Whisper White; Ink:  Rose Red, Rich Razzleberry, Daffodil Delight; Accessories:  Elegant Butterfly Punch, Big Shot, Adorning Accents Edgelits, Dimensionals


New blog look from MDS 2

New blog look from MDS 2 published on 7 Comments on New blog look from MDS 2

For those of you who subscribe by email, you will need to pop over to the actual blog to see!!  Yes, I gave a quick update to my blog look using the new MDS 2.  I started with the custom sized project to create my blog header.  The dimensions were in the WordPress theme and all I had to do was type them in to MDS in pixels.  Well, THAT was easy!  Then I added the Travel Log print with the clouds and one of the Travel Log embellishments.  I covered over the words on the embellishment with some Very Vanilla “paper” then added a stamp from the set.  The stamp is colored using the new coloring tool.  How much I love that feature!!  This went so fast that I decided to create a new Shop with Me button for my sidebar.  It was done in a similar fashion using the embellishment and I just added text boxes for the words.  Finally, a signature block to match.  All in under an hour…in a hotel…on a layover!!

Can’t wait to hear what you think!  Let me know and also let me know if you have any questions about MDS 2.  I’m in love with it already!

Don’t forget that Freshly Made Sketches has a new sketch as of yesterday.  I am absent this week with it being my boys’ last week of summer vacation.  The design team has come up with awesome cards using a great sketch by Jen Mitchell and I know you will want to play along.

Have a great day!

Snowflake Soiree Cards

Snowflake Soiree Cards published on 4 Comments on Snowflake Soiree Cards

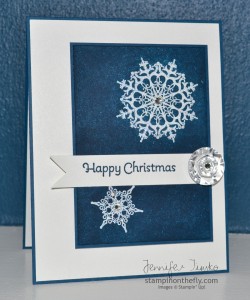
Here today to give you the details on the card I made for the Stampin’ Addicts Blog Hop.  And I actually have two cards to show you.  The first is from the hop and the second is a more subdued version that I made for the Control Freaks Convention Swap.

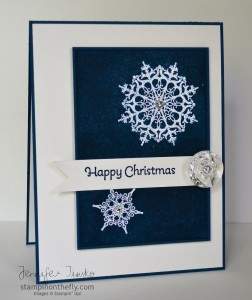
This is a different view than the one I showed for the hop.  I tried to capture the sparkle in about a billion pictures and finally accepted that it just wouldn’t be as pretty as it is in person!  I started by stamping the snowflakes in Versamark ink and then embossing them with Iridescent Ice Embossing Powder.  Then using my brayer, I added Midnight Muse ink until I was happy with the coverage.  You can go lighter or almost match the card stock like I did here.  Just wipe the excess ink from the embossed images and you are done.  I hand cut the banner out of Shimmery White Paper and used that as the background as well.  Finally I topped off the banner with doubled up Vintage Faceted Buttons.  The smallest one fits into the largest one!!!  So cool!!  Basic Rhinestones just begged to be added and you should see how pretty it is in the center of the button!

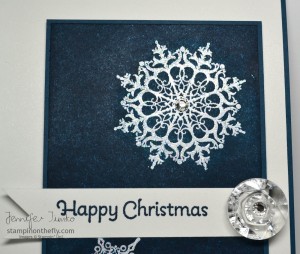
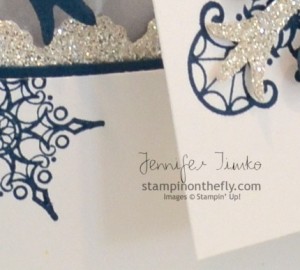
Just a little close-up to show you the embossing (after all, I did take all those pictures).

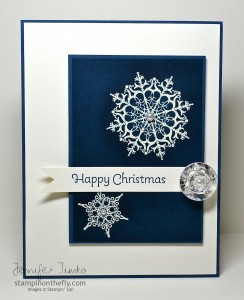
Now for the second card, I know it looks a lot the same in the picture but in person has a very different feel.  This one was made using Very Vanilla and Pearls.  The embossing was done with Clear Embossing Powder.  You can see from the two cards that the depth of brayering was a little different.  It is something fun to play with!  Lessons learned…make sure if you are using the new ink pads that you have reinker on hand (at least if you plan to make more than about 10 of these).  The new pads work beautifully with the brayer but they hold ink differently and you have to re-ink more often and with not as much ink.

Well, I hope you have enjoyed these!  As you can see, it is a SUO Challenges Tuesday and I am not in this week.  With it being the last week of summer break for my boys, I have taken the week off from the design teams.  That, and I’m singing the summer theme song “On the Road Again”.  *smile*  I hope you are having a great week.  Thanks so much for stopping by!  See you again in the next couple of days with details on the mini paint can and the tags from the hop.

Stamps:  Snowflake Soiree, More Merry Messages; Paper:  Shimmery White, Whisper White (card 1), Very Vanilla (card 2), Midnight Muse; Ink:  Midnight Muse; Accessories:  Heat Tool, Iridescent Ice EP (card 1), Clear EP (card 2), Vintage Faceted Buttons, Basic Rhinestones (card 1), Basic Pearls (card 2)

Stampin’ Addicts Holiday Blog Hop

Stampin’ Addicts Holiday Blog Hop published on 24 Comments on Stampin’ Addicts Holiday Blog Hop


Welcome to the Stampin’ Addicts Holiday Catalog Blog Hop!!  We are celebrating the amazing Holiday Catalog and I know you will be so inspired by everyone’s projects.  I am first so I’ll try to start you off with a sparkly holiday celebration.  If you started somewhere in the middle, you came over from Tanya’s Tinkerin’ In Ink and I know you were wowed by her creativity with Wonderfall!  That bag, the candles and, of course, the card…amazing!  My set for today is Snowflake Soiree.  It was the very first set I wanted from the Holiday Catalog and I think it is beautiful!  I hope you love my projects (and you can click on any of them to see them larger).

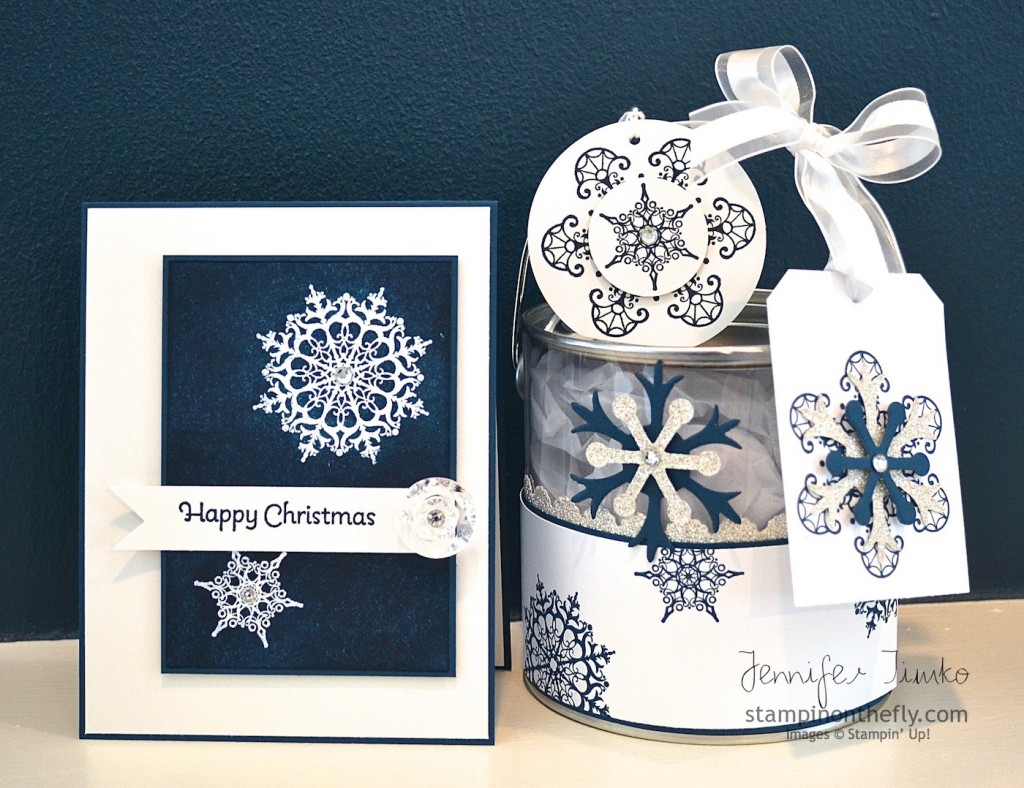
I thought it would be fun to make a gift set so I created a card, the altered paint can and some tags.  I have to say that the beautiful sparkle off this set just cannot be completely photographed.


This card is embossed using Iridescent Ice Embossing Powder and then brayered using Midnight Muse.  Shimmery White Paper provides a subtle bit of extra shine in the background.  Rhinestones top off the snowflakes perfectly, don’t you think?

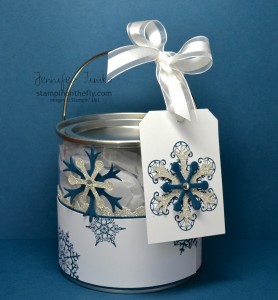
This little paint can was altered using Silver Shimmer Paper, Midnight Muse and Whisper White.  I came upon a happy coincidence while making the little tag and found that the snowflakes from the new Snow Flurry Die coordinate with the stamp.  I love how Stampin’ Up does this!!

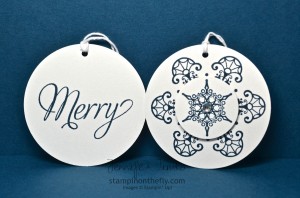
Finally I created some fun and quick tags to put in the little paint can (along with some holiday treats).  These are so quick and easy!  They are also created using Shimmery White Paper for a bit of extra shine and a Basic Rhinestone finishes it off.

I’ll be back over the next week with details on each project.  For now, make sure you move on over to Sharon’s blog, Created by You, to see her projects made with Joyous Celebrations.  You’ll be so impressed with the different looks all from one set!  Enjoy the hop!!


Freshly Made Sketches #48

Freshly Made Sketches #48 published on 11 Comments on Freshly Made Sketches #48

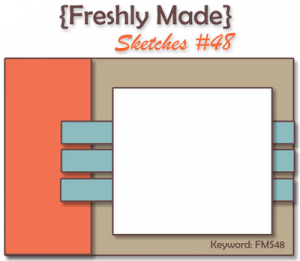
I hope your week is going well so far!  Hard to believe it is Wednesday already but here we are with another Freshly Made Sketches challenge.  This week’s sketch is courtesy of the amazing Tui Nathan.  I love the opportunities this one gives with those little panels across the card.

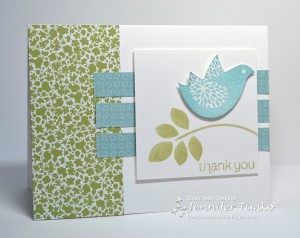
I have been making a number of Christmas projects lately (which you will get to see soon) so I was drawn back to some of the summer colors for this card.  I thought the prints from Twitterpated DSP would be fun to use again.  I realized that they worked perfectly with Betsy’s Blossoms…what a bonus!  The best part is the layout does all the work and is quick and fun.  I pulled out the sentiment from Made For You since it is still one of my new favorites.

The team has so many creative uses for this sketch and you are sure to love them.  Make sure to go right over and take a look!

I’ll be back on Friday for the Stampin’ Addicts Holiday Catalog Blog Hop (sneak peek is on the previous post).  Hope to see you then.  Until then, have a great week!

Stamps:  Betsy’s Blossoms, Made For You; Paper:  Twitterpated DSP, Whisper White;  Ink:  Baja Breeze, Pear Pizzazz (ret); Accessories:  Dimensionals


Stampin’ Addicts Holiday Catalog Hop Preview

Stampin’ Addicts Holiday Catalog Hop Preview published on 1 Comment on Stampin’ Addicts Holiday Catalog Hop Preview

Starting on Friday, August 17th, the Stampin’ Addicts will be celebrating the Holiday Catalog with a Blog Hop.  I can’t wait to show you my projects but for now I’ll just give you a little sneak peek!

Make sure you come back on Friday to see the reveal and to get the links to the whole hop.  You won’t be disappointed!


Freshly Made Sketches #47

Freshly Made Sketches #47 published on 14 Comments on Freshly Made Sketches #47

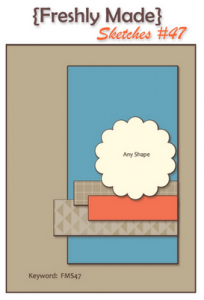
Happy Wednesday and welcome back to see another sketch from Freshly Made Sketches. This week the sketch is mine and I hope you love it!  I thought it would be a fun way to show of scraps of designer papers and punches or framelits.  The design team has done their usual fantastic job and you will love their cards!

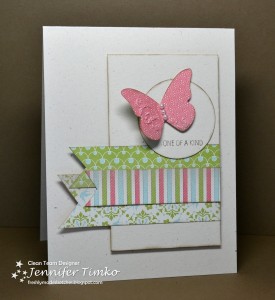
Keeping with my original idea, I chose to use some scraps from the beautiful Everyday Enchanted DSP I have left from Sale-a-bration. I still love this paper and want to use every little bit of it!  I thought using a butterfly from the Beautiful Wings Embosslit would be a pretty way to top off the circle (a 1-3/4″ Circle Punch).  But what sentiment?  I used part of a bigger stamp from the Convention set I Am and thought that “One of a Kind” was perfect for the single butterfly.  I think I know just who this is for…she too is one of a kind.  I did do just a little sponging but without frames and too much extra, I think it still holds to the clean rules for the Freshly Made Sketches concept.

Now…off with you to go see what the team has created!  You will be so inspired!  Can’t wait to see what you will create.  Hope you will join us this week.

Trying to get some extra stamping time this week and I might even get back with an extra post.  Until then, thanks for stopping by and I’ll see you again soon!

Stamp:  I Am (Convention exclusive); Paper:  Everyday Enchanted DSP (SAB), Naturals Ivory; Ink:  Soft Suede; Accessories:  Big Shot, Beautiful Wings Embosslit, 1-3/4″ Circle Punch, Dimensionals, Sponges

SUOC51 – Designer Papers

SUOC51 – Designer Papers published on 4 Comments on SUOC51 – Designer Papers

It is SUO Challenges day and our theme this week will work for everyone!  Designer papers!  We all love them and they make stamping so fun and easy!  Stampin’ Up’s designer series papers really are amazing because the coordinate with our exclusive colors and stamps…makes it even easier to make fantastic cards!  The hardest part for this challenge was choosing which paper set to highlight.

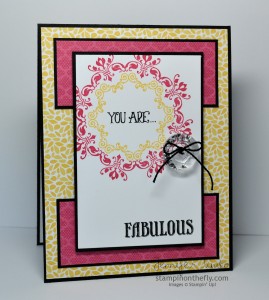
It shouldn’t surprise you that I went with the Floral District DSP.  Let’s face it…I love it!  It just says summery and fun.  I thought I’d pull out a new set Daydream Medallions and see if I could make these work together.  I think yes!  Once I stamped the medallions, I went off to search for a sentiment and came back with the Convention stamp set I Am.  This one was exclusive to Convention and I love the sentiments in it.  I thought this was a fun way to show them.  I added a new Vintage Faceted Button (LOVE these) to finish it off.  See, the DSP did all the work of deciding the colors!  The sketch is courtesy of the Fall-to Layout 202.  It was just perfect for showcasing these pretty papers.

Now when you go over to SUO Challenges you will find two notable things.  First, you’ll see that I’m not the only one that loves Floral District DSP!  Second, and most importantly, you will notice a change in our design team.  We have added the most awesomely talented Connie Babbert of Inkspired Treasures.  The whole team is so happy to have her join us!  Make sure you go tell her welcome too.

I’ll be back tomorrow with a new card for Freshly Made Sketches. Until then, have a great day.  Thanks so much for stopping by!

Stamps:  Daydream Medallions, I Am; Paper:  Floral District DSP, Basic Black, Whisper White; Ink:  Rose Red, Daffodil Delight, Basic Black; Accessories:  Stamp-a-ma-jig, Vintage Faceted Buttons, Thread, Dimensionals
The perfect “princess”

The perfect “princess” published on 11 Comments on The perfect “princess”

I’m on the road (again) but I wanted to update you all on the stamp drive I held for Sydney and RMHC.  I sold enough to have a workshop and Becky from West Virginia was randomly chosen as the hostess!! Congratulations Becky!  My thanks to all of you who purchased the set and also to Jean and my mom to making donations to Sydney’s Children’s Cancer Research Fund.  With their donations and the profits from the workshop (plus a little from me to round it off) we will have donated $100 to Sydney’s fund and $30 to the RMHC from the stamp sales.  I really appreciate your support and can’t wait to send the card to Sydney and her family this week!

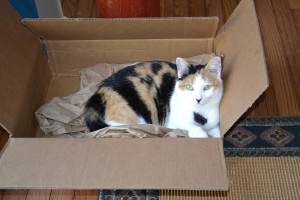
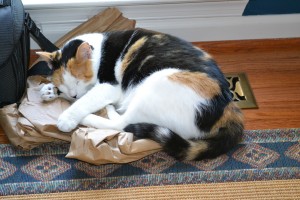
I couldn’t leave you all without some pictures so I thought I would share some pictures of our “new” kitty.  Nevermind that she has been with us since January.  *smile*  Many of you wrote me such sweet notes when our sweet friend Pito passed.  After the holidays had come and gone, my dear husband asked when it would be time for a new kitty.  I put him off (scheduling, training, etc) and he looked at me and laughed.  Off we went to the local shelter!!  I went looking for another little boy kitty.  We have always joked that with  all the males in my house that I am the queen and there will be no other.  But a sweet little calico kitty had other intent.  She had been found with a splint on her paw that was in terrible condition.  The amazing team at the shelter removed the old splint and fur came away too.  They say that she never even complained.  That is her personality!!  She is fearless and trusting.  Yes, she chose us so we had no choice but to bring her home.  But what to name her??!!  My husband, again, solved the problem by designating her as the princess and thus the name Kate.  Here she is soon after she came to us.  Notice the orange fur on her right front paw where the damage had been.

Now I know many of you struggle with what to do about all that paper that comes in Stampin’ Up boxes with your lovely stamps.  Some of you have really creative ideas on crafty projects!!  Well, little Kate has another idea.  Apparently it is great for attacking and then the perfect location for a nap.

Of course, the paper is even better with a box!!  This box has become a part of my dining room decoration because I don’t have the heart to take it away.

She looks pretty pleased with herself, doesn’t she??!!  Notice the front paw is totally white now!  Wonderful what good food and lots of love will do!  Yep, she won the cat lottery and she knows it!

Thanks for stopping in today.  And thank you for all the support on the stamp drive.  See you again on Tuesday and Wednesday for this week’s challenges!


Primary Sidebar