Skip to content

Blog candy winner

Blog candy winner published on No Comments on Blog candy winner

Thanks for all the wonderful comments last week and I really appreciate everyone who reads my blog!  I have to say that 100,000 hits is quite an amazing number to me.  I never thought that when I started this blog back in January 2010 that anything like this would be possible.  I wanted to use it as a way to share what I love and to grow as a stamper.  Never would I have imagined the friends that I would develop along the way!  How grateful I am for the generosity and kindness in the stampers I meet in person and online.

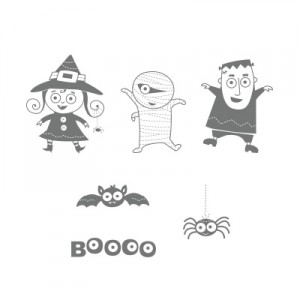
Without further waiting….the blog candy winner is Nanc (I used a random number generator).  I will send you an email and get your mailing address from you.  Hope you enjoy the Googly Ghouls!

This week will be a little calmer for posts but I have been working ahead for some upcoming challenges, a class this week and a surprise guest blog visit.  Make sure you come back on Wednesday for the One Year Anniversary of Freshly Made Sketches!  It is going to be so much fun!!  See you soon!


Fab Friday (on Thursday)

Fab Friday (on Thursday) published on 22 Comments on Fab Friday (on Thursday)


My friend, the oh so talented Mindy Backes,  has started up a brand new challenge called Fab Friday.  The design team over there are some stamping “rock stars” and are a group I admire so much.  So of course I had to play along on their first challenge!!  The first one is a sketch…and you know that I cannot resist a sketch!  This one is really great and I had such fun with it!

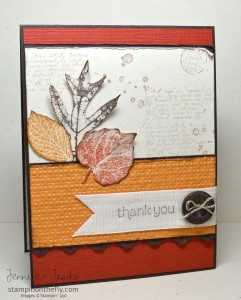
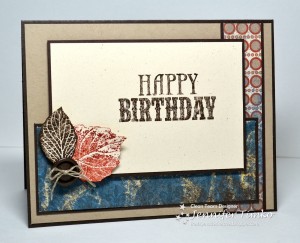
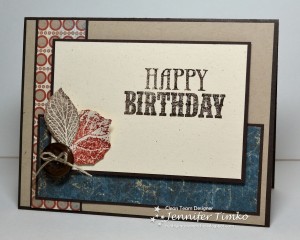
Here is the final proof this week that the Seasonal Stamper’s Disorder (my inability to stamp in anything other than the “seasonal” colors) has taken over completely.  Bring on the fall colors!  Naturally, with fall colors come the most wonderful set, French Foliage.  Love this one so much!  I found an old piece of Cajun Craze textured card stock in my stash and it was just the right size for a card base.  Meant to be!  I did some distressing and decided that adding texture to the More Mustard panel with the Square Lattice Embossing Folder was needed.  Perfect!  I love these leaves cut out so I just stamped, cut and sponged the edges a bit.  For the sentiment, I pulled out my new 7/8″ Cotton Ribbon from the Holiday Catalog (you didn’t think I could pass up a new ribbon did you?).  It is designed to be stamped on so I used it for my sentiment from Made For You.  I have to say that this card makes me happy!  Not sure why, but it does.  I LOVE, LOVE fall and I particularly love it in Virginia!

*Blog Candy*

In case you missed yesterday’s post, I am giving away some blog candy for coming up on 100,000 blog hits.  I will be giving away a clear mount Googly Ghouls stamp set.  All you have to do is comment on this post, Tuesday’s SUO Challenges post or yesterday’s Freshly Made Sketches post to be entered.  I’ll select one winner from all the comments (sometime after 6p Eastern Time on Sunday, Sep. 9th).  Feel free to comment on all of them for more chances.  Sorry but SU rules don’t allow me to ship outside of the U.S.

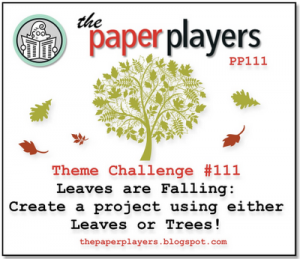
I mentioned stamping rock stars before.  Well, this card is also for another set of my favorite stampers…The Paper Players!  Their theme this week is Leaves Are Falling.  Awesome!

Make sure you take the time to go see what each of these groups has created.  You will be so inspired to join in!

Don’t forget to leave me a note!!  I can’t wait to send the Googly Ghouls to someone!!  Thanks for stopping in today.  See you again soon!

Stamps:  French Foliage, Made For You; Paper:  Cajun Craze Textured (ret), More Mustard, Early Espresso, Naturals Ivory; Ink:  Cajun Craze, More Mustard, Early Espresso; Accessories:  Big Shot, Square Lattice EF, Eyelet Border Punch (ret), 7/8″ Cotton Ribbon, Neutrals Button, Linen Thread, Sponges

Freshly Made Sketches #51

Freshly Made Sketches #51 published on 18 Comments on Freshly Made Sketches #51

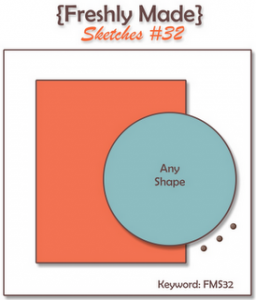
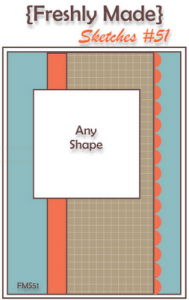
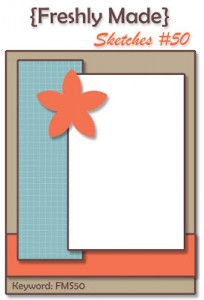
After yesterday’s shabby chic box, today’s project will look seasonal in another way!  This week’s sketch at Freshly Made Sketches comes from Cindy Hall and she has brought us a fabulous one!  So many ways to use that little panel on the side, so many shapes that fit perfectly here!  Cindy’s card is absolutely gorgeous and the rest of the team has some awesome projects too.

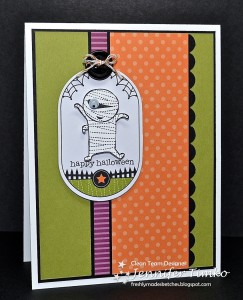
Ok, I finally did it!  After all the adorable projects I have been seeing with Googly Ghouls, I could resist no longer.  I love them!  I love the little mummy and the spider (which is crazy because in general, spiders are NOT a favorite) and the Frankenstein guy!  I see so many cute things to be made with these….so I got the whole  Ghoulish Googlies Bundle.  Guess what, it isn’t just for treat bags!!  I used one of the little tags here as my shape and I am so excited about this card.  I don’t even normally make Halloween cards but I will this year!  I used the sentiment from Teeny Tiny Wishes and it fits perfectly just below the mummy.  The mummy is cut out and popped up on a Dimensional and I added the Pumpkin Pie/White Baker’s Twine from the kit to a button to finish it off.  The Googlies googly eye is part of the kit but can also be gotten separately.  How adorable is it on this guy??!!  The DSP is from my Brights Designer Series Paper Pack but the new Howlstooth & Scaringbone DSP is on the way…could not resist that either!

Now you will notice that this is sketch #51.  You know what…next week is #52 and we will be celebrating the one year anniversary of Freshly Made Sketches!  You will not want to miss it.  Plan some stamping time now!!

*Blog Candy*

Speaking of celebrating, I just realized that I am about to go over 100,000 hits on my blog (at least based on that counter on the side).  To celebrate, I just have to give away something cool!  How about a Googly Ghouls clear mount stamp set??!!  Seems appropriate.  All you have to do is comment on this post, yesterday’s SUO Challenges post or tomorrow’s Fab Friday post to be entered.  I’ll select one winner from all the comments (sometime after 6p Eastern Time on Sunday, Sep. 9th).  Feel free to comment on all of them for more chances.  Sorry but SU rules don’t allow me to ship outside of the U.S.  Thanks for all the support you give to me via this blog!  How lucky I am to be in such a fabulous community of stampers!

So glad you could drop in today.  I’ll be back tomorrow with a card for the brand new Fab Friday Challenge (and also for The Paper Players).  Hope to see you then!

Stamps:  Googly Ghouls, Teeny Tiny Wishes; Paper:  Brights DSP Pack, Lucky Limeade, Whisper White, Basic Black; Ink:  Basic Black Stampin’ Write Marker; Accessories:  Ghoulish Googlies Designer Kit, Dimensionals, Stamp-a-ma-jig, Scallop Edge Border Punch

SUOC53 – Boxes and Bags

SUOC53 – Boxes and Bags published on 8 Comments on SUOC53 – Boxes and Bags

SUO Challenges has such a fun theme this week – Boxes and Bags.  With all the variations of these out there, I’m certain we will see all kinds of fun things!!  Look no further than the design team and you will know what I mean.  There are some awesomely fantastic examples posted!

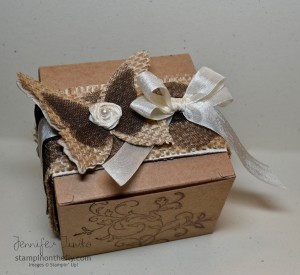
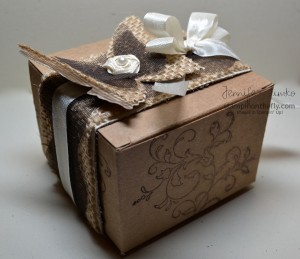
When I saw the theme, the first things that came to mind was the Kraft Gift Boxes.  I love these things…love them!  They are easy to decorate, hold all kinds of cool things and the price is unbeatable!  I have seen lots of cute decorations for these so I wanted to take a different direction.  Sort of shabby chic.  I’m sure you know by now that this isn’t my normal stamping style but I love it and always admire those who do it well.  I wanted to go with the latest trend I’ve been seeing and use some burlap and combine it with different textures.  The burlap is a quick fabric store find and combines so perfectly with our Stampin’ Up products.

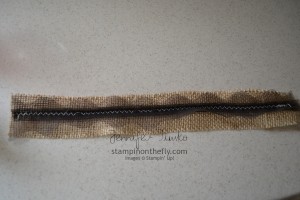
I cut out a piece that was 2″ x 13″ and started seeing how it could form a belly band around the Kraft Box.  After a bit, I figured out that I love the contrast of the new 3-1/2″ Scalloped Tulle Ribbon against the roughness of the burlap.  But how to attach it??!!  Here comes the funny part (you’ll have to pardon the length of the post).  At the beginning of the summer, my mom (who is a quilter) brought me a sewing machine…a really nice one that had been hers.  Way back when I was pregnant with my oldest, I had taken sewing lessons and learned some of the basics.  This is about the time frame where I discovered stamping too.  Well, I haven’t really sewn anything since then and my mom gave me some reminders and machine specific instructions while she was visiting.  Then I put the machine away and continued with the summer craziness.  Well, I realized that sewing was the best way to attach the tulle to the burlap and mostly had the machine set up right…mostly.  Had to call mom to figure out the last details, of course!  She reminds me that with flying airplanes, I should be able to handle a Bernina.  Uh huh.  I practiced on a few scraps and then committed to sewing the pieces together.  As my two boys and one of their friends “supervised” I did it!  I chose a zigzag pattern just to make sure more ribbon got attached and it worked pretty well.  I’ll even show you how it looked if you promise not to laugh too hard at the stitch variations (user error) but they are functional.

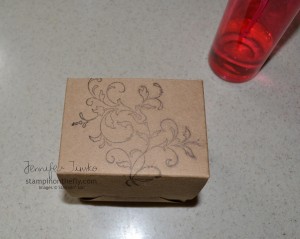
I knew I was planning on an additional layer on top of the stitching so the variations are ok.  You can see that I just bunched the ribbon in the middle to make the scallops the right width.  Using Multipurpose Liquid Glue (Tombo), I attached this layer to some Naturals Ivory Card Stock that had been distressed and sponged with Early Espresso.  I stamped the box with the flourish from Creative Elements in Early Espresso and then spritzed it with water to distress the ink a bit.

Finally I attached some Very Vanilla Seam Binding to the top of the Tulle Ribbon with Sticky Strip and tied on a bow made out of Seam Binding.  The butterfly is made using the Beautiful Butterflies Bigz Die and I cut the large full butterfly out of the burlap and out of some Naturals Ivory card stock.  Then I cut two of the smaller butterflies out of the Tulle Ribbon for layering.  The layers were attached using Crystal Effects.  Finally I added a rosette made from the Seam Binding and topped it off with a Basic Pearl.  The whole butterfly is attached to the belly band using Crystal Effects.

As usual with 3-D items, I had a hard time getting a picture that shows how pretty it is in person.  I didn’t put a tag or any sentiment on it yet since I haven’t figured out who it is for.  I think I will make a coordinating set of 3″ x 3″ note cards to put inside.

Thanks for sticking through the post.  The sewing thing really is pretty funny and the kids’ surprise that it actually worked cracked me up!  I know my mom will get a good chuckle when she reads this!  That said…it could be dangerous.  You may see more sewing (albeit on paper) in the future!!

I’ll be back tomorrow with a new sketch from Freshly Made Sketches!  Hope to see you then!  Thanks for stopping in today!

Stamps:  Creative Elements; Paper:  Naturals Ivory; Ink:  Early Espresso; Accessories:  Big Shot, Beautiful Butterflies Bigz Die, Very Vanilla Seam Binding, Early Espresso 3-1/3″ Scalloped Tulle, Basic Pearls,  Multipurpose Liquid Glue, Crystal Effects, Sticky Strip, Burlap Fabric (fabric store), Kraft Gift Box

Snowflake tags and mini paint can

Snowflake tags and mini paint can published on 2 Comments on Snowflake tags and mini paint can

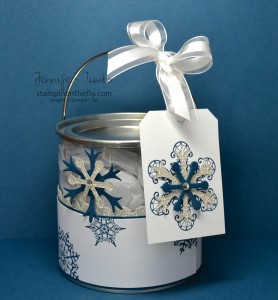
Finally, the details on the mini paint can and the coordinating tags!  I just love these little cans that I got from the Container Store.  They are clear and can be decorated in lots of different ways.  Here I simply cut two pieces of Whisper White, Midnight Muse and Silver Glimmer papers to create a wrap around for the bottom of the container.  I made them short enough that they go under the handle attachment points to keep it easy!  Before attaching them to the can with Sticky Strip, I stamped the snowflakes from Snowflake Soiree and cut the scallops in the Glimmer Paper with the Adorning Accents Edgelit.

I wanted to create a tag for the can and started playing with the snowflakes in the set and the snowflakes in the new Snow Flurry Bigz Die.  What do you know??  They coordinate!  Of course!!  So I cut some out of the Silver Glimmer Paper and Midnight Muse card stock.  I layered two of the flakes on top of the stamped snowflake and then used the inverse flakes to add an embellishment to the can.  Basic Rhinestones were are great last detail to add additional sparkle!  I’m not normally a “glitter gal” but these products sure to make it easy to love shine and shimmer!

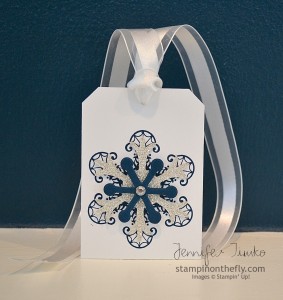
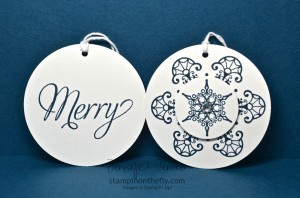
I made a bunch of tags to put into the paint can (along with some other treats).  These are so quick and easy!  I stamped the snowflakes on Shimmery White Paper and punched them out with a 2-1/2″ Circle Punch and a 1-1/4″ Circle Punch.  I just love the words in the Snowflake Soiree set and I chose ‘Merry’ for the back of the tag.  Of course a To/From would be great here too.  The smaller snowflake was layered using a Dimensional and another Basic Rhinestone finished the centers.  I used some White Baker’s Twine for attaching these to bags or boxes.

As many times as I tried, I could never get the sparkle on these to photograph but trust me when I say they are really pretty!  I hope you love these little projects.  Never too soon to start working on teacher gifts or gifts for the special people in your life!!

Thanks for stopping in today.  For those of you in the US, I hope you have a wonderful and safe Labor Day weekend!  See you again soon.

Stamps:  Snowflake Soiree; Paper:  Whisper White, Shimmery White, Silver Glimmer, Midnight Muse; Ink:  Midnight Muse; Accessories:  Big Shot, Snow Flurry Bigz Die, Circle Punches (2-1/2″, 1-1/4″, 1/16″), White Baker’s Twine, White 5/8″ Organza Ribbon, Basic Rhinestones, Mini Paint Can

Freshly Made Sketches #50

Freshly Made Sketches #50 published on 13 Comments on Freshly Made Sketches #50

Happy middle of the week!!  I hope yours is going well.  It is time for the latest Freshly Made Sketches Challenge and Lesley has brought us an awesome sketch!!  This is one you will reach for again and again.  I know that I already have some CASEing to do from the design team’s samples this week!

I told you the other day that I am starting to make my “seasonal stamper’s disorder” transition to fall colors (SSD = inability to stamp in anything but the seasonal colors, enabled by Stampin’ Up’s beautiful DSPs).  I needed to make a card for my mom to use for a friend.  You see, she has used some others that I have made for the wife in this family and the poor husband just could not be slighted!  We got to work and created a card with last year’s Well Worn DSP (perfect for a masculine card and I keep it just for that!) and the always just right French Foliage.  Now, I was looking at the sketch when I made the card with my mom but somehow still didn’t follow it.  So that card is pictured below.  I liked it enough that I created a new version with the actual sketch and will have it for a family birthday coming up in September.  Wow, I’m actually ahead??!!  The sentiment is from the new set You’re Amazing and I love how it is large enough to be the focal point!  The leaves were stamped and then cut out and attached with an Early Espresso button.

Here is the original version I made.  Some panels flipped around but otherwise the same card.  Well, I was feeling pretty proud of these and THEN…I saw what the rest of the team has made.  WOW, WOW, WOW!!  Get right over there because their cards are fabulous!

I have spend the last two morning re-organizing my stamp area and you know what???  I am ready to get stamping!!  Really…it was that bad.  I couldn’t even think to stamp with the clutter.  I suspect you will start seeing the results next week and I will have the paint can/tag information from the blog hop (over a week ago) on Friday.  So glad you stopped in today.  I hope your week is wonderful!

Stamps:  You’re Amazing, French Foliage; Paper:  Well Worn DSP, Naturals Ivory, Early Espresso; Ink:  Early Espresso, Cajun Craze; Accessories:  Neutrals Buttons, Linen Thread, Mini Glue Dots, Dimensionals

With Sympathy

With Sympathy published on 6 Comments on With Sympathy

I’ll start with saying that today’s card is one that no one should ever have to receive (or make).  It is for a family at my children’s school who are suffering the loss of their 9 day old baby girl.  Certainly no words can ever come close so I thought that making a beautiful card might be meaningful.  Again, not sure this comes close but I hope it will at least let them know that we are thinking of them and praying for them.

I had no idea how to approach this card and had been wanting to use the colors from this Stampin’ Celebration Challenge all month.  I am too late to link but I thank them for the inspiration.  Make sure you go see the winner’s card.  Heidi’s creation is beautiful.  I chose the hydrangea from the retired Because I Care since it is one of my favorite stamps. I hope the tone of this isn’t too “sunny” but it seems more subdued in person than in the picture.  I layered some retired Basic Gray Taffeta Ribbon on top of the Victoria Crochet Lace and I think it gives a pretty effect.  The sentiment is from my old go-to Teeny Tiny Wishes.

Thanks for stopping in today.  I’ll be back tomorrow with the latest Freshly Made Sketches challenge.

Stamps:  Because I Care (hostess, retired), Teeny Tiny Wishes; Paper:  Twitterpated DSP, Polka Dot Parade DSP, Very Vanilla, Basic Gray; Ink:  Daffodil Delight, Basic Gray; Accessories:  Victoria Crochet Lace, Basic Gray Taffeta (ret), Neutrals Buttons, Dimensionals


Control Freaks Sketch Challenge

Control Freaks Sketch Challenge published on 1 Comment on Control Freaks Sketch Challenge

I know that I owe you another post about the blog hop projects from last week but I wanted to share a card that I made using the Control Freaks Sketch Challenge for this month.  This is just an internal challenge for the group but you know that I can’t resist a sketch!!

I needed a birthday card for one of my oldest son’s best friends.  Hmmm, stamping for a 9 year old girl….what to make??!!  Out came Betsy’s Blossoms and the Floral District DSP!  I mimicked the colors from the paper for the flower colors on the stamped panel.  Stampin’ Write Markers are so fantastic for creating these multi-colored images!!  Then I inked up the big blossom with Daffodil Delight and stamped it.  Using the new Elegant Butterfly Punch, I created this sweet butterfly.  By putting the top of the punch near the center of the flower, the pattern looks so pretty and directional.  My new favorite sentiment set, Made For You, was the perfect fit and a little scallop using the Adorning Accents Edgelit finished it off.  I am winding down on my “summer” color stamping and I seem to be transitioning to fall colors.  Glad I got this one done before that happens completely.  Yes, Seasonal Stamper’s Disorder is taking over.  *smile*

I have enjoyed my week with the boys so I thank you all for understanding the lack of posts.  We went to the apple orchard on Thursday and got 30, yes 30, pounds of apples!  YUM!  Made homemade applesauce that night and I think an apple crisp is on the menu tonight (recipe care of my lovely friend Rita Wright).  The boys met their teachers yesterday and school starts on Monday.  Always a bittersweet thing!  The good news is that I will have some more time for stamping (but I will miss the craziness around the house I’m sure).  Thanks for dropping in today.  See you soon with the paint can and tag details from the hop!

Stamps:  Betsy’s Blossoms, Made For You; Paper:  Floral District DSP, Rich Razzleberry, Whisper White; Ink:  Rose Red, Rich Razzleberry, Daffodil Delight; Accessories:  Elegant Butterfly Punch, Big Shot, Adorning Accents Edgelits, Dimensionals


New blog look from MDS 2

New blog look from MDS 2 published on 7 Comments on New blog look from MDS 2

For those of you who subscribe by email, you will need to pop over to the actual blog to see!!  Yes, I gave a quick update to my blog look using the new MDS 2.  I started with the custom sized project to create my blog header.  The dimensions were in the WordPress theme and all I had to do was type them in to MDS in pixels.  Well, THAT was easy!  Then I added the Travel Log print with the clouds and one of the Travel Log embellishments.  I covered over the words on the embellishment with some Very Vanilla “paper” then added a stamp from the set.  The stamp is colored using the new coloring tool.  How much I love that feature!!  This went so fast that I decided to create a new Shop with Me button for my sidebar.  It was done in a similar fashion using the embellishment and I just added text boxes for the words.  Finally, a signature block to match.  All in under an hour…in a hotel…on a layover!!

Can’t wait to hear what you think!  Let me know and also let me know if you have any questions about MDS 2.  I’m in love with it already!

Don’t forget that Freshly Made Sketches has a new sketch as of yesterday.  I am absent this week with it being my boys’ last week of summer vacation.  The design team has come up with awesome cards using a great sketch by Jen Mitchell and I know you will want to play along.

Have a great day!

Snowflake Soiree Cards

Snowflake Soiree Cards published on 4 Comments on Snowflake Soiree Cards

Here today to give you the details on the card I made for the Stampin’ Addicts Blog Hop.  And I actually have two cards to show you.  The first is from the hop and the second is a more subdued version that I made for the Control Freaks Convention Swap.

This is a different view than the one I showed for the hop.  I tried to capture the sparkle in about a billion pictures and finally accepted that it just wouldn’t be as pretty as it is in person!  I started by stamping the snowflakes in Versamark ink and then embossing them with Iridescent Ice Embossing Powder.  Then using my brayer, I added Midnight Muse ink until I was happy with the coverage.  You can go lighter or almost match the card stock like I did here.  Just wipe the excess ink from the embossed images and you are done.  I hand cut the banner out of Shimmery White Paper and used that as the background as well.  Finally I topped off the banner with doubled up Vintage Faceted Buttons.  The smallest one fits into the largest one!!!  So cool!!  Basic Rhinestones just begged to be added and you should see how pretty it is in the center of the button!

Just a little close-up to show you the embossing (after all, I did take all those pictures).

Now for the second card, I know it looks a lot the same in the picture but in person has a very different feel.  This one was made using Very Vanilla and Pearls.  The embossing was done with Clear Embossing Powder.  You can see from the two cards that the depth of brayering was a little different.  It is something fun to play with!  Lessons learned…make sure if you are using the new ink pads that you have reinker on hand (at least if you plan to make more than about 10 of these).  The new pads work beautifully with the brayer but they hold ink differently and you have to re-ink more often and with not as much ink.

Well, I hope you have enjoyed these!  As you can see, it is a SUO Challenges Tuesday and I am not in this week.  With it being the last week of summer break for my boys, I have taken the week off from the design teams.  That, and I’m singing the summer theme song “On the Road Again”.  *smile*  I hope you are having a great week.  Thanks so much for stopping by!  See you again in the next couple of days with details on the mini paint can and the tags from the hop.

Stamps:  Snowflake Soiree, More Merry Messages; Paper:  Shimmery White, Whisper White (card 1), Very Vanilla (card 2), Midnight Muse; Ink:  Midnight Muse; Accessories:  Heat Tool, Iridescent Ice EP (card 1), Clear EP (card 2), Vintage Faceted Buttons, Basic Rhinestones (card 1), Basic Pearls (card 2)

Primary Sidebar