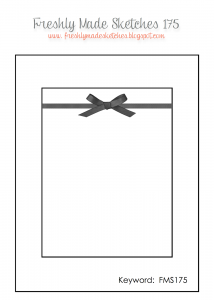
I am so happy to share today’s card with you! My friend Jen Brum has created such a fun sketch for us over at Freshly Made Sketches. In honor of Jen’s, um, aversion to circles I have created a card that is all about circles. *smile* I hope she appreciates my sense of humor on it!
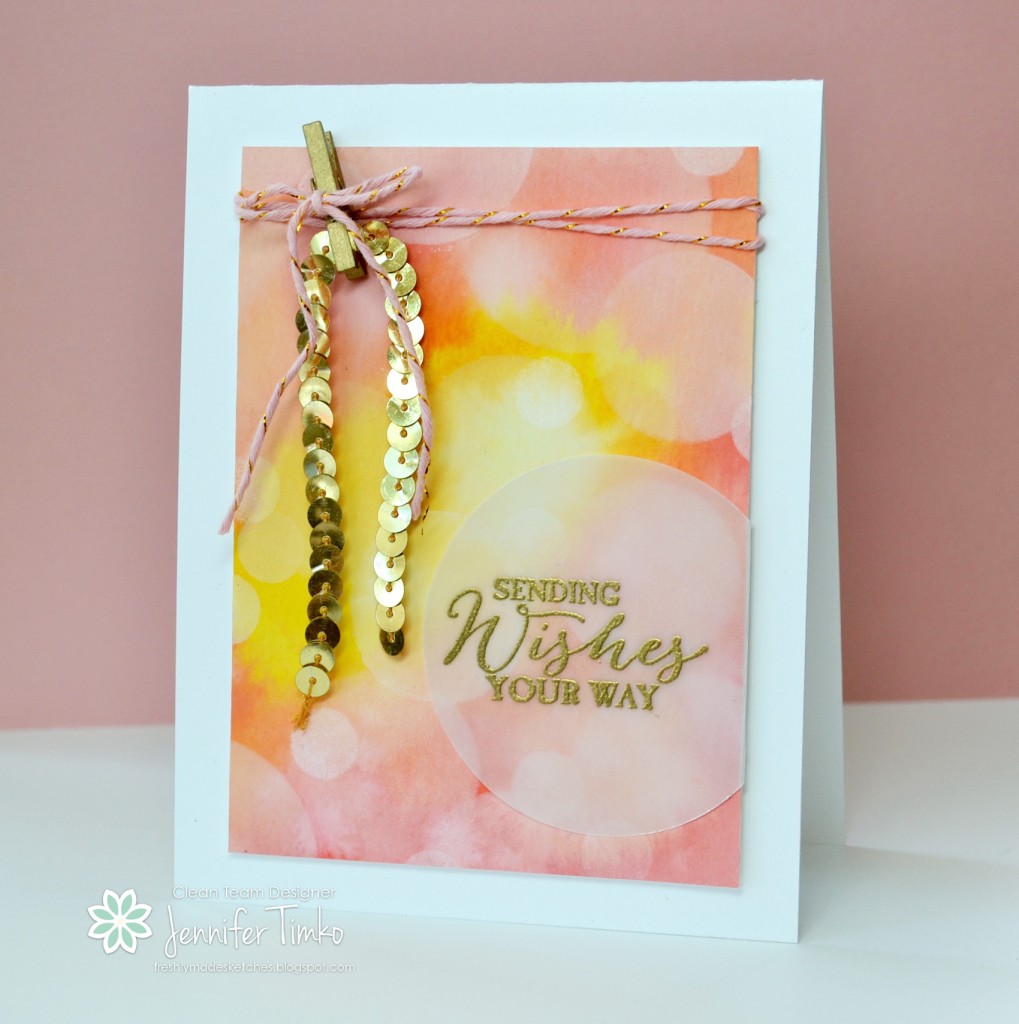
So the bokeh technique is all about circles. Or at least my version is. Bokeh is a photography technique defined as the way a lens renders points of light. The key is the blur effect. Bokeh has also been all the rage in the stamping world for a while and I finally gave it a go. I’ll tell you a bit about how I created the card and then I have photos on how I created the panel itself. I stamped this sentiment from Butterfly Basic in Gold Encore Ink onto Vellum and then heat embossed it with Gold Stampin’ Emboss Powder. Then I punched it out with my 2-1/2″ Circle Punch. I love the way the vellum mimics the look of the inked circles! I used a little bit of Tombow Multipurpose Adhesive on the vellum behind the words to attach the vellum invisibly and also tacked down the portion I folded over on the back side. I had this Blushing Bride Gold Baker’s Twine left over from this month’s Paper Pumpkin kit and it worked perfectly here, don’t you think? To go along with the gold, I added a Gold Mini Metallic Clothespin and Gold Sequin Trim.
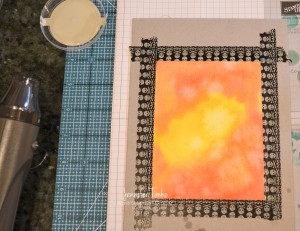
Now for the panel. You can click on the photos to expand them if needed. I took watercolor paper and taped it to a piece of chipboard (the stuff that comes in kits to protect materials) using old washi tape. Then using a paint brush I washed water over the whole panel. I put a few drops of Daffodil Delight Reinker in a container and using the same wet brush, picked up the reinker and splatted it onto the paper. Then I did the same with Calypso Coral Reinker. On the places where is seemed really dark or too watery, I pounced on the paper with a paper towel to absorb some of the extra. This leads to a mottle look and I feel like the mottling is key to success with the rest of the technique. You can let it dry naturally or use the low setting of your heat tool. You can see which one I chose (because I’m impatient).
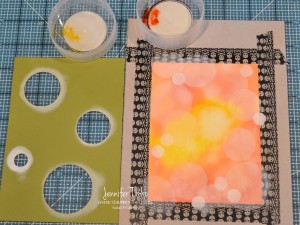
Here you can see my reinker containers (old button boxes). Then using circle punches I made a template using card stock (punches listed in materials below). If you have circle framelits, you can use them instead. I grabbed a trusty sponge dauber and started adding on circles using White Craft Ink. Bigger circles are lighter and smaller circles are darker. You can use just the dauber for the small circles if you want but my precision with those is a bit lacking. I liked the template better. Just add circles until you have the effect you want. Let that panel dry thoroughly again, pull it up and trim to size. It really is MUCH easier than I expected!! I used this video as a basis for mine and then just used Stampin’ Up stuff instead.
 Let me know if you have any questions about this! Don’t be like me and put it off. Pull out some of your favorite colors and give it a try!
The team has done their usual fantastic job with the sketch and I know you will have fun with it too. Another classic in the making! Thanks so much for stopping in today. See you soon!
Click HERE to purchase these wonderful Stampin’ Up products!
Stamps: Butterfly Basics; Paper: Watercolor, White, White Vellum; Ink: Daffodil Delight, Calypso Coral, Gold Encore, White Craft; Accessories: Circle Punches – 1/2″, 1-1/4″, 1-3/8″, 1-3/4″, 2-1/2″; Mini Metallic Clothespins, Gold Sequin Trim, Blushing Bride Gold Baker’s Twine (Paper Pumpkin), Sponge Daubers, Heat Tool, Gold Stampin’ Emboss Powder


15 Comments
This looks awesome, Jen! This technique is on my list of things to try!!!
This is my new favorite card of yours! I love, love, LOVE how it turned out. 🙂 You finished off that gorgeous panel so perfectly.
A bokeh beautify for sure! Gorgeous……with just the right amount of glam with the gold!
This came out perfectly. And I love the sentiment embossed on a vellum layer. Such a great look!
Beautiful. Love the use of the vellum.
This is one of my favourite ever bokeh cards! The panel looks perfect and so realistic – brilliant job. And to finish it off with the vellum circle is just plain genius!
Ha ha ha….you’re just so funny!!!! You and your circles! They’re beautiful circles! You’re so brave! The bokeh turned out amazing. Love the sequins and the mini clothes pin! Amazing!
Great job on the Bokeh technique & I love your card! Just saw a tutorial on SCS & now I’m really inspired to see if I can do it!
Lovely Bokeh Technique!
Great card, really interesting technique and I love how you’ve used the sequin trim.
Wow! I love your bokeh look. And I love that vellum circle with the embossed sentiment. Fabulous card, Jennifer!
You’ve mastered this technique – it’s truly stunning!!! I love that you have topped it with a vellum circle. Thanks for the tutorial!
Wow! This is amazing!!! Thanks for the tutorial!!!
Oh how funny! I didn’t connect your circles with Jen’s fear of them! I absolutely adore your card and the effect you’ve created! I really should try this technique one day…..
So clever and a stunning result too. I love the background, but the little sequin piece really makes the card for me. Cx