SUO Challenges has such a fun theme this week – Boxes and Bags. With all the variations of these out there, I’m certain we will see all kinds of fun things!! Look no further than the design team and you will know what I mean. There are some awesomely fantastic examples posted!
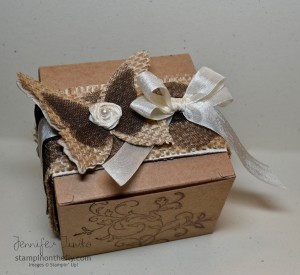
When I saw the theme, the first things that came to mind was the Kraft Gift Boxes. I love these things…love them! They are easy to decorate, hold all kinds of cool things and the price is unbeatable! I have seen lots of cute decorations for these so I wanted to take a different direction. Sort of shabby chic. I’m sure you know by now that this isn’t my normal stamping style but I love it and always admire those who do it well. I wanted to go with the latest trend I’ve been seeing and use some burlap and combine it with different textures. The burlap is a quick fabric store find and combines so perfectly with our Stampin’ Up products.
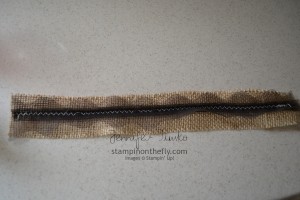
I cut out a piece that was 2″ x 13″ and started seeing how it could form a belly band around the Kraft Box. After a bit, I figured out that I love the contrast of the new 3-1/2″ Scalloped Tulle Ribbon against the roughness of the burlap. But how to attach it??!! Here comes the funny part (you’ll have to pardon the length of the post). At the beginning of the summer, my mom (who is a quilter) brought me a sewing machine…a really nice one that had been hers. Way back when I was pregnant with my oldest, I had taken sewing lessons and learned some of the basics. This is about the time frame where I discovered stamping too. Well, I haven’t really sewn anything since then and my mom gave me some reminders and machine specific instructions while she was visiting. Then I put the machine away and continued with the summer craziness. Well, I realized that sewing was the best way to attach the tulle to the burlap and mostly had the machine set up right…mostly. Had to call mom to figure out the last details, of course! She reminds me that with flying airplanes, I should be able to handle a Bernina. Uh huh. I practiced on a few scraps and then committed to sewing the pieces together. As my two boys and one of their friends “supervised” I did it! I chose a zigzag pattern just to make sure more ribbon got attached and it worked pretty well. I’ll even show you how it looked if you promise not to laugh too hard at the stitch variations (user error) but they are functional.
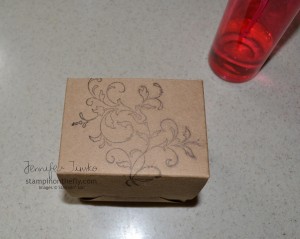
I knew I was planning on an additional layer on top of the stitching so the variations are ok. You can see that I just bunched the ribbon in the middle to make the scallops the right width. Using Multipurpose Liquid Glue (Tombo), I attached this layer to some Naturals Ivory Card Stock that had been distressed and sponged with Early Espresso. I stamped the box with the flourish from Creative Elements in Early Espresso and then spritzed it with water to distress the ink a bit.
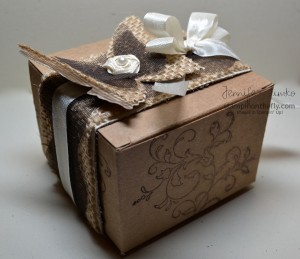
Finally I attached some Very Vanilla Seam Binding to the top of the Tulle Ribbon with Sticky Strip and tied on a bow made out of Seam Binding. The butterfly is made using the Beautiful Butterflies Bigz Die and I cut the large full butterfly out of the burlap and out of some Naturals Ivory card stock. Then I cut two of the smaller butterflies out of the Tulle Ribbon for layering. The layers were attached using Crystal Effects. Finally I added a rosette made from the Seam Binding and topped it off with a Basic Pearl. The whole butterfly is attached to the belly band using Crystal Effects.
As usual with 3-D items, I had a hard time getting a picture that shows how pretty it is in person. I didn’t put a tag or any sentiment on it yet since I haven’t figured out who it is for. I think I will make a coordinating set of 3″ x 3″ note cards to put inside.
Thanks for sticking through the post. The sewing thing really is pretty funny and the kids’ surprise that it actually worked cracked me up! I know my mom will get a good chuckle when she reads this! That said…it could be dangerous. You may see more sewing (albeit on paper) in the future!!
I’ll be back tomorrow with a new sketch from Freshly Made Sketches! Hope to see you then! Thanks for stopping in today!
Stamps: Creative Elements; Paper: Naturals Ivory; Ink: Early Espresso; Accessories: Big Shot, Beautiful Butterflies Bigz Die, Very Vanilla Seam Binding, Early Espresso 3-1/3″ Scalloped Tulle, Basic Pearls, Multipurpose Liquid Glue, Crystal Effects, Sticky Strip, Burlap Fabric (fabric store), Kraft Gift Box

8 Comments
Ohhh, using burlap is so hot in the industry right now. Love how you combined it with the kraft boxes and I love the butterfly details! Gorgeous addition to the Boxes and Bags theme on SUO Challenges!
This is gorgeous! I’ve always loved burlap and I think I’ve got some in a closet somewhere but I’ve hesitated to use it because it sheds. Funny thing is, the other day I JUST bought some burlap ribbon Etsy and now I can’t wait to get my hands on it so I can try some of the fun stuff you’ve got going on here! I love the die-cut burlap butterfly! So many possibilities, so little time!
Jennifer this is beautiful! The texture and colors are just gorgeous together! This was a lot of work, probably more than I would want to give, but the result is worth it. I hope this goes to a very special recipient. They will LOVE it!
Wow! I absolutely LOVE this box! I have a sewing machine that has been sitting in a closet for about 15+ years (not that I want to admit that… makes me feel old). I have no idea how to use it anymore… I think I need to drag it out and find the directions 🙂
Thanks for the inspiration! The burlap and tulle butterflies! What a way to think outside the box (no pun intended – he he). Mary
Very creative use of the burlap and butterflies
Love the use of the burlap! I think I’ll challenge myself to use it too!
Love your take on shabby chic! I’m going to try working with some burlap for the first time! This just pushes me to do it ASAP! Beautiful gift box!!
Brenna
Wow …. stunning! Love the earthy rustic feel …