Skip to content

Fancy Friday – Fancy Technique

Fancy Friday – Fancy Technique published on 3 Comments on Fancy Friday – Fancy Technique

FF Feb - Watercolor Blooms

I am so excited to share with you this month’s project with for our Fancy Friday monthly hop!  If you just came over from the amazing Jeanna, welcome to the next stop.  My friends and I want to be able to share with you our ideas in a monthly format.  We will use different themes each month – sometimes colors, sometimes a sketch, sometimes a stamp set focus.  The one thing you can count on is that it will be fancy!  Over our year on the 2013 Artisan Design Team,  “fancy” became our word to describe the best projects, the best new clothes, even the best pedicure colors.  Now we want to share with you our take on “fancy” each month.  This month our theme is “Fancy Technique”!  We are using techniques that we love and can’t wait to share them with you!

6a00e54f94e01b883401b8d05ef236970c-500wi

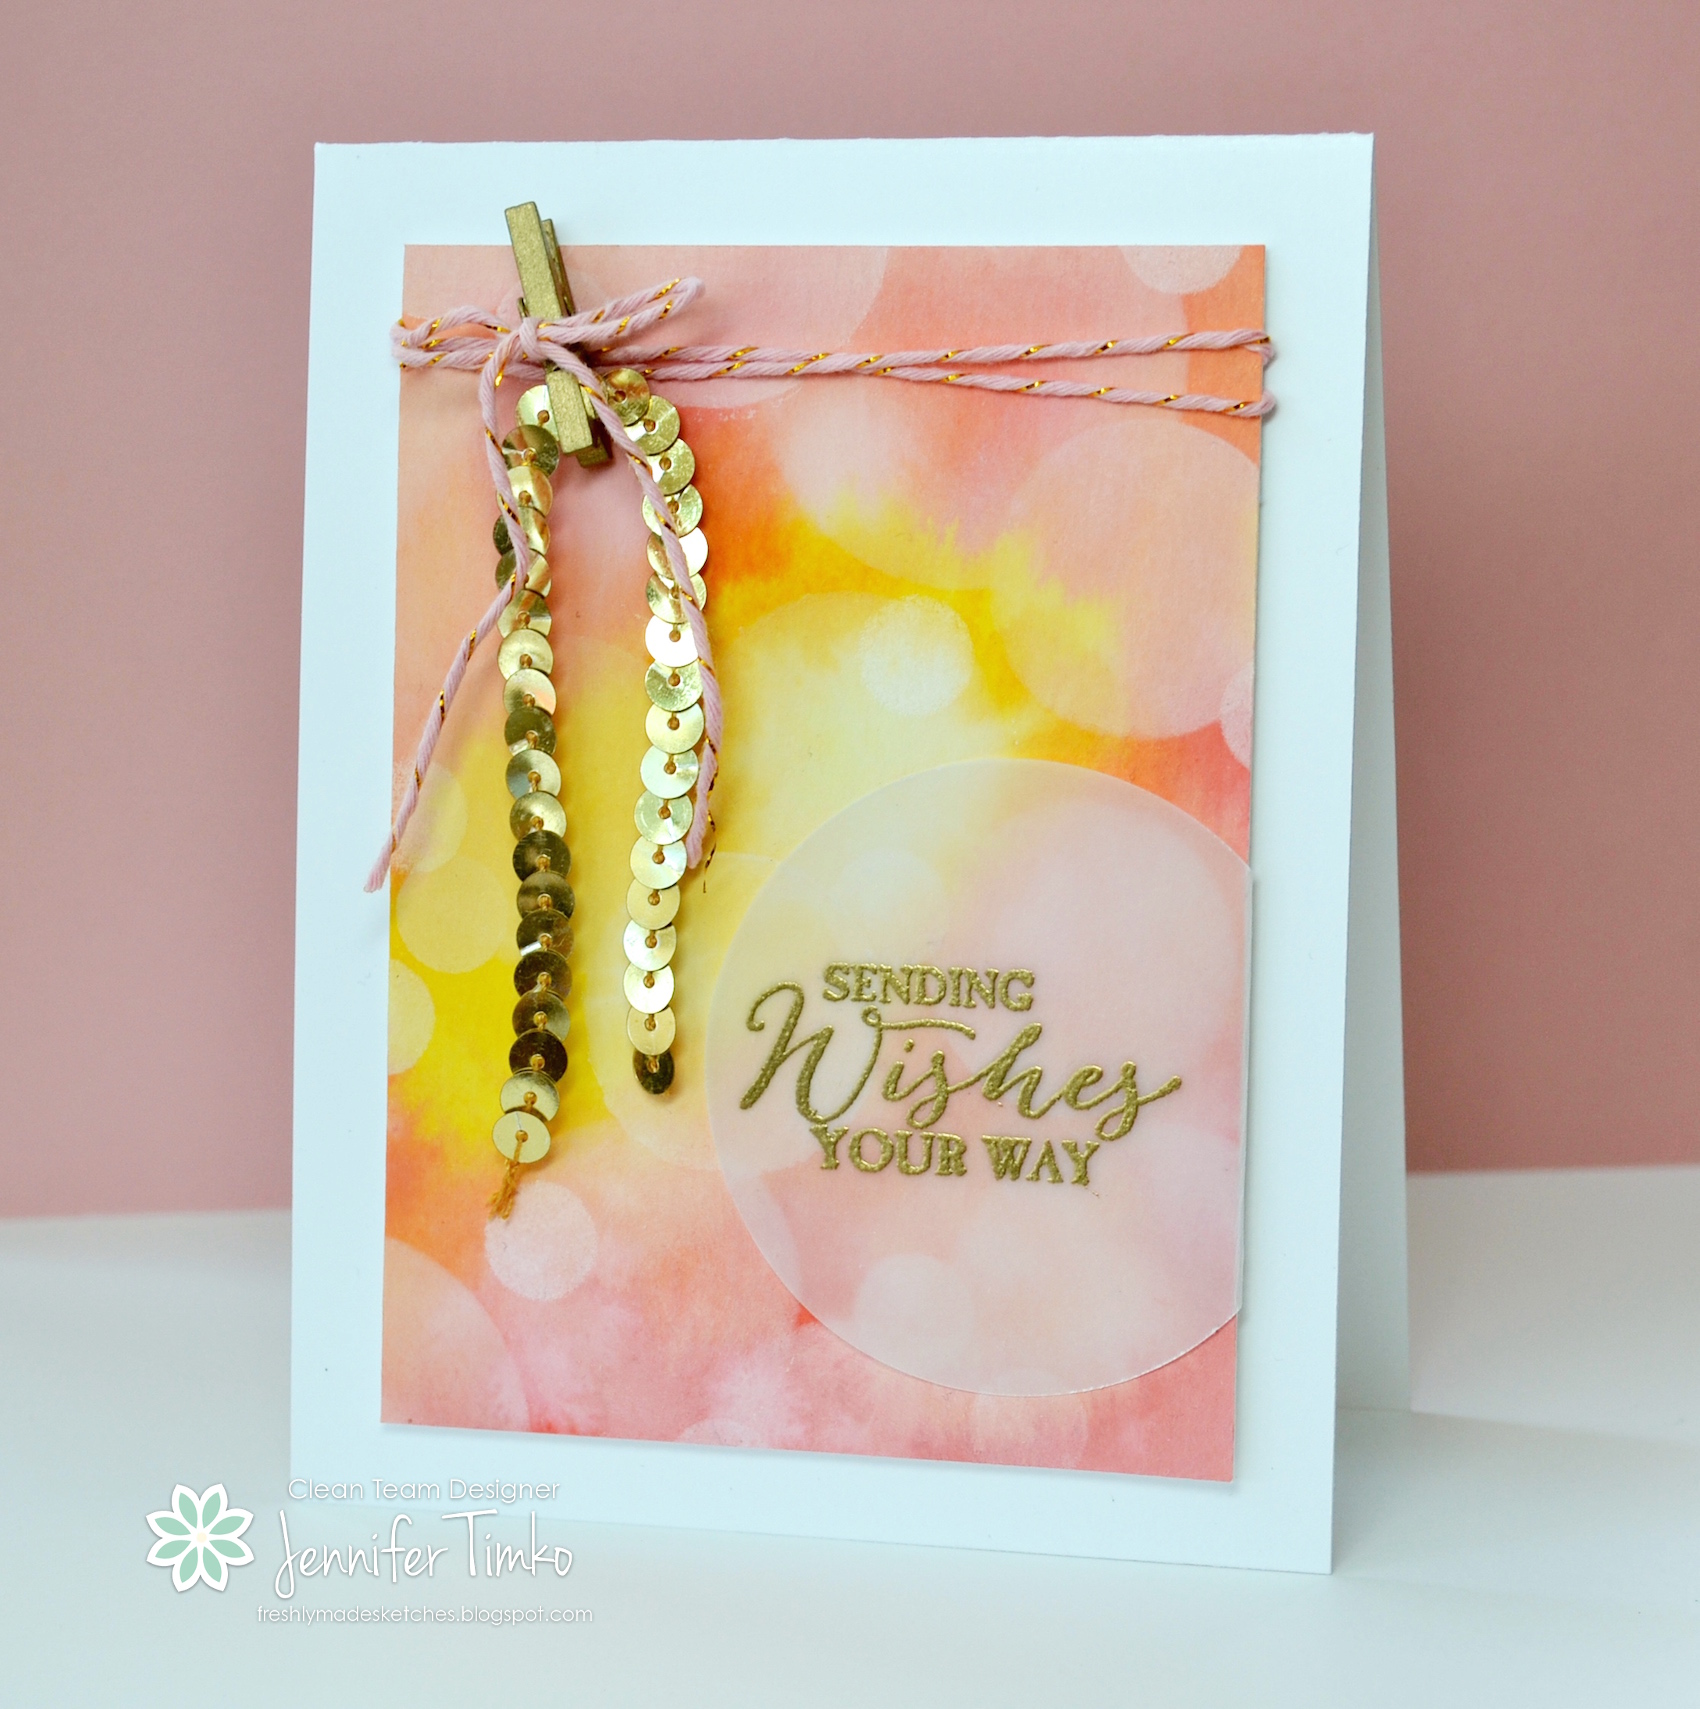
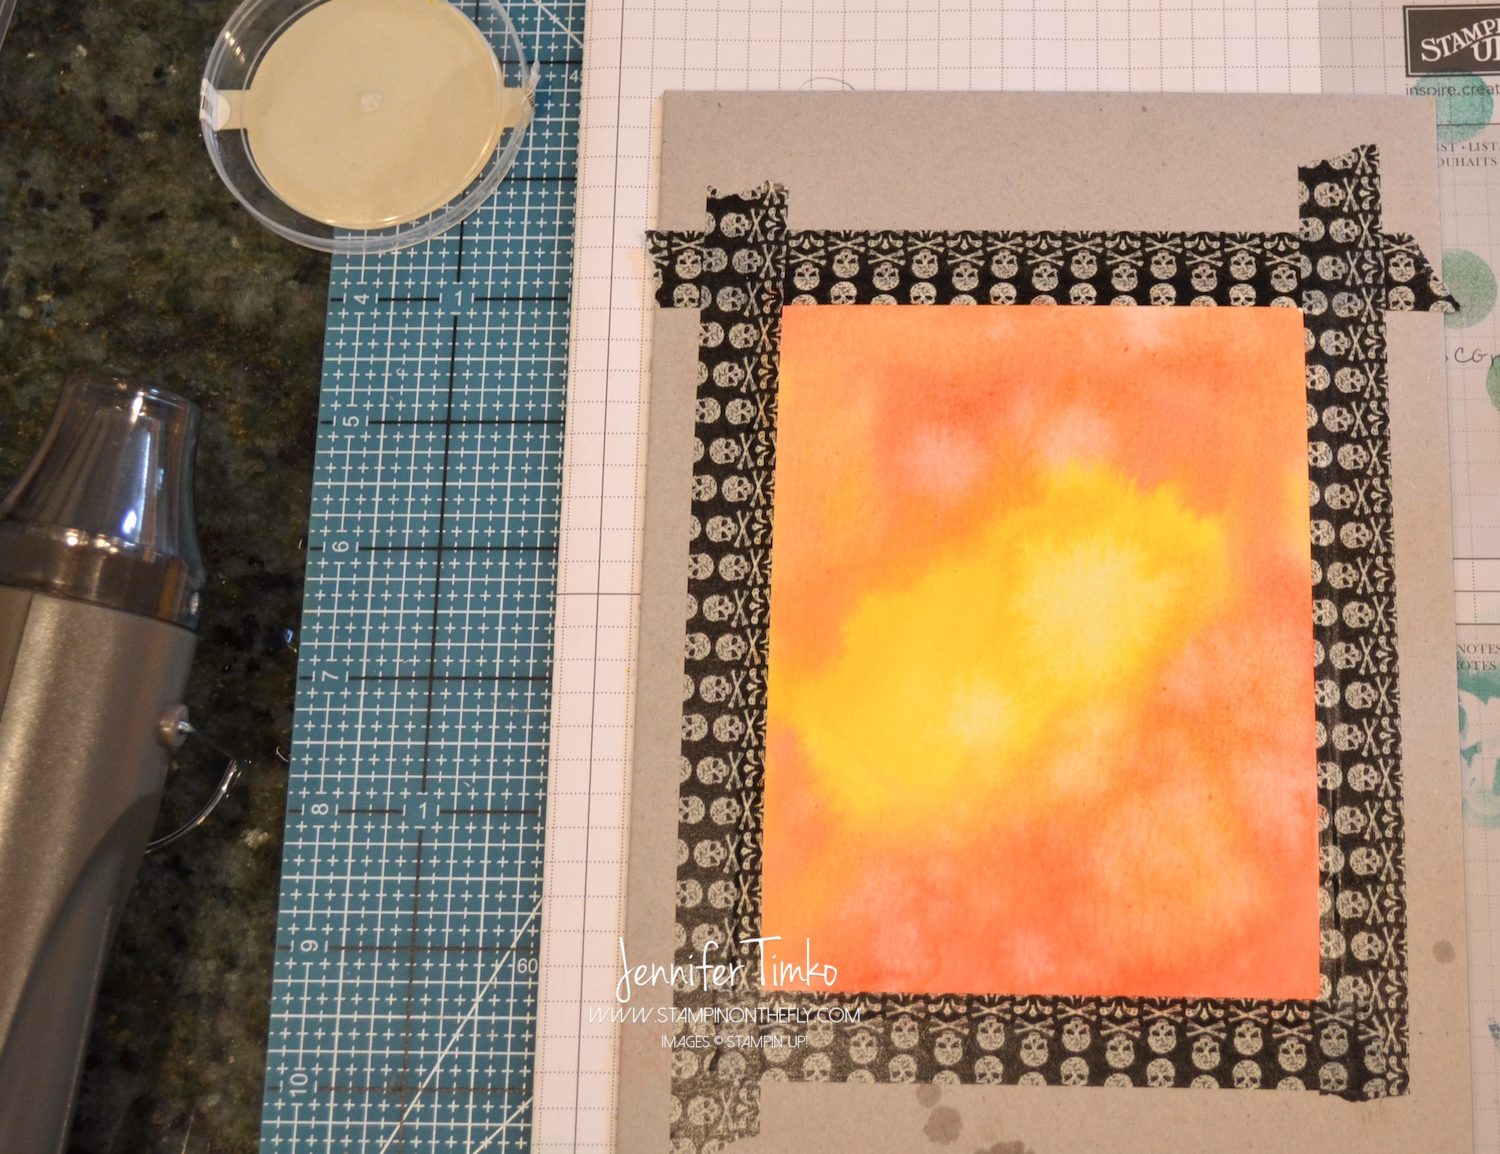
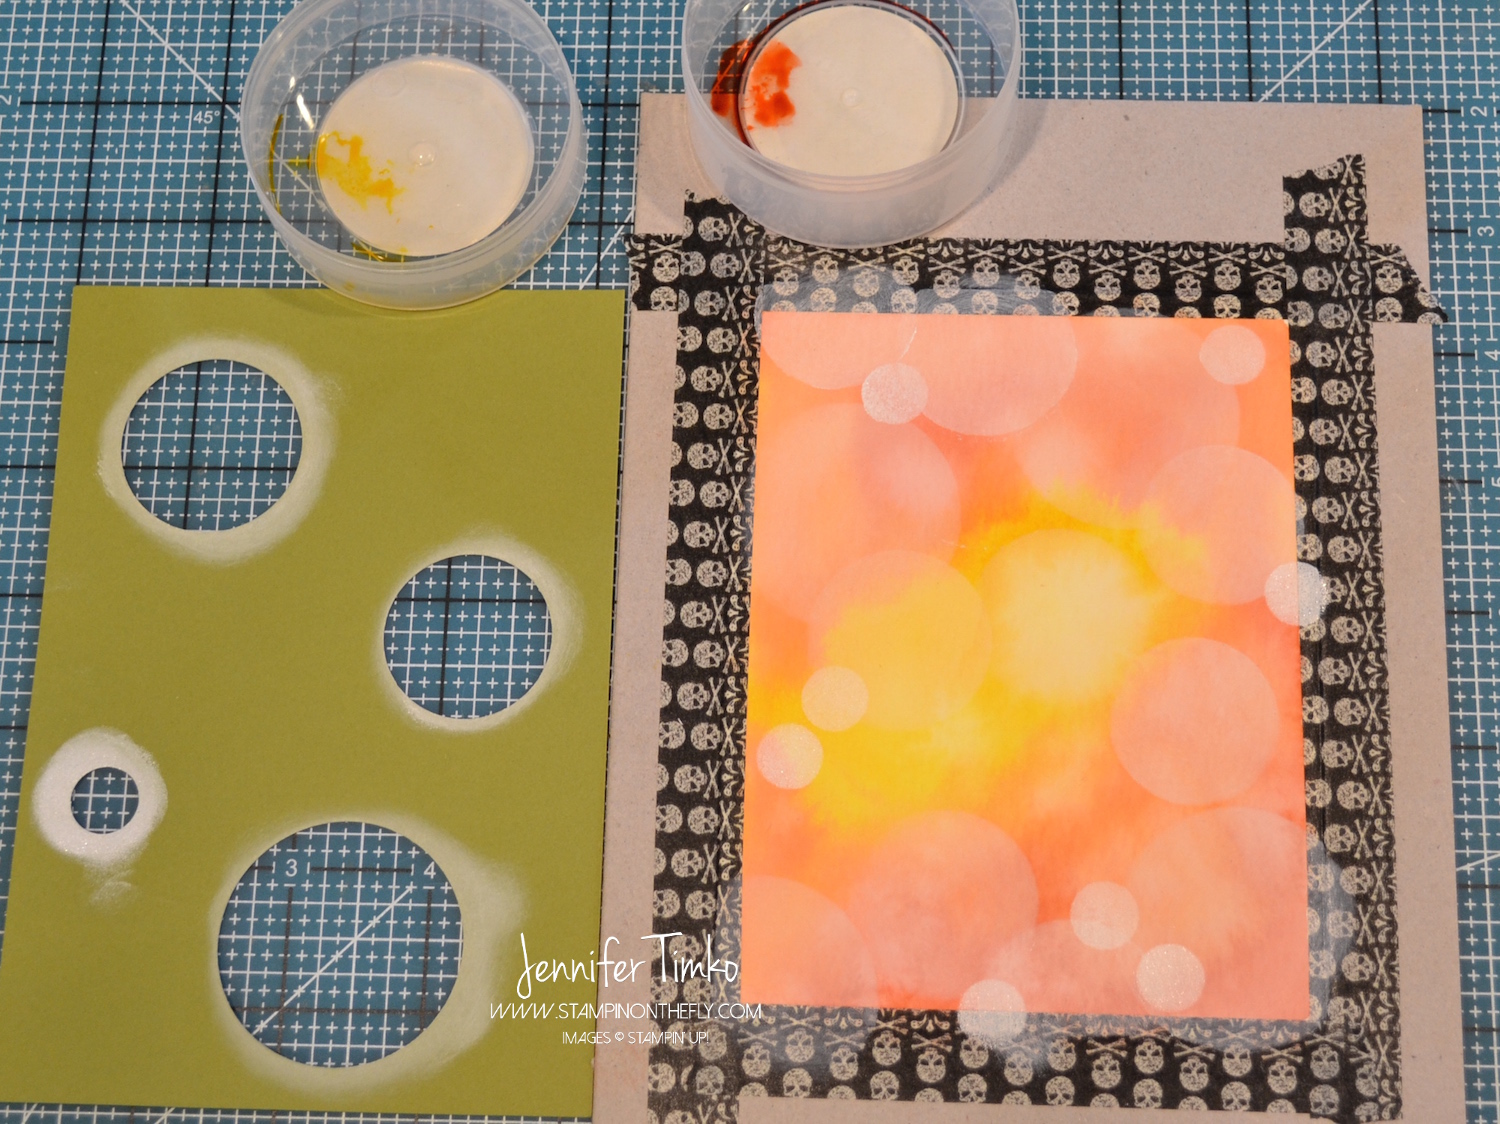
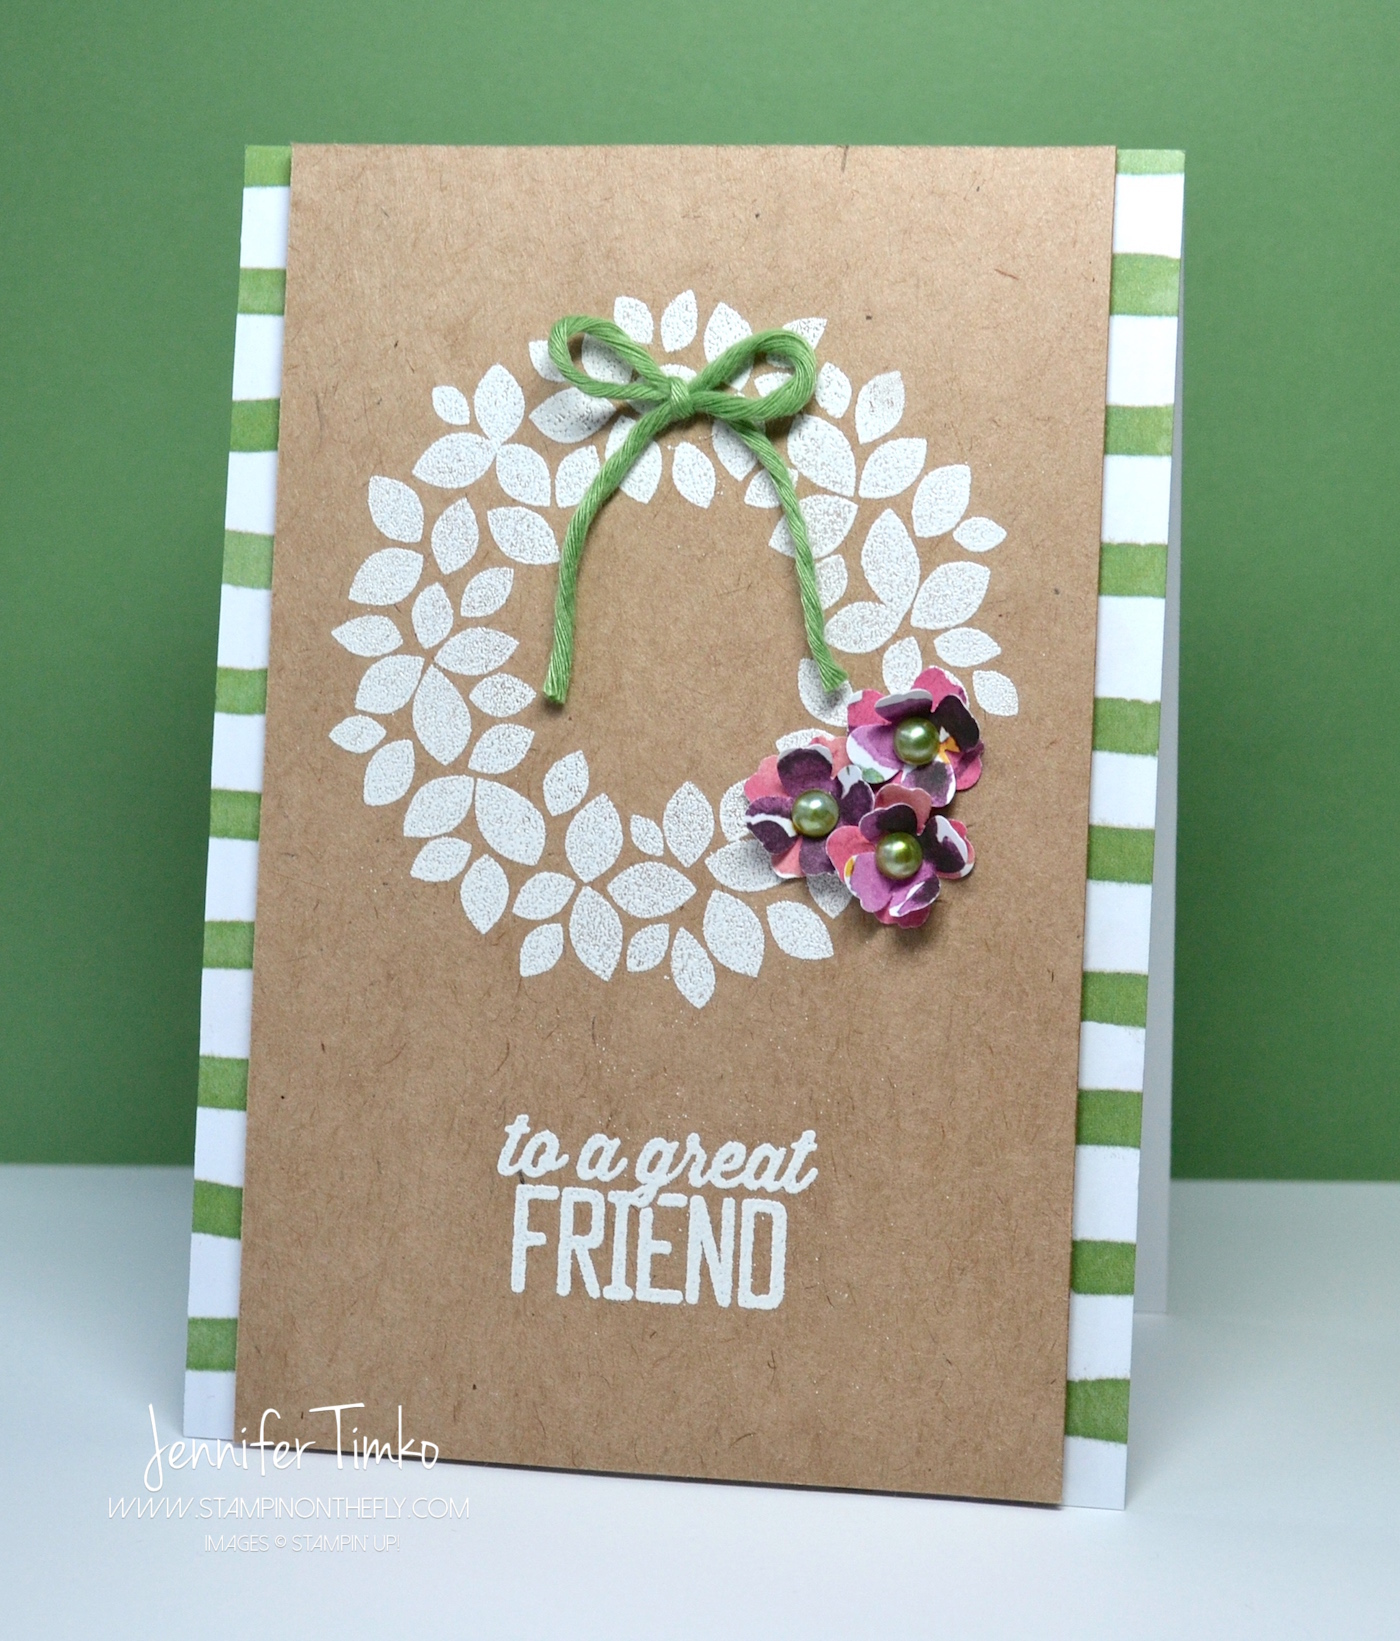
I am just obsessed with the watercolor look right now.  Can’t seem to get enough of it.  You know one of the great things about this technique?  It doesn’t have to be time consuming!  My card for today took very little time and I think it has a really pretty effect.  So how did I make it?  Watercolor paper does all the work, really.  You can swirl on color any old way and it is fabulous.  So, so forgiving too.  Don’t love what you put down?  Add a little more water and then dab it up with a paper towel.  I swirled on some Mossy Meadow and Lost Lagoon to create the background for this beautiful image from the hostess stamp set Bloom with Hope.  Then a little strategic placement on Rich Razzleberry ink behind where the flowers go.  Really, that is it.  To match the soft image, I added a layer of vellum over the front of my Pool Party base to give it that fuzzy quality.  To show you how easy it is, I created a video.

See, I told you!  Makes you look at those line images you have with a new eye.  This would be wonderful with the new Sale-a-bration set called Nature’s Perfection, I think.  What, you don’t know about the NEW and ADDED Sale-a-bration sets???!!!  Click here:  Sale-a-bration Additions.  You really don’t have to color them with precision all the time (although I love doing that too).  I hope you enjoy this card.  Let me know what you think…I love hearing your feedback!

Okay, off to go visit the awesome Mercedes Weber!  You will be wow’d, as always!

And you can click our logo above to get to the Fancy Friday Pinterest page!

6a00e54f94e01b883401b8d05f0bdc970c-320wi-2

Click HERE to purchase these wonderful Stampin’ Up products!

Stamps:   Bloom with Hope; Paper:  Watercolor, Pool Party, Vellum; Ink:  Mossy Meadoe, Lost Lagoon, Rich Razzleberry, Momento Black; Accessories:  Aquapainter, Paint Brush, Heat Tool, Stamp-a-ma-jig

Blog Signature 2015

Freshly Made Sketches #175

Freshly Made Sketches #175 published on 15 Comments on Freshly Made Sketches #175

I am so happy to share today’s card with you!  My friend Jen Brum has created such a fun sketch for us over at Freshly Made Sketches.  In honor of Jen’s, um, aversion to circles I have created a card that is all about circles.  *smile*  I hope she appreciates my sense of humor on it!

Jen Timko - FMS175 - Bokeh Wishes

So the bokeh technique is all about circles.  Or at least my version is.  Bokeh is a photography technique defined as the way a lens renders points of light.  The key is the blur effect.  Bokeh has also been all the rage in the stamping world for a while and I finally gave it a go.  I’ll tell you a bit about how I created the card and then I have photos on how I created the panel itself.  I stamped this sentiment from Butterfly Basic in Gold Encore Ink onto Vellum and then heat embossed it with Gold Stampin’ Emboss Powder.  Then I punched it out with my 2-1/2″ Circle Punch.  I love the way the vellum mimics the look of the inked circles!  I used a little bit of Tombow Multipurpose Adhesive on the vellum behind the words to attach the vellum invisibly and also tacked down the portion I folded over on the back side.  I had this Blushing Bride Gold Baker’s Twine left over from this month’s Paper Pumpkin kit and it worked perfectly here, don’t you think?  To go along with the gold, I added a Gold Mini Metallic Clothespin and Gold Sequin Trim.

Bokeh - Watercolor

Now for the panel.  You can click on the photos to expand them if needed.  I took watercolor paper and taped it to a piece of chipboard (the stuff that comes in kits to protect materials) using old washi tape.  Then using a paint brush I washed water over the whole panel.  I put a few drops of Daffodil Delight Reinker in a container and using the same wet brush, picked up the reinker and splatted it onto the paper.  Then I did the same with Calypso Coral Reinker.  On the places where is seemed really dark or too watery, I pounced on the paper with a paper towel to absorb some of the extra.  This leads to a mottle look and I feel like the mottling is key to success with the rest of the technique.  You can let it dry naturally or use the low setting of your heat tool.  You can see which one I chose (because I’m impatient).

Bokeh - Sponging

Here you can see my reinker containers (old button boxes).  Then using circle punches I made a template using card stock (punches listed in materials below).  If you have circle framelits, you can use them instead.  I grabbed a trusty sponge dauber and started adding on circles using White Craft Ink.  Bigger circles are lighter and smaller circles are darker.  You can use just the dauber for the small circles if you want but my precision with those is a bit lacking.  I liked the template better.  Just add circles until you have the effect you want.  Let that panel dry thoroughly again, pull it up and trim to size.  It really is MUCH easier than I expected!!  I used this video as a basis for mine and then just used Stampin’ Up stuff instead.

FMS Final 175-001Let me know if you have any questions about this!  Don’t be like me and put it off.  Pull out some of your favorite colors and give it a try!

The team has done their usual fantastic job with the sketch and I know you will have fun with it too.  Another classic in the making!  Thanks so much for stopping in today.   See you soon!

Click HERE to purchase these wonderful Stampin’ Up products!

Stamps:  Butterfly Basics; Paper:  Watercolor, White, White Vellum; Ink:  Daffodil Delight, Calypso Coral, Gold Encore, White Craft; Accessories:  Circle Punches – 1/2″, 1-1/4″, 1-3/8″, 1-3/4″, 2-1/2″; Mini Metallic Clothespins, Gold Sequin Trim, Blushing Bride Gold Baker’s Twine (Paper Pumpkin), Sponge Daubers, Heat Tool, Gold Stampin’ Emboss Powder

Blog Signature 2015


Blackberry Butterfly

Blackberry Butterfly published on 2 Comments on Blackberry Butterfly

Well, my card was ready for yesterday but not my post.  Hmmm…  Well, it happens, I guess.  My boys and I had a quick get away this weekend to Orlando.  Unknown to my mom who lives there, we had a surprise birthday party planned for her on Saturday!!  It was such fun and we managed to keep the surprise.  My boys were so worried they would give something away but they did great!  I made my mom a special card too, of course.  She love purple and she is the one who gave me my sewing machine so naturally I created this.

Blackberry ButterflyI had a tough time with the light getting a good picture before we had to leave but I think you can see the idea.  It seems prettier in person though.  The background splatter is from Gorgeous Grunge and is stamped in Gold Encore Ink.  Then I inked the butterfly from Butterfly Basics in Blackberry Bliss.  I hand cut this one out and then added on a gold metal button tied with a Vanilla Baker’s Twine that came in a Christmas card kit (these kits just keep giving).  I added some Venetian Crochet Trim and Blackberry Bliss Stitched Satin Ribbon underneath the butterfly.  The sentiment is from the same stamp set.

10498177_10204992492865672_186847248359245993_o

Quick post today but I thought I’d share a picture from our weekend.  This was taken at my mom’s church and I thought it was really nice.

So glad you stopped in today.  I’ll be back tomorrow with the latest from Freshly Made Sketches.  Hope your day is great!

Click HERE to purchase these wonderful Stampin’ Up products!

Stamps:  Butterfly Basics, Gorgeous Grunge; Paper:  Very Vanilla; Ink:  Blackberry Bliss, Gold Encore; Accessories: Sewing Machine, Venetian Crochet Trim, Blackberry Bliss Stitched Satin Ribbon, Basic Gold Metal Button, Vanilla Baker’s Twine

Blog Signature 2015


Ombre Thank You

Ombre Thank You published on 1 Comment on Ombre Thank You

You know sometimes you just need a quick thank you note.  Or a whole stack of quick thank you notes.  But quick doesn’t necessarily mean that they can’t be special now, does it?!  As I was working on my card for last Wednesday’s Freshly Made Sketches challenge, my youngest son was working on some thank you notes for his birthday presents.  With all the the winter weather days (I’d call them snow days but sometimes they come without snow…like today….again….), I have had no choice but to create with the kids “helping”.  In this case, he decided that he liked the colors I was using and oh, by the way, he needed some extra note cards.  So I made a few of these lickety-split.

Ombre Thank You

I took the already inky sponge daubers and created the ombre look on this fabulous sentiment.  Then I stamped right onto the ever-so-handy Note Cards.  If you don’t have a pack of these in your craft room, you just need to fix that.  Like now!  I cannot tell you how many time they have saved me.  Many times I hand them to the kids and they stamp happily and create amazing cards.  Or in this case, it provided a quick way to make sure we didn’t lose the momentum of writing thank you cards.  When you capture a 9 year old boy and get him writing, you just don’t let him stop until he is done!!

Ok, so I’m still typing but you could have like 10 of these done by now.  I think that I may make a pack of them in different colors to have on hand.  And another pack to have on hand as a gift.  Crazy how much I am liking something that is really so simple.  I hope you love this idea as much as I do.  Let me know what you think and then let me know what colors YOU think would be awesome together on this.

I have a really fabulous card all ready to share for you on Monday and I can hardly wait for you to see it.  So glad you stopped in today.  Hope you have a great weekend!

Click HERE to purchase these wonderful Stampin’ Up products!

Stamps:  Watercolor Thank You; Paper:  Whisper White Note Cards; Ink:  Pool Party, Bermuda Bay, Midnight Muse (ret); Accessories: Sponge Daubers

Blog Signature 2015


Freshly Made Sketches #174

Freshly Made Sketches #174 published on 12 Comments on Freshly Made Sketches #174

This week over at Freshly Made Sketches, the incredible Cindy Lovell is our sketch hostess.  Cindy has the most fabulous eye for design and detail.  I love her cards!  Of course it is no surprise that her design is perfect for lots of interpretations.  It is fantastic!

FMS174 - Triangles For You


I knew I wanted to use this graphic and fun stamp Dotty Angles when I saw the sketch.  But what to do with it?  And which shape, triangles or circles? After playing with it a bit, I thought I do a take on ombre stamping.  I sponged Pool Party, Bermuda Bay and Midnight Muse (retired In Color) inks onto the triangle stamp.  Makes for a pretty cool effect, don’t you think?  I chose the sentiment die from the Mini Treat Bag Thinlits and cut out a few from white card stock.  I used the inky sponge dauber already loaded with Bermuda Bay (from inking the stamp) to sponge color on the top layer.  You could used colored card stock but this effect is a little softer.  The sequins are from the Holiday Catalog (silver) and from Paper Pumpkin.  The darkest one is colored with a Night of Navy Blendabilities marker to make it match.

FMS Final 174-001

I think you are going to have fun with this sketch.  So many great ways to create with the angled panel and circle element.  The team does its usual magic and you will love their work!  I’ll be back Friday with a quick and easy card you are sure to like.  So glad you stopped in today.  Hope your day is great!

Click HERE to purchase these wonderful Stampin’ Up products!

Stamps:  Dotty Angles; Paper:  Neenah White; Ink:  Pool Party, Bermuda Bay, Midnight Muse (ret); Accessories:  Big Shot, Mini Treat Bag Thinlits, Sponge Daubers, Sequins, SSS Stitched Rectangles Die

Blog Signature 2015


Stamp Review Crew – Wondrous Wreath

Stamp Review Crew – Wondrous Wreath published on 14 Comments on Stamp Review Crew – Wondrous Wreath

SRC-Wondrous-Wreath-banner

I am so excited to be a part of this amazing group of Stampin’ Up demonstrators!  If you haven’t heard of “The Crew” yet, you are going to be so thrilled with this.  We are here to show you the versatility of one stamp set every time we hop (the 1st and 3rd Monday of each month).  We have a whole team of people and different stampers participate each time.  Like you, we look to find ways to maximize our investments and the single focus on one set allows you to see all the possibilities!  This week, our featured stamp is Wondrous Wreath.  Let me repeat that…Wondrous Wreath.  Yes, the one from the Holiday Catalog!  Did you know it is on the Returning Favorites List in the Occasions Catalog? Good news if you missed it before in all the holiday madness!

If you just came over from the lovely Yapha Mason, I’m so glad you are here!  If you want to see everyone who is hopping or if you get lost along the way, just click over to The Stamp Review Crew blog.

Jen Timko - SRC - Wondrous WreathThe best part about this stamp is the versatility!  It is not just for Christmas, that is for sure!  Just look at this adorable spring wreath and you can start to see how many variations you can make.  I stamped the wreath in Whisper White Craft Ink and embossed it with White Stampin’ Emboss Powder.  I added a sentiment from the Sale-a-bration set Simply Wonderful in the same way.  Then using the Painted Blooms DSP suite, I added the embellishments.  The Kraft card stock is cut to 3-1/2″ x 5-1/2″ and the striped DSP in the background is cut to 4″ x 5-1/2″.  That allows a practical cutting pattern for the 12″ x 12″ DSP and you can get 6 of these from one sheet.  Love that!  I punched the little flowers out of some scraps of a flower print from the DSP (like the arrow from last week’s FMS card) and doubled them up for these cute add-ons.  The Wild Wasabi twine is from the Painted Blooms Cotton Twine Pack and I colored the pearls to match with Blendabilities.  Just take the middle green from the Old Olive blendies and color first.  Then go back over the pearl with a touch of the darkest marker from the Soft Sky blendies pack.  You can custom blend with these!!  Oh how I adore this feature!  The striped DSP is attached to a white base then the Kraft layer is up on Dimensionals.  I attached the bow and the flowers using Crystal Effects as glue.  Super secure and dries fast!  Perfect for people like me with no patience!

I hope you like today’s card.  Like you, I can’t wait to see all that the others have for inspiration!  Hop on over to Rochelle Blok to continue on your way around.  So glad you dropped in today.  See you again soon!

Click HERE to purchase these wonderful Stampin’ Up products!

Stamps:  Wondrous Wreath, Simply Wonderful; Paper:  Painted Blooms DSP, Kraft; Ink:  White Craft Ink, Blendabilities – Old Olive, Soft Sky; Accessories:  Heat Tool, White Stampin’ Emboss Powder, Itty Bitty Accents Punch Pack, Basic Pearls, Painted Blooms Cotton Twine, Crystal Effects

SRC-Wondrous-Wreath-prevSRC-Wondrous-Wreath-next


Blog Signature 2015


You’re the Best

You’re the Best published on 1 Comment on You’re the Best

I had the privilege of going to a wonderful gathering of Stampin’ Up demonstrators last Saturday and wow was it fun!  My friend Rose-Ellen Eastman puts on an event that mimics the style of Stampin’ Up corporate events and it is always a treat to go!  She puts in a lot of work to make it happen.  This time I offered to help by creating a Make-n-Take.  Everyone seemed to like it and I hope you will too.  I also got to make other designers’ projects as make-n-takes and thought it would be fun to share!

You're the Best - Make and Take

My card shows how easy it is to incorporate stencils into a cute design.  I just love these little hearts from the Hearts and Stars Mask set.  I sponged on Soft Sky ink with a sponge dauber.  Then I punched a piece of the heart print from the Fancy Foil vellum and a piece of Soft Sky card stock using the Note Tag Punch.  I tied the Painted Blooms Twine onto a Mini Metallic Clothespin and cinched the two tags together.  The sentiment comes from the FREE Sale-a-bration set Simply Wonderful.  How do you get that set??  Easy.  Order the stuff used to make this card and you’ll have gifts that keep on giving in your craft stash.  AND you’ll get to choose the free stamp.

  • Note Tag Punch
  • Painted Blooms Twine
  • Fancy Foil Vellum (Silver)
  • Hearts & Stars Mask
  • Mini Metallic Clothespins
  • Sponge Daubers
  • Stampin’ Dimensionals

All this together comes to $50.65 and then you just choose the stamp set for free.  And all of these products can be used to make loads of other things!!  AWESOME!

One of the best things about demonstrator events is that we, of course, just have to make things while we are together.  This adorable little valentine treat bag was designed by the very talented Kim Fields for all of us to make.  I was privileged enough to see her original design.  Do to time constraints the twine was left off the project for the event (we made tons of stuff) but I could not resist adding it.  So I brought my bag home and finished it here so that I could copy Kim’s version completely.  Is this not totally fantastic??!!

Kim's Bag - Closed  Kim's Bag - Open

Our hostess Rose-Ellen really outdid herself with other projects and I just had to show you another favorite.  This adorable little lollipop holder was designed by her for us to make based on a project she saw at Leadership.  What was that??  Yes, you DO still have time to make a few of these before the 14th!!

Rose-Ellen's Treat

I hope these were worth the wait!  If you have any questions about any of the projects, just drop me a note and I’ll be happy to get you the info.  Want to participate in events like this one??  I’d love for you to join my team!  Send me an email or simply click on the tab at the top for more info.  Sale-A-Bration is such a great time to join and I’d love to have you take advantage of all the perks being a demonstrator can give!!

I’m so glad you stopped in today to visit.  I’m working on a project for a blog hop next week and I can’t wait to show you.  Until then, have a great day!

Click HERE to purchase these wonderful Stampin’ Up products!

Stamps:   Simply Wonderful (SAB), Hello Life, Hey Valentine; Paper:  Whisper White, Fancy Foil Silver Vellum, Stacked with Love DSP Pack, Basic Black, Real Red; Ink:  Soft Sky, Momento Black, Blendabilities – Coastal Cabana, Real Red, Pumpkin Pie; Accessories:  Note Tag Punch, Mini Metallic Clothespins, Painted Petals Twine, Hearts and Stars Mask, Sponge Daubers, Big Shot, Mini Gift Bag Thinlit, 2″ Circle Punch, Scalloped Circle Punch, Heart Punch, Black Baker’s Twine, Stacked with Love Washi Tape, Scalloped Tag Punch, Happy Heart Embossing Folder, 1/8″ Real Red Taffeta Ribbon

Blog Signature 2015

Freshly Made Sketches #173

Freshly Made Sketches #173 published on 8 Comments on Freshly Made Sketches #173


So a funny thing happened on the way to this week’s sketch.  Like many design teams, our Freshly Made Sketches team has a separate blog where we can upload sketches and challenges cards early in order to make the weekly challenge happen.  Kind of the magic behind of the scenes.  The team loads in their latest sketches and I convert them to final form in My Digital Studio.  Well, when Kim Singdahlsen uploaded her sketch, I got to work on getting it drawn.  After I got everything done and loaded on the DT page, I looked at the sketch and it was crooked.  Surely, I thought, I hadn’t mistakenly hit rotate??  Seriously??  So I went back to the sketch and no, I hadn’t.  I pulled out a real straight edge and held it to my screen and yep, it is straight.  So apparently Kim is so creative that she can not only concoct great sketches, she can invent optical illusions!!!  We all know she is a card making genius and now we just know that she is a multi-faceted genius!

FMS173 - Thank You


I started my card with the awesome new Painted Blooms DSP.  Both the stripe print and the Daffodil Delight background paper are from that pack.  Aren’t they pretty?!  I love the ombre variation in the stripes!  I decided to pair it up with a card out of the Project Life Everyday Adventure Kit.  That awesome little notebook paper print goes perfectly with the DSP and I didn’t have to cut a thing.  I stamped on the Watercolor Thank You stamp (a single) in Blackberry Bliss.  Then I added an arrow punched with the What’s Up Punch out of a flower print from the Painted Blooms DSP.  A Razzleberry button tied with Crushed Curry Baker’s Twine to finish.  I just love the look of this card….clean but with a sense of fun.

FMS Final 173-001

And here is our funny optical illusion sketch for the week.  I was relieved that the card itself didn’t take on the illusion of the sketch illustration!!  Ok, you KNOW you want to check it yourself.  Go ahead.  The outside rectangle is straight, I promise!!

The team has some fun inspiration for you and I think you are going to have a ball with this one….again.  I have to say (with only a little too much of a bragging voice) that the team has been on fire with the sketches lately!  And the gallery has been incredible as a result.  I am grateful for all the cool stuff I get to see every week as I see what you share.

Ok….so I have my make and take AND some cool samples from the Northern Virginia Regional Event I went to last week.  I finally got some pictures and have them edited so I really will have them up tomorrow.  Life just got away from me over the last couple of days and I could not seem to get the posts up.  But I did teach some awesome kids in 6th grade about the Women’s Airforce Service Pilots and did some other stuff for my boys.  Like working on Valentine’s!  I hope your week is going well and I look forward to having you stop in again tomorrow.  Until then, have a great day!

Click HERE to purchase these wonderful Stampin’ Up products!

Stamps:  Watercolor Thank You; Paper:  Painted Blooms DSP, PLxSU Everyday Adventure; Ink:  Blackberry Bliss; Accessories:  What’s Up Punch, Button,  Crushed Curry Baker’s Twine, Dimensionals

Blog Signature 2015


Celebrate

Celebrate published on 2 Comments on Celebrate

A quick and fun card for you today!  This was a card for my husband’s birthday last week.  Shaker cards are so great because they have an extra element of interest without being all “girly”.  While I love a girly card for sure, around my house I have a need for cards that skew to the masculine side.  I think this one hit the mark!

Celebrate


I used the Stacked with Love DSP Stack again.  Love these prints! Again, interesting but not too feminine.  I cut the frame out with the On Film Framelits and then cut a matching size out of the Window Sheets to fill the square.  I stamped the sentiment from Fabulous Four in Stazon Black Ink.  A little Black Baker’s Twine, a Cherry Cobbler Button and a fun bow (just like the one in my video tutorial from Wednesday).  Then I added some leftover white sequins from my December Paper Pumpkin and attached the frame with foam tape.  This is one of those cards that you could really tailor to the age and color preferences of the recipient.

Now….I’m off today to see my friend Rose-Ellen Eastman.  She is hosting a Northern Virginia demonstrator event tomorrow and I can’t wait.  I can’t wait enough that I’m going to go see what she is up to today.  *smile*  I’ll be back Sunday or Monday with one of the make and take cards from the event that I designed.  Until then, I hope you have a great weekend.  I appreciate you stopping in today!

Click HERE to purchase these wonderful Stampin’ Up products!

Stamp:   Fabulous Four; Paper:  Whisper White, Stacked with Love DSP Pack; Ink:  Stazon Black; Accessories:  Black Baker’s Twine, Cherry Cobbler Button, Big Shot, On Film Framelits, Sequins, Foam Tape

Blog Signature 2015

Freshly Made Sketches #172

Freshly Made Sketches #172 published on 8 Comments on Freshly Made Sketches #172

FMS Final 172-001

Well, didn’t I tell you that the sketch for this week at Freshly Made Sketches was great?!  My friend Linda Callahan  created this one for us and I love it.  The minute she sent it to me I knew we had yet another winner on our hands.  And we have so many cool variations this week from our team.

FMS172 - Love you

Have you ever had a technique that you’ve been wanting to try but somehow it keeps going to the back burner?  That is how I felt about partial die cutting with letter thinlits.  I know that there are products out there with certain words that create something like this but with this technique, you can use whatever word you want.  The Little Letter Thinlit Dies are PERFECT for this one!  I seem to have a bit of a theme going this week using the Stacked with Love DSP Stack.  I find that crafting seems to go like that for me sometimes.  I find something that works and I stick with it!!  As I was starting to figure out how to explain this technique I realized it was just easier to make a video tutorial.  So that is what I did!

As I said in the video, it took me a couple of tries to get the letters lined up just right so that I didn’t cut them out completely.  I recommend you practice once or twice with scrap paper before going to your DSP.  Having the thinnest held together with washi tape make it easy to repeat this and play with the idea.  Once you get the cutting part, the rest is easy and quick.

I have another card ready to share with you on Friday that uses this great paper again.  And then this weekend I’ll be going to a local demonstrator event and I’m sure I have fun things to share from there.  I have helped design a card for the get-together and plan to share with you on Sunday.  I seem to be getting back into the groove of stamping again and look forward to more this week.  Until Friday, I hope you have a great week!  Thanks for stopping in.

Click HERE to purchase these wonderful Stampin’ Up products!

Stamps:  Forever Florals (sentiment); Paper:  Stacked with Love DSP Stack, Whisper White; Ink:  Momento Tuxedo Black; Accessories:  Big Shot, Little Letters Thinlits, Black Baker’s Twine, Buttons

Blog Signature 2015


Primary Sidebar