Skip to content

Birthday Flower

Birthday Flower published on 10 Comments on Birthday Flower

I had a little extra stamping time yesterday so I was able to play the Stampin’ Royalty Challenge this week.  The design team there are some of my favorite stampers and I love to play their challenge!  This week is a sketch (one of my favorite challenges to do).

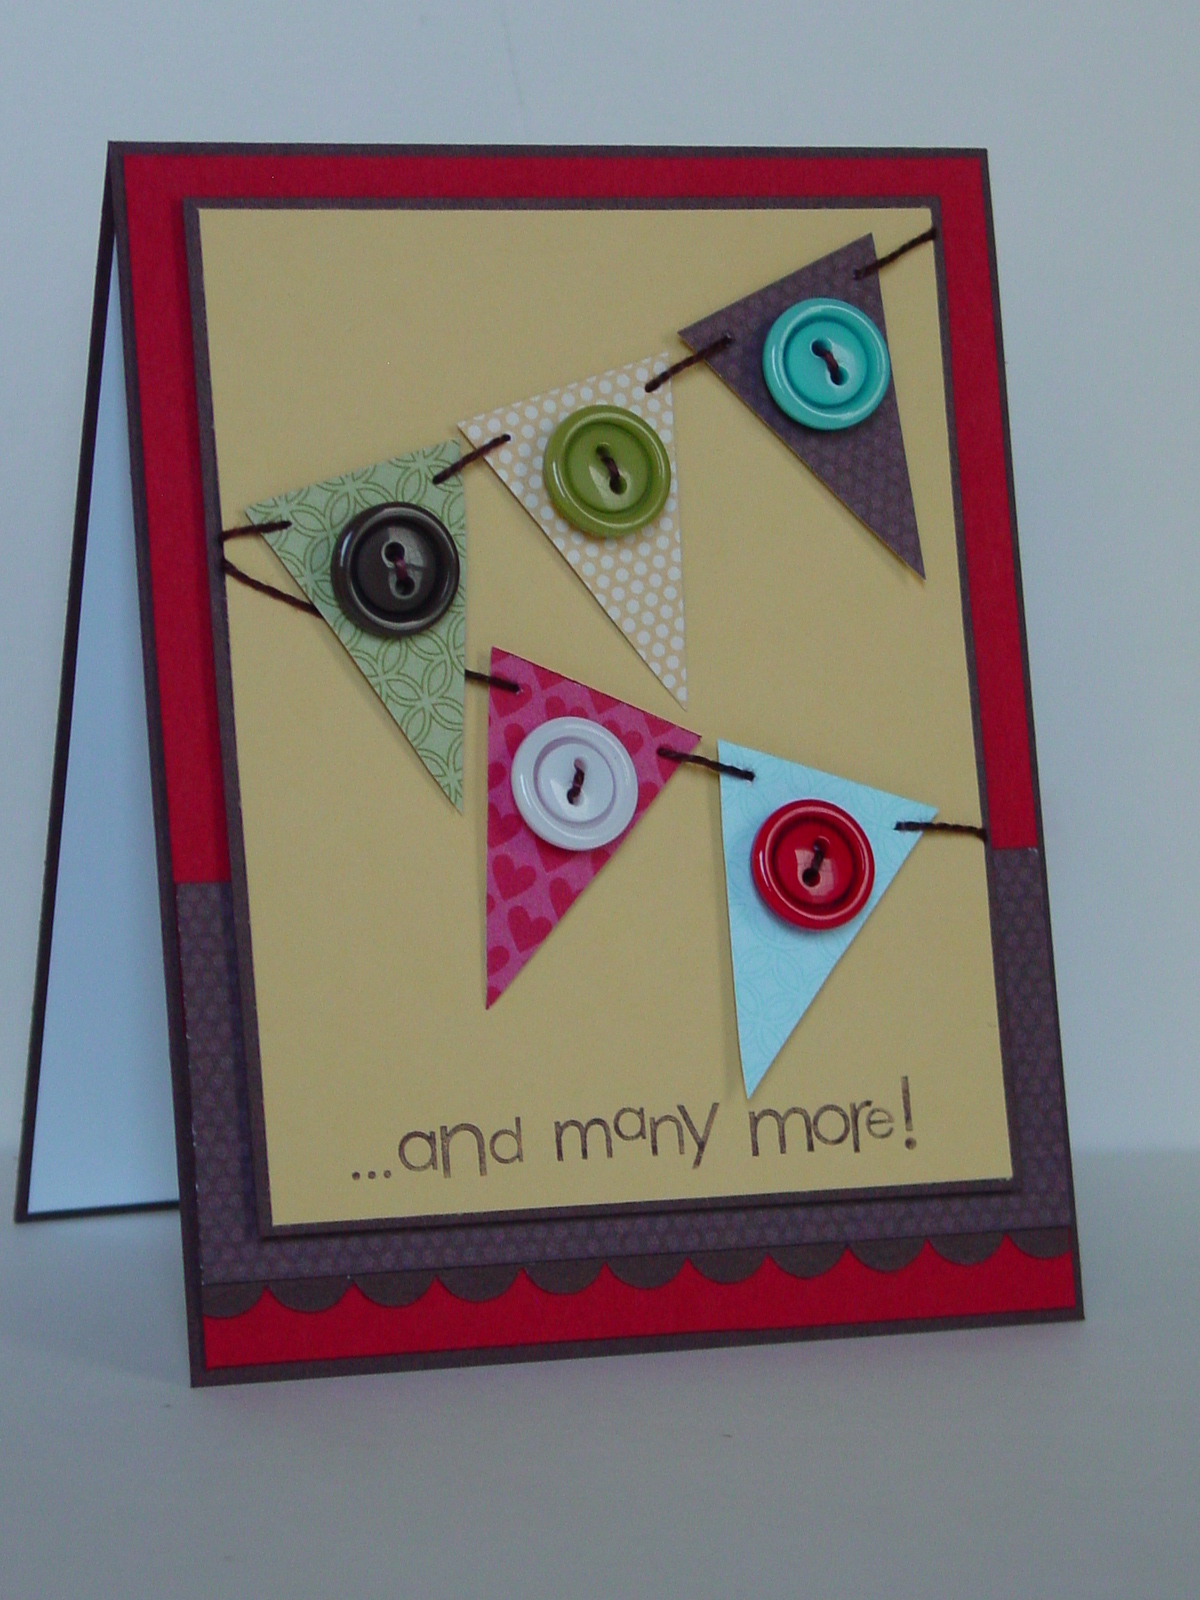
I started with the new Fruit & Flowers set and the matching Berry Blossoms DSP.  After a few false starts, I settled on the flower as the focal stamp and the Early Espresso dots paper as the print.  The sentiment is from Up, Up and Away (another new favorite) with the tiny flower from Fruit & Flowers and I finished it up with some Lucky Limeade Ruffled Ribbon.  I can’t seem to say enough about how much I like this new ribbon.  It ties so well and gives that popular ruffled look with no extra work!  I stamped another one of the big flowers inside to give it a finished feeling.  I do this alot but you can actually see it in this picture.

Well, off to the rest of my weekend activities.  Hope you get some extra time to stamp, too!  See you again on Tuesday for the next SU Only Challenge!

Stamps:  Fruit & Flowers, Up, Up and Away; Paper:  Berry Blossoms DSP, Calypso Coral, Early Espresso, Whisper White; Ink:  Calypso Coral, Lucky Limeade, Early Espresso; Accessories:  1 1/4″ Circle Punch, 1 3/8″ Circle Punch, Lucky Limeade Ruffled Ribbon, Dimensionals

All products are Stampin’ Up!

ColorLab 47

ColorLab 47 published on 13 Comments on ColorLab 47

Hooray for the Red, White and Blue!!  Okay, in this case we have Red, Blue and Blue (with a little Naturals Ivory) but you get the point.  The ColorLab Challenge is timely, as usual…ready for the Independence Day holiday here in the U.S.  The stampers over at Stampin’ Royalty are celebrating their patriotism and this color selection fit right in for me.

You may have noticed that pinwheels are showing up everywhere so I decided to give it a try.  I took some Not Quite Navy card stock and sponged on Night of Navy ink to make it pop.  The DSP is from the retiring Jolly Holiday paper – one last showing!  You’ll notice that I threaded a thin strip through the buttons too.  Today is the LAST DAY to order any retiring items so don’t put it off any longer!!  The layout comes from the Fall-to Layout Challenge.

I hope you are ready for the new catalog to launch…my order is standing by (and getting longer).  With any luck, you’ll start seeing cards with some new products in week or so!  Off for some summer fun with the kids today!  Have a great rest of your week!

Stamp:  Inviting; Paper:  Jolly Holiday (retiring), Not Quite Navy, Naturals Ivory; Ink:  Cherry Cobbler, Night of Navy; Accessories:  Neutrals Designer Buttons, Dimensionals, Sticky Strip, Piercing Tool, Mat Pack

All products are Stampin’ Up!

Just because…

Just because… published on 9 Comments on Just because…

I feel like lately every card I make has had a purpose, either a class or a design team card.  Unfortunately, I haven’t had time to stamp “just because” and I really needed it!  I had some time this week to search around some of my favorite sites and I found this great layout from Stampin’ Royalty:

In knew it was perfect for just playing around.  I needed a change of color palette so I pulled out my Greenhouse Gala DSP and found just the right print.

I love these flowers and they really demand to be the focal point of a card.  This layout really highlights the DSP (although a stamped panel would be beautiful too).  I took the bow and words off center which seemed to balance the print better.  Not sure why, but making this card made me really happy.  It came together quickly and I love the pop of Pumpkin Pie.

I hope you get some “just because” stamping time soon!  Thanks for stopping in today.  I’m looking forward to a busy weekend…soccer, an 8 year old birthday party and my mom in town!  Hope your Memorial Day weekend is happy and safe.  Don’t forget to remember this weekend!  I’m thankful for those who serve and those who have sacrificed.

Stamp:  Teeny Tiny Wishes; Paper:  Greenhouse Gala DSP, Pear Pizzazz, Early Espresso; Ink:  Early Espresso; Accessories:  Word Window Punch, Modern Label Punch, Early Espresso Satin Ribbon, Subtles Buttons, White Baker’s Twine, Dimensionals

All products are Stampin’ Up!

Mother’s Day Rose

Mother’s Day Rose published on 11 Comments on Mother’s Day Rose

Today I am sharing another card from my class for Those Wonderful Women.  This was our Mother’s Day card for the class.  It is also for Stampin’ Royalty’s “Let’s Get Wet” watercolor challenge.

I had the hardest time getting a picture for some reason and the rose looks a little splotchy here.  It is prettier in person.  The coloring from the class participants was absolutely gorgeous!    Now this is as close as I come to a CASE (Copy and Share Everything) and I used this lovely card from Renee Van Stralen at Stamping for Sanity.  Her card is so stunning!  I simplified a little by leaving the back layer as one piece and keeping it monochromatic.    I scrunched up the Rose Red Seam Binding behind the rose and added the Rose Red frame layers behind each Very Vanilla panel.  The sentiment comes from the Teeny Tiny Wishes word set.

My children have Easter Break this week so my stamping may be sporadic!  I also have my stamp clubs and I am so excited to meet with them.  The weather here in Virginia finally feels like spring and I am putting in the rest of my vegetable garden over the next couple of days…what fun!  I hope your week is fantastic and I’ll see you again soon.

Stamps:  Fifth Avenue Floral, Teeny Tiny Wishes; Paper:  Rose Red, Very Vanilla; Ink:  Rose Red; Accessories:  Rose Red Seam Binding, Basic Pearls Blender Pen, Big Shot, Manhattan Flower Embossing Folder, Dimensionals

All products are Stampin’ Up!

ColorLab 29

ColorLab 29 published on 18 Comments on ColorLab 29

Razzleberry…hmmmm….what to do with Razzleberry??  This week’s ColorLab Challenge colors were interesting to me.  What do you think?

Now I must say that I love the idea of combining Old Olive and Pear Pizzazz since they are such sister greens so the Razzleberry became a little less intimidating.  When I am a little stumped with one element of a card, I usually go find a good layout.  For me, it helps me see what to do next.  Sure enough, there is a great basic layout over at Stampin’ 411 – SSC190.  Once I saw that I knew I wanted to use the Pear DSP from Greenhouse Gala for the bottom panel.  Putting Old Olive behind it looked great so then I layered everything with Rich Razzleberry.

  My image panel was completed last and I’ll admit this wasn’t the first panel created.  I was making it way too hard!!  I pulled out this wonderful flower from Friends Never Fade and inked it up with my Stampin’ Write Markers in the three challenge colors.  I knew I was on to something!  I added the phrase from Say It Simply (Occasions Mini) and was left needing one more element.  Given that I rarely use Rich Razzleberry, I don’t have any Taffeta Ribbon in that color.  But I can make any color I want!!  I dampened a piece of White Taffeta Ribbon and inked up the ribbon using my marker.  I then rubbed the color around a little to even it out.

Hint:  Unless you want Razzleberry fingers all day, you may want to use a paper towel or protective gloves when handling the damp ribbon (ask me how I know!).  For really saturated color, you may need to apply your ink twice.

Recently, I won some blog candy from Stampin’ Celebration and the little Olive clip was in my box of treasures.  I am so happy that I could use it for this!  I popped the image panel up on Dimensionals and I am happy with the result.  This is why you should try color challenges especially when one of the colors is “out of your box”.  You end up making a card you might never have considered.  Since I used my markers on both the flower image and the ribbon, this qualifies for Stampin’ Royalty’s Mark It Up Challenge this week.

Glad to see you today.  Make sure to check out the other fantastic work over at ColorLab.  I hope to have something else ready to post this weekend but I’ll definitely be back next Tuesday with the next SU Only Challenge.  See you soon!

Stamps:  Friends Never Fade, Say It Simply; Paper:  Greenhouse Gala DSP, Old Olive, Rich Razzleberry, Whisper White; Ink:  Rich Razzleberry, Pear Pizzazz, Old Olive; Accessories:  White Taffeta Ribbon (dyed), Old Olive Library Clip (retired), Dimensionals

All products are Stampin’ Up!

Valentine-a-pa-looza!!

Valentine-a-pa-looza!! published on 12 Comments on Valentine-a-pa-looza!!

It was a busy weekend around my house.  In typical style, I was working last minute on Valentine’s Day treats for my boys’ classes and their teachers.  Not sure why but this always seems to be something I put off.  I started out with the treats for the kids by pulling out an old set called Mini Messages.  This is one that I bought early in my stamping life and never knew quite what to do with it.  Inspiration hit and off I went!

I stamped the “my friend” script in Soft Suede on Very Vanilla and punched it out with a Large Tag punch.  I then stamped the heart in Cherry Cobbler and cut it out.  Yes, it would have been loads easier if I had used any of our large variety of heart punches but sadly, none live at my house (this WILL be fixed!!).  The Extra-Large Tag Punch was used on Cherry Cobbler paper and I just had to assemble.  I put some chocolate into Medium Cellophane Bags, punched a hole in the tags with a 1/16″ Circle Punch and tied them closed with Vanilla 1/8″ Taffeta Ribbon.  Easy and done!

Being a demonstrator has so many cool advantages and one was that we received a sample of the Love Impressions Rub-Ons as a free gift from Stampin’ Up!  Before I went to work on cards for the teachers, I wanted to make two Valentine’s for my sweet sons.  The front card is one of those.  It uses the FTL127 layout which seemed perfect for this.  There is absolutely no stamping on either of these cards.  It is all rub-ons (even on the inside of the card)!  I put the heart balloons on Whisper White card stock and cut them out so that I could pop them up on Dimensionals.  The heart paper is from the Play Date DSP set.  When I saw Stampin’ Celebration’s inspiration piece this week, I knew I’d use the XOXO balloon for it!  Don’t forget to take a look at all the cool Valentine’s Day goodies they created!

Both of the cards here were used for my sons’ teachers (of course some treats were included for them too).  All of these cards qualify for one of my favorite challenges, Stampin’ Royalty.  Their SR#58 is Hearts, Hearts and More Hearts and that sums up my crafting this weekend!

Thanks for stopping by to see my crazy Valentine-a-pa-looza weekend results.  I hope your day is a happy one!

Cards:

Stamps:  None; Paper:  Whisper White, Basic Gray, Real Red, Play Date DSP; Ink:  None; Accessories:  Love Impressions Rub-ons (Occasions Mini), Dimensionals, Brights Buttons, Thread (non-SU)

All products are Stampin’ Up unless otherwise indicated!

Fabulous Wishes

Fabulous Wishes published on 13 Comments on Fabulous Wishes

Today I was inspired by all kinds of challenges and actually managed to group three of them together!  You may notice that I have been using a lot of hostess sets with my cards and today is no different.  This is to remind you of how many amazing sets are available FREE!  Oh, I love free!  With Sale-a-bration right around the corner and the new Occasions Mini already available, now is a great time to become a hostess. 

I am sending out the last of my thank-you cards today (so far, so good on the resolution!) and now want to get ahead on some upcoming birthdays.  Perfect timing since Stampin’ Royalty is celebrating their birthday with a birthday card challenge.  Arielle is their new Goddess so I thought it fitting to use her ColourQ Challenge #66:


Beautiful colors, aren’t they??  Finally, I used the Splitcoaststampers Sketch Challenge 314 for my layout.

I don’t have any Soft Sky so I substituted with Baja Breeze.  I think it has the same feel to it.  I used the Framed Tulips Embossing Folder again but created a rectangle using a similar method as Sharon Field did at Created By You.  My rectangle is 2 1/2″ x 4 1/8″.  I simply used the short side of the folder instead of the long one.  My flowers are one of the two-step stamps from Fast & Fabulous (hostess level 2).  I started by inking with So Saffron and Daffodil Delight and then added Baja Breeze (these were all Stampin’ Write markers).  I took a sponge dauber to the stamp to soften any edges to the colors.  The outline was stamped in Basic Black.  A little “flag” was created by snipping a rectangle and tucking the still square end under a black button (Neutrals Designer Buttons).  I colored my thread with the Baja Breeze marker.  The image panel is popped up on dimensionals and another dimensional tucked under the raised section of the flag.  The beautiful paper is from the main catalog’s Greenhouse Gala DSP.

I’ll be back tomorrow with another beautiful color combination from the ColorLab Color Challenge.  Thanks for stopping in…see you soon!

Stamps:  Teeny Tiny Wishes, Fast & Fabulous; Paper:  Daffodil Delight, Basic Black, Greenhouse Gala DSP, Whisper White; Ink:  So Saffron, Daffodil Delight, Baja Breeze, Basic Black; Accessories:  Neutrals Designer Buttons, Stamp-a-ma-jig, Sponge Dauber, Dimensionals, Thread (non-SU)

All products Stampin’ Up unless otherwise indicated.

…Fa, la, la, la, la…

…Fa, la, la, la, la… published on 13 Comments on …Fa, la, la, la, la…

My thanks to SUO Challenges and Stampin’ Royalty for choosing this wreath as the SUO Top 3 and a Goddess Pick!!  All the projects were stunning and I am thrilled to be chosen!

Sing along with me!  Deck the Halls with fabric and ribbon, fa la la la la, la la la la!!  Or, just use Deck the Halls fabric and Seam Binding ribbon to make something fabulous!  Conveniently enough, there are three challenges this week which want you to use fabric or ribbon.  The first is the SUO Challenge #4 which asks you to use Fabric or Waffle Paper on your project.  The second is from Stampin’ Royalty with the theme Ribbons, Ribbons, Ribbons.  Last is WT293 (Ways to Use It) over at Splitcoaststampers.  Ever since seeing the new fabric offering from Stampin’ Up, I have had the idea of a wreath spinning around in my head.  You must understand that this is significant since I don’t really sew!  My mother is a quilter and makes the most beautiful things but…yes, I don’t really sew.  That meant my wreath had to be a no-sew project.  I had a pretty good idea of what to do for the wreath itself but when I saw these rosette flowers created by Betty at Kitty Stamp, I knew this was the perfect embellishment.  I have to make sure that I give credit to my mom.  When I first made this, it only had three flowers.  I sent the picture to my mom for an honest critique and she told me to add two more for a better balance.  She was right, don’t you think??!!  I am in love with the clean lines of this wreath! 

Here is a close-up of the flowers:

The best part is that I can actually make two of these out of one package of fabric and still have some of the Cherry/Vanilla fabric left for other uses. 

This wreath will be part of a  gift class I am offering in November.  Please forgive me if I hold onto the specifics until that class is over.  I can’t begin to tell you how lovely this fabric is in person.  In fact, getting this inspired me to finally give in on the Deck the Halls DSP.  I know…it is shocking that I held off as long as I as i did!  I hope this starts getting you into the spirit of creating and giving your “Handmade Holiday” gifts this season (don’t forget the Handmade Holiday bundles listed on my sidebar)!!

Fabric:  Deck the Halls; Ribbon:  Cherry Cobbler Seam Binding; SU Accessories:  Sticky Pages, 1 3/4″ Circle Punch, Mini Glue Dots; Non SU items:  Wreath form, pins

All products are Stampin’ Up unless otherwise indicated.

Stampin' Royalty Guest Designer

Stampin' Royalty Guest Designer published on 9 Comments on Stampin' Royalty Guest Designer

Yep, that’s me!  A Stampin’ Royalty Guest Designer!  Wow!!  Imagine my surprise when I got the e-mail asking me to do this.  I have never had the honor of being a designer so this was really big for me! (Yes, lots of exclamation points)  After my immediate reply to say yes, I had to worry about living up to the standard set by the Goddesses.  Before I got too panic-stricken, Sandra sent me this lovely picture as an inspiration challenge (you’ll recognize it from the catalog) and I knew this would be fun:

These little pennants are so cute!  I loved them the first time I paged through the catalog.  I started thinking about what to make and I couldn’t get the Birthday Bash Suite items (p. 52-53 IBC) out of my head.  Soooo….I went with it.  Using the Party This Way pennant as my guide, I cut out some triangles from my Play Date DSP and strung them together much like the little bucket on pg. 52.  The thread was dyed using my Chocolate Chip marker and I punched holes with my Paper-Piercing Tool to make it easy (and uniform).  Before I attached my banners, the words from the tag punch in Party Hearty were stamped on the So Saffron panel.  I’m sure you can tell that I used my Stamp-a-ma-jig to make that happen (what would I do without it??).  I then attached each pennant with a dimensional.  Something was still missing and I realized that part of what I love about the inspiration picture was the buttons.  So out came my Brights and Neutrals Designer Buttons!  Finally, I cut another panel from the Play Date DSP and added a border with my Scallop Edge Border Punch to mimic the scallop edges of the large pennants in the picture.

I just love the colors in this!!  It will be going to a dear friend of mine for her son who turns 1 next week.  How fast that first year goes! 

Thank you so much to the Goddesses for letting me join them this week.  Make sure you go see all the lovely work they have done with this challenge!  Thanks for stopping by…have a great rest of your week.

Stamp:  Party Hearty, Party This Way (as a guide); Paper:  Play Date DSP, Real Red, So Saffron, Chocolate Chip; Ink:  Chocolate Chip; Accessories:  Brights and Neutrals Designer Buttons, Stamp-a-ma-jig, Dimensionals, Scallop Edge Punch, Thread

All products are Stampin’ Up!

Monochromatic Wish

Monochromatic Wish published on No Comments on Monochromatic Wish

I haven’t been posting this week because I have been working on some projects for a Blog Hop coming up this weekend.  I am participating in the Stampin’ Addicts Hop this weekend featuring products from Stampin’ Up’s new Holiday Mini.  My set is Rejoicing in Christmas and I have had so much fun it.  Here is a sneak peek:

Lots of sparkle, yes indeed!!  Make sure you drop back by this weekend.

Now for today’s post I have made another Christmas card using a beautiful set called A Wish for Peace.  I used the Sketch Challenge 295 from Splitcoaststampers and the Stampin’ Royalty challenge #34, Monochromatic Neutrals.  I chose brown as my neutral (big surprise) and started with Naturals Ivory paper.  I stamped the church image and then sponged on Sahara Sand, Soft Suede and Early Espresso ink for the sky.  Hard to see in the picture but I used Champagne Mist Shimmer Paint for the church and Frost White Shimmer Paint for the ground.  Finally, I used some Smooch Spritz on the whole image.  Pulled out the Square Lattice embossing folder (well, that would assume that it had been put away, but you understand), tied on the button with Linen Thread and attached the Espresso Satin Ribbon.  Here is the final result:

This card is going right into the stash for my Operation Write Home Challenge.  It came together quickly so I’ll probably make a few more just like it!

That’s it for today.  Make sure to stop back by on Friday (or during the weekend!).  Have a great Wednesday!

Stamp:  A Wish For Peace; Paper:  Naturals Ivory, Soft Suede, Early Espresso; Ink:  Soft Suede, Early Espresso, Sahara Sand; Accessories:  Big Shot, Square Lattice Impressions Folder, Shimmer Paints, Smooch Spritz, Espresso Satin Ribbon, Linen Thread, Neutrals Designer Buttons

All products are Stampin’ Up!

Primary Sidebar