Skip to content

Petal Parade – Mini Paint Can

Petal Parade – Mini Paint Can published on 3 Comments on Petal Parade – Mini Paint Can

I hope that your weekend was wonderful!  Mine was pretty busy.  I had some work to do with United and then was home to celebrate my youngest’s birthday yesterday.  Made lots of Whoopie Pie Cookies for him to take to school today to celebrate with his friends.

I have another of my Leadership Display projects to share today.  This one used the Petal Parade stamp set combined with the Sweet Sorbet DSP to create a fun little treat container.

Petal Parade - Mini Paint Can

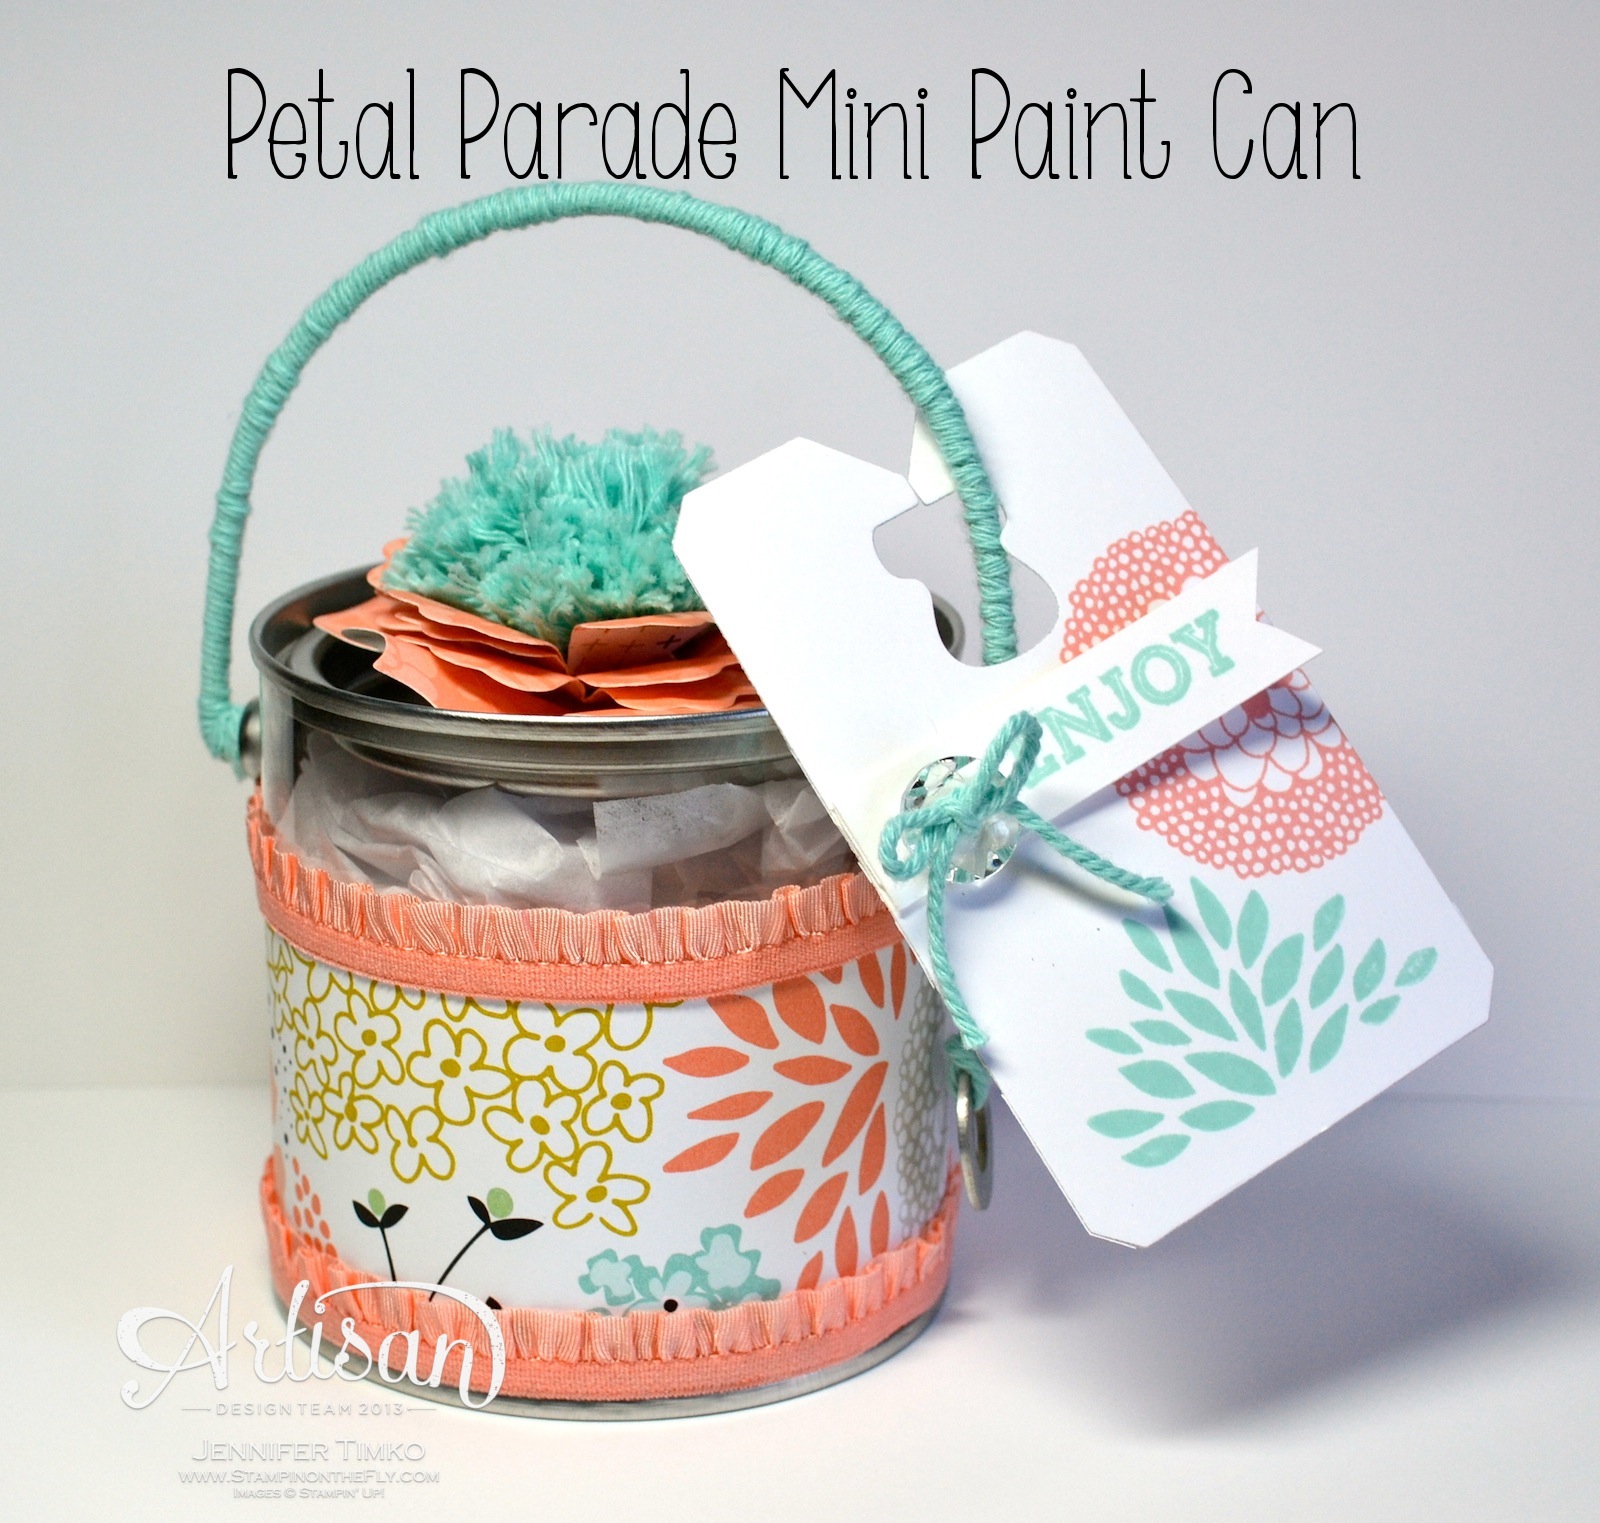
I love mini paint cans and the new Sale-a-bration (SAB) products make one so fun to decorate.  I started by taking a print from the Sweet Sorbet DSP and wrapping it around the can.  I cut it narrow enough to fall right under the little handle attachment places.  The DSP is attached using Sticky Strip.  Then I added on some Crisp Cantaloupe Ruffled Ribbon which is attached using Multipurpose Glue.  Already super cute if you leave it at that!  But I could not stop, lol!  I cut out some flowers using the Fun Flowers Die using my Big Shot and some more of the paper from Sweet Sorbet.

Petal Parade - Mini Paint Can Top

In order to give the flowers a little more dimension, all I did was spritz them with a bit of water and form them on top of the cap of my Multipurpose Glue.  Once dry, they keep their shape.  So easy but it makes a difference!  Then using the twine from the Sweet Sorbet Accessory pack I started working on the flower center.  I simply wrapped the twine around two fingers until I thought it was thick enough.  Pulled it off my fingers and tied in the middle with another piece of twine.  Cut the looped ends to the desired length and fluffed.  I attached it to the flower using Crystal Effects as glue.  After removing the handle, I took more twine and wrapped the handle.  A Glue dot at the beginning and end does the trick for holding it in place and then re-attach the handle.  I thought a fun tag would complete it so I stamped using the Petal Parade set using the colors in the paper (Crisp Cantaloupe and Pool Party) then cut out the tag with my Chalk Talk Framelits.  A little banner made with Oh Goodie (carried over from the Holiday Catalog) and a Vintage Faceted Button tied with a little more twine to finish.  The would be pretty for so many spring occasions and not hard to make a bunch of them!

I hope you like this one.  I hope to be back a little later today with a bonus project (hint…it will be on the Stampin’ Up Blog first).  Definitely back tomorrow with the latest Artisan Wednesday Wow.  The team will be giving you details on the projects shown in the Stampin’ Up Facebook Gallery last Friday.

The rest of the team is showing their Leadership Display Board projects as well so make sure you take a look!

Here is the rest of the Artisan Design Team:


Click HERE to purchase wonderful Stampin’ Up products.

Blog Signature 2014-001

You’re Lovely – Live Happy

You’re Lovely – Live Happy published on No Comments on You’re Lovely – Live Happy

I have my final Leadership Display project of the week to share with you today.  I think this Sale-a-bration set is wonderful and it has such flexibility.  The pretty flowers are so easy to use, of course, but I wanted to make a card that showcased the sentiments and the little flower border.

You're Lovely - Live Happy

I chose to make a pretty clean card that is all about symmetry.  Using my trusty Stamp-a-ma-jig I created the rectangle using the border stamp (it is so easy with that awesome tool).  I inked it up with Early Espresso and created layers with Very Vanilla and Early Espresso card stock.  The pattern is the Summer Starfruit pattern in the Sweet Sorbet DSP (Sale-a-bration).  The button is Crushed Curry but goes beautifully here and it is tied with Early Espresso Baker’s Twine.

I hope you are enjoying my projects so far.  I will be back on Monday to show you some more.

The rest of the team is showing their Leadership Display Board projects as well so make sure you take a look!

Here is the rest of the Artisan Design Team:


Click HERE to purchase wonderful Stampin’ Up products.

Blog signature 2013-001

See Ya’ Later — Sale-a-bration preview

See Ya’ Later — Sale-a-bration preview published on 7 Comments on See Ya’ Later — Sale-a-bration preview

Yep, there is more Leadership fun to share today!  In fact, I’m going to share two!  I changed up what I am posting (I promised Geometrical) because I thought you’d enjoy seeing a preview of a set that will be available during Sale-a-bration (otherwise known as the most wonderful time of the year for stampers!).  The set I am using today is called See Ya’ Later and it has wonderful sentiments.

See Ya' Later - AlligatorI have to say that since I went to Florida State University, I haven’t ever spent a lot of energy on “Gator” things (the Florida Gators are a big rival) but when faced with a sentiment this cute I could not resist.  I had one of those moments of inspiration and realized that a triangle from my Perfect Pennants Die would make an adorable alligator.  I cut out two of them out of Gumball Green (I used the medium sized one) to start.  My Envelope Punch Board was sitting on my table at the time and I used the corner rounder on that to round off all the corners.  Then, I ran the triangles through my Big Shot with the Decorative Dots Embossing Folder (another Sale-a-bration product). On the bottom triangle, I scored it with my Simply Scored Tool 1/2″ from the wide end and then, using Sticky Strip, attached the two triangles.  This scoring allows a bit of a hinge so his mouth can open some.  I cut another triangle out with the Big Shot from Whisper White then hand cut the little triangle on the edges.

See Ya' Later - Alligator side

After trimming off the wide end a bit, I positioned it inside his mouth and attached.  Put a Dimensional in between the layer of his mouth to help it stay open.  Finally for his eyes, I used a 1/2″ Circle Punch and attached some googly eyes.  The alligator goes up on Dimensionals to allow his mouth to be open on the card.  The DSP is from Epic Day and the back panel is Pool Party Card Stock.  The inks match and I used a Pool Party button and some White Baker’s Twine to finish it off.

See Ya' Later - Sun and Clouds

Since you already saw my Artisan Wednesday Wow using this concept, I thought I’d share my sunshine card too.  I started with a base of Sahara Sand and added grass using the Sale-a-bration DSP Sweet Sorbet.  I used the 1-3/8″ Circle Punch and Quatrefancy DSP for the sun center and the Banner Punch (Sale-a-bration) on Daffodil Delight for the sun rays.  Because I didn’t have the Word Bubble Framelit yet, I hand cut the clouds but it is so much easier with the framelit!!  They are embossed with the Decorative Dots Embossing Folder.  The sentiment was stamped on Whisper White and cut out using the Chalk Talk Framelits.  I shortened the length and the rounded the corners again with the Envelope Punch Board rounder.  I stamped the word Happy in Daffodil Delight ink and hand cut the letters apart and attached with Glue Dots to give a little more texture to the sentiment.

I hope you like these and that you will enjoy the Sale-a-bration products as much as I already have!  The promotion begins on January 28th so start making your lists.  For every $50 you spend, you can get one of these SAB items FREE!

The rest of the team is showing their Leadership Display Board projects as well so make sure you take a look!

Here is the rest of the Artisan Design Team:


I’ll be back tomorrow with another project from Leadership.  So glad you stopped in today.  See you again soon!

Click HERE to purchase wonderful Stampin’ Up products.

Blog signature 2013-001

Primary Sidebar