Skip to content

Artisan Wednesday Wow – Season of Style Gift Bag and Card

Artisan Wednesday Wow – Season of Style Gift Bag and Card published on 8 Comments on Artisan Wednesday Wow – Season of Style Gift Bag and Card

12-Dec-Blog-Hop-Button

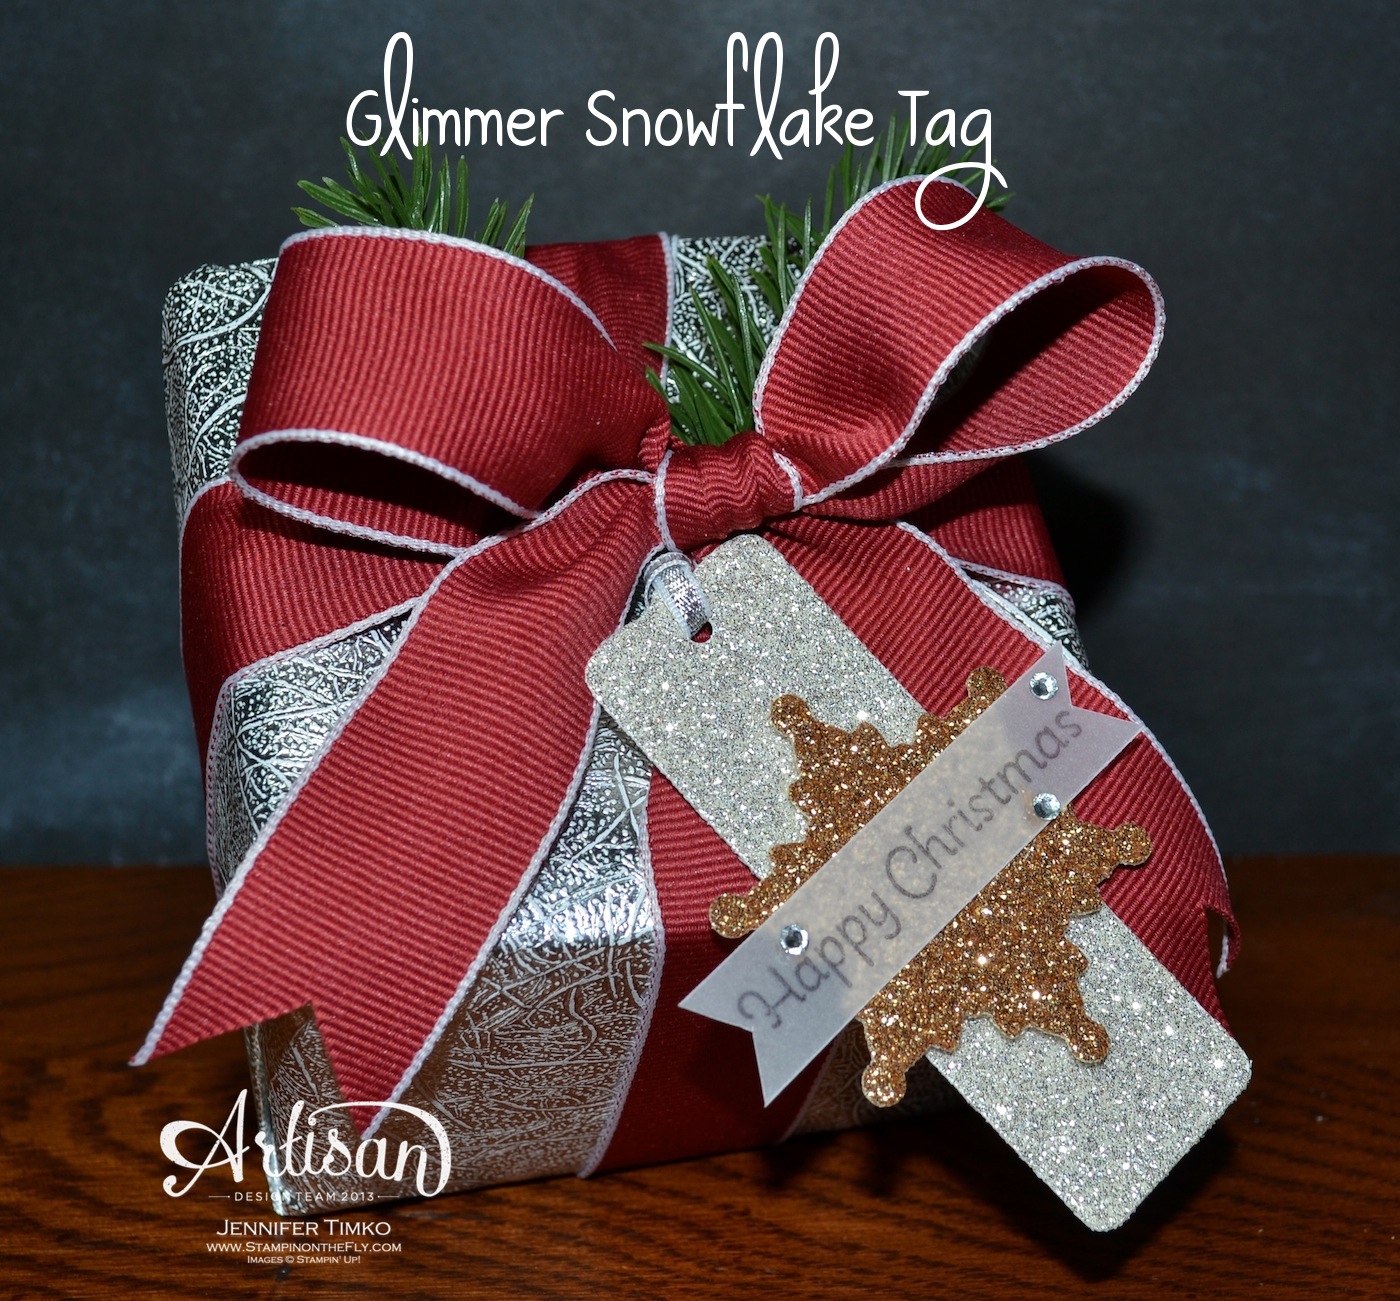
Stampin’ Up’s Artisan Design Team is starting to bring you projects from our December box this week!  We are in full holiday mode and having so much fun!  If you have come over from amazing Jeanna, welcome to the next stop.  If you are starting here, just continue around using the next buttons until you get back to me.

AWW Dec - Stylish Bag and Card Set

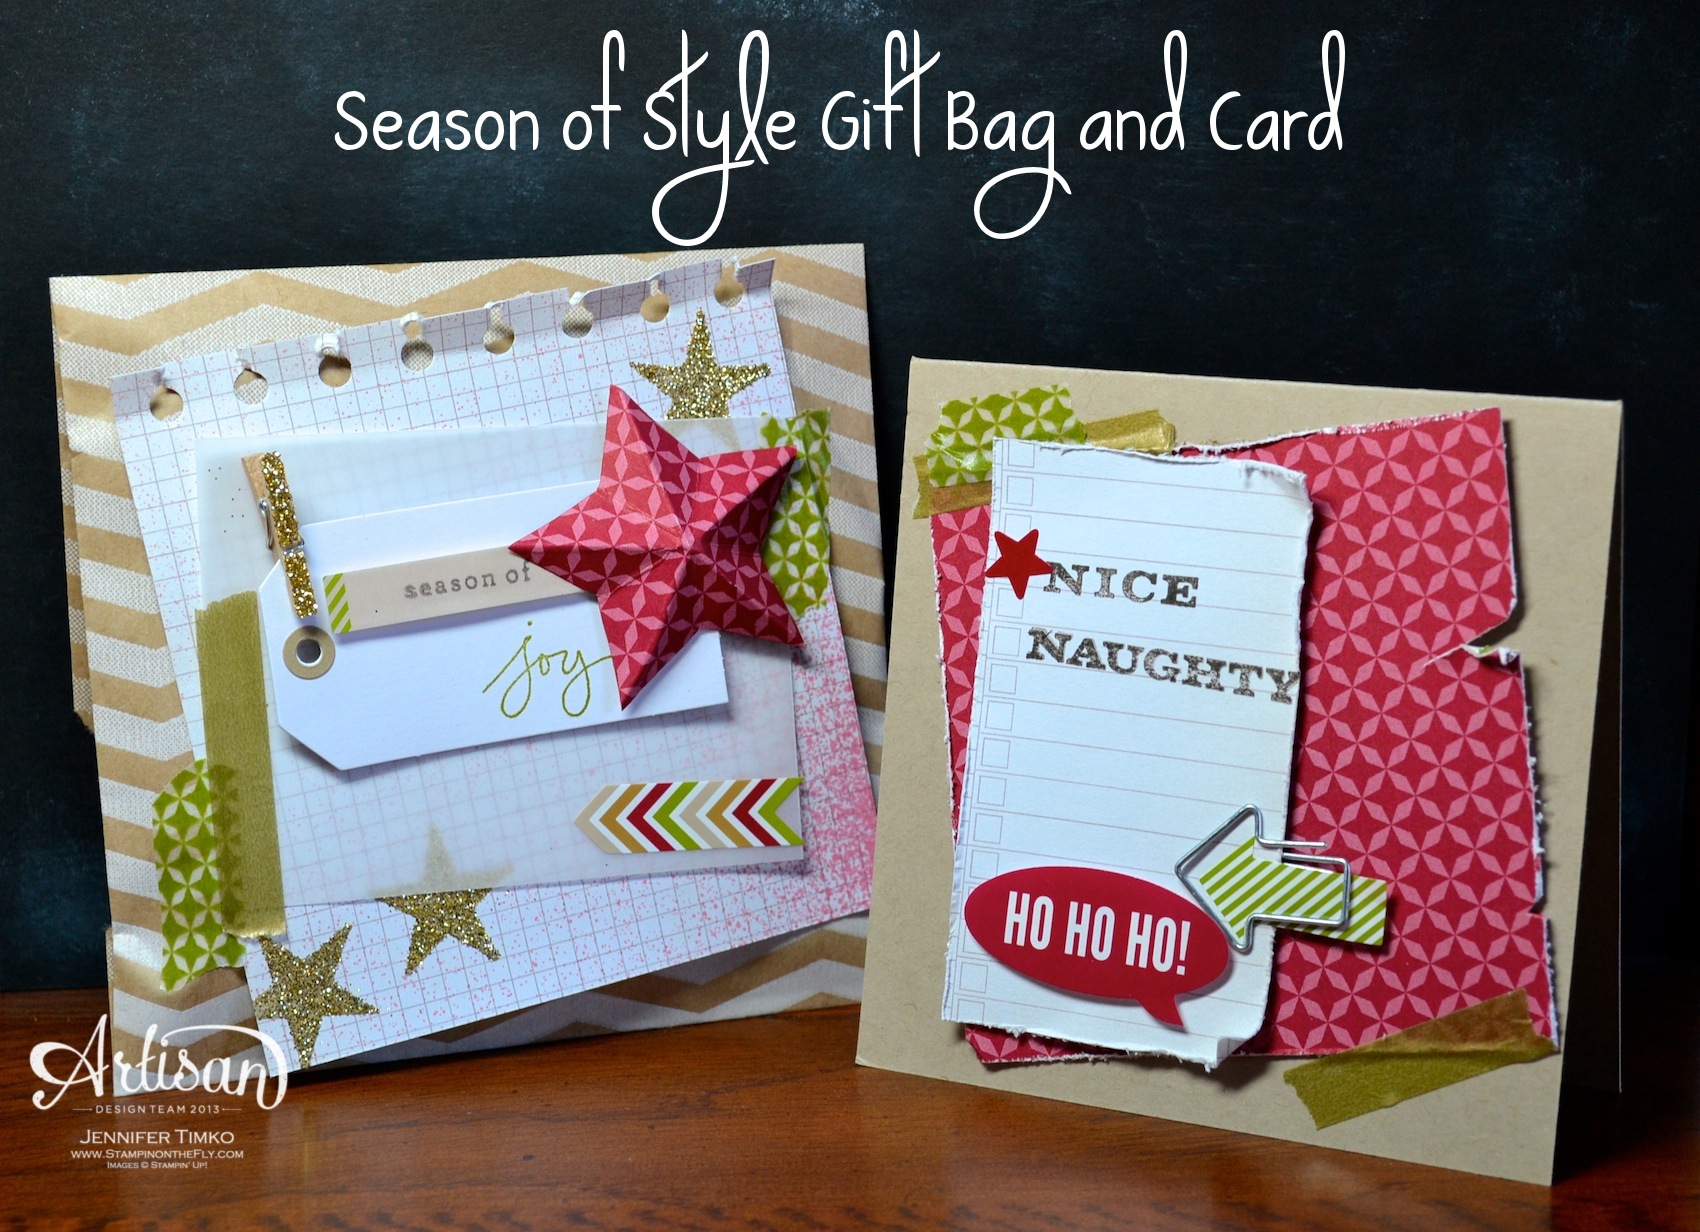
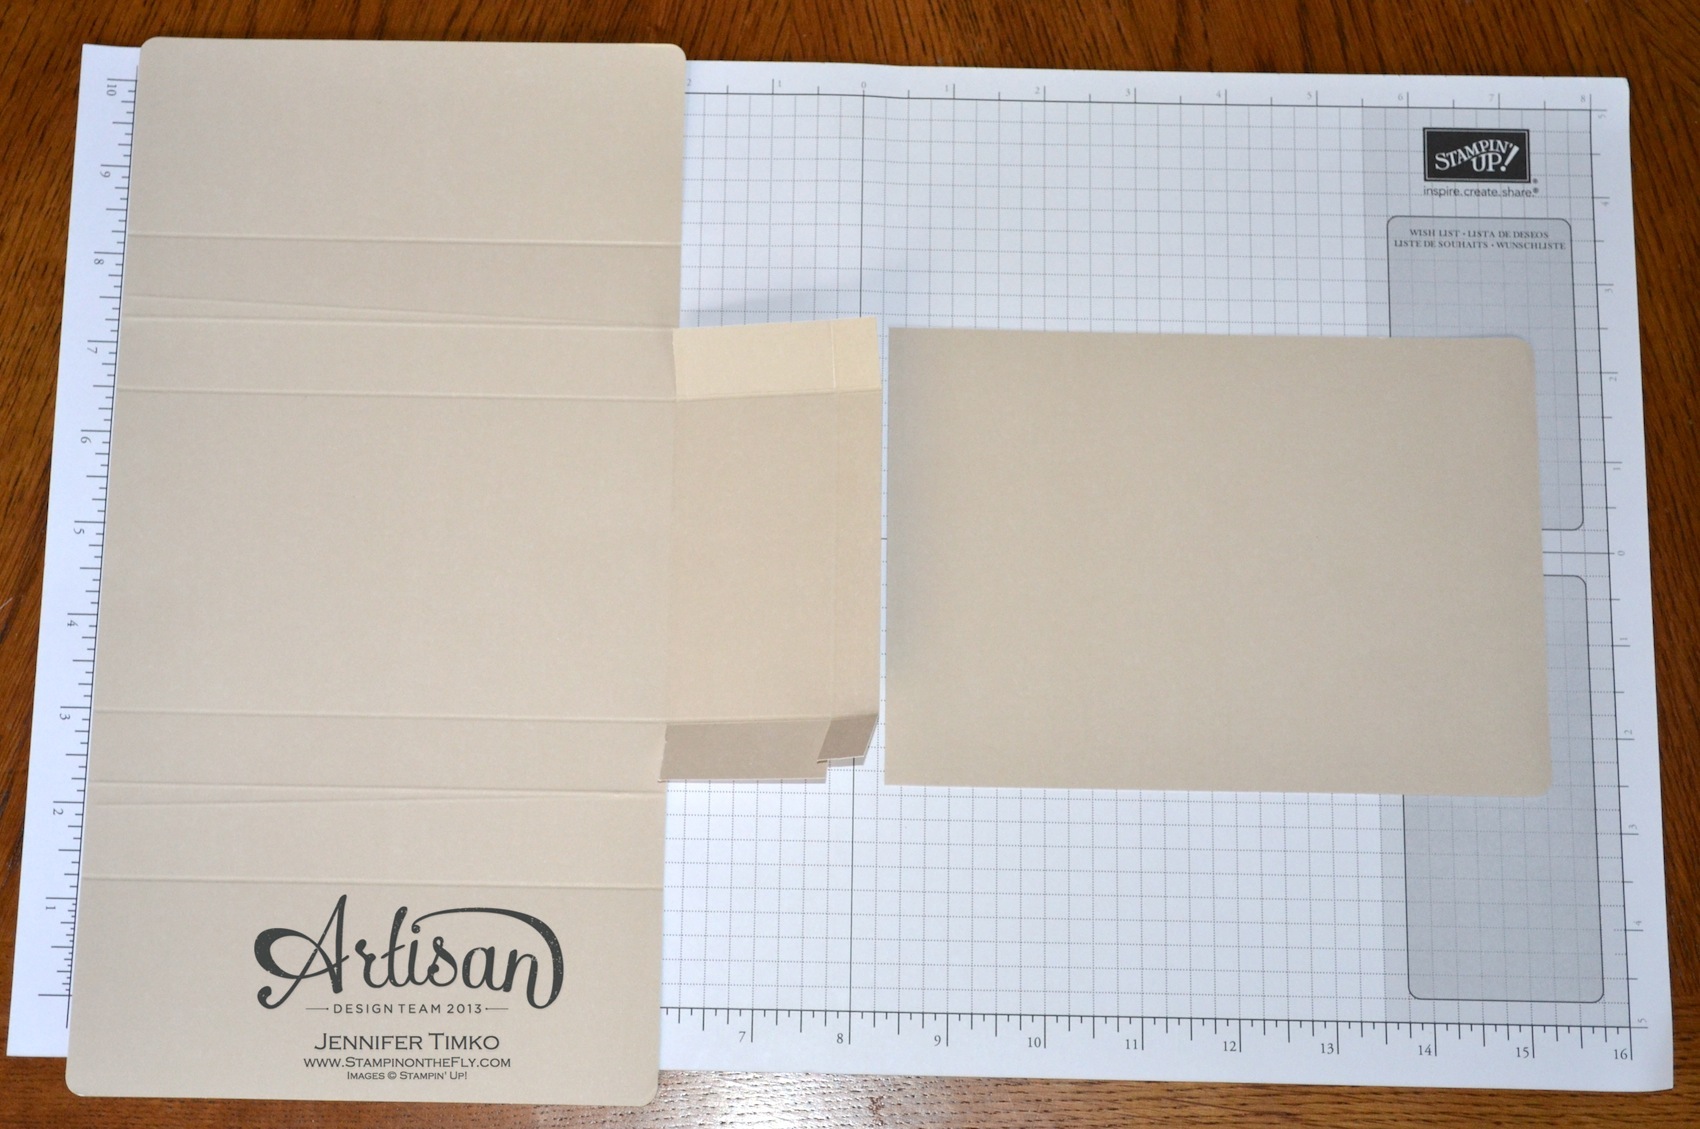
I’m sure you have seen by now that I really love the Season of Style suite of products! The colors are so fantastic!  Well, I pulled out yet another of the coordinating items this week – the Season of Style This and That Journal.  And I did what I never thought I would.  I tore pages out.  Yep…right out of the journal.  The grid piece on the bag is the page I tore out.

AWW Dec - Stylish Gift Bag

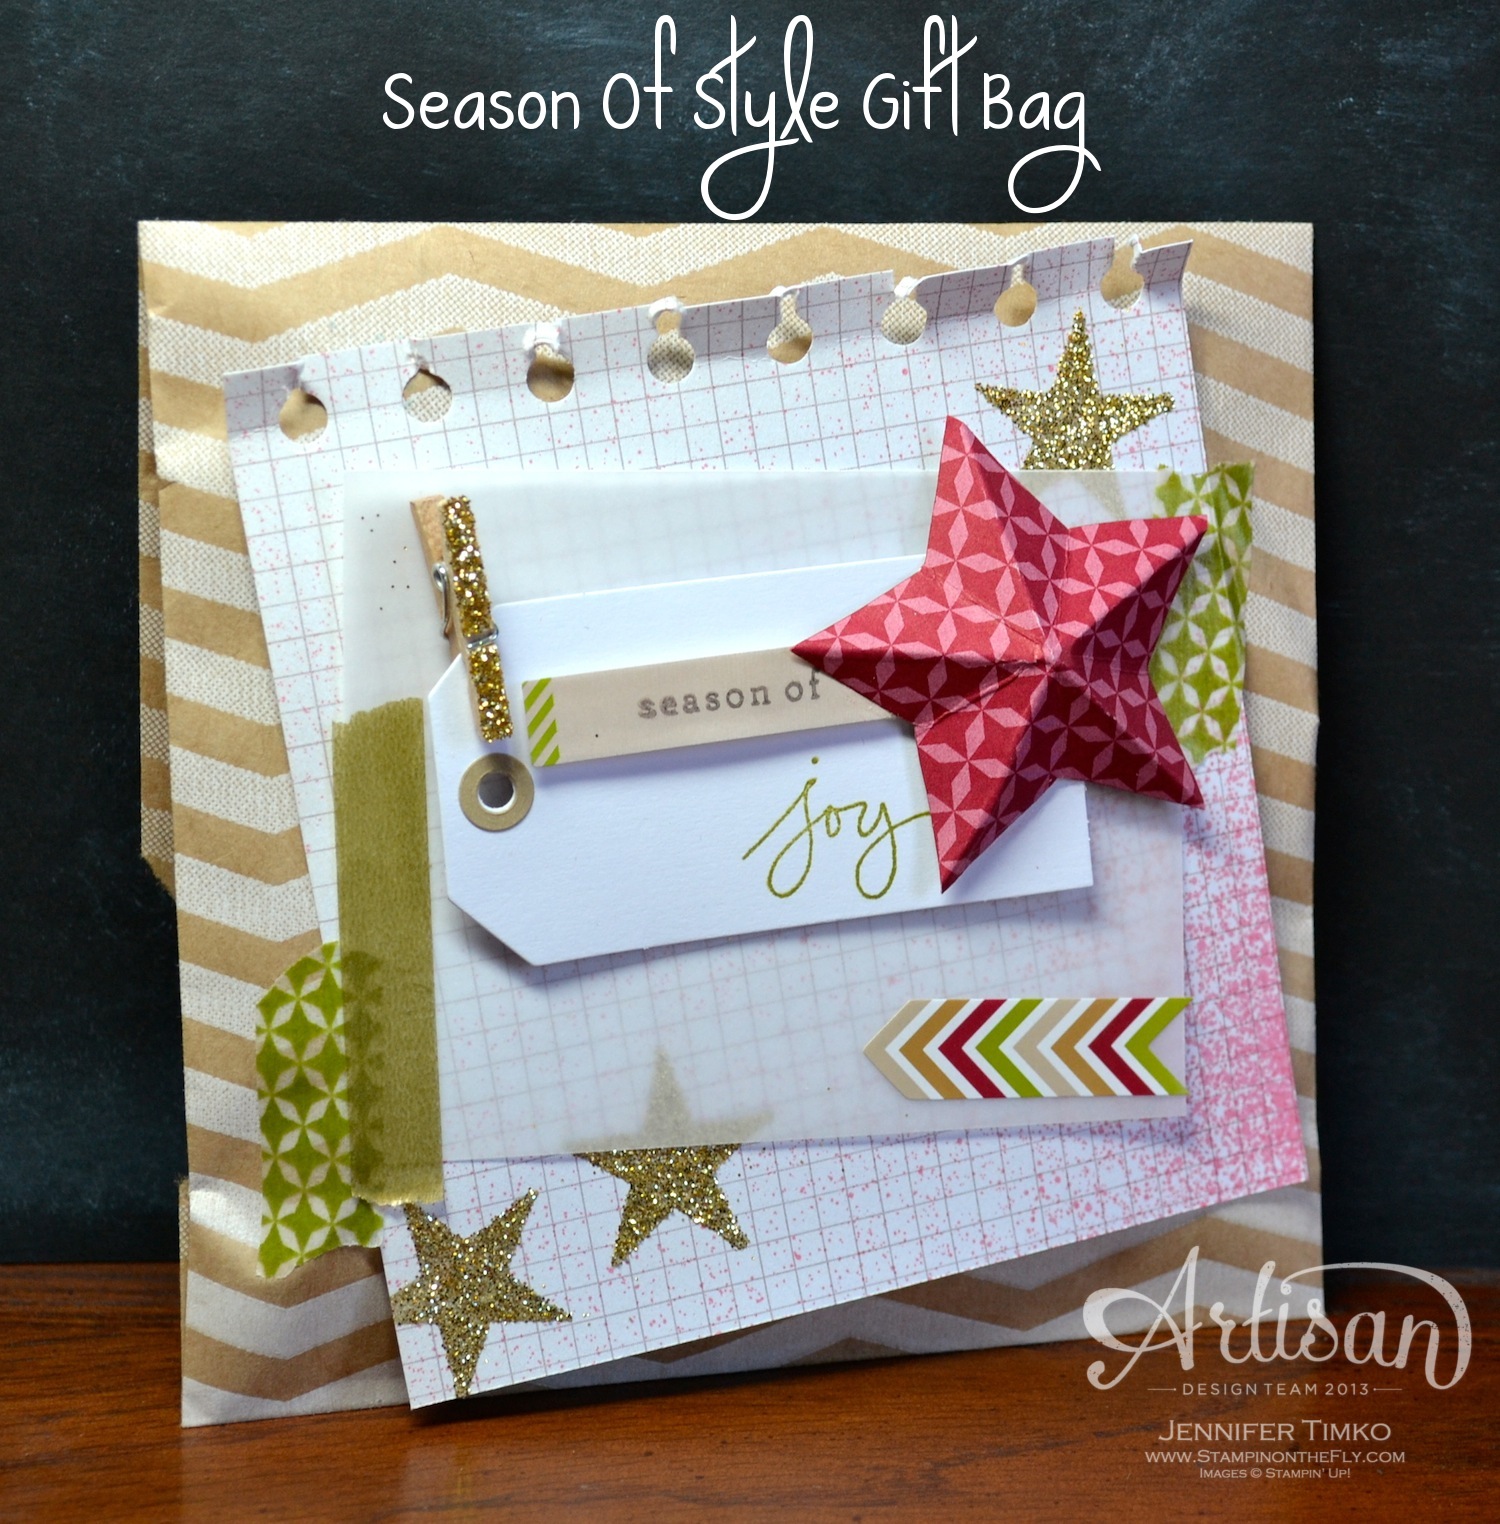
I started by spritzing the page with Cherry Cobbler ink, then stamped on some stars from Simply Stars using Versamark Ink.  I added Heat & Stick Powder and then the amazing Gold Stampin’ Glitter.  Once the base layer was done I simply started adding stuff on.  I used the Cherry Cobbler print from Season of Style DSP to create the star.  The chevron arrow is a sticker from the Season of Style This and That Stickers.  So is the Crumb Cake layer where part of the sentiment is stamped.  The tag comes from the Stamp a Tag Kit and I attached a layer of White Vellum underneath to add a little more dimension. Season of Style Washi Tape combined with the new (Occasions Catalog – available Jan 3rd) Watercolor Wonder Washi Tape hold the layers together.  I added some more Versamark and Heat & Stick Powder to the edge of the little clothespin (from Tag a Bag Accessories) and put on a little more Gold Glitter.  It is all attached to a Tag a Bag Gift Bag.

AWW Dec - Stylish Card

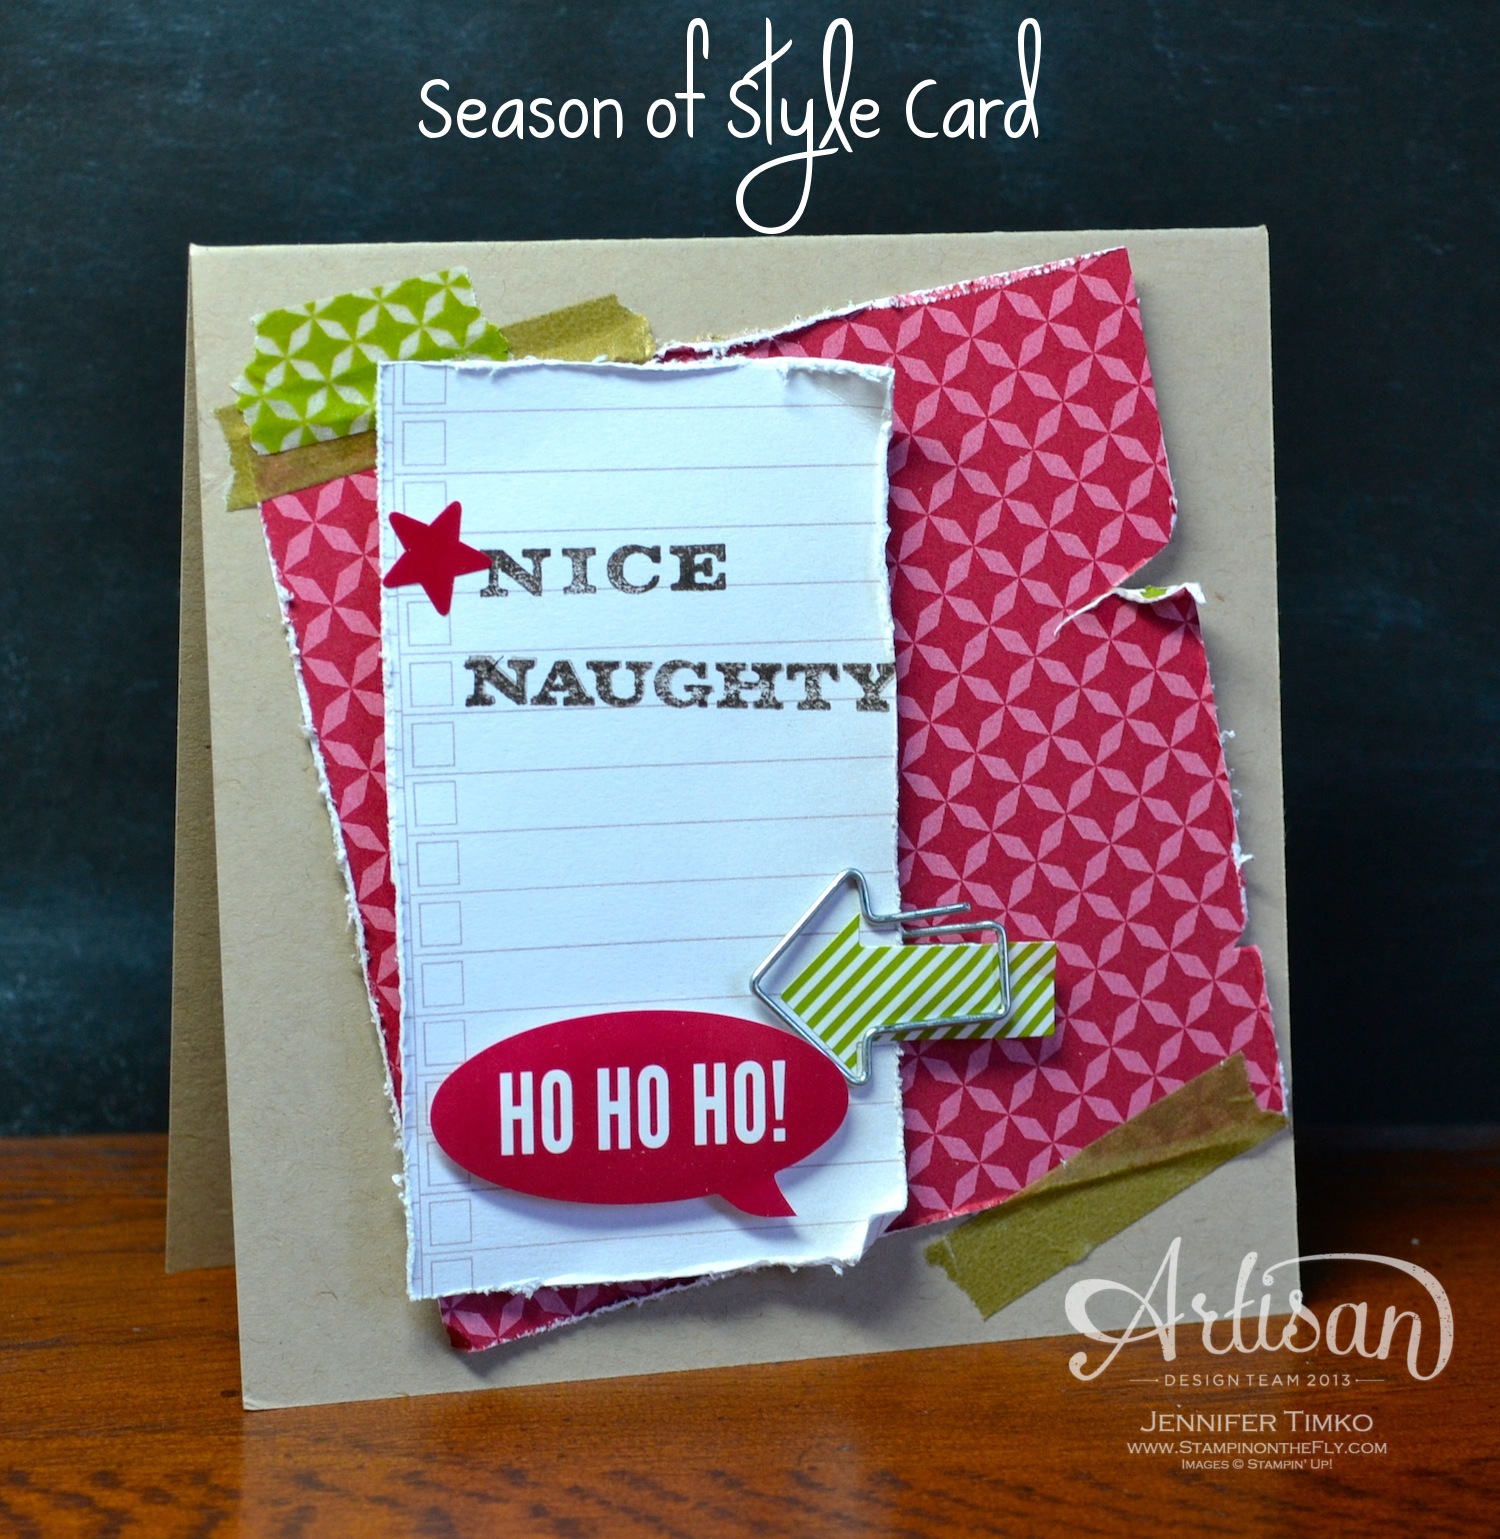
I am using the bag as an envelope for this fun card (it will be sealed on the back with more Washi Tape).  Again, I went a little nuts with the stickers from the This and That Stickers set.  The words are from the coordinating Rotary Stamp.  Again, the lined paper is a page taken from the journal and I love how it works here.  A little arrow clip from Hung Up Cute Clips seemed like the perfect addition.

Now I know this combines a lot of products lines so it might not be for the beginning stamper.  But I wanted to show you how beautifully so many of the Stampin’ Up products work together to create this trendy, eclectic style.  Don’t be afraid to use projects in a way not originally intended.  It is fun and a great way to use up stuff that is sitting on your craft table.

Okay, off to go visit the awesome Mercedes Weber.  Every week she has another project I want to CASE!  She is so fabulous!  Make sure hop around the whole loop to take a look at beautiful creations by the whole team…you’ll be happy you did!

12-Dec-Blog-Hop-NEXT-Button

Click HERE to purchase any of these wonderful Stampin’ Up products.

Stamps:  Simply Stars, Season of Style Rotary Stamp, Endless Wishes (ret); Paper:  Season of Style DSP, Crumb Cake; Ink:  Old Olive, Early Espresso, Versamark; Accessories:  Season of Style This and That Journal, Stickers and Washi Tape; Heat and Stick Powder, Heat Tool, Gold Stampin’ Glitter, Watercolor Wonder Washi Tape, Hung Up Cute Clips, Tag a Bag Gift Bags and Accessory Kit

Blog signature 2013-001

Freshly Made Sketches #114

Freshly Made Sketches #114 published on 5 Comments on Freshly Made Sketches #114

FMS114-LindaS-20131127

Happy Wednesday!  I hope this finds you safe and warm since so many in the US have been experiencing a winter blast.  I’m so excited to share this cool sketch by Linda Suarez…another fabulous addition to the Freshly Made Sketches challenge.  I suppose that Linda’s snowflakes are just getting us in the season for snow, right?

FMS114 - Festive Season

I used a rather literal translation of the sketch but I love that I could use this pretty Season of Style DSP!  My snowflakes are the Festive Flurry variety…so easy to use with their matching framelits.  I added a sentiment from the now sold out Endless Wishes and paired the words with the retired Jewelry Tag Punch.  This is a quick and easy card that is  so much fun to make!

Our team has created some amazing cards with the sketch.  I know…they always do, don’t they?!  So run over and take a look.

I have had the normal holiday craziness leading up to Thanksgiving.  In fact, I’ll be celebrating with my family today because of my holiday flying schedule.  Bring on the turkey, dressing, beans and pumpkin pie!  I will be a cooking fiend as the day goes on.  Planning for lots of leftovers.  They may actually be the best part!  I am almost done with my “big project” and hope to get back to stamping I can share immediately.  I have to admit that it will be hard to wait until January to share all that I have been doing!

For those of you in the US, I wish you a happy and safe Thanksgiving weekend.  Please travel safely!  Thanks so much for dropping in today.  See you soon!

Stamps:  Festive Flurry, Endless Wishes; Paper:  Season of Style DSP, Cherry Cobbler, Whisper White; Ink:  Early Espresso, Cherry Cobbler; Accessories:  Big Shot, Festive Flurry Framelits, Jewelry Tag Punch, Cherry Cobbler buttons, Cherry Cobbler Baker’s Twine

Click HERE to purchase any of these fun Stampin’ Up products.

Blog signature 2013-001

Freshly Made Sketches #113

Freshly Made Sketches #113 published on 11 Comments on Freshly Made Sketches #113

FMS Final 113-001Yep, we have another awesome sketch for you this week over at Freshly Made Sketches!  This one is courtesy of the lovely and amazing Cindy Hall.  I just love the cool layering she has given us!

FMS113 - Christmas FrostI figured I needed to get on the bandwagon with this amazing Winter Frost DSP.  Pretty isn’t it?  The Pool Party combined with Cherry Cobbler is a bit non-traditional but still feels festive.  I love this sentiment from Christmas Messages!  So fun with the chalkboard fond and the script.  The snowflakes are from a retired die and I added a little bling with some Rhinestones.

I’m at the point where I need some quick and fun holiday cards so this might be re-created a few more times.  I made a tag with this great DSP that I posted earlier.  Totally different feel (love when DSP can do that!).  I apologize for the shorts posts.  I have been working on a whole lot of projects that I will be able to share with you later in January(!).  Yep…they use some new fun stuff and I can’t wait to share.  But I have lots still to make.  So back to the stamp room….

Can’t wait to see all the ways you talented stampers use this sketch!  The design team has created their usual array of fabulousness so go check it out.  I hope your week is going well and I will see you again soon!  Have a great day!

Stamps:  Christmas Messages; Paper:  Winter Frost DSP, Cherry Cobbler, Whisper White; Ink:  Cherry Cobbler; Accessories:  Retired snowflake die, Rhinestones, Dimensionals

The Holiday Sale starts today!!  Special prices up to 50% off.

Please use hostess code:  999UZVP

Click HERE to purchase any of these wonderful Stampin’ Up products.

Blog signature 2013-001


Artisan Wednesday Wow – Frosted Tree Tag

Artisan Wednesday Wow – Frosted Tree Tag published on 5 Comments on Artisan Wednesday Wow – Frosted Tree Tag

11-Nov-Blog-Hop-Button

Stampin’ Up’s Artisan Design Team is bringing you projects from our November box this week!  You will see that the SU season is turning a bit more towards the holidays.  The shimmer and shine continues this week! If you have come over from amazing Jeanna, welcome to the next stop.  If you are starting here, just continue around using the next buttons until you get back to me.

AWW Nov - Frosted Tree Tag


I have a fun little tag to show you today.  The perfect finish for a special present.  I created this tree using the Perfect Pennants Die (for the triangle).  I used the beautiful Winter Frost DSP and combined it with Cherry Cobbler and Basic Gray.  The base of the tree is a Frosted Finishes Embellishment…wow are these amazing!  I added an oval with the Ovals Framelits and rounded the top of the tag with an oval too.  My all time most used sentiment set ever, Teeny Tiny Wishes, provides the perfect little Merry Christmas and I finished the top with Cherry Cobbler Seam Binding and Silver 1/8″ Ribbon.  I love how this looks against silver wrapping paper!

Okay, off to go visit the awesome Mercedes Weber.  Every week she has another project I want to CASE!  She is so fabulous!  Make sure hop around the whole loop to take a look at beautiful creations by the whole team…you’ll be happy you did!

11-Nov-Blog-Hop-NEXT-Button


Click HERE to purchase any of these wonderful Stampin’ Up products.

Blog signature 2013-001

Artisan Wednesday Wow – Facebook Friday Edition

Artisan Wednesday Wow – Facebook Friday Edition published on 11 Comments on Artisan Wednesday Wow – Facebook Friday Edition

11-Nov-Blog-Hop-Button

Stampin’ Up’s Artisan Design Team is bringing you projects from our November box today in a special extra Friday post!  Once a month, Stampin’ Up features the Artisan Team projects on their Facebook Page and today was the day.  The shimmer and shine continues this week!  If you have come over from amazing Jeanna, welcome to the next stop.  I bet you were blown away by her tag project…I was!  If you are starting here, just continue around using the next buttons until you get back to me.

Nov FB - Glittered Pinecone Swag

I have been thinking about a project like this for a while.  When I opened the November box from Stampin’ Up, I knew I had to finally go for it!  So off to the craft store for some faux greenery I went.  I found some that I cut apart and then hot glued back together to create the base of the swag.  Next came the bow.  Now, I have questions periodically about tying bows and I struggle sometimes to answer.  I definitely have a technique for some of the smaller ones I make, but these larger ones usually are the product of playing around until it looks right.  With this one using Cherry Cobbler 1″ Stitched Edge Grosgrain Ribbon, I started by creating the first loop and then continued making “S-loops” until it looked properly full.  While I suspect that floral wire would work well to cinch it in the middle, I just used a little Linen Thread to do the job.  Then I tied the bow onto the swag.

Nov FB -Swag Bow


Next up the pinecones.  I cut varying lengths of the Silver 1/8″ Ribbon.  At the middle point, I hot glued them to the top of three pinecones.  Next came the Silver Stampin’ Glitter.  I have to say that this is the part I love the best and just could not get a decent photo to show you.  Using Multipurpose Glue (and some patience), I placed glue on the edges of the pinecones and then sprinkled on the glitter.  I let it dry in between so that I could get all the sides.  Disclaimer:  This is messy.  Really messy.  It will make you all glittery!  *smile*  Frankly, that glitter is so sparkly that it gives off funny reflections to the camera.  While not great for photography, it is really great for you.  It is gorgeous! knotted the ribbon at the top and looped them together using the remainder of the Linen Thread used to tie on the bow.  Finally I created a loop out of the Cherry ribbon and hot glued it to the back so this could hang on a wreath hanger or hook.

Nov FB - Glittered Pinecones

This is a picture of the pinecones inside my house with different lighting to show you a little more of the glitter.

Okay, off to go visit the awesome Mercedes Weber.  I have the advantage of having seen her work for this week.  I’m in love with those cards!  She is so fabulous!  Make sure hop around the whole loop to take a look at beautiful creations by the whole team…you’ll be happy you did!

11-Nov-Blog-Hop-NEXT-Button

Accessories:  Cherry Cobbler 1″ Stitched Edge Grosgrain Ribbon, Frosted Finishes Embellishments, Silver 1/8″ Ribbon, Silver Stampin’ Glitter, Multipurpose Liquid Glue, Hot glue, Pinecones, Faux greenery

Click HERE to purchase any of these wonderful Stampin’ Up products.

Blog signature 2013-001

Freshly Made Sketches #112

Freshly Made Sketches #112 published on 10 Comments on Freshly Made Sketches #112

FMS Final 112-001


Freshly Made Sketches has another fun sketch for you this week!  I have to say that I love the sketches from this team and they just keep coming up with new and fun ideas!  This week, the awesomeness is courtesy of the lovely Jen Brum.  This one lends itself to some cool interpretations.

FMS112 - Christmas Season

I thought I’d go all out with banners and chevrons on this on.  I started with the polka dot print from the Season of Style Paper Pack.  The chevron pattern on the back of that print was perfect to cut into little arrows so I started working on layering.  I needed something for behind that print and I punched out Cherry Cobbler chevrons using the Chevron Border Punch.  LOVE that one!  The Gumball Green arrows add another layer of detail but what to do for a sentiment?  Oh yes…the stamps from A Banner Christmas to the rescue!  I stamped the chevrons in Crumb Cake on White Vellum then cut them out and stamped on “Christmas” in Early Espresso.  The “Merry” is inked in Cherry Cobbler and cut out.  I added on a Vintage Faceted Button tied up with Cherry Cobbler Baker’s Twine to finish it up.  It is more layering than I normally do but I really like this card!  It seems fun and modern to me.

Ok, I know that you will love everything the design team has made.  This sketch has inspired a wonderful variety of styles!  I can’t wait to see what the gallery will hold!

I’ll be back on Friday with an Artisan extra post (our Stampin’ Up Facebook Page projects).  Don’t forget to check out my glittery tags from my earlier post too!  Hope your week is going well…see you soon!

Stamp:  A Banner Christmas; Paper:  Season of Style Paper Pack, Early Espresso, Cherry Cobbler, Gumball Green, Whisper White; Ink;  Cherry Cobbler, Early Espresso, Crumb Cake; Accessories:  Chevron Border Punch, Vintage Faceted Buttons, Cherry Cobbler Baker’s Twine, Glue Dots, Dimensionals

Click HERE to purchase any of these wonderful Stampin’ Up products.

Blog signature 2013-001

Artisan Wednesday Wow – Glimmer Snowflake Tags

Artisan Wednesday Wow – Glimmer Snowflake Tags published on 11 Comments on Artisan Wednesday Wow – Glimmer Snowflake Tags

11-Nov-Blog-Hop-Button

Stampin’ Up’s Artisan Design Team is bringing you projects from our November box this week!  You will see that the SU season is turning a bit more towards the holidays.  The shimmer and shine continues this week! If you have come over from amazing Jeanna, welcome to the next stop.  If you are starting here, just continue around using the next buttons until you get back to me.

AWW Nov - Glimmer Snowflake Tag

My silver and gold obsession continues this week with some fun tags.  Apparently my no glitter stance has been firmly crushed and I am adding it to everything this year!  Stampin’ Up’s Glimmer Paper makes it easy and WAY less messy.  I started by cutting the base of the tag out of the Silver Glimmer Paper with a Chalk Talk Framelit.  Then, using my new Festive Flurry Framelits, I cut a snowflake out of the Champagne Glimmer Paper.  Using White Vellum card stock, I created a banner and stamped on the sentiment from More Merry Messages (have I mentioned this is a must have set?!) in Basic Gray ink.  Now the only part that was hard about the whole project was figuring out the best way to attach the vellum banner.  So, some well placed Glue Dots solved the problem.

AWW Nov - Snowflake how-to

I placed the Glue Dots towards the edges and mostly you really don’t notice them but I thought it looked cleaner to conceal them by adding on some Basic Rhinestones.  Problem solved!  The snowflake is attached using a Dimensional.

AWW Nov - Glimmer Tags

You can see how the Rhinestones add just another layer of sparkle.  I topped them off with Silver 1/8″ Ribbon and they are so pretty.  Because the back of the Glimmer Paper is white, I added a to/from there making these not only pretty but functional.

Okay, off to go visit the awesome Mercedes Weber.  Every week she has another project I want to CASE!  She is so fabulous!  Make sure hop around the whole loop to take a look at beautiful creations by the whole team…you’ll be happy you did!

11-Nov-Blog-Hop-NEXT-Button

Stamp:  More Merry Messages; Paper:  Silver and Champagne Glimmer Paper, White Velluml; Ink:  Basic Gray; Accessories:  Chalk Talk Framelits, Festive Flurry Framelits, Big Shot, Silve 1/8″ Ribbon, Glue Dots, Dimensionals

Don’t forget that you save 15% if you bundle the Festive Flurry Stamp and Framelits!

Click HERE to purchase any of these wonderful Stampin’ Up products.

Blog signature 2013-001

Artisan Wednesday Wow – Silver and Gold Flurry

Artisan Wednesday Wow – Silver and Gold Flurry published on 14 Comments on Artisan Wednesday Wow – Silver and Gold Flurry

11-Nov-Blog-Hop-Button

Stampin’ Up’s Artisan Design Team is bringing you projects from our November box this week!  You will see that the SU season is turning a bit more towards the holidays.  Sparkle, snowflakes and so much more! If you have come over from amazing Jeanna, welcome to the next stop.  If you are starting here, just continue around using the next buttons until you get back to me.

AWW Nov - Silver and GoldI can’t tell you how excited I was to get the Festive Flurry Bundle in this latest package!  Wow, oh wow, are these pretty!  And the framelits make the snowflakes so easy to use!  I thought I would jump on the trend of mixing metallic colors and I am so glad I did.  I love this card (local stampers, we will be making this one in a class soon).  I inked up the snow flakes with the Metallic Encore Pads (both Gold and Silver) and stamped them onto White Vellum Card Stock.  Then I embossed them with a Heat Tool and Clear Stampin’ Emboss Powder.  The Festive Flurry Framelits cut them out perfectly and all I had to do was layer them with Dimensionals in between.  The snowflakes are topped off with one of the Frosted Finishes Embellishments (they are SOOO pretty!!).  Using a sentiment from More Merry Messages (this really is a seasonal must-have), I stamped with the Gold Encore Ink and embossed with clear powder again.  A frame was created for the Crumb Cake stamped layer using the Gold Foil Sheets.  After attaching the snowflake, I placed some Basic Rhinestones randomly and put the whole thing up one some more Dimensionals.  This is definitely one of those card that is even prettier in person.  The subtle shine of the metallic inks and the sparkle of the embellishment/rhinestones make this a wow!

Okay, off to go visit the awesome Mercedes Weber.  You are sure to love what she has for you this week!  Make sure hop around the whole loop to take a look at fabulous creations of the whole team…you’ll be happy you did!

11-Nov-Blog-Hop-NEXT-Button

Stamp:  Festive Flurry, More Merry Messages; Paper:  Crumb Cake, White Vellum, Gold Foil; Ink:  Gold and Silver Encore Metallic; Accessories:  Festive Flurry Framelits, Big Shot, Clear Stampin’ Emboss Powder, Heat Tool, Frosted Finishes Embellishments, Basic Rhinestones, Dimensionals, Glue Dots

Don’t forget that you save 15% if you bundle the Festive Flurry Stamp and Framelits!

Click HERE to purchase any of these wonderful Stampin’ Up products.

Blog signature 2013-001

Freshly Made Sketches #109

Freshly Made Sketches #109 published on 10 Comments on Freshly Made Sketches #109

FMS Final 109-001Happy Wednesday!!  Did you miss me last week?  Well, I know the rest of the team wow’d you with their projects and that awesome sketch!  I am happy to say that I was on vacation.  A real live vacation that included no traveling for work!  We went to Orlando, FL for a week.  YEA!  First we got to visit my mom, then we got to go to Legoland and Busch Gardens (Tampa) with some swimming at our cool hotel in the middle.  Finally, back to mom’s house.  What a fantastic week!  I still haven’t even downloaded the pics yet but soon (sorry mom!).  We have been catching up…lots of homework and laundry and all the normal stuff you have to do to “recover” from vacation.

Ok…on to the sketch!  This week’s challenge at Freshly Made Sketches is brought to us by Jen Mitchell.  Oh, how I love her work!  No surprise that she has given us a sketch that has so many possibilities.

FMS109 - MerryI just had to pull out these Expressions Thinlits for some more fun.  I really love them.  I was looking at ways to layer the positive and negative images when I realized I could tuck the different colors tucked together.  I think it has a fun look…what do you think?!  I paired it with the Season of Style Paper Stack to create a fun and easy to re-create card.  In order to hold the Cherry Cobbler word in the Old Olive negative, I simply put some Dimensionals behind the panel in places that keep them linked (Glue Dots would work if you don’t want the extra pop-up).

Ok…I am still catching up but plan to get some stamping done over the next week or so.  Hopefully I will have a lot more holiday stuff in store for you soon!  If you didn’t already see it, my Artisan Wednesday Wow project of the week went up earlier and is a continuation of projects with the Thankful Tablescape Kit.

I know you will love the projects from the rest of the team.  Head on over and join in!  Can’t wait to see what you create!  Thanks so much for stopping in.  See you again soon!

Paper:  Season of Style Paper Pack, Chocolate Chip, Cherry Cobbler, Old Olive; Accessories:  Big Shot, Expressions Thinlits, Neutrals Buttons, Cherry Cobbler Baker’s Twine, Dimensionals

Blog signature 2013-001


Artisan Wednesday Wow – Thankful Gift Bag and Note Card

Artisan Wednesday Wow – Thankful Gift Bag and Note Card published on 9 Comments on Artisan Wednesday Wow – Thankful Gift Bag and Note Card

AWW Oct Hop

Stampin’ Up’s Artisan Design Team is continuing with more projects from our October box!  For those of you who are unfamiliar, the team gets a box of fabulous SU products to create our projects each month. This month we have a lot to be thankful for because Stampin’ Up has so many beautiful Thanksgiving and fall things.  If you have come over from amazing Jeanna, welcome to the next stop.  If you are starting here, just continue around using the next buttons until you get back to me.

 AWW Oct - Thankful Bag and Notecard

I told you last week that I was looking to show you how you could create things with the Thankful Tablescape Simply Created Kit.  One of the fun items in the kit is a napkin holder.  While it is adorable used exactly as designed, I wanted to show you something else you can make.  Using just one of the holders, you can created a quick and fun little gift bag.

AWW Oct - Thankful Bag template

I simply cut off a portion of the long flap, scored and created the bag.  Really fun and easy!  With the remaining flap portion, I created the note card with just a little trimming and created matching rounded corners with my 3/16″ Corner Punch.  The decoration was super fast too.  I used a portion of the Chocolate Chip Paper Ribbon from the kit and snipped off the corners to create a tag.  Then I used the Chalk Talk Framelits for that little oval at the top.  The “thx” comes from the new Circle Card Thinlits using paper from the kit and leaves are from the kit too.   I added buttons and some Linen Thread for extra detail and topped the bag with a mini clothespin I have from the Tag a Bag Accessory Kit.  The little sentiment on the note card?  It is from the new Photopolymer Another Thank You stamp set.  Talk about a useful set!  I always need another thank you sentiment, it seems.

Okay, off to go visit the awesome Mercedes Weber.  You are sure to love what she has for you this week!  Make sure hop around the whole loop to take a look at fabulous creations of the whole team…you’ll be happy you did!

AWW Oct Next

Stamp:  Another Thank You Photopolymer; Accessories:  Thankful Tablescape Simply Created Kit, Big Shot, Circle Card Thinlits, Tag a Bag Accessory Kit, 3/16″ Corner Punch, Simply Scored Scoring Tool, Neutrals Buttons, Linen Thread, Sticky Strip

Click HERE to purchase any of these fun Stampin’ Up products.

Blog signature 2013-001

Primary Sidebar