Skip to content

Freshly Made Sketches #632

Freshly Made Sketches #632 published on 4 Comments on Freshly Made Sketches #632

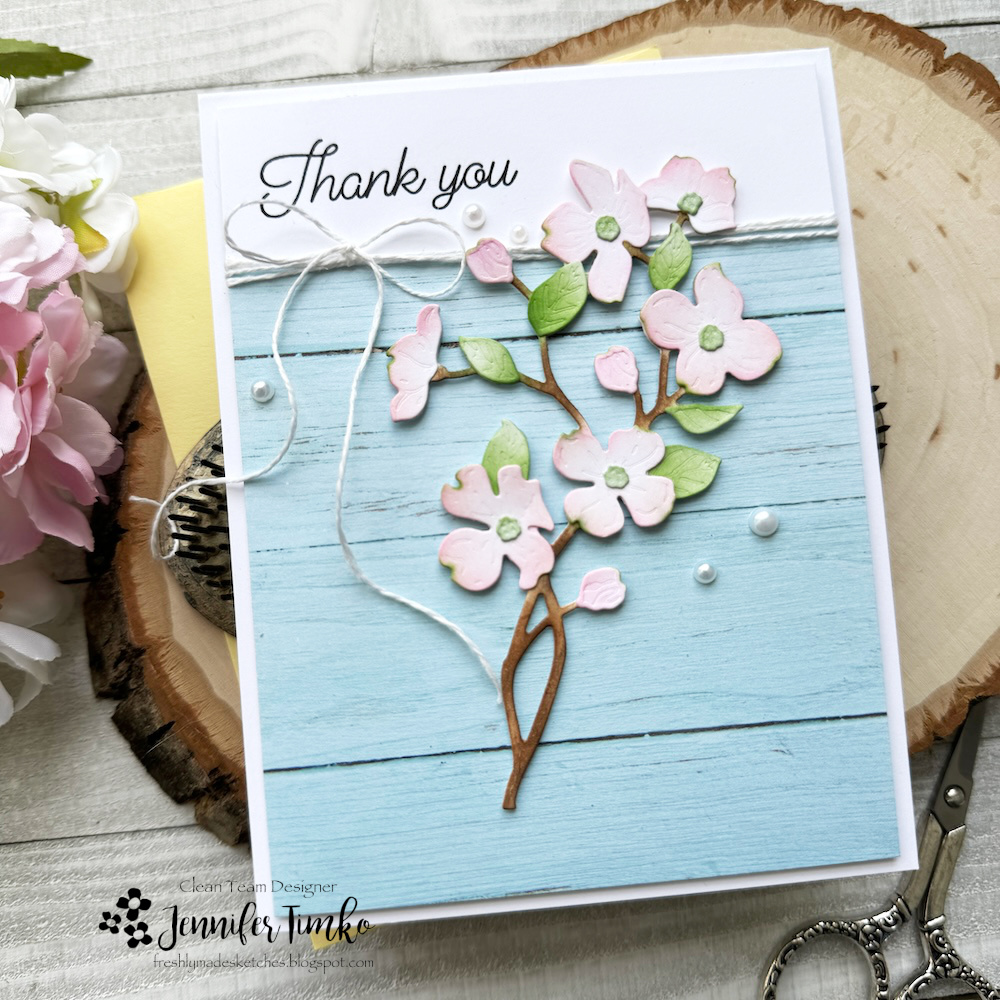
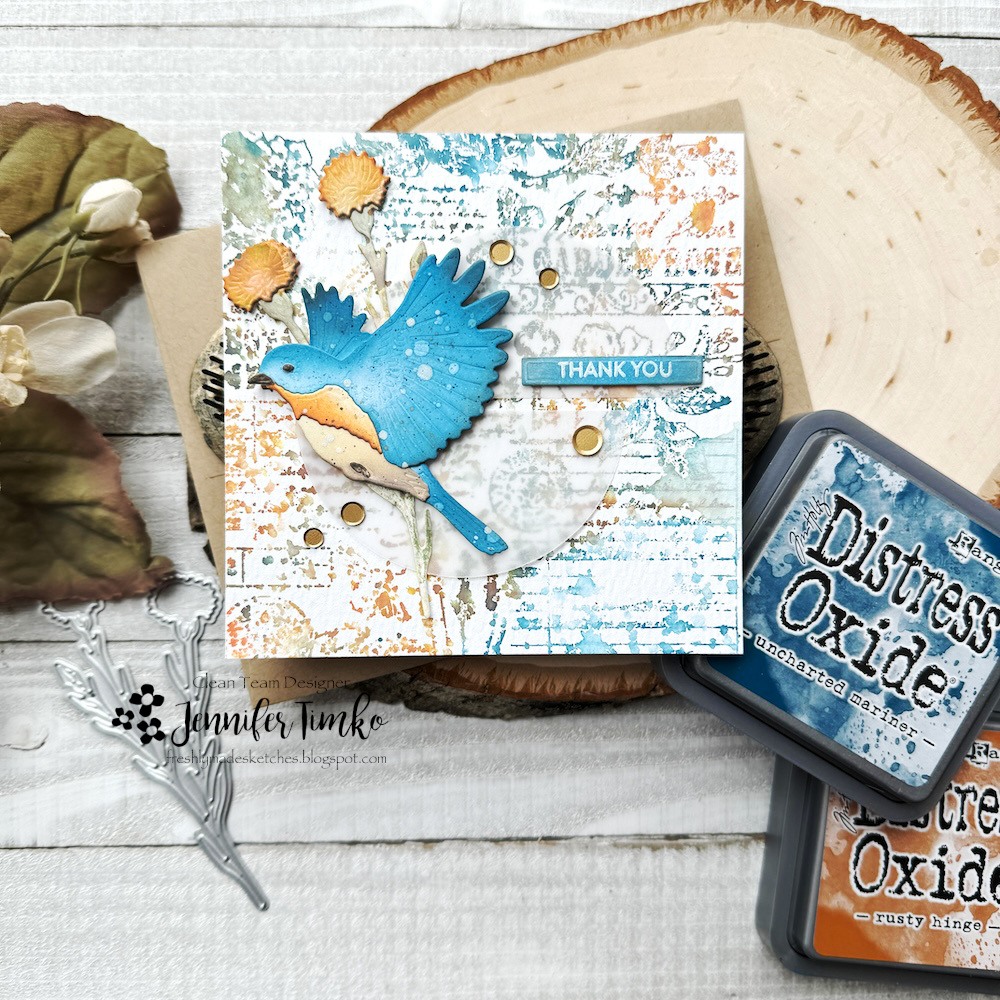
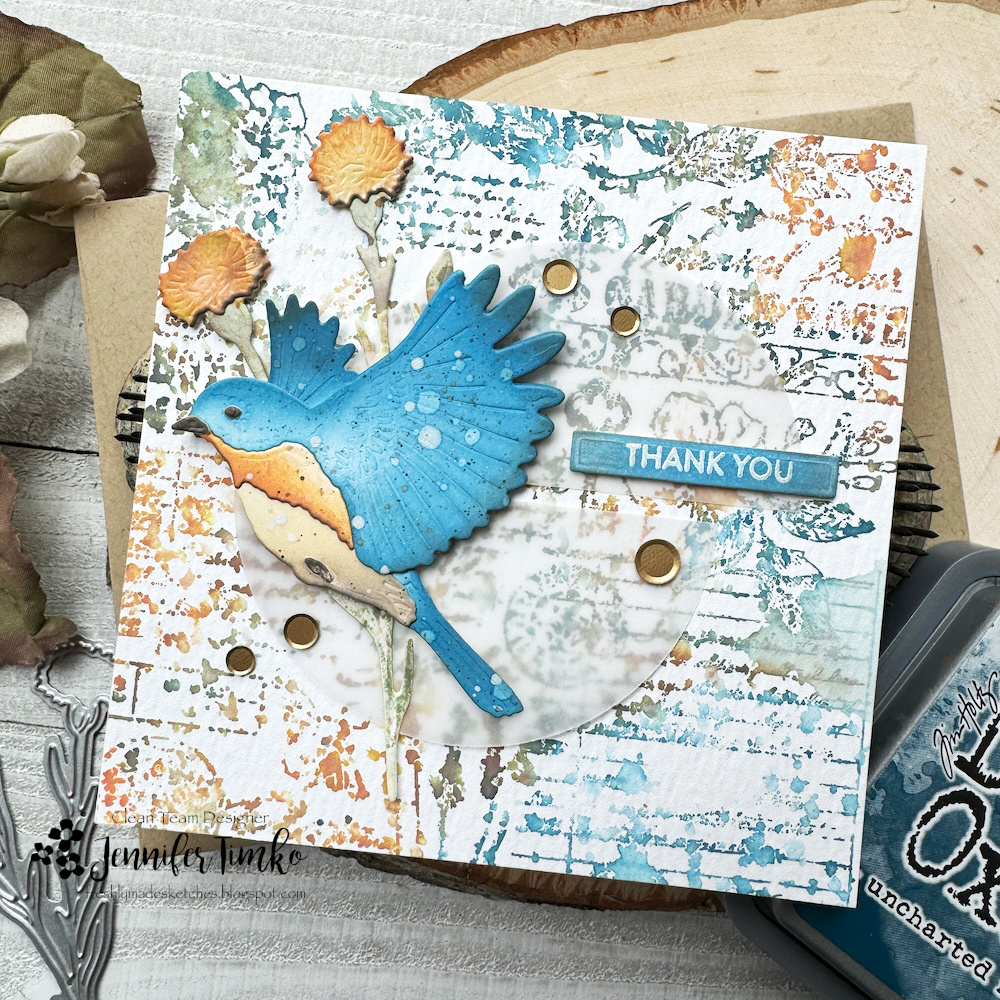
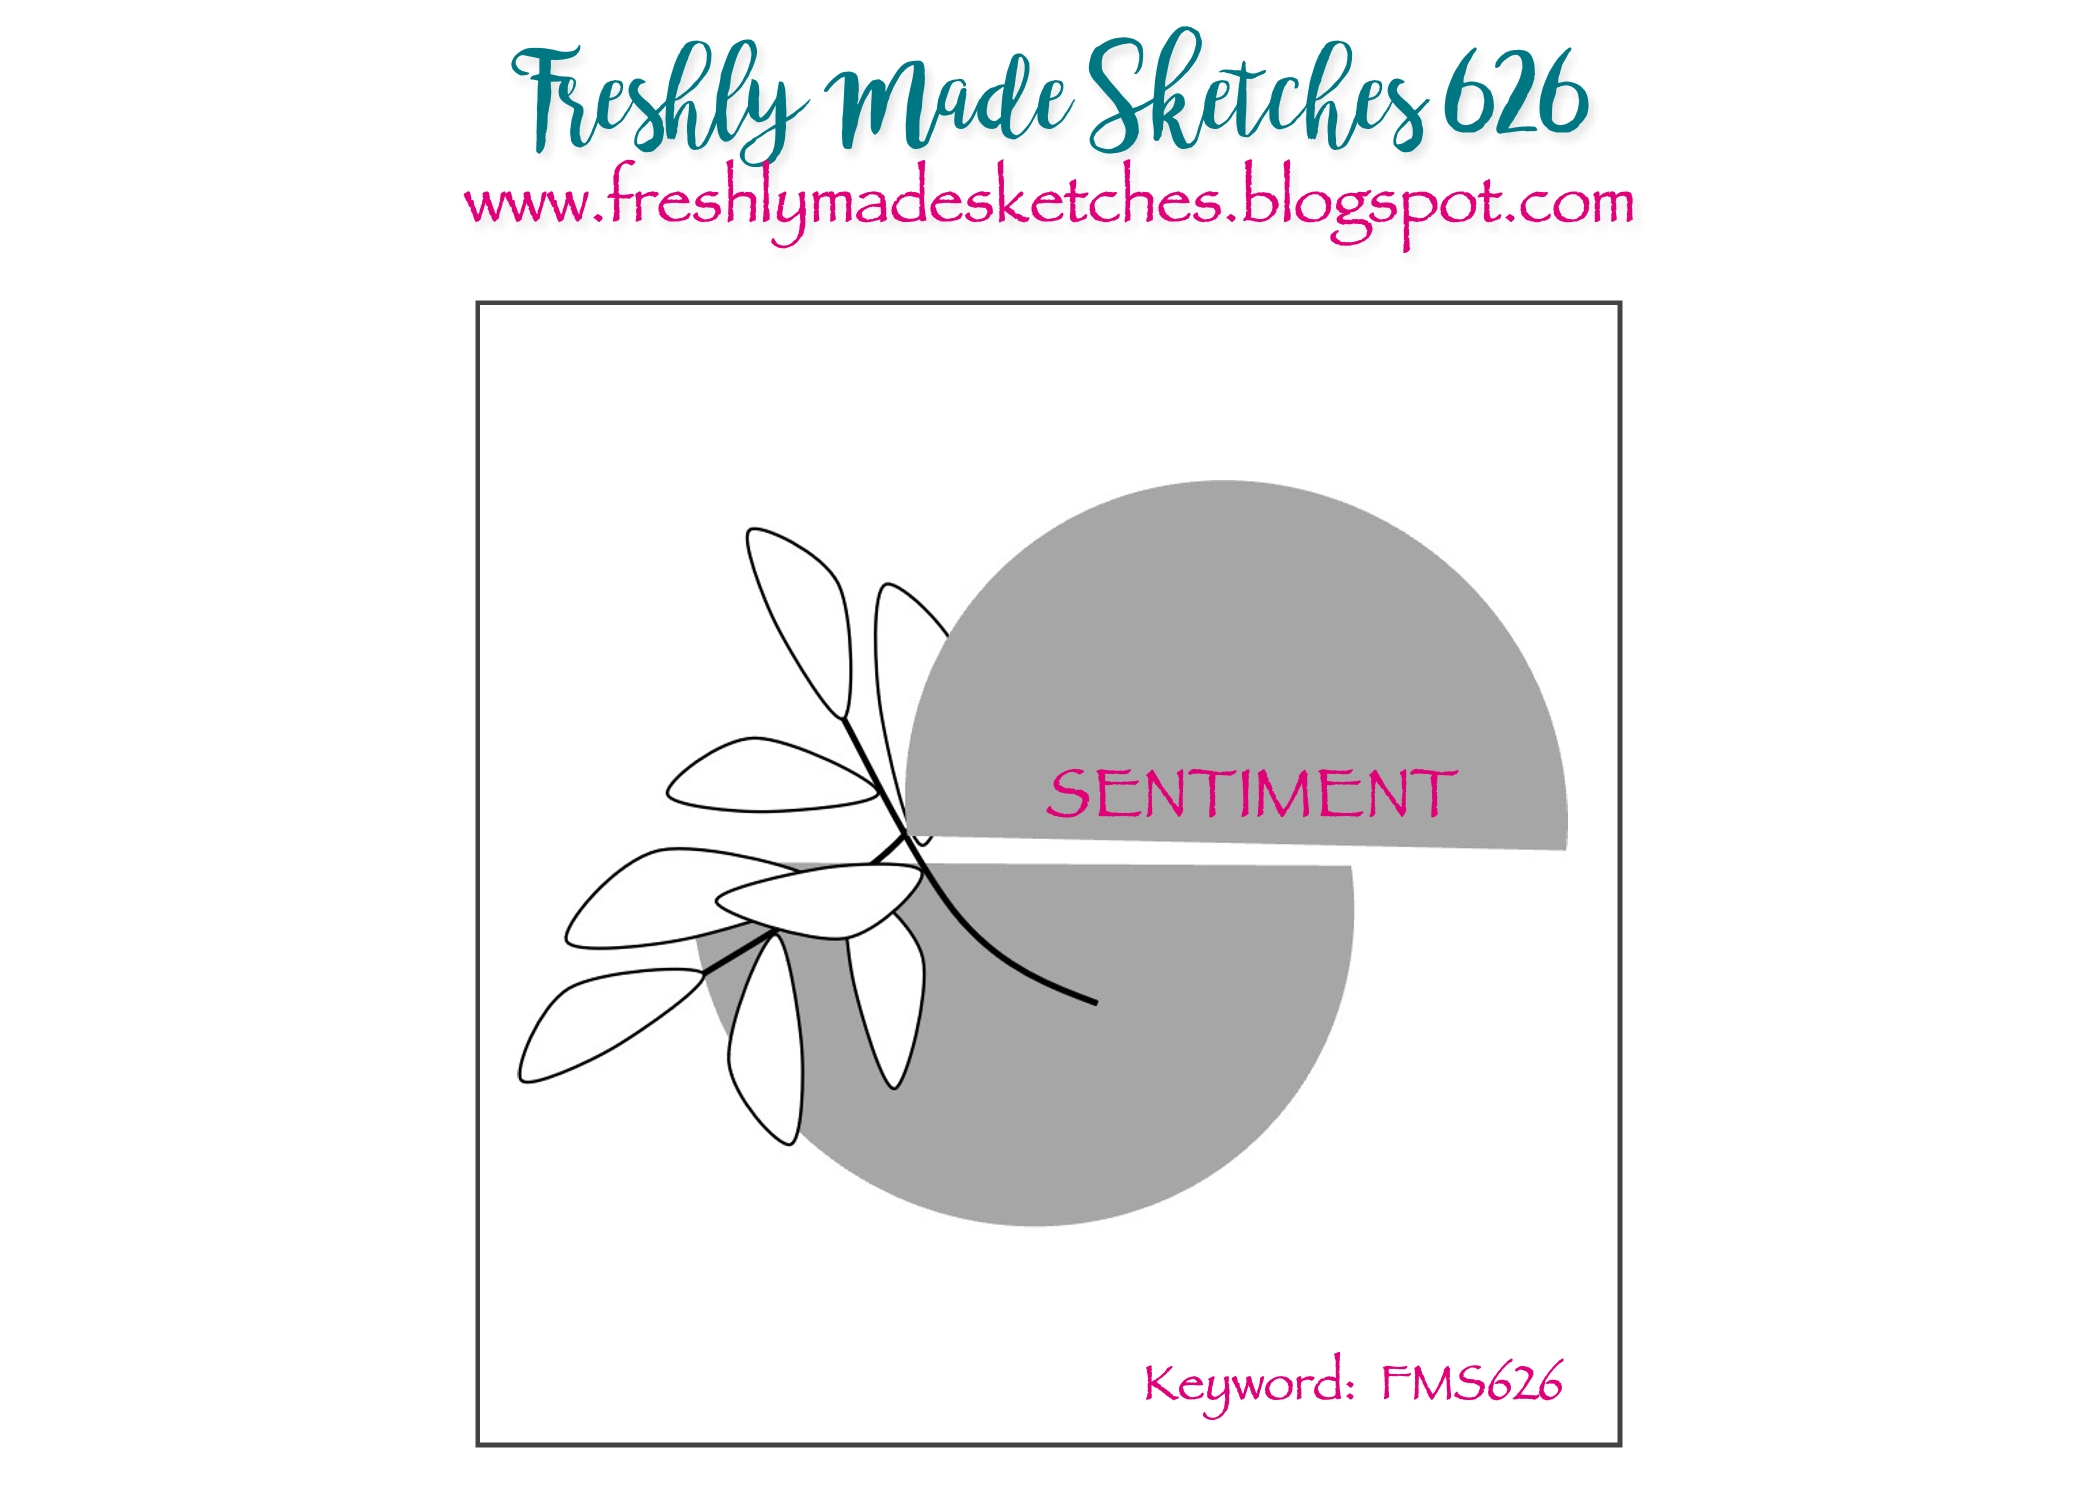
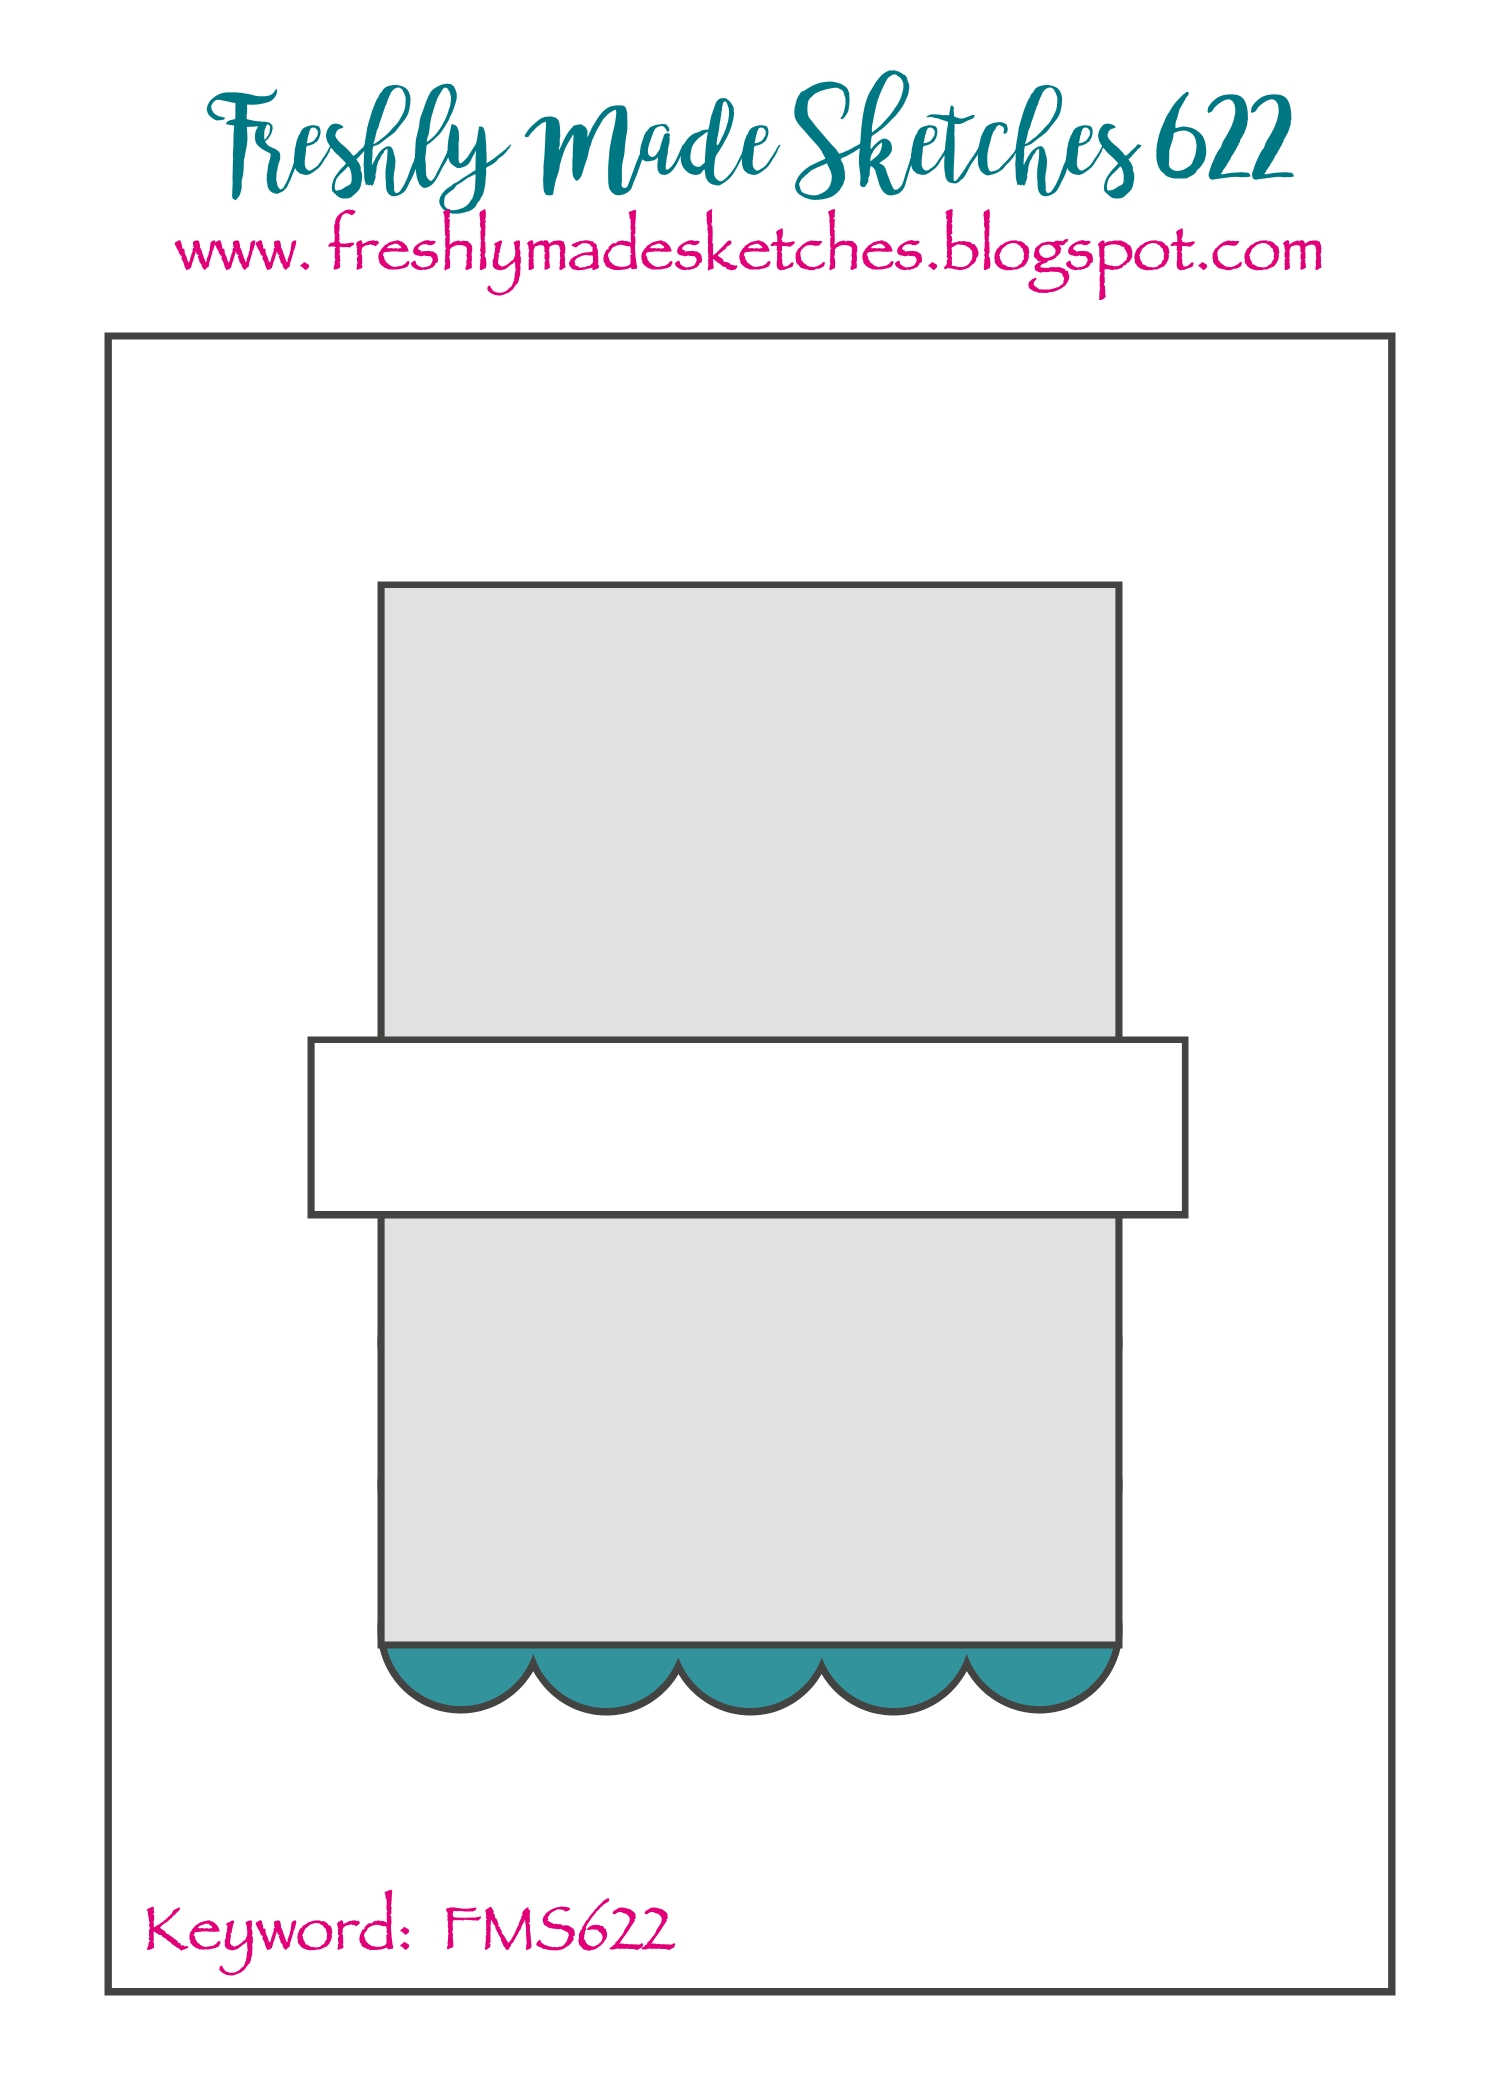
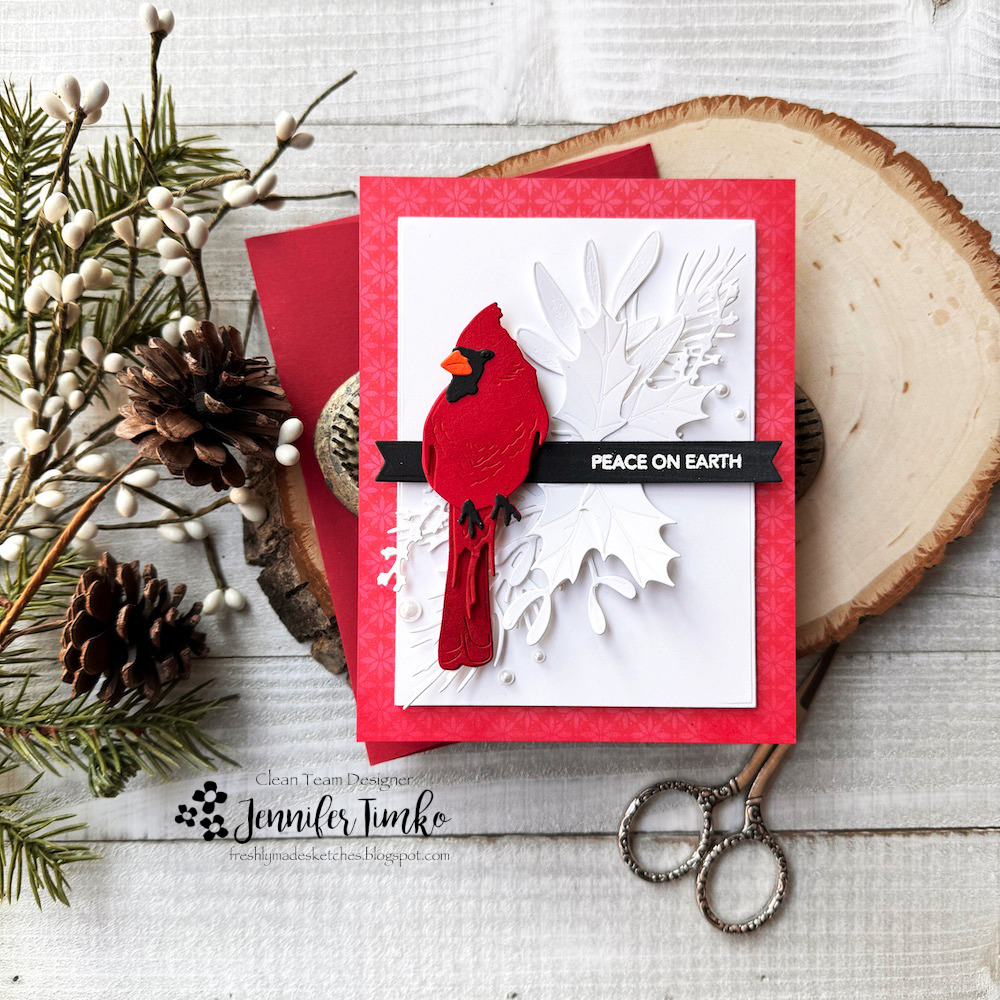
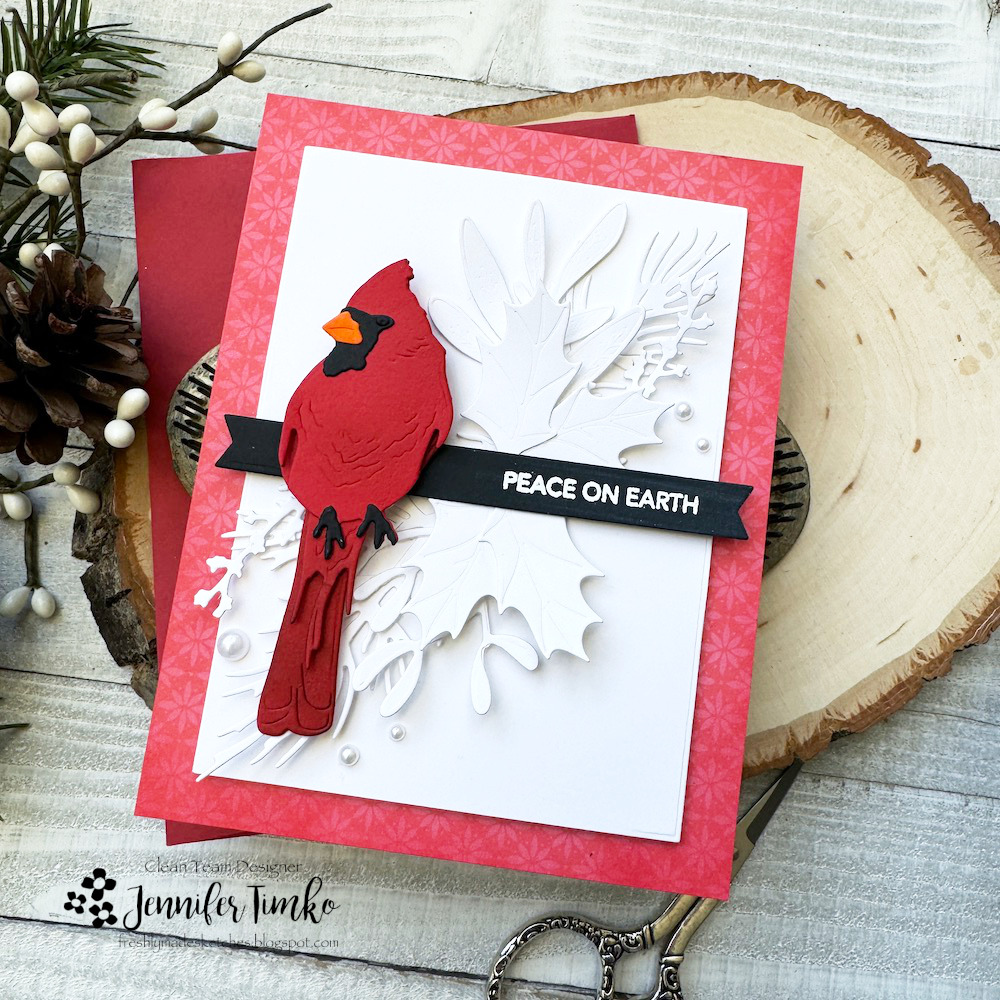
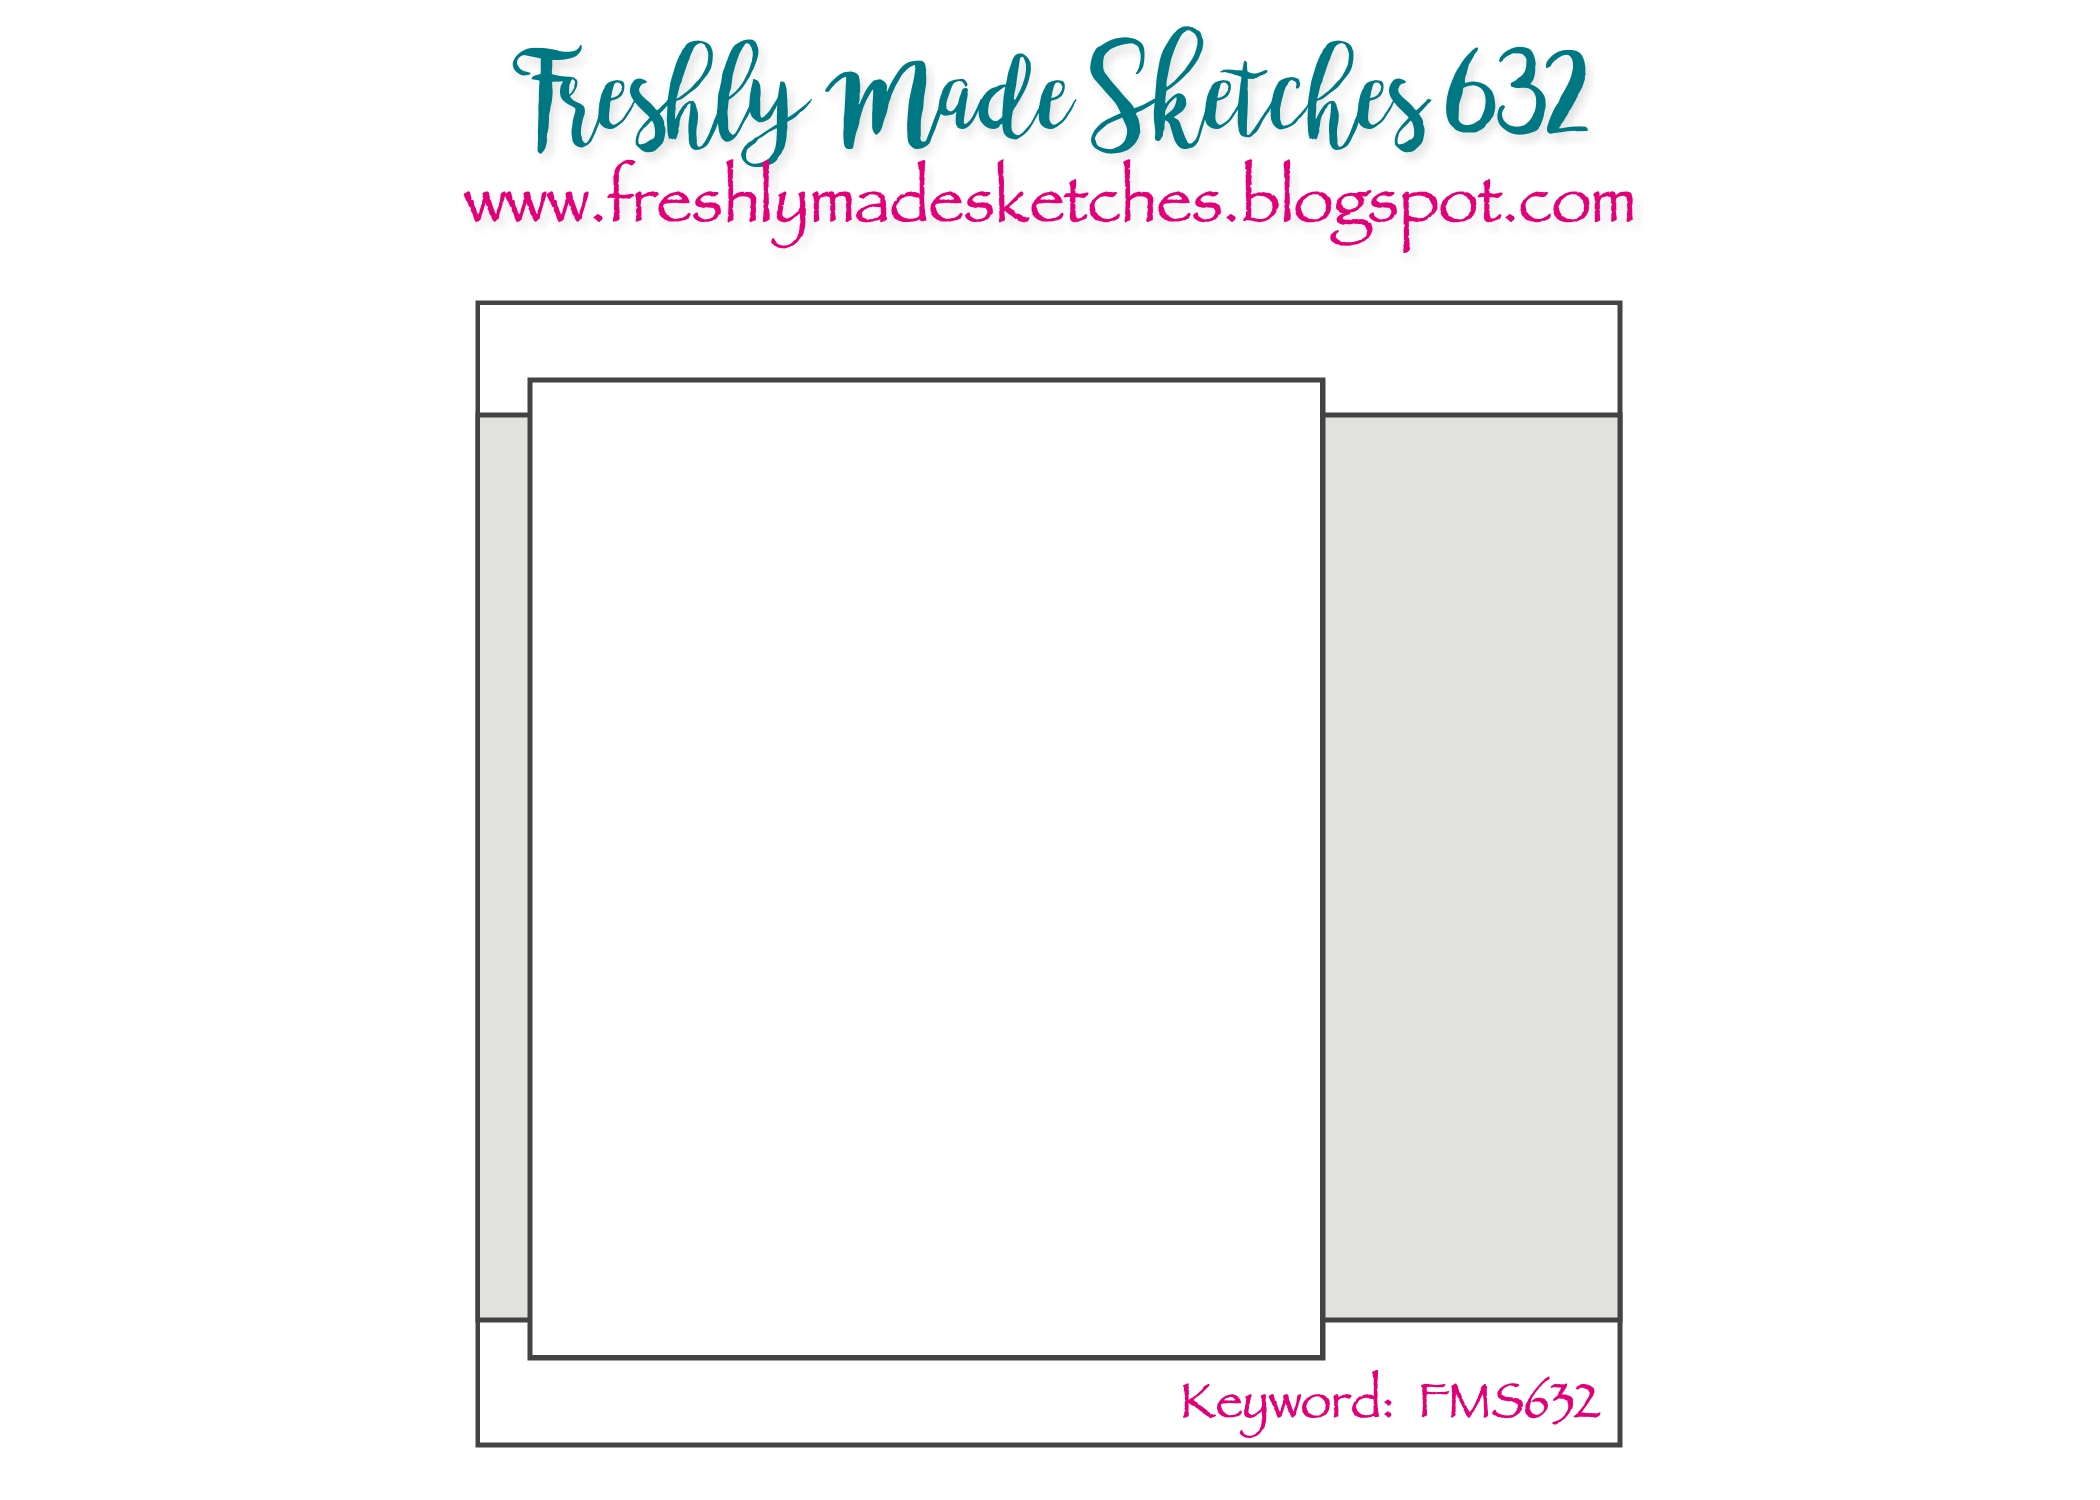
Welcome back for another sketch from Freshly Made Sketches! This week, our sketch designer is our one of the challenges fearless leaders, the amazing Jen Mitchell. I was so happy when I saw her sketch for the week because I was already working on the perfect thing to use.

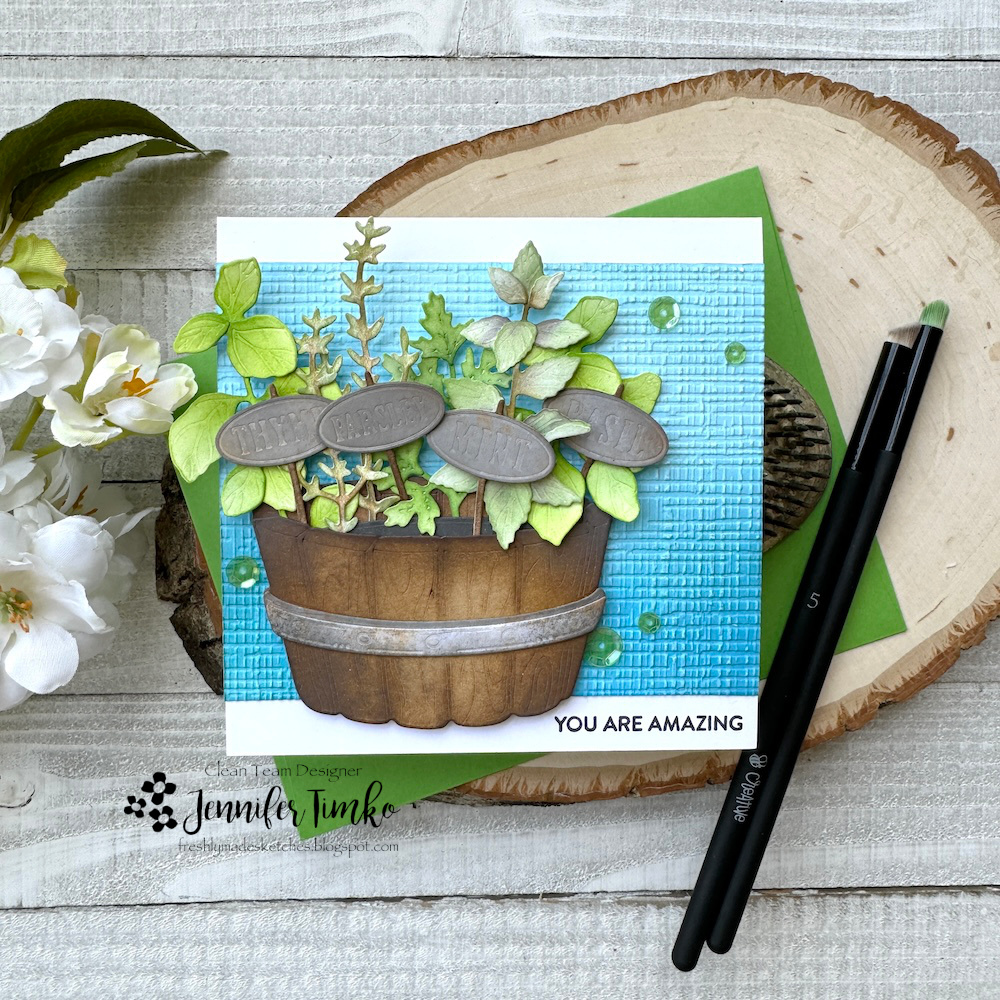
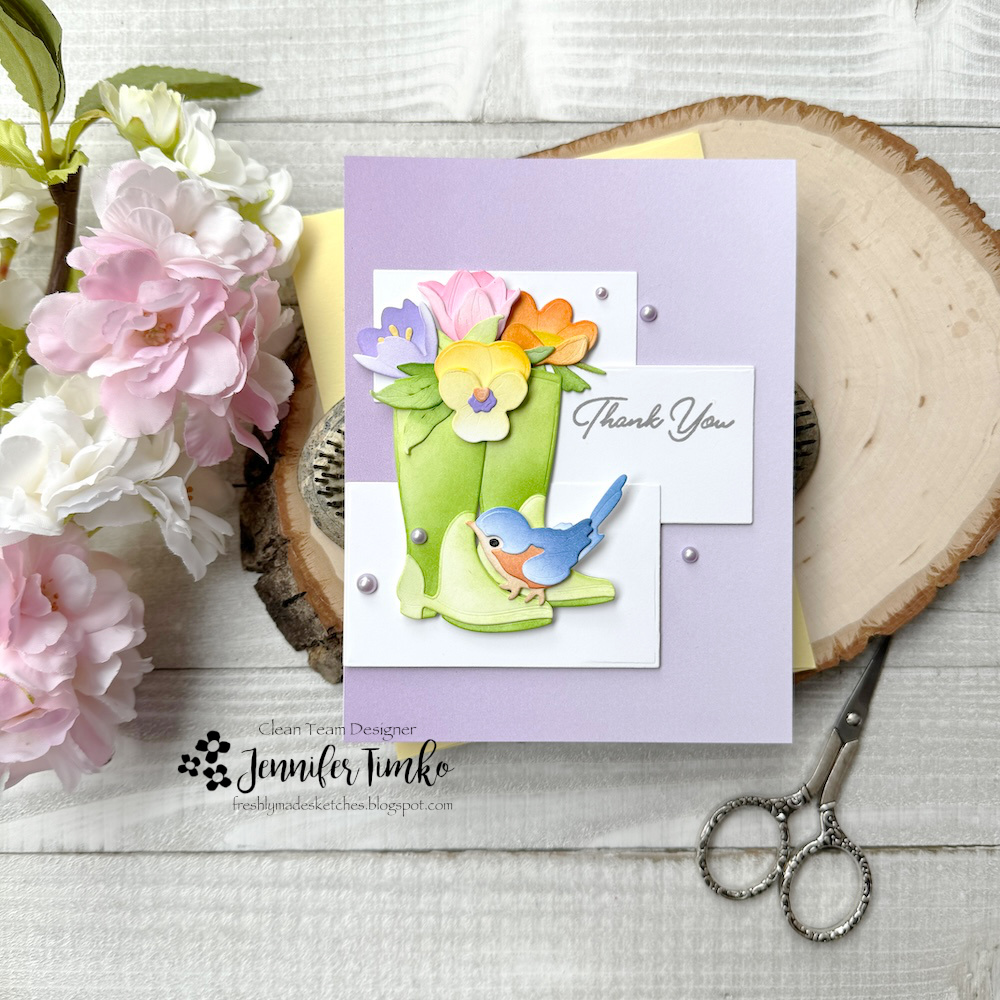
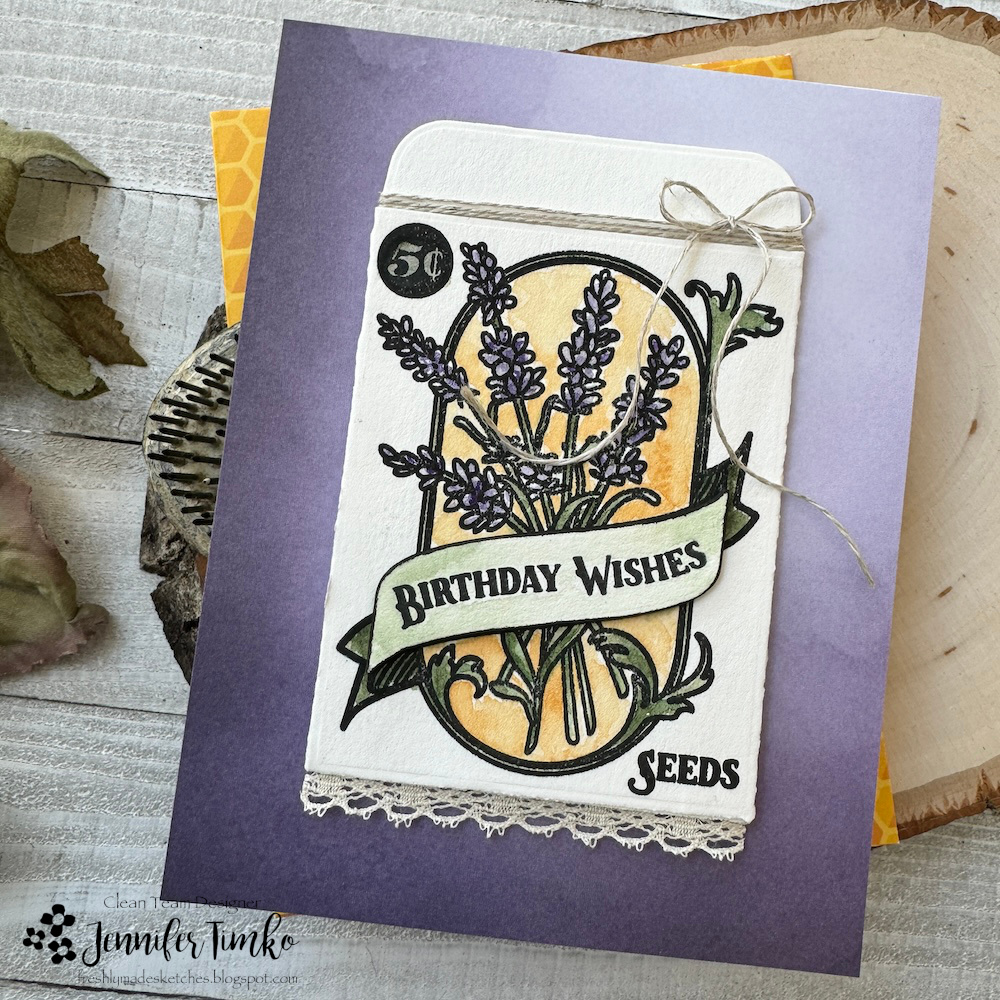
I was so excited when I saw the Lovely Layers: Herb Garden set from Honey Bee Stamps on their last release. Like absurdly excited. First of all, I love growing herbs. But also, I love the idea of something that is easy to use for everybody on the card list! While the set comes with adorable little buckets, I immediately thought of the barrel from the Lovely Layers: Apple Barrel set and decided that was what I would use to hold my herbs.

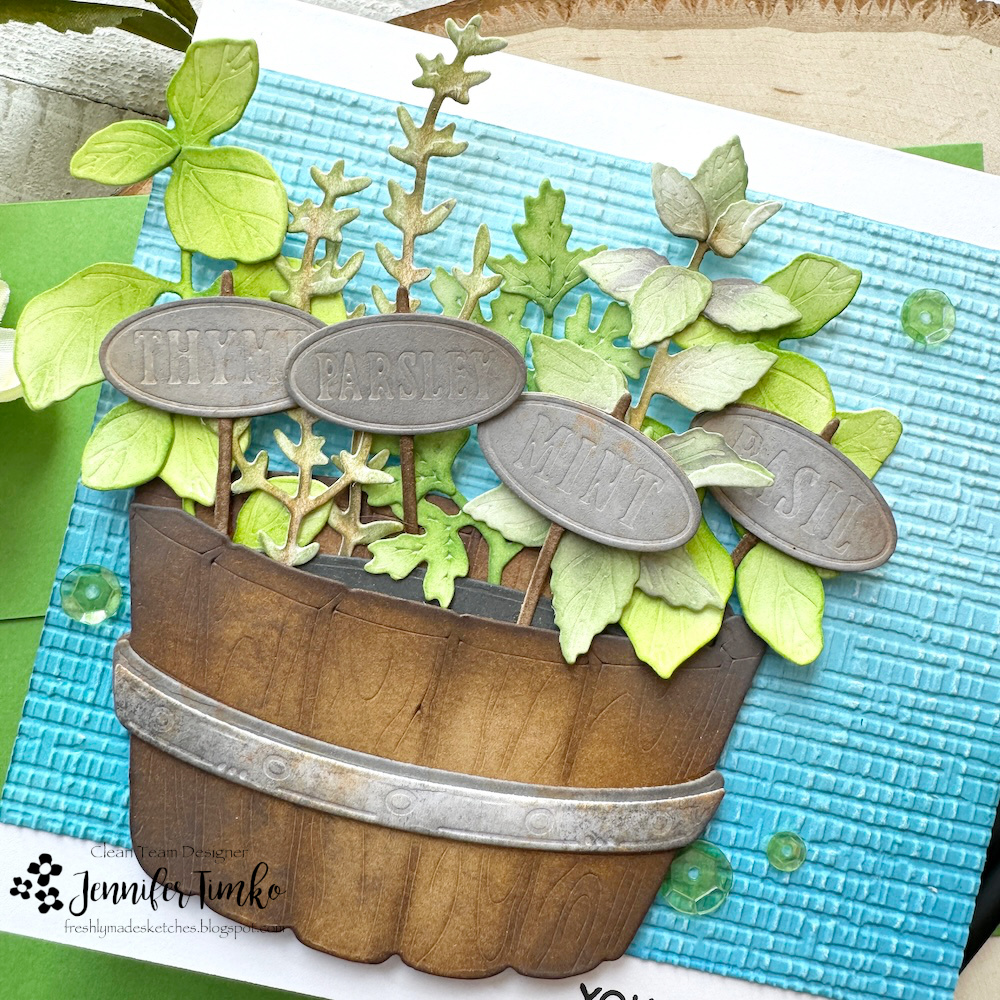
I had a ridiculous amount of fun creating each herb and playing with the shading on greens and accents of browns and purples (all Distress Ink). The new Beeluxe Blending Brushes were key (I used the smallest ones, size 5 for the details and my Bitty Bunny Blending Brushes (from The Rabbit Hole Design) for the broader areas. Once I had them done, I moved on to the apple barrel. Bigger areas with my regular sized brushes, then working down to the tiny ones. I created the aged metal band and added a bit of Rusty Hinge Distress Oxide Ink. To create the illusion of dirt, I cut an extra of the back belly band and trimmed it off a bit, turned it upside down and made it black. Voilá…soil!

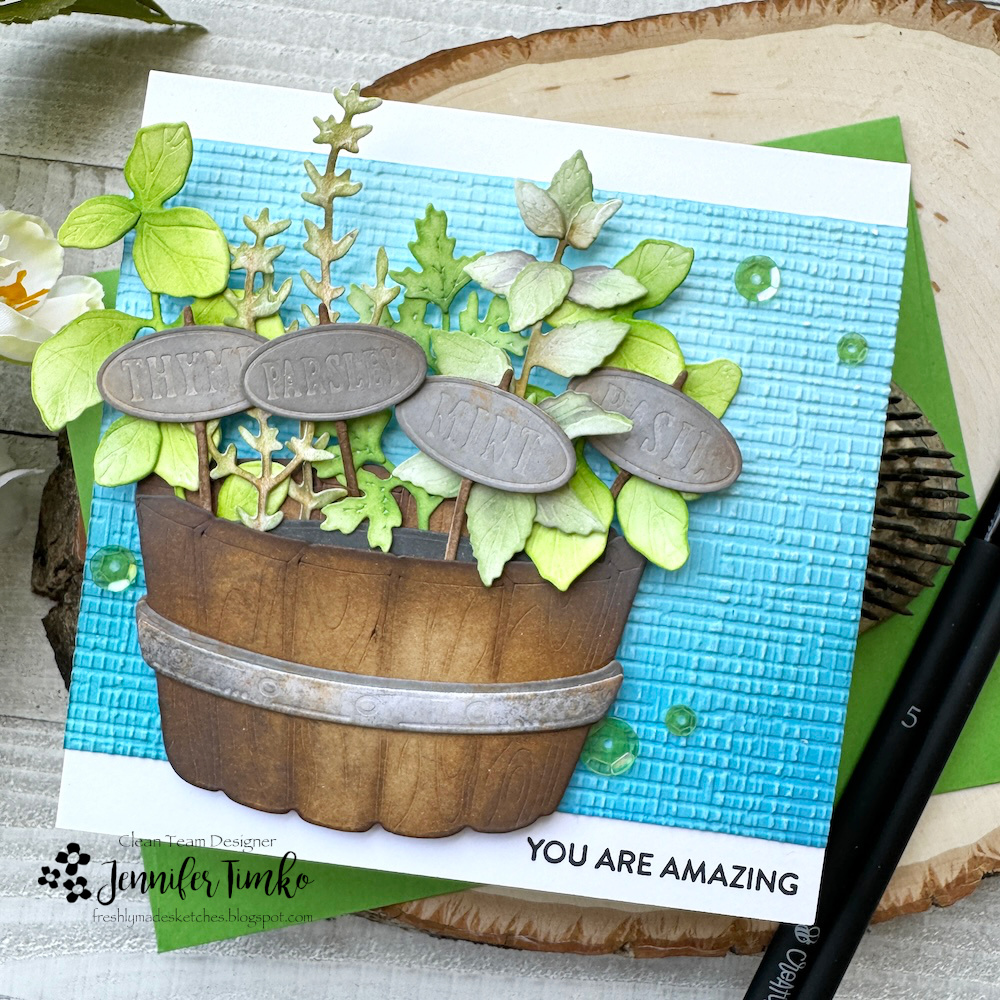
Finally, I created the herb signs to match the band. I found that if I did a little bit of brush work in a lighter gray and then did direct to paper with the ink, it allowed me to see the words better. A little extra Rusty Hinge on those too. Then it was just putting it together. I wanted it to look like a real garden so it is a bit haphazard with signs askew. I want this on my deck for real!! I did an ombré background and added the Burlap 3D textured embossing for a little more interest. The sentiment from Mini Messages is great to send just because! Finally a few sequins.

Hoping you have a great week and maybe even get to start thinking about your summer garden. I have some spinach in now and can’t wait until I can plant the rest of my faves. Make sure to go see the challenge blog and take a look at the beautiful creations from the FMS team. Thanks for stopping in today!

Freshly Made Sketches #631

Freshly Made Sketches #631 published on 5 Comments on Freshly Made Sketches #631

Hi everyone! Back with the latest from Freshly Made Sketches and I am the sketch designer this week. Not gonna lie, I cheated on the sketch and created it after I had colored my image for the card. I just HAD to use it!

This giant image is so beautiful and perfect for practicing coloring. In this case, Copic Marker coloring. I thought about a not-red rose but thought I’d just keep it classic for the first use of the stamp. It is the Big & Bold – Smell the Roses stamp and die set from Colorado Craft Company. I did the coloring over a few days and had fun playing with shading not just on the flower but on the leaves too.

The base of the card is 5-1/2″x 5-1/2″ so that I didn’t have to cut off any of the image. I used a woodgrain background and then did some “imperfect” stamping with the Vintage Flora stamp by Honey Bee Stamps. It isn’t as big as the card but I just inked up part of it with Distress Oxide Ink in Scorched Timber. I did some stitching around the edges and then I added some splatters in white gouache and black watercolor paint and a few black confetti pieces. Finally, I chose a sentiment from the stamp stamp set as the flower. Perfect for the red rose, don’t you think?!

I hope you enjoy this card as much as I did making it. Have a great rest of your week and I look forward to seeing you in the gallery!

Freshly Made Sketches #630

Freshly Made Sketches #630 published on 6 Comments on Freshly Made Sketches #630

A sweet spring card for you today using some brand new products. Our wonderful sketch at Freshly Made Sketches is courtesy of the lovely Judy Rozema and it allows for some interesting variations.

I just got some things from the latest release by Honey Bee Stamps and wanted to pull these dies out right away. Are they sweet?! I mean, that bird…and then the boots and all the flowers. It comes with an umbrella (which I could have used for real today) too. I cut all the elements from Hammermill White Card Stock and then used my Distress Inks to color them. I cannot wait to try some other variations!

I pulled a retiring piece of ombré patterned paper (Honey Bee Stamps) and added the three rectangles from the sketch. I thought about some texture on those but when I tried it…nope. Instead a pretty script sentiment and some matching pearls. Quick to put together after I did the ink blending on the elements.

The pictures today are a bit dark and the colors aren’t quite true. A rainy day and I just couldn’t get any lighting to cooperate. Ah well. Perfect day for those rain boots! Hope you are having a good week!

Freshly Made Sketches #629

Freshly Made Sketches #629 published on 6 Comments on Freshly Made Sketches #629

Happy Wednesday, friends! Happy to see you today. I’m so happy to share the latest from Freshly Made Sketches. Our lovely Amy O’Neill is the sketch designer and I love her simple take this week.

My beautiful cherry tree is blooming in my front yard (just like the famous ones at the Tidal Basin in DC) and that inspired my card. I pulled out the Lovely Layers: Dogwood dies (they are a little less fussy than my Cherry Blossom die) and started playing with ink. Using Bitty Blender Brushes, I added Distress Ink on all the layers and then built the stem. Something about this always makes me happy, especially when I’ve been away from the craft room too long (like lately).

I chose one of the woodgrain prints from the Grain and Grunge paper pack and added a white strip to match the sketch. The sentiment is from Spring Joy (retiring) and I love the pretty font. I added a bit of twine and some pearls to finish it off. So happy to be back to the craft room…and I think I actually have a few weeks where I can get inky!

I hope you will come over to see the beautiful work done by the team and can spend a little time joining us this week. Thanks so much for stopping by! See you soon!

Freshly Made Sketches #626

Freshly Made Sketches #626 published on 6 Comments on Freshly Made Sketches #626

We have another fun sketch this week at Freshly Made Sketches and our designer, the lovely Cécile Ribon, gave us a great one. The half circle elements are particularly fun!

This card is directly inspired by the amazing Dawn Woleslagle. She did a live one night just playing with Distress Oxide ins and this background stamp from Honey Bee Stamps called Vintage Flora. She used exactly these colors! Her reminder was that when you are feeling a little flat on creativity, just pull out the inks and play. So I did just that! This background is the result and it is super cool.

This bluebird had been sitting on my desk for a few weeks waiting for plan and the background gave me just that! I added a bit of splattering and inking on the edges to match the style and knew it was going to work. With the extra ink after stamping the background, I had stamped again a few times. I used one of those and cut out the flowers, then added just a little more ink. I thought vellum would be perfect for the split semicircles and I love the texture it adds without covering anything up. Finally a little sentiment from the Mini Messages Set.

I hope this will inspire you to get out some inks and just play around! It is good for the soul! Thanks for stopping in today. See you soon!

Freshly Made Sketches #622

Freshly Made Sketches #622 published on 5 Comments on Freshly Made Sketches #622

As promised, back with a card for the latest challenge from Freshly Made Sketches. This week our sketch designer is the always awesome Jen Mitchell and she has a clean classic for us.

I pulled out an older set from Honey Bee Stamps called Seeds of Kindness. It is designed to go with the Seed Packet die and I thought it might be a good way to use the sketch. I stamped with Versafine Clair ink then pulled out my watercolor paints. I didn’t do a ton of shading since the flower are so small but nice to do a little bit of watercoloring again.

I cut out the image using the die and created this little seed pack. Tied on some linen thread and added a bit of lace to the bottom in a nod to the scalloped detail in the sketch. Hard to tell in the photo but the banner is stamped, cut and popped up on the birthday sentiment part. The background is from a paper pack so while it looks hard, it could not have been easier to use.

I think this one will be super popular this week and I hope you’ll come over and join us. Thanks for stopping in and I’ll see you soon!

Freshly Made Sketches #617

Freshly Made Sketches #617 published on 5 Comments on Freshly Made Sketches #617

Happy New Year! I hope that you had a wonderful and safe holiday season. As we all get back to work and school, our team at Freshly Made Sketches has some fun to share too! Our amazing Stampin’ Up Artisan DT 2024 Member Narelle Farrugia is our sketch hostess and she has a clean and classic sketch to get us back to creating.

I thought I’d get back to it with a clean and simple little card with some easy coloring and happy colors. The Little Birdies set from Honey Bee Stamps seemed just right for the job. I stamped some of the images and colored them with my Copics. I love this little bird!

For the squared I used the inserts from the Lovely Layers: Seasonal Frame. These deckled edges give a bit of detail and make alignment less fussy. Great for a quick card! I brushed on some Distress Oxide Ink in Salty Ocean with a little bit of fade on the bottom. The sentiment is from the Mini Messages Stamp set (and there are MANY mini messages on this one!) and used the coordinating Mini Messages Banners Dies to cut it out.

I hope you will come over and join us this week. Make sure to stop by and say hi to the team (and especially tell Narelle a big congrats on being chosen for the ADT this year). Wishing you another year of happy crafting and I hope that 2024 brings you and your families much joy!

Good Tidings

Good Tidings published on No Comments on Good Tidings

As this holiday season is in full swing, I wanted to share a series of cards I made with the Good Tidings line by Honey Bee Stamps. I started this as a test of stenciling on images. I see lots of people who create beautiful cards with stenciling as their method of coloring. But personally, I have not had a ton of success with it. Still, when I saw the Good Tidings suite, I thought yeah…just get the stencils too. I was already getting the stamps and dies and, knowing the quality of Honey Bee, the stencils were a worthwhile add-on.

First up, I went to my tried and true. Copic coloring! I loved coloring this image! I find it such a brain break and I get lost in the shading and details. But, when it comes to holiday cards, not the most efficient. This one took me about 2 hours to color. So next, I pulled out the stencils. To be honest, my first attempt was not good. I stenciled first and then over-stamped with the image. That did not work for me. So I tried again except that I stamped the image and then used the stencils for shading. Since I already had the Copic image, I looked to mimic those colors and shading with my Distress Inks. Here they are side by side:

I did not use the one stencil that has “highlights” for the leaves but otherwise just worked through the stack. Other than the shading on the pinecones, I was able to approximate the darks and lights using my Bitty Blender Brushes to help get more color in the nooks and crannies. And this one took me…..10 minutes. Yes, TEN. So in mass production, this is manageable and still feels hand colored and special. I’m a convert to the stencils! Obviously, the Copic markers allow for more depth but the stencils give such flexibility on time.

I finished these out in a way to match. On the Copic version, I used the Burlap 3D Embossing folder on the panel behind the image and matted it with Gold Cardstock from Erin Lee Creative. Both images with cut out with the coordinating die and I chose a sentiment from the stamp set for heat embossing (also with a coordinating die). Pearls to match but the layout is exactly the same.

I created one more for those who might not have the stencil but still want a card that is easy to make in multiples. This time, the power of gold! I got rid of the extra layer and just stamped, embossed and cut out the image. Same sentiment and some pretty gold pearls.

I love the versatility of this suite and am so glad I took the chance on the stencils. The beauty of this image is what captured me and I will be using this for years to come.

I’m on call today and hoping the system stays quiet for a couple more days. Cookies to back and a few last presents to wrap. Wishing you a bit of calm in your hustle and bustle!

Merry Merry Merry with Unity

Merry Merry Merry with Unity published on No Comments on Merry Merry Merry with Unity

A very quick post for today. I have a few cards to share over the next week or so as I move through my Christmas stamping. I’m back out in Denver but got some photos before I left so I could share.

When I saw this little reindeer from Unity Stamp Company, I thought it was totally different that anything I have and knew it would be fun to use. It is called Winter Cheer and Deer. I stamped in black ink, then heat embossed with clear so that I could make this good and inky. It was white paper to start and I added tons of distress ink in Vintage Photo, Corduroy and Ground Espresso. I cut it with an old oval die which conveniently matched up to the Stacking Art Deco Labels Dies from Honey Bee Stamps.

I had some really old (like a decade maybe!) paper with the music on it. I love it and hoard it and I need to USE IT!! This is a start. I inked it up with Distress Oxide Ink in Iced Spruce and then Rustic Wilderness. I added splatters with brown ink and then paint. It still needed something, so I added some stitching too. I inked and embossed the sentiments just like the main image and hand cut them (it adds to the vintage vibe to not be too perfect). I tied it up with a bow…literally. Some old seam binding from my stash. I always love the bows made with this ribbon!

Ok, I’m off to learn from some experts and get to be a part of training the newest 60 Captains at United. These are exciting days! Back later in the week with more. Hope you are having a wonderful day!

Freshly Made Sketches #614

Freshly Made Sketches #614 published on 4 Comments on Freshly Made Sketches #614

Well hello all! It has been a minute since I posted. Quick explanation…I’m in training to become a facilitator (instructor) for United’s Captain Leadership Training. This has taken much of my brain power and I have still been flying the line, of course. Quite the trip over Thanksgiving but so grateful to my many kind passengers and crew members! I muddled back into the craft room on Monday and got to work on this sketch. Not sure I quite hit the mark but I did have fun with the card. Our sketch designer this week at Freshly Made Sketches is the awesome Jen Brum. She also inspired this card with her all white beauty last week.

I started with the Lovely Layers: Winter Birds and created this cardinal. I chose a red cardstock and then added some Distress Ink to darken the back layers a bit. I cut the Lovely Layers: Winter Greenery from white card stock using my Bitty Buzz Cutter. I love this little table top die cut machine for working through these little dies and keeping the texture showing on them.

I decided I needed a little more color so I cut down my white panel and added a printed paper behind it from the new Holiday Wishes Paper Pack. The sentiment comes from Mini Messages: Holiday. Love all the sentiments but this one seems especially right. I added a few pearls to try to match the sketch a little more.

I hope you had a wonderful Thanksgiving holiday if you celebrate it and are off to a good week. I’m back in training next week but I’ll be trying to get ahead a little with a card for while I’m gone. Goodness knows, I need some more Christmas cards to get done! Thanks for stopping in today. Make sure to go see all the beautiful work from the FMS Design Team and our Guest Designer this week.

Primary Sidebar